MX390 series Příručka online Skenování čeština (Czech)
Skenování Skenování z počítače Skenování s nástrojem IJ Scan Utility Skenování z aplikačního softwaru, který používáte (program ScanGear) Užitečné informace o skenování Další metody skenování Umístění položek (při skenování z počítače) Skenování z ovládacího panelu zařízení Odosielanie naskenovaných údajov do počítača pomocou ovládacieho panela zariadenia Nastavení položek pomocí ovládacího panelu zařízení Výběr reakce na příkazy z ovládacího panelu pomocí programu IJ Scan Utility Základní
Skenování z počítače Skenování s nástrojem IJ Scan Utility Skenování z aplikačního softwaru, který používáte (program ScanGear) Užitečné informace o skenování Další metody skenování Umístění položek (při skenování z počítače)
Skenování z ovládacího panelu zařízení Odosielanie naskenovaných údajov do počítača pomocou ovládacieho panela zariadenia Nastavení položek pomocí ovládacího panelu zařízení Výběr reakce na příkazy z ovládacího panelu pomocí programu IJ Scan Utility Základní
Skenování s nástrojem IJ Scan Utility Informace o nástroji IJ Scan Utility (software skeneru) Spuštění nástroje IJ Scan Utility Snadné skenování v režimu automatického skenování Základní Skenování fotografií Skenování dokumentů Skenování pomocí oblíbených nastavení Skenování položek větších než sklo (Sešití obrázku) Skenování většího počtu položek současně Skenování více dokumentů současně pomocí podavače ADF (automatický podavač dokumentů) Ukládání po kontrole výsledků skenování Odesílání naskenovaných o
Informace o nástroji IJ Scan Utility (software skeneru) IJ Scan Utility je aplikace, která umožňuje snadno skenovat fotografie a dokumenty, atd. Celý proces od skenování po uložení obrazu lze provést jedním klepnutím na odpovídající ikonu na hlavní obrazovce nástroje IJ Scan Utility.
Důležité Některé funkce jsou dostupné až po instalaci nástroje My Image Garden. Poznámka Informace o nastavení aplikací určených k integraci naleznete v části „Dialogové okno Nastavení“.
Spuštění nástroje IJ Scan Utility Pokud chcete spustit nástroj IJ Scan Utility, z nabídky Start vyberte položky Všechny programy (All Programs) > Canon Utilities > IJ Scan Utility > IJ Scan Utility.
Snadné skenování v režimu automatického skenování Umožňuje snadné skenování dokumentů s automatickým rozpoznáním typu položky. Důležité Následující typy položek nemusí být naskenovány správně. V tomto případě upravte rámce pro oříznutí (oblasti skenování) v režimu zobrazení celého obrazu programu ScanGear (ovladač skeneru) a skenování zopakujte. Fotografie s bělavým pozadím Položky vytištěné na bílém papíře, ručně psané dokumenty, vizitky atd.
Skenování fotografií Fotografie umístěné na skle můžete naskenovat s využitím nastavení vhodného pro fotografie. 1. Umístěte fotografii na sklo. Umístění položek (při skenování z počítače) 2. Spusťte aplikaci IJ Scan Utility. Spuštění nástroje IJ Scan Utility 3. Klepněte na možnost Nastavení... (Settings...), vyberte dialogové okno Nastavení (Skenování fotografií) (Settings (Photo Scan)) a zadejte potřebnou velikost papíru, rozlišení atd.
Skenování dokumentů Položky umístěné na skle můžete naskenovat s využitím nastavení vhodného pro dokumenty. 1. Umístěte položku na desku skeneru. Umístění položek (při skenování z počítače) 2. Spusťte aplikaci IJ Scan Utility. Spuštění nástroje IJ Scan Utility 3. Klepněte na možnost Nastavení... (Settings...), vyberte dialogové okno Nastavení (Skenování dokumentů) (Settings (Document Scan)) a zadejte potřebnou velikost papíru, rozlišení atd.
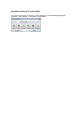
Skenování pomocí oblíbených nastavení Položky umístěné na skle skeneru můžete naskenovat s využitím dříve využitých oblíbených nastavení. Jedná se o pohodlný způsob, jak lze uložit často používané nastavení, či pro podrobné úpravy nastavení skenování. 1. Spusťte aplikaci IJ Scan Utility. Spuštění nástroje IJ Scan Utility 2. Klepněte na možnost Nastavení... (Settings...), vyberte dialogové okno Nastavení (Uživatelské skenování) (Settings (Custom Scan)) a vyberte zdroj, rozlišení atd.
5. Ověřte, zda je v nabídce Směr skenování (Scan Direction) vybrána možnost Skenovat zleva (Scan from Left). 6. Položku, kterou chcete zobrazit na levé části obrazovky umístěte na sklo skenovanou stranou dolů. 7. Klepněte na tlačítko Spustit skenování obrázku 1 (Start Scanning Image 1). První položka se naskenuje a zobrazí v části 1. Poznámka Chcete-li skenování zrušit, klepněte na tlačítko Storno (Cancel).
8. Položku, kterou chcete zobrazit na pravé části obrazovky umístěte na sklo skenovanou stranou dolů. 9. Klepněte na tlačítko Spustit skenování obrázku 2 (Start Scanning Image 2). Druhá položka se naskenuje a zobrazí v části 2. Poznámka Chcete-li skenování zrušit, klepněte na tlačítko Storno (Cancel). 10. Naskenované obrázky požadovaným způsobem upravte. S pomocí panelu nástrojů můžete obrázky otáčet, přibližovat nebo oddalovat a upravit tak jejich polohu.
Zaškrtnutím políčka Upravit rámce pro oříznutí (Adjust cropping frames) určete oblast, kterou chcete uložit. Úpravy rámce pro oříznutí (nástroj IJ Scan Utility) Pokud chcete položku znovu naskenovat, vyberte obrázek v oblasti náhledu nebo oblasti miniatur v horní části obrazovky a klepněte na tlačítko odstraní a vy budete moci položku znovu naskenovat. (Odstranit). Vybraný obrázek se 11. Klepněte na tlačítko Uložit (Save). Sloučený obraz se uloží.
Skenování většího počtu položek současně Podle potřeby můžete skenovat dvě nebo více fotografií (malých položek) umístěné na skle současně a ukládat je poté samostatně. Důležité Následující typy položek nemusí být oříznuty správně. V tomto případě upravte rámce pro oříznutí (oblasti skenování) v režimu zobrazení celého obrazu programu ScanGear (ovladač skeneru) a skenování zopakujte. Fotografie s bělavým pozadím Položky vytištěné na bílém papíře, ručně psané dokumenty, vizitky atd.
5. Vyberte nastavení Vybrat zdroj (Select Source) podle skenovaných položek. 6. V nabídce Velikost papíru (Paper Size) vyberte možnost Automatické skenování (Auto scan) a klepněte na tlačítko OK.
Zobrazí se hlavní obrazovka nástroje IJ Scan Utility. Poznámka Podrobnosti o položkách nastavení v dialogovém okně Nastavení naleznete na následujících stránkách. Dialogové okno Nastavení (Skenování fotografií) Dialogové okno Nastavení (Skenování dokumentů) Dialogové okno Nastavení (Uživatelské skenování) 7. Klepněte na tlačítko Uživatelský (Custom). Více položek je naskenováno současně. Poznámka Chcete-li skenování zrušit, klepněte na tlačítko Storno (Cancel).
Skenování více dokumentů současně pomocí podavače ADF (automatický podavač dokumentů) Umístěte více dokumentů do podavače ADF (automatický podavač dokumentů) a naskenujte je všechny najednou. Poznámka Více dokumentů najednou můžete z podavače ADF skenovat pomocí následujících možností: Automaticky (Auto), Dokument (Document), Uživatelský (Custom) nebo ScanGear.
5. Vyberte nastavení Vybrat zdroj (Select Source) podle skenovaných dokumentů. Chcete-li skenovat pouze přední stranu jednotlivých dokumentů, vyberte položku Dokument (ADF/ sklo) (Document (ADF/Platen)) nebo Dokument (ADF, jednostranně) (Document (ADF Simplex)). Chcete-li naskenovat přední i zadní strany všech dokumentů, vyberte položku Dokument (ADF, ručně oboustranně) (Document (ADF Manual Duplex)). 6. Nastavte požadovaný barevný režim, velikost dokumentu a rozlišení skenování. Klepněte na tlačítko Nast.
Zobrazí se hlavní obrazovka nástroje IJ Scan Utility. Poznámka Podrobnosti o položkách nastavení v dialogovém okně Nastavení naleznete na následujících stránkách. Dialogové okno Nastavení (Skenování dokumentů) Dialogové okno Nastavení (Uživatelské skenování) 7. Klepněte na tlačítko Dokument (Document). Spustí se skenování. Poznámka Chcete-li skenování zrušit, klepněte na tlačítko Storno (Cancel).
Je-li v nastavení Nast. orientace při sken. dokum... (Document Scan Orientation Settings...) jako Strana vazby (Binding Side) vybrána Krátká hrana (Short edge) Umístěte dokumenty tak, abyste nezměnili orientaci již naskenovaných dokumentů. 9. Klepněte na tlačítko OK. Spustí se skenování. Poznámka Chcete-li skenování zrušit, klepněte na tlačítko Storno (Cancel).
Ukládání po kontrole výsledků skenování Výsledky skenování můžete zkontrolovat a následně obrázky uložit do počítače. Důležité Při skenování pomocí funkce Automaticky (Auto) nebo skenování z ovládacího panelu nelze před uložením výsledky skenování zkontrolovat. Poznámka V následujících popisech jsou jako příklady použity obrazovky skenovaných fotografií. 1. Spusťte aplikaci IJ Scan Utility. Spuštění nástroje IJ Scan Utility 2. Klepněte na tlačítko Nastavení... (Settings...).
Zobrazí se hlavní obrazovka nástroje IJ Scan Utility. Poznámka Podrobnosti o položkách nastavení v dialogovém okně Nastavení naleznete na následujících stránkách. Dialogové okno Nastavení (Skenování fotografií) Dialogové okno Nastavení (Skenování dokumentů) Dialogové okno Nastavení (Uživatelské skenování) Dialogové okno Nastavení (Skenování a sešití) Dialogové okno Nastavení (ScanGear) 5. Klepněte na tlačítko Fotografie (Photo). Spustí se skenování.
7. Klepněte na tlačítko OK. Naskenované obrazy se uloží podle zadaného nastavení.
Odesílání naskenovaných obrazů prostřednictvím e-mailu Naskenované obrázky můžete odesílat prostřednictvím e-mailu. Poznámka V následujících popisech jsou jako příklady použity obrazovky skenovaných fotografií. 1. Spusťte aplikaci IJ Scan Utility. Spuštění nástroje IJ Scan Utility 2. Klepněte na tlačítko Nastavení... (Settings...). Zobrazí se dialogové okno Nastavení. Dialogové okno Nastavení 3. Klepněte na tlačítko Skenování fotografií (Photo Scan). 4.
Poznámka Je-li zadán program My Image Garden, text v obrazu je po jeho naskenování rozpoznán a zobrazí se v poznámkovém bloku (součástí systému Windows). 5. Klepněte na tlačítko OK. Zobrazí se hlavní obrazovka nástroje IJ Scan Utility. Poznámka Podrobnosti o položkách nastavení v dialogovém okně Nastavení naleznete na následujících stránkách.
6. Klepněte na tlačítko Dokument (Document). Spustí se skenování. Po dokončení skenování se naskenované obrázky uloží podle nastavení a rozpoznaný text se zobrazí ve vybrané aplikaci. Poznámka Chcete-li skenování zrušit, klepněte na tlačítko Storno (Cancel). Text zobrazený v poznámkovém bloku (součástí systému Windows) je pouze informativní. Text v následujících typech obrazů nemusí být správně rozpoznáván.
Obrazovky nástroje IJ Scan Utility Hlavní obrazovka nástroje IJ Scan Utility Dialogové okno Nastavení Dialogové okno Nastavení (Automatické skenování) Dialogové okno Nastavení (Skenování fotografií) Dialogové okno Nastavení (Skenování dokumentů) Dialogové okno Nastavení (Uživatelské skenování) Dialogové okno Nastavení (Skenování a sešití) Dialogové okno Nastavení (ScanGear) Dialogové okno Nastavení (Uložit do počítače (automaticky)) Dialogové okno Nastavení (Uložit do počítače (fotografie)) Dialogové okno N
Hlavní obrazovka nástroje IJ Scan Utility Pokud chcete spustit nástroj IJ Scan Utility, z nabídky Start vyberte položky Všechny programy (All Programs) > Canon Utilities > IJ Scan Utility > IJ Scan Utility. Celý proces od skenování po uložení obrazu můžete provést jedním klepnutím na odpovídající ikonu. • Název produktu (Product Name) Zobrazí název produktu, který program IJ Scan Utility dle nastavení aktuálně používá. Není-li zobrazen produkt, který chcete použít, vyberte požadovaný produkt ze seznamu.
Dialogové okno Nastavení
Dialogové okno Nastavení V dialogovém okně Nastavení jsou k dispozici tři karty: (Skenování z počítače), (Skenování z ovládacího panelu) a (Obecné nastavení). Po klepnutí na kartu se zobrazení v červeném rámečku přepne a vy můžete upravit podrobné nastavení funkcí na každé z karet. Karta (Skenování z počítače) Podle potřeby můžete upravit odezvu při skenování pomocí nástroje IJ Scan Utility nebo My Image Garden.
Karta (Obecné nastavení) Podle potřeby můžete nastavit používaný produkt, omezení velikosti souboru připojeného k e-mailu, jazyk pro rozpoznávání textu v obrazech nebo složku, do které chcete obrazy dočasně ukládat.
Dialogové okno Nastavení (Automatické skenování) Klepnutím na možnost Automatické skenování (Auto Scan) na kartě (Skenování z počítače) zobrazíte dialogové okno Nastavení (Automatické skenování) (Settings (Auto Scan)). V dialogovém okně Nastavení (Automatické skenování) (Settings (Auto Scan)) můžete zadat upřesňující nastavení skenování a skenovat s automatickým zjištěním typu položky.
Poznámka K potlačení efektu moaré nastavte v dialogovém okně Nastavení (Skenování dokumentů) (Settings (Document Scan)) nebo Nastavení (Uživatelské skenování) (Settings (Custom Scan)) v nastavení Vybrat zdroj (Select Source) možnost Časopis (Magazine) a na hlavní obrazovce nástroje IJ Scan Utility klepněte na tlačítko Dokument (Document) nebo Uživatelský (Custom).
Tuto možnost vyberte, chcete-li skenované obrázky vylepšit nebo opravit. V rozevírací nabídce můžete vybrat požadovanou aplikaci. • Odeslat do aplikace (Send to an application) Tuto možnost vyberte, pokud chcete použít naskenované obrázky v podobě, v jaké se nachází v aplikaci umožňující obrázky procházet nebo organizovat. V rozevírací nabídce můžete vybrat požadovanou aplikaci.
Dialogové okno Nastavení (Skenování fotografií) Klepnutím na možnost Skenování fotografií (Photo Scan) na kartě (Skenování z počítače) zobrazíte dialogové okno Nastavení (Skenování fotografií) (Settings (Photo Scan)). V dialogovém okně Nastavení (Skenování fotografií) (Settings (Photo Scan)) můžete zadat upřesňující nastavení skenování a skenovat položky jako fotografie.
Vyberete-li možnost Vlastní (Custom), otevře se okno, ve kterém můžete zadat velikost papíru. Zadejte nastavení Jednotka (Unit), poté zadejte hodnoty Šířka (Width) a Výška (Height) a nakonec klepněte na tlačítko OK. Poznámka Klepnutím na tlačítko Výchozí (Defaults) obnovíte u vybraného nastavení výchozí hodnoty. • Rozlišení (Resolution) Vyberte rozlišení položky, kterou chcete naskenovat. Čím vyšší rozlišení (hodnota), tím více detailů bude v obrazu.
Důležité Po zobrazení dialogového okna Nastavení v nástroji My Image Garden se tato možnost nezobrazí. • Zkontrolovat výsledky skenování (Check scan results) Zobrazí po skenování dialogové okno Nastavení uložení (Save Settings). Dialogové okno Nastavení uložení Důležité Po zobrazení dialogového okna Nastavení v nástroji My Image Garden se tato možnost nezobrazí.
Dialogové okno Nastavení (Skenování dokumentů) Klepnutím na možnost Skenování dokumentů (Document Scan) na kartě (Skenování z počítače) zobrazíte dialogové okno Nastavení (Skenování dokumentů) (Settings (Document Scan)). V dialogovém okně Nastavení (Skenování dokumentů) (Settings (Document Scan)) můžete zadat upřesňující nastavení skenování a skenovat položky jako dokumenty.
Pokud je vybrána možnost Dokument (ADF/sklo) (Document (ADF/Platen)) a dokumenty jsou umístěny na skle i v podavači ADF, budou naskenovány dokumenty umístěné v podavači ADF. • Barevný režim (Color Mode) Vyberte barevný režim, ve kterém chcete předlohu skenovat. Důležité Chcete-li vybrat možnost Černobíle (Black and White), zrušte zaškrtnutí políčka Komprimovat naskenované obrazy při přenosu (Compress scanned images upon transfer).
• Nastavení zpracování obrazu (Image Processing Settings) Klepnutím na symbol (plus) můžete nastavit následující. Poznámka Zobrazené položky se liší v závislosti na nastaveních Vybrat zdroj (Select Source) a Barevný režim (Color Mode). • Použít Automatickou opravu dokumentů (Apply Auto Document Fix) Zaškrtnutím tohoto políčka lze zvýšit ostrost textu v dokumentu nebo časopise, a tím zlepšit jeho čitelnost.
Rukou psaný text Dokumenty, které obsahují svislé i vodorovné čáry (tabulky) Poznámka Pokud je zapnutá možnost Korekce zešikmení textového dokumentu (Correct slanted text document), skenování trvá déle než obvykle. • Určení orientace textového dokumentu a otočení obrazu (Detect the orientation of text document and rotate image) Zjištěním orientace textu ve skenovaném dokumentu automaticky zajistí otočením obrázku správnou orientaci.
Zobrazí po skenování dialogové okno Nastavení uložení (Save Settings). Dialogové okno Nastavení uložení Důležité Po zobrazení dialogového okna Nastavení v nástroji My Image Garden se tato možnost nezobrazí. (3) Oblast Nastavení aplikace • Otevřít v aplikaci (Open with an application) Tuto možnost vyberte, chcete-li skenované obrázky vylepšit nebo opravit. V rozevírací nabídce můžete vybrat požadovanou aplikaci.
Dialogové okno Nastavení (Uživatelské skenování) Klepnutím na možnost Uživatelské skenování (Custom Scan) na kartě (Skenování z počítače) zobrazíte dialogové okno Nastavení (Uživatelské skenování) (Settings (Custom Scan)). V dialogovém okně Nastavení (Uživatelské skenování) (Settings (Custom Scan)) můžete zadat upřesňující nastavení skenování a skenovat podle vašich předvoleb.
Textové dokumenty menší než formát 2L (127 x 178 mm) (5 x 7 palců), například stránky brožury s odříznutým hřebenem Položky vytištěné na tenkém bílém papíře Dlouhé a úzké položky, jako např. panoramatické fotografie Reflexní štítky na discích nemusí být naskenovány podle vašeho očekávání. Položky umístěte správně podle typu skenované položky. V opačném případě se položky nemusí naskenovat správně. Podrobné informace o způsobu umístění položek naleznete v tématu „Umístění položek (při skenování z počítače)“.
Klepnutím zobrazte dialogové okno Nast. orientace při sken. dokumentů (Document Scan Orientation Settings), ve kterém můžete nastavit orientaci a umístění vazby dokumentu určeného ke skenování pomocí podavače ADF. Důležité Parametr Strana vazby (Binding Side) nelze zadat, skenujete-li pouze přední stranu jednotlivých dokumentů. • Komprimovat naskenované obrazy při přenosu (Compress scanned images upon transfer) Komprimuje naskenované obrázky při jejich přenosu do počítače.
Zaškrtnutím tohoto políčka lze zvýšit ostrost textu v dokumentu nebo časopise, a tím zlepšit jeho čitelnost. Důležité K dispozici pouze pokud není zaškrtnuto políčko Komprimovat naskenované obrazy při přenosu (Compress scanned images upon transfer). V důsledku použití oprav se může barevný tón lišit od zdrojového obrazu. V takovém případě zrušte zaškrtnutí políčka a spusťte skenování. Poznámka Povolíte-li tuto funkci, skenování trvá déle než obvykle.
Zjištěním orientace textu ve skenovaném dokumentu automaticky zajistí otočením obrázku správnou orientaci. Důležité Jsou podporovány pouze textové dokumenty napsané v jazycích, které lze vybrat v nabídce Jazyk dokumentu (Document Language) v dialogovém okně Nastavení (Obecné nastavení) (Settings (General Settings)). Dialogové okno Nastavení (Obecné nastavení) U následujících typů nastavení nebo dokumentů je možné, že nebude rozpoznána orientace, protože nebude možno správně rozpoznat text.
Dialogové okno Nastavení uložení Důležité Tlačítko není dostupné v případě, že je v nabídce Vybrat zdroj (Select Source) vybrána možnost Automaticky (Auto). Po zobrazení dialogového okna Nastavení v nástroji My Image Garden se tato možnost nezobrazí. (3) Oblast Nastavení aplikace • Otevřít v aplikaci (Open with an application) Tuto možnost vyberte, chcete-li skenované obrázky vylepšit nebo opravit. V rozevírací nabídce můžete vybrat požadovanou aplikaci.
Dialogové okno Nastavení (Skenování a sešití) Klepnutím na možnost Skenování a sešití (Scan and Stitch) na kartě (Skenování z počítače) zobrazíte dialogové okno Nastavení (Skenování a sešití) (Settings (Scan and Stitch)). V dialogovém okně Nastavení (Skenování a sešití) (Settings (Scan and Stitch)) můžete zadat upřesňující nastavení skenování v případě skenování položek větších, než je sklo.
Rozlišení • Nastavení zpracování obrazu (Image Processing Settings) Klepnutím na symbol (plus) můžete nastavit následující. Dostupnost položek nastavení se liší podle hodnot v nabídce Vybrat zdroj (Select Source). Důležité Pokud je v nastavení Barevný režim (Color Mode) vybrána možnost Černobíle (Black and White), Nastavení zpracování obrazu (Image Processing Settings) nebude k dispozici.
Po zobrazení dialogového okna Nastavení v nástroji My Image Garden se tato možnost nezobrazí. • Zkontrolovat výsledky skenování (Check scan results) Zobrazí po skenování dialogové okno Nastavení uložení (Save Settings). Dialogové okno Nastavení uložení Důležité Po zobrazení dialogového okna Nastavení v nástroji My Image Garden se tato možnost nezobrazí. (3) Oblast Nastavení aplikace • Otevřít v aplikaci (Open with an application) Tuto možnost vyberte, chcete-li skenované obrázky vylepšit nebo opravit.
Dialogové okno Nastavení (ScanGear) Klepnutím na možnost ScanGear na kartě Nastavení (ScanGear) (Settings (ScanGear)). (Skenování z počítače) zobrazíte dialogové okno V dialogovém okně Nastavení (ScanGear) (Settings (ScanGear)) můžete určit způsob ukládání obrázků při skenování položek pomocí nástroje ScanGear (ovladač skeneru) a způsob odezvy po jejich uložení.
Klepnutím zobrazíte dialogové okno Nastavení formátu dat (Data Format Settings), ve kterém lze nastavit kvalitu ukládaných obrázků, vyhledávat soubory formátu PDF podle klíčových slov, nebo nastavit formát dat, ve kterém budou obrázky naskenované v režimu automatického skenování uloženy. Dialogové okno Nastavení formátu dat • Uložit do (Save in) Zobrazí složku pro ukládání naskenovaných obrazů.
• Nepouštět žádnou aplikaci (Do not start any application) Uložení do složky vybrané v nabídce Uložit do (Save in). Poznámka Vyberte aplikaci nebo složku v dialogovém okně Výběr aplikace (Select Application) nebo Výběr cílové složky (Select Destination Folder), které se otevře po výběru možnosti Přidat... (Add...) v rozevírací nabídce. • Pokyny (Instructions) Otevře tuto příručku. • Výchozí (Defaults) Nastavení na otevřené obrazovce můžete obnovit na výchozí hodnoty.
Dialogové okno Nastavení (Uložit do počítače (automaticky)) Klepnutím na položku Uložit do počítače (automaticky) (Save to PC (Auto)) na kartě (Skenování z ovládacího panelu) zobrazíte dialogové okno Nastavení (Uložit do počítače (automaticky)) (Settings (Save to PC (Auto))). V dialogovém okně Nastavení (Uložit do počítače (automaticky)) (Settings (Save to PC (Auto))) můžete určit způsob odezvy při ukládání obrázků do počítače po jejich naskenování z ovládacího panelu automatickým zjištěním typu položky.
• Nastavení zpracování obrazu (Image Processing Settings) Klepnutím na symbol (plus) můžete nastavit následující. • Použít doporučenou korekci obrazu (Apply recommended image correction) Použije automatické opravy podle typu položky. Důležité V důsledku použití oprav se může barevný tón lišit od zdrojového obrazu. V takovém případě zrušte zaškrtnutí políčka a spusťte skenování. Poznámka Povolíte-li tuto funkci, skenování trvá déle než obvykle.
Tuto možnost vyberte, chcete-li skenované obrázky vylepšit nebo opravit. V rozevírací nabídce můžete vybrat požadovanou aplikaci. • Odeslat do aplikace (Send to an application) Tuto možnost vyberte, pokud chcete použít naskenované obrázky v podobě, v jaké se nachází v aplikaci umožňující obrázky procházet nebo organizovat. V rozevírací nabídce můžete vybrat požadovanou aplikaci.
Dialogové okno Nastavení (Uložit do počítače (fotografie)) Klepnutím na položku Uložit do počítače (fotografie) (Save to PC (Photo)) na kartě (Skenování z ovládacího panelu) zobrazíte dialogové okno Nastavení (Uložit do počítače (fotografie)) (Settings (Save to PC (Photo))). V dialogovém okně Nastavení (Uložit do počítače (fotografie)) (Settings (Save to PC (Photo))) můžete určit způsob odezvy při ukládání obrázků do počítače ve formátu fotografií po jejich naskenování prostřednictvím ovládacího panelu.
Zadejte název souboru obrázku, který chcete uložit. Pokud soubor uložíte, k nastavenému názvu souboru je připojeno datum a 4 číslice ve formátu „_20XX0101_0001“. • Formát dat (Data Format) Nastavení pomocí ovládacího panelu. • Nastavení... (Settings...
Dialogové okno Nastavení (Uložit do počítače (dokument)) Klepnutím na položku Uložit do počítače (dokument) (Save to PC (Document)) na kartě (Skenování z ovládacího panelu) zobrazíte dialogové okno Nastavení (Uložit do počítače (dokument)) (Settings (Save to PC (Document))). V dialogovém okně Nastavení (Uložit do počítače (dokument)) (Settings (Save to PC (Document))) můžete určit způsob odezvy při ukládání obrázků do počítače ve formátu dokumentů po jejich naskenování prostřednictvím ovládacího panelu.
• Komprimovat naskenované obrazy při přenosu (Compress scanned images upon transfer) Komprimuje naskenované obrázky při jejich přenosu do počítače. Tato možnost je užitečná, jsou-li skener nebo tiskárna připojeny k počítači skrze pomalé rozhraní, jako např. USB1.1. • Nastavení zpracování obrazu (Image Processing Settings) Klepnutím na symbol (plus) můžete nastavit následující.
Dokumenty s malým množstvím textu Dokumenty obsahující schémata a obrázky Rukou psaný text Dokumenty, které obsahují svislé i vodorovné čáry (tabulky) Poznámka Pokud je zapnutá možnost Korekce zešikmení textového dokumentu (Correct slanted text document), skenování trvá déle než obvykle. • Určení orientace textového dokumentu a otočení obrazu (Detect the orientation of text document and rotate image) Zjištěním orientace textu ve skenovaném dokumentu automaticky zajistí otočením obrázku správnou orientaci.
V rozevírací nabídce můžete vybrat požadovanou složku. • Nepouštět žádnou aplikaci (Do not start any application) Uložení do složky vybrané v nabídce Uložit do (Save in). Poznámka Vyberte aplikaci nebo složku v dialogovém okně Výběr aplikace (Select Application) nebo Výběr cílové složky (Select Destination Folder), které se otevře po výběru možnosti Přidat... (Add...) v rozevírací nabídce. • Pokyny (Instructions) Otevře tuto příručku.
Dialogové okno Nastavení (Obecné nastavení) Klepnutím na kartu (Obecné nastavení) zobrazíte dialogové okno Nastavení (Obecné nastavení) (Settings (General Settings)). V dialogovém okně Nastavení (Obecné nastavení) (Settings (General Settings)) můžete podle potřeby nastavit používaný produkt, omezení velikosti souboru připojeného k e-mailu, jazyk pro rozpoznávání textu v obrazech a složku, do které chcete obrazy dočasně ukládat.
Dialogové okno Nastavení formátu dat Dialogové okno Nastavení formátu dat (Data Format Settings) zobrazíte jednou z následujících operací. • Klepnutím na tlačítko Nastavení... (Settings...) v nabídce Nastavení uložení (Save Settings) na každé kartě dialogového okna Nastavení. • Klepnutím na tlačítko Nastavení... (Settings...
• Formát položky identifikované při automatickém skenování jako dokument (Format for Item Detected as Document in Auto Scan) Podle potřeby můžete určit formát dat u automaticky ukládaných položek rozpoznaných v režimu automatického skenování jako dokumenty.
Dialogové okno Nastavení uložení Zaškrtnutím políčka Zkontrolovat výsledky skenování (Check scan results) v nabídce Nastavení uložení (Save Settings) dialogového okna Nastavení zobrazíte po skenování dialogové okno Nastavení uložení (Save Settings). Formát dat a cílové umístění lze zadat během prohlížení miniatur výsledků skenování. Důležité Po skenování z nástroje My Image Garden nebo ovládacího panelu se dialogové okno Nastavení uložení (Save Settings) nezobrazí.
(3) Oblast Nastavení uložení • Název souboru (File Name) Zadejte název souboru obrázku, který chcete uložit. Pokud soubor uložíte, k nastavenému názvu souboru je připojeno datum a 4 číslice ve formátu „_20XX0101_0001“. • Formát dat (Data Format) Vyberte formát dat, ve kterém chcete naskenované obrázky uložit. Můžete vybrat možnost JPEG/Exif, TIFF, PNG, PDF nebo PDF (více stránek) (PDF (Multiple Pages)). Důležité Formáty PDF a PDF (více stránek) (PDF (Multiple Pages)) nelze vybrat v následujících případech.
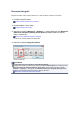
Okno Sešití obrázku Klepnutím na položku Sešití (Stitch) na hlavní obrazovce nástroje IJ Scan Utility zobrazte okno Sešití obrázku (Image Stitch). Můžete skenovat levou a pravou polovinu položky, která je větší než sklo, a poté spojit obrázky do jednoho obrázku. Skenovat lze položky až přibližně dvakrát větší, než je velikost skla. (1) Tlačítka pro nastavení a ovládání (2) Panel nástrojů (3) Oblast Zobrazení miniatur (4) Oblast náhledu Poznámka Zobrazené položky se liší podle vybraného zdroje a zobrazení.
Zobrazí první naskenovaný obrázek na pravé straně. • Skenování obrázku 1 (Scan Image 1) • Spustit skenování obrázku 1 (Start Scanning Image 1) Naskenuje první položku. • Skenování obrázku 2 (Scan Image 2) • Spustit skenování obrázku 2 (Start Scanning Image 2) Naskenuje druhou položku. • Upravit rámce pro oříznutí (Adjust cropping frames) Oblast skenování lze upravit v náhledu. Jestliže není určena žádná oblast, uloží se obrázek o velikosti zvolené v nabídce Vybrat výstupní velikost (Select Output Size).
• Storno (Cancel) Zruší skenování Sešití (Stitch). (2) Panel nástrojů • Panel nástrojů Podle potřeby můžete odstranit naskenované obrázky nebo upravit obrázky v náhledu. • (Odstranit) Odstraní naskenovaný obrázek. • (Zvětšit/zmenšit) Umožňuje zvětšit nebo zmenšit obrázek v náhledu. Klepnutím levým tlačítkem myši na oblast náhledu zvětšíte zobrazený obrázek. Klepnutím pravým tlačítkem myši na oblast náhledu zobrazený obrázek zmenšíte.
• Po naskenování první položky klepnutím na možnost Spustit skenování obrázku 1 (Start Scanning Image 1) Obrázek se naskenuje ve směru uvedeném v nabídce Směr skenování (Scan Direction) a vedle něj se zobrazí číslo 2. • Po naskenování druhé položky klepnutím na možnost Spustit skenování obrázku 2 (Start Scanning Image 2) Zobrazí se dva naskenované obrázky.
Skenování z aplikačního softwaru, který používáte (program ScanGear) Informace o programu ScanGear (ovladač skeneru) Skenování s rozšířeným nastavením v programu ScanGear (ovladač skeneru) Spuštění programu ScanGear (ovladač skeneru) Skenování v základním režimu Skenování v rozšířeném režimu Skenování více dokumentů z ADF (automatický podavač dokumentů) v rozšířeném režimu Skenování většího počtu dokumentů současně pomocí programu ScanGear (ovladač skeneru) Úpravy obrazů a nastavení barev pomocí programu Sc
Informace o programu ScanGear (ovladač skeneru) Program ScanGear (ovladače skeneru) je software vyžadovaný pro skenování dokumentů. Umožňuje určit výslednou velikost a provést opravy obrazu při skenování dokumentů. Program ScanGear lze spustit z aplikace My Image Garden nebo z nástroje IJ Scan Utility. Program lze také spustit z jiných aplikací, které jsou kompatibilní se standardním rozhraním s názvem TWAIN. (Program ScanGear je ovladač kompatibilní s rozhraním TWAIN.
Skenování s rozšířeným nastavením v programu ScanGear (ovladač skeneru) Spuštění programu ScanGear (ovladač skeneru) Spuštění programu ScanGear (ovladač skeneru) Skenování dokumentů po provedení jednoduchých oprav obrazu Skenování v základním režimu Skenování dokumentů po provedení rozšířených oprav obrazu a nastavení jasu nebo barvy Skenování v rozšířeném režimu Skenování více dokumentů pomocí podavače ADF (automatický podavač dokumentů) po provedení rozšířených úprav obrazu a nastavení jasu nebo barvy Ske
Spuštění programu ScanGear (ovladač skeneru) Použití programu ScanGear (ovladač skeneru) k opravám obrazu nebo nastavení barev při skenování. Program ScanGear lze spustit z aplikace My Image Garden nebo z aplikace. Poznámka Nastavte síťové prostředí, pokud máte více než jeden skener nebo pokud máte síťový model a změnili jste připojení z připojení pomocí USB na síťové připojení. Spuštění z aplikace My Image Garden Při spuštění programu ScanGear z aplikace My Image Garden postupujte následovně. 1.
Skenování v základním režimu Na kartě Základní režim (Basic Mode) lze snadno skenovat podle následujících zobrazených kroků. Informace o skenování více dokumentů ze skla současně naleznete v části „Skenování většího počtu dokumentů současně pomocí programu ScanGear (ovladač skeneru)“. Při skenování pomocí podavače ADF (automatický podavač dokumentů) budou dokumenty naskenovány bez zobrazení náhledu. Důležité Následující typy dokumentů nelze naskenovat správně.
Chcete-li skenovat časopisy, které obsahují mnoho barev, vyberte možnost Časopis (barevný) (Magazine (Color)). Při používání modelu vybaveného podavačem ADF s podporou automatického oboustranného skenování můžete pomocí volby Nastavení výstupu papíru APD pro oboustranný tisk (ADF Duplex Paper Output Settings) na kartě Skenovat (Scan) v dialogovém okně Předvolby (Preferences) nastavit způsob výstupu papíru z podavače ADF po naskenování obou stran. Karta Skenovat 3. Klepněte na tlačítko Náhled (Preview).
Klepnutím na tlačítko (Informace) otevřete dialogové okno, ve kterém můžete zkontrolovat aktuální nastavení skenování (typ dokumentu atd.). Odezvu programu ScanGear po skenování lze určit v nabídce Stav dialogového okna ScanGear po skenování (Status of ScanGear dialog after scanning) na kartě Skenovat (Scan) v dialogovém okně Předvolby (Preferences).
Skenování v rozšířeném režimu V režimu Rozšíř. režim (Advanced Mode) můžete při skenování zadat režim barev, výstupní rozlišení, jas obrazu, barevný tón a další možnosti. Informace o skenování více dokumentů současně naleznete v části „Skenování většího počtu dokumentů současně pomocí programu ScanGear (ovladač skeneru)“.
4. Klepněte na tlačítko Náhled (Preview). V oblasti náhledu se zobrazí náhled obrazu. 5. Nastavte položku Nastavení výstupu (Output Settings). Nastavení výstupu 6. Upravte požadovaným způsobem rámec pro oříznutí (oblast skenování), opravte obrázek a upravte barvy. Úpravy rámce pro oříznutí (program ScanGear) Nastavení obrazu Tlačítka pro nastavení barev 7. Klepněte na tlačítko Skenovat (Scan). Spustí se skenování.
Skenování více dokumentů z ADF (automatický podavač dokumentů) v rozšířeném režimu Na kartě Rozšíř. režim (Advanced Mode) lze zadat jas obrazu, barevný tón a další atributy a skenovat současně více dokumentů vložených do podavače ADF (automatický podavač dokumentů). Při používání modelu vybaveného podavačem ADF s podporou automatického oboustranného skenování lze skenovat obě strany dokumentu automaticky z podavače ADF.
4. Nastavte položku Nastavení výstupu (Output Settings). Nastavení výstupu 5. Proveďte opravy obrazu a úpravy barev podle potřeby. Nastavení obrazu Tlačítka pro nastavení barev 6. Klepněte na tlačítko Skenovat (Scan). Spustí se skenování. Poznámka Klepnutím na tlačítko (Informace) otevřete dialogové okno, ve kterém můžete zkontrolovat aktuální nastavení skenování (typ dokumentu atd.).
Skenování většího počtu dokumentů současně pomocí programu ScanGear (ovladač skeneru) Pomocí možností na kartách Základní režim (Basic Mode) a Rozšíř. režim (Advanced Mode) můžete skenovat dvě nebo více fotografií (malých dokumentů) na skle skeneru současně. Tato část popisuje postup při skenování většího počtu dokumentů na kartě Základní režim (Basic Mode). Důležité Chcete-li naskenovat více dokumentů do jednoho obrázku, spusťte skenování v režimu zobrazení celého snímku.
3. Klepněte na tlačítko Náhled (Preview). V oblasti náhledu se zobrazí miniatury náhledů obrázků. Rámce pro oříznutí se určí automaticky podle velikosti dokumentu. 4. Nastavte Cílové umístění (Destination). 5. Nastavte Výstupní velikost (Output Size) podle zamýšleného účelu. 6. Rámce pro oříznutí dle potřeby upravte a nastavte Opravy obrazu (Image corrections). Poznámka Aplikace umožňuje opravu každého obrázku zvlášť. Vyberte snímek, který chcete opravit.
Poznámka Při zobrazení celého obrázku se ikona změní na (Celý snímek). 2. Nastavte Cílové umístění (Destination). 3. Nastavte Výstupní velikost (Output Size) podle zamýšleného účelu. MožnostPřevrátit poměr stran (Invert aspect ratio) bude dostupná, pokud bude volba Výstupní velikost (Output Size) nastavena na jakoukoli možnost kromě Proměnlivá (Flexible). Klepnutím na toto tlačítko otočíte rámec pro oříznutí. Klepnete-li na tlačítko znovu, vrátí se rámec do původní orientace. 4.
Úpravy obrazů a nastavení barev pomocí programu ScanGear (ovladač skeneru) Zaostření rozostřených fotografií, odstranění stop prachu a škrábanců a opravy vybledlých barev Opravy obrazu (Zaostřit s maskou, Zeslabit prach a škrábance, Oprava vyblednutí atd.
Opravy obrazu (Zaostřit s maskou, Zeslabit prach a škrábance, Oprava vyblednutí atd.) Funkce Nastavení obrazu (Image Settings) na kartě Rozšíř. režim (Advanced Mode) programu ScanGear (ovladač skeneru) vám při skenování obrazů umožňují vylepšit obrysy předmětů, zeslabit prach a škrábance a opravit vybledlé barvy. Položky nastavení Klepněte na tlačítko (šipka) u příslušné funkce a vyberte z rozevírací nabídky požadovanou položku.
Snížení průhlednosti textových dokumentů nebo zesvětlení základní barvy u dokumentů z recyklovaného papíru, novin atd. při skenování dokumentů Nastavte položku Snížit průhlednost (Reduce Show-through) na hodnotu ZAPNUTO (ON). VYPNUTO (OFF) ZAPNUTO (ON) Zaostření mírně rozostřených obrazů Nastavte funkci Zaostřit s maskou (Unsharp Mask) na možnost ZAPNUTO (ON). VYPNUTO (OFF) ZAPNUTO (ON) Omezení přechodů a proužků Nastavte možnost Funkce Descreen (Descreen) na ZAPNUTO (ON).
Žádné (None) Střední (Medium) Oprava barev, které vybledly působením času nebo vyprchání barev Podle stupně vyblednutí nebo vyprchání barev nastavte funkci Oprava vyblednutí (Fading Correction) na úroveň Nízký (Low), Střední (Medium) či Vysoký (High). Žádné (None) Střední (Medium) Omezení zrnitosti Podle stupně zrnitosti nastavte funkci Oprava zrnitosti (Grain Correction) na úroveň Nízký (Low), Střední (Medium) či Vysoký (High).
Úpravy barev pomocí barevného vzorku Pomocí funkce barevného vzorku na kartě Základní režim (Basic Mode) v programu ScanGear (ovladač skeneru) si můžete zobrazit náhled změn barev a reprodukovat přirozené barvy. Nastavení barev Opravte barvy, které vybledly působením času nebo vyprchání barev. Vyprchání barev je úkaz, který vzniká po celé fotografii vlivem počasí nebo silného okolního zabarveného světla. V rámečku Nastavení barev (Color Adjustment) klepněte na šipku barvy, kterou chcete zdůraznit.
Následuje příklad opravy namodralého obrazu. Jelikož jsou barvy Modrá (Blue) a Zelená (Green) příliš silné, opravte obraz klepnutím na šipky barev Žlutá (Yellow) a Purpurová (Magenta). Před Po Poznámka Nastavení barev se použije pouze na rámce pro oříznutí (oblasti skenování) nebo na rámec vybraný v zobrazení miniatur. Více snímků nebo rámců pro oříznutí můžete vybrat klepáním při současném stisknutí klávesy Ctrl.
Nastavení sytosti a vyvážení barev V programu ScanGear (ovladač skeneru) na kartě Rozšíř. režim (Advanced Mode) klepněte na tlačítko (sytost a vyvážení barev). Poznámka Původní nastavení v aktuálním okně vrátíte klepnutím na tlačítko Výchozí (Defaults). Sytost Slouží k úpravě sytosti (živosti) obrazu. Lze ji použít například k rozjasnění barev, které vybledly působením času.
Azurová a Červená Purpurová a Zelená Žlutá a Modrá Jedná se o komplementární dvojice barev (smísením každé dvojice barev vznikne odstín šedé). Přirozené barvy obrazu lze reprodukovat potlačením zobrazené barvy a zesílením komplementární barvy. Obvykle bývá obtížné dosáhnout celkové korekce obrazu úpravou jediné dvojice barev. Doporučený postup je najít místo obrazu, které má být bílé, a upravit všechny tři dvojice barev tak, aby místo skutečně bylo bílé. Lze také zadat hodnotu v rozmezí od -127 do 127.
Nastavení jasu a kontrastu V programu ScanGear (ovladač skeneru) na kartě Rozšíř. režim (Advanced Mode) klepněte na tlačítko (jas a kontrast). Poznámka Klepnutím na tlačítko (šipka dolů) přepnete na detailní zobrazení. Klepnutím na tlačítko (šipka nahoru) se vrátíte k předchozímu zobrazení. Původní nastavení v aktuálním okně vrátíte klepnutím na tlačítko Výchozí (Defaults). Kanál Každá tečka obrazu je směsí červené, zelené a modré barvy v různých poměrech (přechod).
Jas (jezdec) u atributu Jas (Brightness) doleva obraz Slouží k úpravě jasu obrazu. Přesunutím jezdce ztmavíte, přesunutím doprava obraz rozjasníte. Lze také zadat hodnotu v rozmezí od -127 do 127. Ztmaveno Původní obraz Rozjasněno Poznámka Pokud obraz příliš zjasníte, může se ztratit zvýraznění světel. Pokud obraz příliš ztmavíte, mohou se ztratit stíny. Kontrast „Kontrast“ je míra rozdílnosti mezi světlými a tmavými částmi obrazu. Zvýšením kontrastu dosáhnete zvětšení rozdílu a obraz se tedy zostří.
Nastavení histogramu V programu ScanGear (ovladač skeneru) na kartě Rozšíř. režim (Advanced Mode) klepněte na tlačítko (histogram). Poznámka Původní nastavení v aktuálním okně vrátíte klepnutím na tlačítko Výchozí (Defaults). Kanál Každá tečka obrazu je směsí červené, zelené a modré barvy v různých poměrech (přechod). Tato barvy lze samostatně upravit jako „kanál“. • Vzor (Master) Slouží ke společné úpravě kanálu červené, zelené a modré barvy. • Červená (Red) Slouží k úpravě kanálu červené barvy.
(1) Jasná oblast (2) Tmavá oblast (3) Celý obraz Většina dat je na straně světla. Většina dat je na straně stínu. Data jsou rozprostřena mezi oblast světla a stínu. Úpravy histogramů (pomocí jezdce) Vyberte možnost Kanál (Channel) a poté posunutím (jezdec černého bodu) nebo bodu) určete úroveň, která bude nastavena jako stínování nebo zvýraznění. (jezdec bílého - Všechny části vlevo od (jezdec černého bodu) budou černé (úroveň 0).
Obrazy, kde je většina dat přesunuta na stranu světla Posuňte jezdcem středního bodu blíže ke straně světla. Obrazy, kde je většina dat přesunuta na stranu stínu Posuňte jezdcem středního bodu blíže ke straně stínu. Úpravy histogramů (pomocí kapátek) Vyberete-li Kanál (Channel) a klepnete na kapátko černého bodu, středního bodu nebo bílého bodu, ukazatel myši na náhledu obrazu se změní na kapátko. Chcete-li změnit nastavení, klepněte na kapátko zobrazené pod histogramem.
Nastavení tónové křivky V programu ScanGear (ovladač skeneru) na kartě Rozšíř. režim (Advanced Mode) klepněte na tlačítko (nastavení tónové křivky). Poznámka Původní nastavení v aktuálním okně vrátíte klepnutím na tlačítko Výchozí (Defaults). Kanál Každá tečka obrazu je směsí červené, zelené a modré barvy v různých poměrech (přechod). Tato barvy lze samostatně upravit jako „kanál“. • Vzor (Master) Slouží ke společné úpravě kanálu červené, zelené a modré barvy.
Nastavení tónové křivky U položky Vybrat tónovou křivku (Select Tone Curve) vyberte z možností Bez opravy (No correction), Přeexponováno (Overexposure), Podexponováno (Underexposure), Vysoký kontrast (High contrast), Zaměnit negativní a pozitivní obraz (Reverse the negative/positive image) a Upravit uživatelskou křivku (Edit custom curve).
Upravit uživatelskou křivku (Edit custom curve) Přetažením určitých bodů Tónové křivky lze volně upravit jas příslušných oblastí.
Nastavení prahové hodnoty Jas barevných obrázků a obrázků v odstínech šedi je vyjádřen jako hodnota v rozmezí 0 až 255. Při vytváření černobílých obrázků jsou však všechny barvy mapovány jako černá (0) nebo bílá (255). „Prahová hodnota“ představuje hraniční hodnotu, která určuje barvu jako černou nebo bílou. Úpravou úrovně prahu lze v textovém dokumentu zaostřit text a u novin omezit prosvítání tisku z druhé strany.
Obrazovky programu ScanGear (ovladač skeneru) Karta Základní režim Karta Rozšíř.
Karta Základní režim Tento režim umožňuje snadné skenování podle pokynů na obrazovce. Tato část popisuje nastavení a funkce, které jsou k dispozici na kartě Základní režim (Basic Mode). Při skenování pomocí podavače ADF (automatický podavač dokumentů) budou dokumenty naskenovány bez zobrazení náhledu. (1) Tlačítka pro nastavení a ovládání (2) Panel nástrojů (3) Oblast náhledu Poznámka Zobrazené položky se liší v závislosti na typu dokumentu a zobrazení.
Nastavení obrazu Důležité Nepoužívejte tyto funkce na obrazy, kde nejsou vzorky moaré, prach či škrábance nebo vybledlé barvy. Může to negativně ovlivnit barevný odstín. Výsledky provedených oprav obrazu se v náhledu nemusejí projevit. Poznámka Volitelná nastavení závisí na nastavení Barevný režim (Color Mode). Pokud je zobrazeno Nastavení obrazu (Image Settings), skenování může trvat déle než obvykle.
Poznámka Není-li obraz dostatečně upraven při nastavení Automaticky (Auto), vyberte typ dokumentu. V důsledku použití funkce Nastavení obrazu se může barevný tón lišit od zdrojového obrazu. V tom případě vyberte v nastavení funkce Nastavení obrazu (Image Adjustment) možnost Žádné (None).
Důležité Tato funkce není pro některé typy fotografií účinná. Poznámka Při skenování tištěných materiálů doporučujeme nastavit tuto funkci na možnost Žádné (None). • Oprava vyblednutí (Fading Correction) Tato funkce se používá k opravě fotografií, které vybledly působením času nebo kvůli vyprchání barev. Vyprchání barev je úkaz, který vzniká po celé fotografii vlivem počasí nebo silného okolního zabarveného světla. • Žádné (None) Oprava vyblednutí nebude provedena.
Vyberte tuto možnost, je-li úroveň efektu při nastavení na střední hodnotu příliš slabá. Důležité Na sklo skeneru nepokládejte dokumenty nebo knihy, které váží 2,0 kg (4,4 libry) a více. Netlačte na dokument silou větší než 2,0 kg (4,4 libry). Při silném tlaku může skener pracovat nesprávně, případně může dojít k rozbití skleněné desky. Dokument zarovnejte s hranou skla skeneru. Pokud tak neučiníte, nebude správně opraven stín. Oprava stínů nemusí být v závislosti na dokumentu úspěšná.
Tlačítka pro nastavení barev Pomocí tlačítek pro nastavení barev lze vytvářet jemné opravy barevných tónů a jasu obrazu. Lze také upravit kontrast nebo jas celého obrazu a upravit hodnoty jeho zvýraznění a stínů (histogram) nebo vyvážení (tónová křivka). Důležité Tlačítka pro úpravu barev nebudou dostupná, pokud v dialogovém okně Předvolby (Preferences) na kartě Nastavení barev (Color Settings) vyberete možnost Soulad barev (Color Matching).
Slouží k úpravě jasu obrazu výběrem typu grafu (tónové křivky), který zobrazuje vyvážení mezi vstupním a výstupním odstínem. Lze provádět jemné doladění jasu v určité oblasti. Nastavení tónové křivky • (Závěrečný náhled) Závěrečná kontrola nastavení barev. Zobrazí se výsledná podoba tónové křivky a histogramu odvozená z následného zpracování obrazu. V této obrazovce nelze provádět nastavení.
Settings List) nebo Seznam nastavení prahové hodnoty (Threshold Settings List), klepněte na tlačítko Uložit (Save). Můžete načíst uložené nastavení tónové křivky a prahové hodnoty a použít je na obraz v náhledu. Chcete-li načíst nastavení, vyberte z rozevírací nabídky uloženou položku. Poznámka Můžete uložit až 20 položek. • Výchozí (Defaults) Zrušení všech úprav (sytost, vyvážení barev, jas, kontrast, histogram a tónová křivka).
Dialogové okno Předvolby Klepnutím na tlačítko Předvolby... (Preferences...) na obrazovce programu ScanGear (ovladač skeneru) otevřete dialogové okno Předvolby (Preferences). V dialogovém okně Předvolby (Preferences) můžete na kartách Skener (Scanner), Náhled (Preview), Skenovat (Scan) a Nastavení barev (Color Settings) určit rozšířené nastavení funkcí programu ScanGear.
Karta Skener Na kartě Skener (Scanner) lze určit následující nastavení. • Tiché nastavení (Quiet Settings) Funkce ztišení umožňuje snížit provozní hluk tohoto zařízení. Tuto funkci použijte, chcete-li snížit provozní hluk, například při skenování nebo tisku v noci. Klepnutím na položku Nastavení... (Settings...) nastavte tichý režim. Poznámka Tichý režim můžete spustit na ovládacím panelu zařízení, v ovladači tiskárny nebo v programu ScanGear.
• Vybrat složku pro umístění dočasných souborů (Select Folder Where Temporary Files are Saved) Zobrazí složku pro dočasné ukládání obrazů. Chcete-li složku změnit, klepněte na tlačítko Procházet... (Browse...) a zadejte jinou složku. • Nastavení zvuku (Sound Settings) Zařízení můžete nastavit tak, aby během nebo na konci skenování hrálo hudbu.
Karta Náhled Na kartě Náhled (Preview) lze určit následující nastavení. • Náhled při spuštění aplikace ScanGear (Preview at Start of ScanGear) Vyberte, jaká akce se provede s náhledem po spuštění programu ScanGear (ovladač skeneru). • Automatické zobrazení náhledu (Automatically Execute Preview) Program ScanGear při spuštění automaticky začne vytvářet náhled. • Zobrazit uložený náhled obrazu (Display Saved Preview Image) Zobrazí se náhled předchozího obrázku.
• Standardní (Standard) Standardní velikost. • Menší (Smaller) Zobrazí 95 % (na šířku a na výšku) oblasti zobrazené pro standardní velikost. Poznámka Změníte-li nastavení Velikost rámce oříznutí pro zobrazení miniatur (Cropping Size for Thumbnail View), dojde k aktualizaci miniatur a jejich oříznutí na novou velikost. Při aktualizaci obrazů náhledu se obnoví použité barev a jiná nastavení použitá v těchto obrazech.
Karta Skenovat Na kartě Skenovat (Scan) lze určit následující nastavení. • Stav dialogového okna ScanGear po skenování (Status of ScanGear dialog after scanning) Vyberte, jaká akce se provede s programem ScanGear (ovladač skeneru) po naskenování obrazů. • Zavřít ovladač ScanGear automaticky (Close ScanGear automatically) Vyberete-li tuto možnost, dojde po skončení skenování k návratu do původní aplikace.
• Výstup zadní/přední stranou (rychlý) (Output by back/front(Fast)) Toto nastavení je preferováno, požadujete-li rychlý výstup skenovaných dokumentů. Výsledkem však je výstup dokumentů s nesprávným pořadím stránek. • Výstup podle stránky (Output by page) Naskenované dokumenty budou vystupovat se správným pořadím stránek.
Karta Nastavení barev Na kartě Nastavení barev (Color Settings) lze určit následující nastavení. • Nastavení barev Vyberte jednu z následujících možností. Tuto možnost můžete vybrat, je-li v nastavení Barevný režim (Color Mode) vybrána možnost Barevně (Color) nebo Stupně šedi (Grayscale). • Doporučeno (Recommended) Vyberte tuto možnost, pokud chcete věrně zobrazit odstín dokumentu na obrazovce. Toto nastavení se doporučuje v běžných případech.
Poznámka Hodnotu gamma obrazovky zjistíte z příslušné příručky pro obrazovku. Není-li hodnota uvedena v příručce, obraťte se na výrobce.
Umístění položek (při skenování z počítače) Informace o umístění položek na sklo nebo podavač ADF (automatický podavač dokumentů) skeneru nebo tiskárny. Položky umístěte správně podle typu skenované položky. V opačném případě se položky nemusí naskenovat správně. Důležité Nepokládejte žádné předměty na kryt dokumentu. Při otevírání krytu dokumentů mohou do skeneru nebo tiskárny zapadnout předměty a způsobit tak poškození. Během skenování musí být kryt dokumentu zavřený.
v jiném formátu než ve formátu PDF, upřesněte při skenování datový formát. Umístění více položek Předlohy umístěte alespoň 1 cm (0,4 palce) od okrajů (oblast se šikmými proužky) skla a stejnou vzdálenost nechte i mezi položkami. Části umístěné do šrafované oblasti nelze skenovat. více než 1 cm (0,4 palce) Poznámka Na sklo lze umístit až 12 položek.
Úpravy rámce pro oříznutí (program ScanGear) Oříznutí je operace, při které vyberete na obrázku oblast, kterou chcete zachovat. Zbývající část bude při skenování odstraněna. Na kartách Základní režim (Basic Mode) a Rozšíř. režim (Advanced Mode) můžete určit rámce pro oříznutí (oblasti skenování) na obrázcích zobrazených v oblasti náhledu na obrazovce. Po spuštění skenování bude každá oblast ohraničená rámcem pro oříznutí naskenována jako samostatný obrázek.
Přesunete-li kurzor do oblasti rámce pro oříznutí, změní se na symbol přetažením kurzoru přesunete celý rámec. (vlasový kříž). Klepnutím myší a Poznámka Na kartě Rozšíř. režim (Advanced Mode) lze určit rámec pro oříznutí tím, že zadáte hodnoty (Šířka) a (Výška) v části Nastavení vstupu (Input Settings). Nastavení vstupu Rámec pro oříznutí lze otočit o 90 stupňů pomocí tlačítka (Záměna poměru stran).
Můžete vytvořit několik rámců pro oříznutí a v každém použít jiné nastavení skenování. Klepnutím na rámce pro oříznutí při současném stisknutí klávesy Ctrl můžete také vybrat více rámců pro oříznutí. Vyberte-li více rámců pro oříznutí a změníte-li nastavení na kartě vpravo od programu ScanGear, nastavení se použije na všechny vybrané rámce pro oříznutí. Pokud vytvoříte nový rámec pro oříznutí, budou u něj zachována nastavení posledního rámce pro oříznutí. Poznámka Můžete vytvořit až 12 rámců pro oříznutí.
Obecné informace (ovladač skeneru) Program ScanGear (ovladač skeneru) má následující omezení. Při jeho používání mějte na paměti následující body. Omezení ovladače skeneru • Při použití systému souborů NTFS možná nebude vyvolán zdroj dat TWAIN. Modul TWAIN není možné zapsat do složky „winnt“ z bezpečnostních důvodů. V takovém případě se obraťte na správce počítače. • Některé počítače (včetně notebooků) připojené k zařízení se nemusí správně obnovit z pohotovostního režimu.
• Při skenování obrazů do aplikací sady Microsoft Office 2007/Microsoft Office 2010 (Word, Excel, PowerPoint atd.) použijte aplikaci Microsoft Clip Organizer. • V některých aplikacích se obrazy nemusí naskenovat správně. V takovém případě je třeba zvýšit virtuální paměť operačního systému a pokus zopakovat. • Je-li velikost obrazu příliš velká (například při skenování velkých obrazů ve vysokém rozlišení), nemusí počítač v závislosti na aplikaci odpovídat nebo ukazatel průběhu zůstane úrovni na 0 %.
Užitečné informace o skenování Úpravy rámce pro oříznutí (nástroj IJ Scan Utility) Rozlišení Formáty dat Soulad barev
Úpravy rámce pro oříznutí (nástroj IJ Scan Utility) Oříznutí je operace, při které vyberete na obrázku oblast, kterou chcete zachovat. Zbývající část bude při skenování odstraněna. V okně Sešití obrázku (Image Stitch) můžete u obrázku zobrazeného v oblasti náhledu nastavit rámec pro oříznutí.
Rozlišení Naskenovaný obraz představuje matici bodů, ve které je uložena informace o jejich jasu a barvě. Hustota těchto bodů se označuje jako „rozlišení“ a určuje množství detailů, které obrázek obsahuje. Jednotkou rozlišení je dpi (dots per inch). Dpi je počet bodů na úsečce o délce 2,5 cm (1 palce). Větší rozlišení (hodnota) znamená více detailů v obrázku, menší rozlišení (hodnota) méně detailů. Nastavení rozlišení Rozlišení lze nastavit na následujících obrazovkách.
Formáty dat Při ukládání naskenovaných souborů lze zvolit formát dat. Vhodnost formátu dat je třeba volit podle toho, jak a v které aplikaci bude obrázek použit. Dostupné formáty dat se liší dle aplikace a operačního systému (Windows nebo Mac OS). Zde jsou uvedeny vlastnosti jednotlivých formátů dat obrázku. PNG (standardní přípona souborů: .png) Formát dat často využívaný na webových stránkách. Formát PNG je vhodný pro úpravy uložených obrazů. JPEG (standardní přípona souborů: .
Soulad barev Funkce „Soulad barev“ umožňuje provádět úpravy, které zajistí soulad barevných tónů u původní položky, při zobrazení na monitoru a u barevného výtisku. Na skeneru nebo tiskárně lze barevné tóny upravit následovně.
Další metody skenování Skenování pomocí ovladače WIA Skenování pomocí Ovládacích panelů (pouze v systému Windows XP)
Skenování pomocí ovladače WIA Položku můžete naskenovat z aplikace slučitelné s funkcí WIA (Windows Image Acquisition). WIA je model ovladače implementovaný v systému Windows XP nebo v novějších systémech. Umožňuje skenovat předlohy bez použití aplikace. Postup se liší v závislosti na používané aplikaci. Následující postupy slouží pouze jako příklady. Podrobnosti naleznete v příručce k aplikaci. Důležité Některé aplikace nepodporují souvislé skenování pomocí podavače ADF (automatický podavač dokumentů).
• Velikost papíru (Paper size) Vyberte velikost papíru. Velikost papíru (Paper size) lze nastavit pouze tehdy, je-li v poli Zdroj (Source) vybrána položka Podavač (skenování jedné strany) (Feeder (Scan one side)). • Formát barvy (Color format) Vyberte barevný režim, ve kterém chcete předlohu skenovat. • Typ souboru (File type) Vyberte formát dat z nabídky JPEG, BMP, PNG a TIFF. • Rozlišení (Resolution (DPI)) Zvolte rozlišení. Zadejte hodnotu mezi 50 dpi a 600 dpi.
Poznámka Chcete-li pro skenování použít hodnoty dříve nastavené v dialogovém okně Úprava kvality skenovaného obrázku (Adjust the quality of the scanned picture), vyberte možnost Vlastní nastavení (Custom Settings). Vyberete-li v poli Zdroj papíru (Paper source) položku Podavač dokumentů (Document Feeder), budete moci vybrat Velikost stránky (Page size). 4. Klepněte na položku Úprava kvality skenovaného obrázku (Adjust the quality of the scanned picture) a nastavte předvolby podle potřeby.
6. Klepněte na tlačítko Skenovat (Scan). Po dokončení skenování se naskenovaný obraz zobrazí v aplikaci.
Skenování pomocí Ovládacích panelů (pouze v systému Windows XP) Obrazy můžete skenovat pomocí Ovládacích panelů systému Windows XP a ovladače WIA. 1. V nabídce Start vyberte příkaz Ovládací panely (Control Panel). 2. Klepněte na položku Tiskárny a jiný hardware (Printers and Other Hardware) > Skenery a fotoaparáty (Scanners and Cameras) a poklepejte na položku Canon série XXX (Canon XXX series), kde "XXX" je název modelu. Otevře se dialogové okno Průvodce skenery a fotoaparáty (Scanner and Camera Wizard).
• Jas (Brightness) Pomocí jezdce upravte jas. Přesunutím jezdce doleva obraz ztmavíte, přesunutím doprava obraz zesvětlíte. Lze také zadat hodnotu v rozmezí od -127 do 127. • Kontrast (Contrast) Pomocí jezdce upravte kontrast. Přesunutím jezdce doleva se kontrast sníží, obraz se tedy zjemní. Přesunutím jezdce doprava se kontrast zvýší a obraz bude ostřejší. Lze také zadat hodnotu v rozmezí od -127 do 127. • Rozlišení (Resolution (DPI)) Zvolte rozlišení. Zadejte hodnotu mezi 50 dpi a 600 dpi.
Umístění položek (při skenování z počítače) Informace o umístění položek na sklo nebo podavač ADF (automatický podavač dokumentů) skeneru nebo tiskárny. Položky umístěte správně podle typu skenované položky. V opačném případě se položky nemusí naskenovat správně. Důležité Nepokládejte žádné předměty na kryt dokumentu. Při otevírání krytu dokumentů mohou do skeneru nebo tiskárny zapadnout předměty a způsobit tak poškození. Během skenování musí být kryt dokumentu zavřený.
v jiném formátu než ve formátu PDF, upřesněte při skenování datový formát. Umístění více položek Předlohy umístěte alespoň 1 cm (0,4 palce) od okrajů (oblast se šikmými proužky) skla a stejnou vzdálenost nechte i mezi položkami. Části umístěné do šrafované oblasti nelze skenovat. více než 1 cm (0,4 palce) Poznámka Na sklo lze umístit až 12 položek.
Skenování z ovládacího panelu zařízení Odosielanie naskenovaných údajov do počítača pomocou ovládacieho panela zariadenia Nastavení položek pomocí ovládacího panelu zařízení Výběr reakce na příkazy z ovládacího panelu pomocí programu IJ Scan Utility Základní
Odosielanie naskenovaných údajov do počítača pomocou ovládacieho panela zariadenia Naskenovaná data můžete předat do počítače pomocí ovládacího panelu zařízení. Před předáním naskenovaných dat do počítače ověřte splnění těchto podmínek: • Ovladače MP Drivers jsou nainstalovány. Pokud ovladače MP Drivers nejsou ještě nainstalované, vložte do CD mechaniky počítače Instalační disk CD-ROM a nainstalujte ovladače MP Drivers. • Zařízení je správně připojeno k počítači.
Originály vkládejte správným způsobem v závislosti na jejich typu. V opačném případě nemusí být některé originály naskenovány správně. Podrobné informace o vloženém originálu: Vkládání originálů Skenovat lze následující položky: Fotografie, pohlednice, vizitky, časopisy, noviny, dokumenty a disky BD, DVD nebo CD. Následující nelze skenovat správně. Fotografie formátu A4. Dokumenty menší než 127 x 178 mm (5 x 7 palců), například stránky brožury s odříznutým hřebenem Originály na tenkém bílém papíře.
• Vložení originálu na skleněnou desku: • Pokud v nastavení Formát dat (Data format) vyberete možnost JPEG nebo TIFF, zařízení zahájí skenování a skenovaná data budou předána do počítače. • Pokud v nastavení Formát dat (Data format) vyberete možnost PDF nebo Kompaktní PDF (Compact PDF), zobrazí se po dokončení skenování potvrzovací obrazovka s otázkou, zda chcete pokračovat ve skenování. Pokud vyberete možnost Ano (Yes) a stisknete tlačítko OK, můžete pokračovat ve skenování originálů.
Nastavení položek pomocí ovládacího panelu zařízení Některá nastavení skenování, například velikost skenování, rozlišení nebo formát dat, můžete změnit. Pomocí tlačítka vyberte položku nastavení a stiskněte tlačítko OK. každou položku v nastavení upravte a nakonec stiskněte tlačítko OK. Zobrazí se Pomocí tlačítka následující položka nastavení. Poznámka Aktuální nastavení je na displeji LCD označeno symbolem * (hvězdička). Je-li v nastavení Typ dokumentu (Document type) vybrána možnost Autom.
Výběr reakce na příkazy z ovládacího panelu pomocí programu IJ Scan Utility V programu IJ Scan Utility můžete určit způsob odezvy při skenování pomocí ovládacího panelu. Poznámka V následujících popisech jsou jako příklady použity obrazovky pro určení odezvy při využití režimu automatického skenování prostřednictvím ovládacího panelu. 1. Spusťte aplikaci IJ Scan Utility. Spuštění nástroje IJ Scan Utility 2. Klepněte na tlačítko Nastavení... (Settings...). Zobrazí se dialogové okno Nastavení. 3.
4. V nabídce Možnosti skenování (Scan Options) nastavte opravu obrazu. 5. V nabídce Nastavení uložení (Save Settings) zadejte název souboru a další nastavení. 6. V nabídce Nastavení aplikace (Application Settings) vyberte aplikaci, kterou chcete po skenování spustit.
7. Klepněte na tlačítko OK. Jakmile začnete skenovat pomocí ovládacího panelu, odezvy proběhnou v souladu s použitým nastavením.