MX390 series Online-Handbuch Fax senden Deutsch (German)
Fax senden Vorbereitungen für Faxübertragungen Anschließen der Telefonleitung Einstellen des Telefonleitungstyps Einrichten des Empfangsmodus Festlegen der Absenderinformationen Senden von Faxen mithilfe des Bedienfelds am Gerät Senden von Faxen mithilfe der Zifferntasten Grundlagen Erneutes Senden von Faxen (Wahlwiederholung einer besetzten Faxnummer) Senden von Faxen mithilfe nützlicher Funktionen Registrieren von Empfängern Registrieren von Empfängern über das Bedienfeld des Geräts Registrieren von Emp
Senden von Faxen mithilfe des Bedienfelds am Gerät Senden von Faxen mithilfe der Zifferntasten Grundlagen Erneutes Senden von Faxen (Wahlwiederholung einer besetzten Faxnummer) Senden von Faxen mithilfe nützlicher Funktionen
Registrieren von Empfängern Registrieren von Empfängern über das Bedienfeld des Geräts Registrieren von Empfängern mit dem Kurzwahlprogramm
Empfangen von Faxen Empfangen von Faxen Ändern der Papiereinstellungen Erweiterte Einstellungen im Empfangsmodus Speicherempfang Empfangen von Faxen mithilfe nützlicher Funktionen
Weitere nützliche Faxfunktionen Verwenden von Informationsdiensten Übertragen/Empfangen von Faxen mit ECM Im Gerätespeicher gespeicherte Dokumente Zusammenfassung von Berichten und Listen
Senden von Faxen über den Computer Senden eines FAXES (Faxtreiber) Grundlagen Erstellen eines Adressbuchs (Faxtreiber) Bearbeiten oder Entfernen eines Empfängers in einem Adressbuch (Faxtreiber) Suchen nach einem Empfänger in einem Adressbuch (Faxtreiber) Fehlerbehebung beim Senden von Faxen (Faxtreiber) Allgemeine Hinweise (Fax-Treiber)
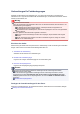
Vorbereitungen für Faxübertragungen Schließen Sie das Gerät an die Telefonleitung an, und richten Sie das Gerät vor Verwendung der Faxfunktionen ein. Legen Sie anschließend die Grundeinstellungen, wie Absenderinformationen, Datum/ Uhrzeit und Sommerzeit, fest. Wichtig Bei plötzlichem Stromausfall: Wenn Sie versehentlich den Netzstecker ziehen oder ein Stromausfall auftritt, wird die Datums- und Uhrzeiteinstellung zurückgesetzt.
Anschließen der Telefonleitung Die Verbindungsmethode variiert je nach Telefonleitung. • Bei direktem Anschluss des Geräts an die Telefonleitungstypdose/Bei Anschluss des Geräts an den xDSL-Splitter: Einfacher Anschluss • Bei Anschluss des Geräts an eine andere Leitung wie xDSL: Anschließen unterschiedlicher Leitungen Erfolgt der Anschluss nicht ordnungsgemäß, kann das Gerät keine Faxmitteilungen versenden und empfangen. Sorgen Sie für den korrekten Anschluss des Geräts.
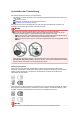
Falls Sie die Telefonleitung anschließen, während das Gerät eingeschaltet ist, schalten Sie das Gerät zuerst aus, und ziehen Sie den Netzstecker ab. Warten Sie 1 Minute lang, und stecken Sie Telefonleitung und Netzstecker ein. Hinweis Informationen zur Position der Buchse für Telefonkabel und der Buchse für externe Geräte finden Sie unter Rückansicht. Vor dem Anschließen eines Telefons oder Anrufbeantworters muss die Abdeckkappe des Telefonanschlusses entfernt werden.
A. Analoger Telefonanschluss B. xDSL-Modem (Splitter muss nicht in das Modem integriert sein) C. Computer D. Telefon oder Anrufbeantworter Wichtig Wenn der Splitter nicht in das Modem integriert ist, darf die Telefonleitung nicht vor dem Splitter (wandseitig) verzweigt werden. Außerdem dürfen nicht mehrere Splitter parallel angeschlossen werden. Andernfalls funktioniert das Gerät eventuell nicht ordnungsgemäß.
Einstellen des Telefonleitungstyps Stellen Sie vor Verwenden des Geräts sicher, dass Sie den Telefonleitungstyp für Ihre Telefonleitung richtig eingestellt haben. Wenn Sie nicht genau wissen, über welchen Leitungstyp Sie verfügen, setzen Sie sich mit Ihrem Telefonanbieter in Verbindung. Bei xDSL- oder ISDN-Anschlüssen wenden Sie sich an Ihren Telefon- oder Diensteanbieter, um eine Bestätigung des Leitungstyp zu erhalten. Hinweis Telefonleitungstyp (Telephone line type) wird nur in Ländern bzw.
Einrichten des Empfangsmodus Legen Sie dem Empfangsvorgang (Empfangsmodus) fest. Weitere Informationen zum Einrichten des Empfangsmodus: Einrichten des Empfangsmodus Sie können den geeigneten Modus auswählen. Weitere Informationen zum auswählbaren Empfangsmodus: Info zum Empfangsmodus Hinweis Je nach ausgewähltem Empfangsmodus gibt es Unterschiede im Empfangsvorgang.
Ruftöne werden vom Gerät automatisch überwacht, und bei Erkennen des Fax-Ruftons wird das Fax automatisch empfangen. Zum Verwenden von DRPD gehen Sie wie folgt vor, um den Fax-Rufton laut Zuteilung Ihres Telefonanbieters einzustellen. Hinweis Setzen Sie sich mit Ihrem Telefonanbieter in Verbindung, um weitere Informationen über diesen Service zu erhalten. 1. Stellen Sie sicher, dass das Gerät eingeschaltet ist. Sicherstellen, dass der Drucker eingeschaltet ist 2. Drücken Sie die Taste FAX.
Das Gerät kann bei einem eingehenden Anruf automatisch in den Faxempfangsmodus wechseln, ohne dass der Hörer abgenommen werden muss (Wechsel man./autom. (Manual/auto switch)). Das Gerät kann ebenfalls automatisch ein Fax empfangen, wenn Sie den Hörer abnehmen oder wenn der Anrufbeantworter einen Faxanruf annimmt (Benutzerfr. Empfang (User-friendly RX)). Erweiterte Einstellung in Tel.-Prioritätsmod.
Festlegen der Absenderinformationen Sie können Absenderinformationen wie Datum/Uhrzeit, Gerätename und Fax-/Telefonnummer des Geräts festlegen. Info zu Absenderinformationen Einstellen von Datum und Uhrzeit Einstellen der Sommerzeit Registrieren der Benutzerinformationen Info zu Absenderinformationen Wenn der Gerätename und die Fax-/Telefonnummer des Geräts registriert sind, werden diese Daten zusammen mit dem Datum und der Uhrzeit als Absenderinformationen auf dem Empfänger-Faxgerät ausgedruckt. A.
2. Drücken Sie die Taste Einrichten (Setup). Der Bildschirm Menü einrichten (Setup menu) wird angezeigt. 3. Verwenden Sie die Taste , um Geräteeinstellungen (Device settings) auszuwählen, und drücken Sie dann die Taste OK. 4. Wählen Sie mit der Taste Sie dann die Taste OK. die Option Gerätbenutz.einst. (Dev. user settings) aus, und drücken 5. Wählen Sie mit der Taste Sie dann die Taste OK. die Option Datum/Zeit einst. (Date/time setting) aus, und drücken 6. Stellen Sie Datum und Uhrzeit ein.
Zum Deaktivieren der Sommerzeit wählen Sie die Option AUS (OFF). 7. Stellen Sie das Datum und die Uhrzeit für den Beginn der Sommerzeit ein. 1. Wählen Sie mit der Taste die Option Beginn Datum/Zeit (Start date/time) aus, und drücken Sie dann die Taste OK. 2. Stellen Sie sicher, dass Monat einstellen (Set month) ausgewählt ist, und drücken Sie dann die Taste OK. 3. Wählen Sie mit der Taste dann die Taste OK. den Monat aus, in dem die Sommerzeit beginnt, und drücken Sie 4.
Geben Sie Ihren Namen und Ihre Fax-/Telefonnummer auf dem Bildschirm Fax-Benutz.einst. (FAX user settings) unter Reg. eigene Tel.-Nr. (Unit TEL no. registr.) und Registr. Gerätename (Unit name registr.) ein (nur USA), bevor Sie ein Fax versenden. 1. Stellen Sie sicher, dass das Gerät eingeschaltet ist. Sicherstellen, dass der Drucker eingeschaltet ist 2. Drücken Sie die Taste Einrichten (Setup). Der Bildschirm Menü einrichten (Setup menu) wird angezeigt. 3. Wählen Sie mit der Taste dann die Taste OK.
Senden von Faxen mithilfe des Bedienfelds am Gerät Senden von Faxen mithilfe der Zifferntasten Grundlagen Erneutes Senden von Faxen (Wahlwiederholung einer besetzten Faxnummer) Senden von Faxen mithilfe nützlicher Funktionen
Senden von Faxen mithilfe der Zifferntasten In diesem Abschnitt wird beschrieben, wie Sie Faxe senden, indem Sie mithilfe der Zifferntasten direkt wählen. Wichtig Es kann vorkommen, dass Faxe an falsche Empfänger aufgrund einer falschen Eingabe oder falschen Eintragung der Fax-/Telefonnummer gesendet werden. Daher ist es beim Senden wichtiger Dokumente empfehlenswert, vorher ein Telefonat mit dem Empfänger zu führen. Senden eines Faxes nach einem Telefonat 1.
Wenn Sie die Taste OK drücken, wird auf der LCD-Anzeige wieder der Fax-Standby-Bildschirm angezeigt. Folgende Einstellungen sind in Scanauflösung (Scan resolution) auswählbar. Standard Geeignet für Dokumente, die nur Text enthalten. Fein (Fine) Geeignet für fein gedruckte Dokumente. Extrafein (Extra fine) Geeignet für detaillierte Illustrationen oder Dokumente in feiner Druckqualität.
Drücken Sie zum Abbrechen der Faxübertragung die Taste Stopp (Stop). Während ein Fax gesendet wird, können Sie die Faxübertragung abbrechen, indem Sie die Taste Stopp (Stop) drücken und dann den Anweisungen auf der LCD-Anzeige folgen. Wenn Dokumente im ADF verbleiben, nachdem Sie beim Scannen die Taste Stopp (Stop) gedrückt haben, wird auf der LCD-Anzeige Abdeckung des Einzugs schließen (Close the feeder cover) [OK] Dokumentausgabe (Eject the document) angezeigt.
Erneutes Senden von Faxen (Wahlwiederholung einer besetzten Faxnummer) Es gibt zwei Methoden der Wahlwiederholung: Automatische Wahlwiederholung und manuelle Wahlwiederholung. • Automatische Wahlwiederholung Wenn die Leitung des Empfängers beim Senden eines Dokuments besetzt ist, wird die gewählte Nummer nach einem festgelegten Intervall vom Gerät erneut gewählt. Automatische Wahlwiederholung • Manuelle Wahlwiederholung Mit den Zifferntasten können Sie die gewählten Empfängernummern erneut wählen.
3. Legen Sie Dokumente auf die Auflagefläche oder in den ADF. Auflegen von Originalen 4. Stellen Sie Scan-Kontrast und Auflösung nach Bedarf ein. Hinweis Weitere Informationen zum Anpassen von Scankontrast und -auflösung finden Sie unter Senden von Faxen mithilfe der Zifferntasten. 5. Drücken Sie die Taste Menü (Menu). Der Bildschirm Menü FAX (FAX menu) wird angezeigt. 6. Wählen Sie mit der Taste Taste OK. die Option Wahlwiederhol. (Redial) aus, und drücken Sie dann die Der Bildschirm Wahlwiederhol.
Senden von Faxen mithilfe nützlicher Funktionen Senden eines Faxes nach einem Telefonat Senden von Faxen mithilfe der Speicherwahlfunktion Suchen eines registrierten Empfängers über den Namen Senden desselben Dokuments an mehrere Empfänger (sequentielles Rundsenden) Verhindern einer fehlerhaften Übertragung von Faxen Verwenden der Funktion zur Wahl mit aufgelegtem Hörer
Senden eines Faxes nach einem Telefonat Wenn Sie vor dem Senden eines Fax mit dem Empfänger sprechen möchten oder der Empfänger kein automatisch empfangsbereites Faxgerät besitzt, können Sie nach dem Telefonat das Fax manuell senden, um zu prüfen, ob Faxe empfangen werden können. Wichtig Es kann vorkommen, dass Faxe an falsche Empfänger aufgrund einer falschen Eingabe oder falschen Eintragung der Fax-/Telefonnummer gesendet werden.
Drücken Sie zum Senden in Farbe die Taste Farbe (Color) oder die Taste Schwarz (Black) für eine Übertragung in Schwarzweiß. Wichtig Das Senden in Farbe ist nur möglich, wenn das Faxgerät des Empfängers dies unterstützt. 10. Legen Sie den Hörer auf. Hinweis Drücken Sie zum Abbrechen der Faxübertragung die Taste Stopp (Stop). Während ein Fax gesendet wird, können Sie die Faxübertragung abbrechen, indem Sie die Taste Stopp (Stop) drücken und dann den Anweisungen auf der LCD-Anzeige folgen.
Senden von Faxen mithilfe der Speicherwahlfunktion Das Registrieren von Fax-/Telefonnummern und Namen des Empfängers für die Code-Speicherwahl oder Gruppenwahl vereinfacht den Faxversand für Sie. Wichtig Es kann vorkommen, dass Faxe an falsche Empfänger aufgrund einer falschen Eingabe oder falschen Eintragung der Fax-/Telefonnummer gesendet werden. Daher ist es beim Senden wichtiger Dokumente empfehlenswert, vorher ein Telefonat mit dem Empfänger zu führen.
2. Drücken Sie die Taste OK. 8. Drücken Sie zum Senden in Farbe die Taste Farbe (Color) oder die Taste Schwarz (Black) für eine Übertragung in Schwarzweiß. Wichtig Das Senden in Farbe ist nur möglich, wenn das Faxgerät des Empfängers dies unterstützt. Hinweis Drücken Sie zum Abbrechen der Faxübertragung die Taste Stopp (Stop). Während ein Fax gesendet wird, können Sie die Faxübertragung abbrechen, indem Sie die Taste Stopp (Stop) drücken und dann den Anweisungen auf der LCD-Anzeige folgen.
Suchen eines registrierten Empfängers über den Namen Sie können einen registrierten Empfänger suchen, indem Sie in alphabetischer Reihenfolge sortieren und das Fax senden. Wichtig Es kann vorkommen, dass Faxe an falsche Empfänger aufgrund einer falschen Eingabe oder falschen Eintragung der Fax-/Telefonnummer gesendet werden. Daher ist es beim Senden wichtiger Dokumente empfehlenswert, vorher ein Telefonat mit dem Empfänger zu führen.
Um zum Bildschirm für die Auswahl des Code-Speicherwahlcodes oder Gruppenwahlcodes zurückzukehren, drücken Sie die Taste . 8. Geben Sie mit den Zifferntasten den ersten Buchstaben des Empfängernamens oder des Gruppennamens ein, den Sie suchen möchten. Die Empfängernamen und die Gruppennamen werden in alphabetischer Reihenfolge sortiert.
Senden desselben Dokuments an mehrere Empfänger (sequentielles Rundsenden) Mit diesem Gerät können Sie dasselbe Dokument gleichzeitig an maximal 21 Empfänger versenden. Die Empfänger können mit den Zifferntasten, per Code-Speicherwahl und per Gruppenwahl angegeben werden. Die folgende Anzahl von Empfängern kann in Kombination festgelegt werden.
Wenn für Faxnr. neu eingeben (FAX no. re-entry) in Sicherheit einstell. (Security control) unter Faxeinstellungen (Fax settings) die Option EIN (ON) eingestellt ist, geben Sie die Nummer erneut über die Zifferntasten ein, und drücken Sie die Taste OK. Sicherheit einstell. (Security control) • Durch Wahlwiederholung: die Option Drücken Sie die Taste Menü (Menu), und wählen Sie mit der Taste Wahlwiederhol. (Redial) aus. Drücken Sie dann die Taste OK.
Verhindern einer fehlerhaften Übertragung von Faxen Dieses Gerät verfügt über zwei Funktionen zum Verhindern einer fehlerhaften Übertragung von Faxen. • Senden von Faxen nach zweimaligem Eingeben der Fax-/Telefonnummer Bei dieser Funktion müssen Sie die Fax-/Telefonnummer nach der Eingabe über die Zifferntasten erneut eingeben, sodass eine falsche Eingabe vom Gerät verhindert wird.
1. Stellen Sie sicher, dass das Gerät eingeschaltet ist. Sicherstellen, dass der Drucker eingeschaltet ist 2. Drücken Sie die Taste Einrichten (Setup). Der Bildschirm Menü einrichten (Setup menu) wird angezeigt. 3. Wählen Sie mit der Taste dann die Taste OK. die Option Faxeinstellungen (Fax settings) aus, und drücken Sie 4. Wählen Sie mit der Taste Sie dann die Taste OK. die Option Sicherheit einstell. (Security control) aus, und drücken 5.
Verwenden der Funktion zur Wahl mit aufgelegtem Hörer Führen Sie die folgenden Schritte aus, um Faxe mit der Funktion zur Wahl mit aufgelegtem Hörer zu senden. Wichtig Es kann vorkommen, dass Faxe an falsche Empfänger aufgrund einer falschen Eingabe oder falschen Eintragung der Fax-/Telefonnummer gesendet werden. Daher ist es beim Senden wichtiger Dokumente empfehlenswert, vorher ein Telefonat mit dem Empfänger zu führen.
Hinweis Drücken Sie zum Abbrechen der Faxübertragung die Taste Stopp (Stop). Während ein Fax gesendet wird, können Sie die Faxübertragung abbrechen, indem Sie die Taste Stopp (Stop) drücken und dann den Anweisungen auf der LCD-Anzeige folgen. Wenn Dokumente im ADF verbleiben, nachdem Sie beim Scannen die Taste Stopp (Stop) gedrückt haben, wird auf der LCD-Anzeige Abdeckung des Einzugs schließen (Close the feeder cover) [OK] Dokumentausgabe (Eject the document) angezeigt.
Registrieren von Empfängern Registrieren von Empfängern über das Bedienfeld des Geräts Registrieren von Empfängern mit dem Kurzwahlprogramm
Registrieren von Empfängern über das Bedienfeld des Geräts Mithilfe der Speicherwahl können Sie durch Drücken weniger Tasten die Fax-/Telefonnummern auf einfache Weise wählen.
Registrieren von Empfängern für die Code-Speicherwahl Wenn Sie die Code-Speicherwahlfunktion verwenden möchten, müssen Sie zuerst die Fax-/ Telefonnummern der Empfänger registrieren. Befolgen Sie die nachstehenden Schritte, um Fax-/ Telefonnummern der Empfänger zu registrieren. 1. Stellen Sie sicher, dass das Gerät eingeschaltet ist. Sicherstellen, dass der Drucker eingeschaltet ist 2. Drücken Sie die Taste Einrichten (Setup). Der Bildschirm Menü einrichten (Setup menu) wird angezeigt.
Die Fax-/Telefonnummer wird im Gerät registriert. Fahren Sie mit dem nächsten Schritt fort. • Aus Liste ang. Anr. (From call log (IN)) Wenn Sie diese Registrierungsmethode auswählen, wird der Bildschirm zur Auswahl der Fax-/ Telefonnummer oder des Namens aus den Protokollen für ankommende Anrufe angezeigt. 1. Wählen Sie mit der Taste drücken Sie die Taste OK. eine Fax-/Telefonnummer oder einen Namen aus und 2. Wenn Tel.nummer (TEL number) angezeigt wird, drücken Sie die Taste OK.
10. Geben Sie mithilfe der Zifferntasten den Namen des Empfängers ein. Hinweis Sie können für den Namen bis zu 16 Zeichen (einschließlich Leerzeichen) eingeben. Weitere Informationen zum Einfügen und Löschen von Zeichen: Eingeben von Ziffern, Buchstaben und Symbolen 11. Drücken Sie die Taste OK, um die Registrierung abzuschließen.
Registrieren von Empfängern für Gruppenwahl Wenn Sie zwei oder mehr registrierte Code-Speicherwahlcodes für eine Gruppenwahl registrieren, können Sie dasselbe Dokument nacheinander an alle Empfänger senden, die für die Gruppenwahl registriert sind. 1. Stellen Sie sicher, dass das Gerät eingeschaltet ist. Sicherstellen, dass der Drucker eingeschaltet ist 2. Drücken Sie die Taste Einrichten (Setup). Der Bildschirm Menü einrichten (Setup menu) wird angezeigt.
Geben Sie den ersten Buchstaben des gesuchten Empfängernamens mit den Zifferntasten ein, und wählen Sie mit der Taste einen Code-Speicherwahlcode aus, der für die Gruppenwahl registriert werden soll. Drücken Sie dann die Taste OK. Suchen eines registrierten Empfängers über den Namen Um zum Bildschirm für die Auswahl des Code-Speicherwahlcodes oder Gruppenwahlcodes zurückzukehren, drücken Sie die Taste . 3. Drücken Sie die Taste OK. Der Code-Speicherwahlcode wird für die Gruppenwahl registriert. 4.
Ändern von gespeicherten Informationen Führen Sie die folgenden Schritte aus, um Informationen zu ändern, die für eine Code-Speicherwahl oder Gruppenwahl registriert sind. 1. Stellen Sie sicher, dass das Gerät eingeschaltet ist. Sicherstellen, dass der Drucker eingeschaltet ist 2. Drücken Sie die Taste Einrichten (Setup). Der Bildschirm Menü einrichten (Setup menu) wird angezeigt. die Option Faxeinstellungen (Fax settings) aus, 3. Wählen Sie mit der Taste und drücken Sie dann die Taste OK.
3. Fügen Sie das Mitglied hinzu oder löschen Sie es, und registrieren Sie den CodeSpeicherwahlcode für die Gruppenwahl. Drücken Sie dann die Taste OK. 4. Ändern Sie den Gruppennamen, und registrieren Sie den Code-Speicherwahlcode für die Gruppenwahl. Drücken Sie dann die Taste OK. Hinweis Sie können für den Namen bis zu 16 Zeichen (einschließlich Leerzeichen) eingeben.
Löschen von gespeicherten Informationen Führen Sie die folgenden Schritte aus, um Informationen zu löschen, die für eine Code-Speicherwahl oder Gruppenwahl registriert sind. 1. Stellen Sie sicher, dass das Gerät eingeschaltet ist. Sicherstellen, dass der Drucker eingeschaltet ist 2. Drücken Sie die Taste Einrichten (Setup). Der Bildschirm Menü einrichten (Setup menu) wird angezeigt. die Option Faxeinstellungen (Fax settings) aus, 3. Wählen Sie mit der Taste und drücken Sie dann die Taste OK.
Drucken einer Liste mit gespeicherten Zielen Sie können eine Liste der für die Speicherwahl gespeicherten Empfänger ausdrucken und in der Nähe des Geräts aufbewahren, um sie beim Wählen zu verwenden. 1. Stellen Sie sicher, dass das Gerät eingeschaltet ist. Sicherstellen, dass der Drucker eingeschaltet ist 2. Legen Sie das zu bedruckende Papier ein. Einlegen von Papier 3. Drücken Sie die Taste FAX. Der Fax-Standby-Bildschirm wird angezeigt. 4. Drücken Sie die Taste Menü (Menu).
Registrieren von Empfängern mit dem Kurzwahlprogramm Info zum Kurzwahlprogramm Mit dem Kurzwahlprogramm können die im Gerät registrierten Fax-/Telefonnummern an einen Computer weitergeleitet und dort registriert/geändert werden. Darüber hinaus können Sie die Fax-/Telefonnummer, den Benutzernamen, die Fax-/Telefonnummer des Benutzers und auf dem Computer bearbeitete zurückgewiesene Nummern im Gerät registrieren. Sie können sie auch auf einem Computer als Backup speichern.
Starten des Kurzwahlprogramms Überprüfen Sie vor dem Starten des Kurzwahlprogramms die folgenden Punkte: • Die erforderliche Anwendungssoftware (MP Drivers und Kurzwahlprogramm) ist installiert. Wenn die Anwendungssoftware (MP Drivers und Kurzwahlprogramm) noch nicht installiert ist, legen Sie die Installations-CD-ROM in das Laufwerk des Computers ein, und installieren Sie MP Drivers und Kurzwahlprogramm. • Das Gerät ist ordnungsgemäß an einen Computer angeschlossen.
Dialogfenster Kurzwahlprogramm Die folgenden Optionen sind Bestandteil des Dialogfelds Kurzwahlprogramm (Speed Dial Utility). 1. Druckername: (Printer Name:) Sie können das Gerät auswählen, für das die registrierten Informationen mit dem Kurzwahlprogramm bearbeitet werden sollen. 2. Druckereinstellungen anzeigen (Display Printer Settings) Sie können die registrierten Informationen des unter Druckername: (Printer Name:) ausgewählten Geräts in das Kurzwahlprogramm laden. 3.
7. Anweisungen (Instructions) Zeigt dieses Handbuch an. 8. Beenden (Exit) Hiermit wird das Kurzwahlprogramm beendet. Die mit dem Kurzwahlprogramm registrierten oder bearbeiteten Informationen werden weder auf dem Computer gespeichert noch im Gerät registriert. 9. Auf PC speichern... (Save to PC...) Sie können die mit dem Kurzwahlprogramm bearbeiteten Informationen auf dem Computer speichern. 10. In Drucker registr.
Speichern von im Gerät registrierten Informationen auf dem Computer Befolgen Sie die unten stehenden Anweisungen, um die Nummern für die Kurzwahl (oder Speicherwahl)/ Gruppenwahl, den Benutzernamen, die Fax-/Telefonnummer oder die im Gerät zurückgewiesenen Nummern auf dem Computer zu speichern. 1. Starten Sie das Kurzwahlprogramm. Starten des Kurzwahlprogramms 2.
Registrieren einer Fax-/Telefonnummer mit dem Kurzwahlprogramm Befolgen Sie die nachstehenden Schritte, um Fax-/Telefonnummern zu registrieren. Hinweis Stellen Sie vor dem Registrieren von Fax-/Telefonnummern mit dem Kurzwahlprogramm sicher, dass keine Faxvorgänge ausgeführt werden. 1. Starten Sie das Kurzwahlprogramm. Starten des Kurzwahlprogramms 2. Wählen Sie das Gerät im Listenfeld Druckername: (Printer Name:) aus, und klicken Sie auf Druckereinstellungen anzeigen (Display Printer Settings). 3.
1. Geben Sie den Gruppennamen ein. 2. Wählen Sie den Code aus, den Sie der Gruppenwahl hinzufügen möchten, und klicken Sie dann auf Hinzufügen >> (Add >>). Hinweis Sie können nur Nummern eingeben, die bereits registriert wurden. 6. Klicken Sie auf OK. Wiederholen Sie die Schritte 4 bis 6, um weitere Fax-/Telefonnummern oder eine Gruppenwahl zu registrieren. • So speichern Sie die registrierten Informationen auf dem Computer: 1. Klicken Sie auf Auf PC speichern... (Save to PC...). 2.
Ändern einer Fax-/Telefonnummer mit dem Kurzwahlprogramm Befolgen Sie die nachstehenden Schritte, um Fax-/Telefonnummern zu ändern. Hinweis Stellen Sie vor dem Ändern von Fax-/Telefonnummern mit dem Kurzwahlprogramm sicher, dass keine Faxvorgänge ausgeführt werden. 1. Starten Sie das Kurzwahlprogramm. Starten des Kurzwahlprogramms 2. Wählen Sie das Gerät im Listenfeld Druckername: (Printer Name:) aus, und klicken Sie auf Druckereinstellungen anzeigen (Display Printer Settings). 3.
So fügen Sie ein Mitglied hinzu: Wählen Sie den Code aus, den Sie der Gruppenwahl hinzufügen möchten, und klicken Sie dann auf Hinzufügen >> (Add >>). So löschen Sie ein Mitglied: Wählen Sie den Code aus, den Sie aus der Gruppenwahl löschen möchten, und klicken Sie dann auf << Löschen (<< Delete). 5. Klicken Sie auf OK. Wiederholen Sie die Schritte 4 bis 5, um weitere Fax-/Telefonnummern oder Gruppenwahlen zu ändern. • So speichern Sie die bearbeiteten Informationen auf dem Computer: 1.
Löschen einer Fax-/Telefonnummer mit dem Kurzwahlprogramm Befolgen Sie die nachstehenden Schritte, um Fax-/Telefonnummern zu löschen. Hinweis Stellen Sie vor dem Löschen von Fax-/Telefonnummern mit dem Kurzwahlprogramm sicher, dass keine Faxvorgänge ausgeführt werden. 1. Starten Sie das Kurzwahlprogramm. Starten des Kurzwahlprogramms 2. Wählen Sie das Gerät im Listenfeld Druckername: (Printer Name:) aus, und klicken Sie auf Druckereinstellungen anzeigen (Display Printer Settings). 3.
Ändern von Absenderinformationen mithilfe des Kurzwahlprogramms Befolgen Sie die unten stehenden Anweisungen, um den Benutzernamen oder die Fax-/Telefonnummer zu ändern. 1. Starten Sie das Kurzwahlprogramm. Starten des Kurzwahlprogramms 2. Wählen Sie das Gerät im Listenfeld Druckername: (Printer Name:) aus, und klicken Sie auf Druckereinstellungen anzeigen (Display Printer Settings). 3.
Registrieren/Ändern von zurückgewiesenen Nummern mithilfe des Kurzwahlprogramms Befolgen Sie die nachstehenden Schritte, um zurückgewiesene Nummern zu registrieren, zu ändern oder zu löschen. 1. Starten Sie das Kurzwahlprogramm. Starten des Kurzwahlprogramms 2. Wählen Sie das Gerät im Listenfeld Druckername: (Printer Name:) aus, und klicken Sie auf Druckereinstellungen anzeigen (Display Printer Settings). 3.
Abrufen der registrierten Informationen vom Computer und Registrieren der Informationen im Gerät Sie können die Fax-/Telefonnummern, den Benutzernamen, die Fax-/Telefonnummer des Benutzers und auf dem Computer gespeicherte zurückgewiesene Nummern im Gerät registrieren. 1. Starten Sie das Kurzwahlprogramm. Starten des Kurzwahlprogramms 2. Wählen Sie das Gerät im Listenfeld Druckername: (Printer Name:) aus, und klicken Sie auf Druckereinstellungen anzeigen (Display Printer Settings). 3.
Deinstallieren des Kurzwahlprogramms Befolgen Sie die nachstehenden Schritte, um das Kurzwahlprogramm zu deinstallieren. Wichtig Melden Sie sich mit Administratorrechten am Benutzerkonto an. 1. Deinstallieren des Kurzwahlprogramms. • Windows 7 oder Windows Vista: 1. Klicken Sie auf Start > Systemsteuerung (Control Panel) > Programme (Programs) > Programme und Funktionen (Programs and Features). 2.
Empfangen von Faxen Empfangen von Faxen Ändern der Papiereinstellungen Erweiterte Einstellungen im Empfangsmodus Speicherempfang Empfangen von Faxen mithilfe nützlicher Funktionen
Empfangen von Faxen In diesem Abschnitt werden die Vorbereitungen und die Vorgehensweise zum Empfangen von Faxen beschrieben. Vorbereitungen zum Empfangen von Faxen Bereiten Sie den Empfang von Faxen wie folgt vor. 1. Stellen Sie sicher, dass das Gerät eingeschaltet ist. Sicherstellen, dass der Drucker eingeschaltet ist 2. Drücken Sie die Taste FAX. Der Fax-Standby-Bildschirm wird angezeigt. 3. Achten Sie auf die Empfangsmodus-Einstellung.
Das Telefon klingelt bei einem eingehenden Anruf. Heben Sie den Hörer ab. Wenn Sie den Faxton hören, warten Sie nach dessen Beendigung noch mindestens 5 Sekunden, und legen Sie den Hörer auf. Das Gerät nimmt das Fax entgegen. Hinweis Sollte das Gerät nicht automatisch in den Faxempfangsmodus umschalten, drücken Sie die Taste FAX und dann die Taste Farbe (Color) oder Schwarz (Black), um das Fax zu empfangen.
- Erläutern Sie Anrufern im Ansagetext, wie sie ein Fax senden können. Wenn ein Sprachanruf eingeht: Das Telefon klingelt bei einem eingehenden Anruf. Nehmen Sie den Hörer ab, und führen Sie das Gespräch. Hinweis Wenn das Gerät während eines Telefonanrufs unerwartet in den Faxempfangsmodus wechselt, stellen Sie die erweiterte Einstellung Benutzerfr. Empfang (User-friendly RX) auf AUS (OFF). Wenn die erweiterte Einstellung Wechsel man./autom.
Das Telefon klingelt bei einem eingehenden Anruf. Wenn das Gerät keinen Fax-Rufton erkennt, gibt das Telefon weiterhin Klingeltöne aus. Nehmen Sie den Hörer ab, und führen Sie das Gespräch. Hinweis Zum Verwenden dieser Funktion ist das Abonnieren eines kompatiblen Dienstes Ihrer Telefongesellschaft erforderlich. Für DRPD Sie müssen am Gerät den entsprechenden Rufton auswählen.
Ändern der Papiereinstellungen Dieses Gerät druckt die empfangenen Faxe auf das zuvor in das Gerät eingelegte Papier. Über das Bedienfeld können Sie die Papiereinstellungen zum Drucken von Faxen ändern. Berücksichtigen Sie beim Auswählen der Einstellungen das eingelegte Papier.
Hinweis Wenn ein anderer Medientyp als Normalpap. (Plain paper) ausgewählt ist, wählen Sie Normalpap. (Plain paper) mit der Taste und drücken dann die Taste OK. 9. Drücken Sie die Taste FAX, um zum Fax-Standby-Bildschirm zurückzukehren.
Erweiterte Einstellungen im Empfangsmodus Sie können in jedem Empfangsmodus erweiterte Einstellungen festlegen. In diesem Abschnitt werden die Vorgehensweise zum Festlegen der erweiterten Einstellungen im Empfangsmodus sowie die Einstellungselemente beschrieben. Legen Sie die erweiterten Einstellungen entsprechend den nachstehenden Anweisungen fest. 1. Stellen Sie sicher, dass das Gerät eingeschaltet ist. Sicherstellen, dass der Drucker eingeschaltet ist 2. Drücken Sie die Taste FAX.
Erweiterte Einstellung in Tel.-Prioritätsmod. (TEL priority mode) Sie können die folgenden Einstellungselemente festlegen. • Wechsel man./autom. (Manual/auto switch) Wenn Sie EIN (ON) wählen, empfängt das Gerät automatisch Faxe, nachdem das externe Gerät eine bestimmte Anzahl von Ruftönen generiert hat. Sie können den Zeitraum bis zum Beginn des automatischen Empfangs angeben. • Benutzerfr.
Speicherempfang Wenn das empfangene Fax nicht vom Gerät gedruckt werden konnte, wird es im Gerätespeicher gespeichert. Die Anzeige FAX-Speicher (FAX Memory) leuchtet, und auf der LCD-Anzeige wird Im Speicher empfangen (Received in memory) angezeigt. Wichtig Wenn Sie das Gerät von der Stromversorgung trennen, werden alle Faxdokumente im Gerätespeicher gelöscht. Wenn Sie das Gerät wieder einschalten, drücken Sie die Taste OK nach der Anzeige eines Bestätigungsbildschirms.
Legen Sie Papier mit dem unter Seitenformat (Page size) angegebenen Format ein, und drücken Sie dann die Taste OK. • Seitenformat (Page size) ist nicht auf A4, Letter oder LTR (oder Legal eingestellt: Stellen Sie für Seitenformat (Page size) das Format A4, Letter oder LTR (oder Legal ein. Ändern der Papiereinstellungen Hinweis Die Verfügbarkeit einiger Seitenformate hängt davon ab, in welchem Land oder welcher Region das Gerät erworben wurde. • Medientyp (Media type) ist nicht auf Normalpap.
Empfangen von Faxen mithilfe nützlicher Funktionen Fernempfang Zurückweisen des Faxempfangs Verwenden des Anrufer-Kennung-Services zum Zurückweisen von Anrufen
Fernempfang Falls der Standort des Geräts vom Telefon entfernt ist, nehmen Sie zum Empfangen von Faxen per Fernempfang den Hörer des mit dem Gerät verbundenen Telefons ab, und wählen Sie die FernempfangsID 25. • Wenn Sie eine Impulswahlleitung verwenden, wechseln Sie vorübergehend zur Tonwahl. Ausführliche Informationen über die Vorgehensweise zum Wechseln zur Tonwahl finden Sie in der Bedienungsanleitung für das Telefon.
Zurückweisen des Faxempfangs Sie können einstellen, dass Faxe ohne Absenderinformationen oder Faxe von bestimmten Absendern vom Gerät zurückgewiesen werden. Wählen Sie eine der folgenden Bedingungen zum Zurückweisen von Faxen. • Faxe ohne Anrufer-Kennung. • Faxe von Absendern, die nicht für die Code-Speicherwahl registriert sind. • Faxe von Absendern, deren Faxnummern auf diesem Gerät als zurückgewiesene Nummern registriert sind. Wählen Sie in folgenden Schritten eine Fax-Zurückweisungsbedingung aus. 1.
1. Wenn der Bestätigungsbildschirm zur Registrierung der zurückgewiesenen Nummer angezeigt wird, verwenden Sie die Taste , um Ja (Yes) auszuwählen, und drücken Sie dann die Taste OK. 2. Verwenden Sie die Taste dann die Taste OK. 3. Wählen Sie mit der Taste , um den zu registrierenden Wahlcode auszuwählen, und drücken Sie eine Registrierungsmethode aus und drücken Sie die Taste OK. Registrieren Sie die zurückgewiesene Nummer entsprechend der Registrierungsmethode. • Aus Liste getät. Anr.
Verwenden des Anrufer-Kennung-Services zum Zurückweisen von Anrufen Wenn Sie den Anrufer-Kennung-Service abonniert haben, ermittelt das Gerät die Anrufer-Kennung des Absenders. Wenn die Kennung des Absenders die in dieser Einstellung angegebene Bedingung erfüllt, weist das Gerät den Telefonanruf oder Faxempfang vom Absender zurück. Hinweis Die Unterstützung dieser Einstellung hängt davon ab, in welchem Land oder in welcher Region das Gerät erworben wurde.
Selbst wenn Sie Zurückweisen (Reject) auswählen, läutet das Gerät einmal. (Je nachdem, in welchem Land oder welcher Region das Gerät erworben wurde, läutet das Gerät möglicherweise auch nicht.
Weitere nützliche Faxfunktionen Verwenden von Informationsdiensten Übertragen/Empfangen von Faxen mit ECM Im Gerätespeicher gespeicherte Dokumente Zusammenfassung von Berichten und Listen
Verwenden von Informationsdiensten Ihnen stehen zahlreiche Informationsdienste zur Verfügung, die beispielsweise von Banken oder für Flugund Hotelreservierungen angeboten werden. Da für diese Dienste der Tonwahlmodus erforderlich ist, müssen Sie vorübergehend zur Tonwahl wechseln, wenn das Gerät mit einer Impulswahlleitung verbunden ist.
6. Legen Sie zum Beenden der Verbindung mit dem Informationsdienst den Hörer auf. Verwenden einer Impulswahlleitung • Wählen mit der Funktion zur Wahl mit aufgelegtem Hörer Hinweis Sie können die Funktion zur Wahl mit aufgelegtem Hörer nur verwenden, wenn für Hörertasteneinst. (On-hook setting) in Sicherheit einstell. (Security control) unter Faxeinstellungen (Fax settings) die Einstellung Aktivieren (Enable) festgelegt ist. Sicherheit einstell. (Security control) 1.
Übertragen/Empfangen von Faxen mit ECM Dieses Gerät wurde für das Senden und Empfangen von Faxen im ECM (Error Correction Mode, Fehlerkorrekturmodus) eingerichtet. Wenn das Faxgerät des Empfängers mit ECM kompatibel ist, werden Fehler automatisch korrigiert und das Fax erneut gesendet. Hinweis Ist das Faxgerät des Senders oder Empfängers nicht mit ECM kompatibel, wird das Fax ohne automatische Fehlerkorrektur gesendet/empfangen. Stellen Sie zum Empfang von Farbfaxen sicher, dass für ECM-EM (ECM RX) in Erw.
Im Gerätespeicher gespeicherte Dokumente Wenn das Senden von Faxen noch nicht abgeschlossen ist oder die empfangenen Faxe vom Gerät nicht gedruckt werden konnten, werden diese Faxe im Gerätespeicher abgelegt. Bei einem Fehler während der Faxübertragung wird das Dokument nicht im Gerätespeicher gespeichert. In den folgenden Fällen kann das empfangene Fax nicht gedruckt werden und wird automatisch im Speicher des Geräts gespeichert. • Die verbleibende Tintenmenge reicht nicht aus, um das Fax zu drucken.
Drucken von im Gerätespeicher vorhandenen Dokumenten Sie können ein bestimmtes Dokument im Gerätespeicher drucken oder alle im Speicher enthaltenen Dokumente auf einmal drucken. Wenn Sie ein bestimmtes Dokument drucken möchten, wählen Sie es anhand der Übertragungsnummer aus. Wenn Sie die Übertragungsnummer für das Zieldokument nicht kennen, drucken Sie zuerst die Liste der Dokumente (SPEICHERLISTE (MEMORY LIST)).
Drucken eines bestimmten im Gerätespeicher vorhandenen Dokuments Drucken Sie ein bestimmtes Dokument entsprechend den nachstehenden Anweisungen. 1. Stellen Sie sicher, dass das Gerät eingeschaltet ist. Sicherstellen, dass der Drucker eingeschaltet ist 2. Legen Sie das zu bedruckende Papier ein. Einlegen von Papier 3. Drücken Sie die Taste FAX. Der Fax-Standby-Bildschirm wird angezeigt. 4. Drücken Sie die Taste Menü (Menu). Der Bildschirm Menü FAX (FAX menu) wird angezeigt. 5.
• Wenn Sie Nein (No) wählen: Alle Seiten des Dokuments werden gedruckt. Der Bildschirm zur Bestätigung, ob das gedruckte Dokument aus dem Gerätespeicher gelöscht werden soll, wird angezeigt. Wenn Sie mit der Taste die Option Ja (Yes) auswählen und die Taste OK drücken, wird das gedruckte Dokument aus dem Gerät espeicher gelöscht.
Löschen von im Gerätespeicher vorhandenen Dokumenten Sie können ein bestimmtes Dokument im Gerätespeicher löschen oder alle im Speicher enthaltenen Dokumente auf einmal löschen. Löschen eines bestimmten im Gerätespeicher vorhandenen Dokuments Löschen aller Dokumente im Gerätespeicher Hinweis Wenn Sie ein bestimmtes Dokument löschen möchten, wählen Sie es anhand der Übertragungsnummer aus.
6. Verwenden Sie die Taste , um die Übertragungsnummer (SE/EM-Nr.) des zu löschenden Dokuments auszuwählen, und drücken Sie dann die Taste OK. Der Bestätigungsbildschirm wird angezeigt. 7. Wählen Sie mit der Taste die Option Ja (Yes) aus, und drücken Sie dann die Taste OK. Das ausgewählte Dokument wird aus dem Gerätespeicher gelöscht.
Zusammenfassung von Berichten und Listen Das Gerät druckt nach dem Senden oder Empfangen von Faxen automatisch einen Bericht aus. Sie können die Liste der aktuellen Fax-/Telefonnummern oder der aktuellen Einstellungen drucken. Typen von Berichten und Listen Drucken von Berichten und Listen Typen von Berichten und Listen Bericht oder Liste Beschreibung AKTIVITÄTSBER. (ACTIVITY REPORT) Zeigt die letzten Faxübertragungen an. • Sie können den AKTIVITÄTSBER. (ACTIVITY REPORT) manuell ausdrucken.
Sie können einstellen, dass das Gerät bei jedem Senden eines Dokuments einen SENDEBERICHT (TX REPORT) druckt oder das Drucken des Berichts deaktivieren, indem Sie Sendebericht (TX report) in Einst. autom. Druck (Auto print settings) unter Faxeinstellungen (Fax settings) wählen. Sie können die Druckeinstellung auch so festlegen, dass die erste Faxseite mit dem Bericht gedruckt wird. Einst. autom. Druck (Auto print settings) Hinweis Die erste Seite des Fax wird nicht bei einer Übertragung in Farbe gedruckt.
3. Drücken Sie die Taste FAX. Der Fax-Standby-Bildschirm wird angezeigt. 4. Drücken Sie die Taste Menü (Menu). Der Bildschirm Menü FAX (FAX menu) wird angezeigt. 5. Verwenden Sie die Taste , um Ber./Listen drucken (Print reports/lists) auszuwählen, und drücken Sie dann die Taste OK. 6. Verwenden Sie die Taste , um die zu druckende Liste bzw. den Bericht auszuwählen, und drücken Sie dann die Taste OK.
#017 Kein Ton erkannt. Das Gerät konnte keinen Wählton erkennen. Für Wähltonerkennung (Dial tone detect) ist in Erw. FAXEinstell. (Adv. FAX settings) unter Faxeinstellungen (Fax settings) die Einstellung EIN (ON) festgelegt. Stellen Sie die Funktion auf AUS (OFF). Erw. FAX-Einstell. (Adv. FAX settings) #018 Die Leitung war besetzt. Die gewählte Fax-/Telefonnummer ist besetzt. Warten Sie einen Augenblick, und wählen Sie dann erneut. Die Nummer ist gelöscht.
Löschen Sie den Inhalt des Speichers, und bitten Sie den Absender, das Fax erneut zu senden. Siehe Im Gerätespeicher gespeicherte Dokumente. #046 Der Empfang wurde aufgrund der angegebenen Faxzurückweisungsbedingung zurückgewiesen. Der Empfang wurde zurückgewiesen, da das Fax die durch Faxempf. zurückw. (FAX RX reject) in Sicherheit einstell. (Security control) unter Faxeinstellungen (Fax settings) angegebene Faxzurückweisungsbedingung erfüllt.
Senden von Faxen über den Computer Senden eines FAXES (Faxtreiber) Grundlagen Erstellen eines Adressbuchs (Faxtreiber) Bearbeiten oder Entfernen eines Empfängers in einem Adressbuch (Faxtreiber) Suchen nach einem Empfänger in einem Adressbuch (Faxtreiber) Fehlerbehebung beim Senden von Faxen (Faxtreiber) Allgemeine Hinweise (Fax-Treiber)
Senden eines FAXES (Faxtreiber) Sie können mithilfe des Faxtreibers Faxe senden von Anwendungen, die den Dokumentendruck unterstützen. Hinweis Nur die Schwarz-Weiß-Übertragung wird unterstützt. 1. Stellen Sie sicher, dass das Gerät eingeschaltet ist. 2. Öffnen Sie das Dokument, das Sie faxen möchten, mit einem Programm (z. B. Notepad), und klicken Sie dann auf den Druckbefehl. (Der Befehl lautet Drucken... (Print...) im Menü Datei (File).) 3.
2. Klicken Sie mit der rechten Maustaste auf das Symbol für Canon XXX series FAX (wobei "XXX" für den Modellnamen steht) und wählen Sie Druckeinstellungen (Printing Preferences) aus. Windows XP: 1. Klicken Sie im Menü Start auf Systemsteuerung (Control Panel) > Drucker und andere Hardware (Printers and Other Hardware) > Drucker und Faxgeräte (Printers and Faxes). 2.
Wenn die Fax-/Telefonnummer des Empfängers falsch eingegeben wird oder wenn die gespeicherte Fax-/Telefonnummer falsch ist, kann das Fax an einen anderen als den vorgesehenen Empfänger gesendet werden. Wenn Sie ein wichtiges Fax senden, sollten Sie vor dem Abschicken die eingegebenen Informationen und den Status des Empfängers überprüfen.
Erstellen eines Adressbuchs (Faxtreiber) Mittels des Adressbuches können Sie ein Fax einfach mit Angabe eines Empfängers in eben in diesem Adressbuch senden. Sie können den Namen des Empfängers, Faxnummer und andere Informationen im Adressbuch speichern. Speichern eines Empfängers (WAB-Kontakt) im Adressbuch Sie können einen individuellen Empfänger (Kontakt) im Adressbuch speichern. 1.
Erstellen eines neuen Windows-Adressbuchs (WAB-Datei) exklusiv für die Faxfunktion Wählen Sie Neue Windows-Adressbuchdatei für Faxversand erstellen. (Create a new Windows Address Book file for faxing.), und klicken Sie anschließend auf OK. Sie können die Einstellung auch später ändern, damit Sie ein anderes Adressbuch verwenden können. Verwenden eines bestehenden Windows-Adressbuchs Klicken Sie auf Vorhandene Windows-Adressbuchdatei auswählen. (Select existing Windows Address Book file.
5. Klicken Sie im Dialogfeld Neuer Eintrag (New Entry) auf Kontakt (Contact), und klicken Sie danach auf OK. Hinweis Um ein Fax zu senden, können Sie nur den Kontakt (Contact) (einen Empfänger) angeben. Sie können keine Verteilerliste (Distribution List)angeben. 6. Geben Sie Vorname (First), zweiter Vorname (Middle) und Nachname (Last) des Kontakts in der Registerkarte Name und E-Mail (Name and E-mail) (Registerkarte Name bei anderen Systemen als Windows XP) im Dialogfeld Eigenschaften (Properties) ein.
7. Geben Sie die Faxnummer auf der Registerkarte Privat (Home) oder Arbeit (Work) ein, und klicken Sie anschließend auf OK. Ein individueller Empfänger (Kontakt) wird im Adressbuch gespeichert. Hinweis Sie können einen Empfänger auch speichern, indem Sie nach Eingabe des Empfängers auf die Schaltfläche In Adressbuch aufnehmen... (Add to Address Book...) im Dialogfeld Fax senden (Send FAX) klicken.
(Beispiel: Wenn die Nummer für die Ausgangsleitung "0" ist und die Faxnummer "XXX-XXXX" lautet, geben Sie "0XXX-XXXX" ein.
Bearbeiten oder Entfernen eines Empfängers in einem Adressbuch (Faxtreiber) Sie können Name, Faxnummer und andere Angaben zum Empfänger ändern oder im Adressbuch gespeicherte Empfänger löschen. Bearbeiten von Empfängern in einem Adressbuch Sie können die im Adressbuch gespeicherten Kontakte bearbeiten. 1.
4. Wählen Sie den Empfänger, den Sie bearbeiten möchten, im Dialogfeld Adressbuch (Address Book) aus, und klicken Sie dann auf Eigenschaften (Properties). 5. Ändern Sie wunschgemäß die Informationen im Dialogfeld Eigenschaften (Properties), und klicken Sie anschließend auf OK. Löschen von Empfängern in einem Adressbuch Sie können die im Adressbuch gespeicherten Kontaktinformationen löschen. 1.
Klicken Sie im Menü Start auf Systemsteuerung (Control Panel) > Drucker und andere Hardware (Printers and Other Hardware) > Drucker und Faxgeräte (Printers and Faxes). 2. Öffnen Sie den Einstellungsbildschirm für den Faxtreiber. • Windows 7: Klicken Sie mit der rechten Maustaste auf das Symbol für Canon XXX series Printer und wählen Sie Druckeinstellungen (Printing Preferences) und dann Canon XXX series FAX aus.
Suchen nach einem Empfänger in einem Adressbuch (Faxtreiber) Sie können Empfänger, die im Adressbuch gespeichert sind, nach Namen suchen. 1. Öffnen Sie das Dokument, das Sie faxen möchten, mit einem Programm (z. B. Notepad), und klicken Sie dann auf den Druckbefehl. (Der Befehl lautet Drucken... (Print...) im Menü Datei (File).) 2. In Drucker auswählen (Select Printer) oder Name im Dialogfeld Drucken (Print) wählen Sie Canon XXX series FAX (wobei "XXX" für den Modellnamen steht). 3.
5. Geben Sie den Namen des Empfängers, den Sie suchen möchten, in Suche nach Empfänger (Search by Recipient) im Dialogfeld Empfänger aus dem Adressbuch auswählen (Select Recipient from Address Book) ein. Wenn der eingegebene Name gefunden wird, wird der Empfänger in der Kontaktliste mit seinem ausgewählten Namen angezeigt. Klicken Sie bei ausgewähltem Namen auf Als Empfänger bestimmen (Set as Recipient), um ihn als Empfänger anzugeben. Wichtig Sie können lediglich den Namen als Suchkriterium verwenden.
Fehlerbehebung beim Senden von Faxen (Faxtreiber) Check 1: Ist das Gerät eingeschaltet? • Wenn das Gerät ausgeschaltet ist, können keine Faxe gesendet werden. Drücken Sie die Taste "EIN", um das Gerät einzuschalten. • Wenn Sie das Netzkabel aus der Steckdose gezogen haben, ohne das Gerät vorher auszuschalten (wenn eine Taste auf dem Bedienfeld noch leuchtet), wird das Gerät beim Einstecken des Netzkabels automatisch wieder eingeschaltet.
Sollte ein Supportcode angezeigt werden, konsultieren Sie auf der Startseite des Online-Handbuchs die "Supportcodeliste" für Ihr Modell. Wird kein Supportcode angezeigt, konsultieren Sie auf der Startseite des Online-Handbuchs den Abschnitt "Eine Meldung wird angezeigt" für Ihr Modell. Wenn Sie es eilig haben, drücken Sie die Taste "Stopp", um die Meldung zu schließen, und senden Sie anschließend das Fax.
Allgemeine Hinweise (Fax-Treiber) Für den Fax-Treiber gelten die nachfolgend beschriebenen Beschränkungen. Beachten Sie diese Beschränkungen, wenn Sie mit dem Fax-Treiber arbeiten. • Der Faxtreiber funktioniert möglicherweise nicht ordnungsgemäß, wenn beim Senden eines Microsoft Excel 2002-Dokuments als Fax in Microsoft Excel 2002 die Option Anpassen an A4/US Letter (Allow A4/Letter Paper Resizing) markiert ist. Befolgen Sie die nachstehenden Anweisungen, um das Problem zu lösen: 1.
Das Dialogfeld Canon XXX series FAX-Eigenschaften (Canon XXX series FAX Properties) (wobei "XXX" für den Modellnamen steht) wird angezeigt. 3. Klicken Sie auf die Registerkarte Anschlüsse (Ports). Stellen Sie sicher, dass die Option Druckerpool aktivieren (Enable printer pooling) aktiviert ist. - Windows XP: 1. Klicken Sie im Menü Start auf Systemsteuerung (Control Panel) > Drucker und andere Hardware (Printers and Other Hardware) > Drucker und Faxgeräte (Printers and Faxes). 2.