
Guide for Mac
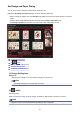
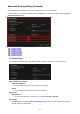

Advanced Settings Dialog (Photo Layout)
When you want to add dates to the images to be used for layout printing, you can specify the position, size,
color, etc. for the date.
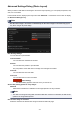
In the Item edit screen, display a photo layout and click Advanced... at the bottom of the screen to display
the Advanced Settings dialog.
Note
• Use the same image in all frames and Rotate/crop all the same images in the same way appear
only when using an ID photo design.
Date Printing Settings
You can set how to print the date.
Text Orientation
You can select the orientation of the date.
Position
You can select the position to print the date.
The print position of the date does not change even if images are rotated.
Font Size
You can select the size of the date.
Font Color
You can select the font color of the date.
(Color Setting)
The Colors dialog appears. Select the color you want to set.
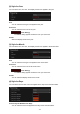
Set the date printing option for every images
Add date
Select these checkboxes to add dates to all images placed in the layout frames.
Note
• The date is the image shooting date recorded as Exif data. If there is no Exif data, the date of last
update to the image will be printed.
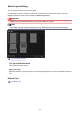
Use the same image in all frames
Select this checkbox to add the same image to all frames within the page.
207