Camera User Guide Photo of PowerShot A495 • Make sure you read this guide before using the camera. • Store this guide safely so that you can use it in the future.
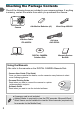
Checking the Package Contents Check if the following items are included in your camera package. If anything is missing, contact the retailer from which you purchased the camera. Camera AA Alkaline Batteries (x2) Interface Cable IFC-400PCU Getting Started DIGITAL CAMERA Solution Disk Wrist Strap WS-800 AV Cable AVC-DC300 Warranty System Booklet Using the Manuals Also refer to the manuals on the DIGITAL CAMERA Manuals Disk.
Read This First Test Shots and Disclaimer Take some initial test shots and play them back to make sure the images were recorded correctly. Please note that Canon Inc., its subsidiaries and affiliates, and its distributors are not liable for any consequential damages arising from any malfunction of a camera or accessory, including memory cards, that results in the failure of an image to be recorded or to be recorded in a way that is machine readable.
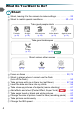
What Do You Want to Do? Shoot Shoot, leaving it to the camera to make settings . . . . . . . . . . . . 22 Shoot to match special conditions . . . . . . . . . . . . . . . . . . . 50 – 52 Take good people shots I Portraits (p. 50) F At night (p. 50) V Kids and pets (p. 50) w At the beach (p. 51) P Against snow (p. 51) Take good landscapes O U Foliage (p. 51) Sunsets (p. 52) Shoot various other scenes ’ Indoors (p. 51) Low light (p. 51) t Fireworks (p. 52) Focus on faces . . . . . . . . . .
What Do You Want to Do? View Look at my pictures . . . . . . . . . . . . . . . . . . . . . . . . . . . . . . . . . . 26 Automatically play back pictures (slideshow) . . . . . . . . . . . . . . 86 Look at my pictures on a TV . . . . . . . . . . . . . . . . . . . . . . . . . . . 89 Look at my pictures on a computer . . . . . . . . . . . . . . . . . . . . . . 32 Quickly search pictures . . . . . . . . . . . . . . . . . . . . . . . . . . . . 84, 85 Erase pictures . . . . . . . . . . . . . . . . . . . . . . . .
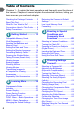
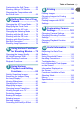
Table of Contents Chapters 1 – 3 explain the basic operations and frequently used functions of this camera. Chapters 4 onward explain the advanced functions, letting you learn more as you read each chapter. Checking the Package Contents ...... 2 Read This First ................................. 3 What Do You Want to Do? ............... 4 Conventions Used in This Guide ...... 8 Safety Precautions............................ 9 1 Getting Started ............. 13 Compatible Memory Cards (Sold Separately) ...
Table of Contents Customizing the Self-Timer ............ 68 Shooting Using a TV Monitor.......... 69 Changing the Composition with the Focus Lock ............................... 69 5 Getting More Out of Your Camera .......................... 71 Changing the AF Frame Mode ....... 72 Magnifying the Focal Point ............. 73 Shooting with the AF Lock .............. 74 Changing the Metering Mode ......... 74 Shooting with the AE Lock .............. 75 Shooting with the FE Lock ..............
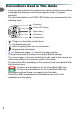
Conventions Used in This Guide • Icons are used in the text to represent the camera buttons and switches. • Language that displays on the screen appears inside [ ] (square brackets). • The directional buttons and FUNC./SET button are represented by the following icons. (Up button) (FUNC./SET button) (Right button) (Left button) (Down button) • : Things you should be careful about. • : Troubleshooting tips. • : Hints for getting more out of your camera. • : Supplemental information. • (p.
Safety Precautions • Before using the camera, please ensure that you read the safety precautions described below. Always ensure that the camera is operated correctly. • The safety precautions noted on the following pages are intended to prevent injuries to yourself and other persons, or damage to the equipment. • Be sure to also check the guides included with any separately sold accessories you use. Warning Denotes the possibility of serious injury or death. Caution Denotes the possibility of injury.
Safety Precautions Batteries • Use only recommended batteries. • Do not place the batteries near or in direct flame. • Do not let the batteries come into contact with water (e.g. sea water) or other liquids. • Do not attempt to disassemble, alter or apply heat to the batteries. • Avoid dropping or subjecting the batteries to severe impacts. The above may cause explosions or leaks, resulting in fire, injury and damage to the surroundings.
Safety Precautions Caution • Do not aim the camera at bright light sources (the sun, etc.). Doing so may cause malfunctions or damage the image sensor. • When using the camera on a beach or at a windy location, be careful not to allow dust or sand to enter the camera. This may cause the camera to malfunction. • In regular use, small amounts of smoke may be emitted from the flash. This is due to the high intensity of the flash burning dust and foreign materials stuck to the front of the unit.
1 Getting Started This chapter explains preparations before shooting, how to shoot in » mode, and then how to view and erase the images you take. The latter part of this chapter explains how to shoot and view movies and transfer images to a computer. Attaching the Strap/Holding the Camera • Be sure to attach the supplied strap to the camera and wrap it around your wrist when shooting to avoid dropping the camera. • Keep your arms tight against your body while holding the camera firmly by the sides.
Compatible Memory Cards (Sold Separately) • • • • • • SD memory cards (2 GB and less)* SDHC memory cards (More than 2 GB, up to and including 32 GB)* SDXC memory cards (More than 32 GB)* MultiMediaCards MMCplus memory cards HC MMCplus memory cards * This memory card complies with the SD standards. Some cards may not operate properly depending on the brand of card used. Depending on your computer’s OS version, SDXC memory cards may not be recognized when using a commercially available card reader.
Inserting the Batteries and Memory Card Insert the memory card. 4 ● Insert the memory card as shown until it locks into place with a click. ● Be sure the memory card is oriented correctly. Inserting the memory card in the wrong direction could damage the camera. Label the cover. 5 Close ● Close the cover and press downward as you slide it until it clicks into place . ● Removing the Memory Card ● Push the memory card in until you hear a click, then slowly release it. The memory card will pop up.
Inserting the Batteries and Memory Card Compatible Batteries AA alkaline batteries and Canon AA NiMH batteries (sold separately) (pp. 36, 37). Can any other batteries be used? We cannot recommend the use of any other batteries than those listed above because performance varies widely. Why use NiMH batteries? NiMH batteries last much longer than alkaline batteries, especially in cold weather. Battery Charge Indicator When battery charge is low, an icon and message will appear on the screen.
Setting the Date and Time The Date/Time settings screen will appear the first time the camera is turned on. Since the dates and times recorded into your images are based on these settings, be sure to set them. on the camera. 1 Turn ● Press the ON/OFF button. The Date/Time screen will appear. the date and time. 2 Set ● Press the qr buttons to choose an option. ● Press the op buttons to set a value. the setting. 3 Complete ● Press the m button.
Setting the Date and Time ● Changing the Date and Time You can change the current date and time settings. the menus. 1 Display ● Press the n button. [Date/Time] in the 3 tab. 2 Choose ● Press the qr buttons to choose the 3 tab. ● Press the op buttons to choose [Date/ Time], then press the m button. the date and time. 3 Change ● Follow Steps 2 and 3 on p. 17 to adjust the setting. ● Pressing the n button will close the menu.
Setting the Display Language You can change the language that displays on the screen. Playback mode. 1 Enter ● Press the 1 button. the settings screen. 2 Display ● Press and hold the m button, then press the n button. the display language. 3 Set ● Press the opqr buttons to choose a language, then press the m button. Once the display language has been set, the settings screen will close.
Formatting Memory Cards Before you use a new memory card or one that has been formatted in other devices, you should format the card with this camera. Formatting (initializing) a memory card erases all data on the memory card. As you cannot retrieve the erased data, exercise adequate caution before formatting the memory card. the menu. 1 Display ● Press the n button. [Format]. 2 Choose ● Press the qr buttons to choose the 3 tab. ● Press the op buttons to choose [Format], then press the m button.
Pressing the Shutter Button When formatting ends, [Memory card formatting complete] will appear on the screen. ● Press the m button. Formatting or erasing data on a memory card merely changes the file management information on the card and does not ensure its contents are completely erased. Be careful when transferring or disposing of a memory card. When disposing of a memory card, take precautions such as physically destroying the card to prevent personal information leaks.
Taking Pictures (Smart Auto) Since the camera can determine the subject and shooting conditions, you can let it automatically select the best settings for the scene and just shoot. The camera can also detect and focus on faces, setting the color and brightness to optimal levels. on the camera. 1 Turn ● Press the ON/OFF button. The start-up screen will appear. » mode. 2 Choose ● Press the button, then press the qr buttons to choose ». ● Press the m button.
Taking Pictures (Smart Auto) When the camera focuses, it will beep twice and AF frames will appear where the camera focuses. Several AF frames will appear when the camera focuses on more than one point. AF Frame 5 Shoot. ● Press the shutter button fully. The camera will play the shutter sound and shoot. The flash will automatically fire in low light conditions. The image will appear on the screen for about two seconds.
Taking Pictures (Smart Auto) Background Subject Bright Including Blue Skies Backlit Dark When Using Tripod Backlit People * Landscapes – – Close Subjects – – Icon Background Color Gray Light Blue * – Dark Blue * Appears when the scene is dark and the camera is attached to a tripod. Under certain conditions, the icon that appears may not match the actual scene.
Taking Pictures (Smart Auto) What if... • What if white and gray frames appear when you point the camera toward a subject? When faces are detected, a white frame appears on the face of the main subject, while gray frames appear on other detected faces. The frames will follow the subjects within a certain range (p. 72). • What if a flashing appears? Attach the camera to a tripod so that the camera does not move and blur the image.
Viewing Images You can view the images you have taken on the screen. Playback mode. 1 Enter ● Press the 1 button. The last image you took will appear. an image. 2 Choose ● Pressing the q button will cycle through the ● ● ● images in the reverse order they were taken, from the newest image to the oldest. Pressing the r button will cycle through the images in the order they were taken, from oldest to newest.
Erasing Images You can choose and erase images one at a time. Please note that erased images cannot be recovered. Exercise adequate caution before erasing an image. Playback mode. 1 Enter ● Press the 1 button. The last image you took will appear. an image to erase. 2 Choose ● Press the qr buttons to display an image to erase. the image. 3 ●Erase Press the p button. [Erase?] appears on the screen. ● Press the qr buttons to choose [Erase], then press the m button. The displayed image will be erased.
Shooting Movies The camera can automatically select all settings so that you can shoot movies just by pressing the shutter button. E mode. 1 Enter ● Press the button, then press the qr buttons to choose E. ● Press the m button. Shooting Time the shot. 2 Compose ● Pressing the zoom button toward i will zoom in on your subject, making it appear larger. Pressing the button toward j will zoom out from your subject, making it appear smaller. 3 Focus. ● Press the shutter button halfway to focus.
Shooting Movies Elapsed Time Recording will start, and [ Rec] and the elapsed time will appear on the screen. ● Once shooting begins, take your finger off the shutter button. ● If you change the composition of your shot during shooting, the focus will stay the same, but the brightness and tone will automatically adjust. ● Do not touch the microphone while shooting. ● Do not press any buttons other than the shutter button while shooting. The sound the buttons make will be recorded in the movie.
Shooting Movies Estimated Shooting Times Memory Card 4 GB 16 GB Shooting Time 32 min. 26 sec. 2 hrs. 12 min. 50 sec. • Shooting times are based on default settings. • Recording will automatically stop when either the clip file size reaches 4 GB or the recording time reaches approximately 1 hour. • Recording may stop even if the maximum clip length has not been reached on some memory cards. SD Speed Class 4 or higher memory cards are recommended.
Viewing Movies You can view the movies you have shot on the screen. Playback mode. 1 Enter ● Press the 1 button. The last image you shot will appear. appears on movies. a movie. 2 Choose ● Press the qr buttons to choose a movie, then press the m button. The movie control panel will appear. the movie. 3 Play ● Press the qr buttons to choose ● ● (Play), then press the m button. The movie will play. Press the m button again to pause the movie or resume playback.
Transferring Images to a Computer for Viewing You can use the included software to transfer images you have shot with the camera to a computer for viewing. If you are already using ZoomBrowser EX/ImageBrowser, install the software from the included CD-ROM, overwriting your current installation.
Transferring Images to a Computer for Viewing ● Preparations Windows Vista and Mac OS X (v10.5) are used for these explanations. 1 Install the Software. Windows Place the CD in the computer’s CD-ROM drive. ● Place the supplied CD-ROM (DIGITAL CAMERA Solution Disk) (p. 2) into the computer’s CD-ROM drive. Begin installation. ● Click [Easy Installation] and follow the on-screen instructions to proceed with the installation.
Transferring Images to a Computer for Viewing the camera to the 2 Connect computer. ● Turn off the camera. ● Open the cover, and insert the small end of the plug firmly into the camera terminal in the direction shown. ● Insert the cable’s larger plug into the computer. For connection details, refer to the user guide provided with the computer. on the camera. 3 Turn ● Press the 1 button to turn on the camera. 4 Open CameraWindow.
Transferring Images to a Computer for Viewing ● Transfer and View Images ● Click [Import Images from Camera], and then click [Import Untransferred Images]. All images not previously transferred will transfer to the computer. Transferred images will be sorted by date and saved in separate folders in the Pictures folder. ● When [Image import complete.] appears, click [OK], then click [X] to close CameraWindow. ● Turn off the camera and unplug the cable.
Accessories Supplied with Camera Wrist Strap WS-800 DIGITAL CAMERA Solution Disk AV Cable AVC-DC300* AA Alkaline Batteries (×2) Interface Cable IFC-400PCU* * Also available for purchase separately. Memory Card Card Reader Windows/Macintosh Canon-Brand PictBridge Compliant Printers Compact Photo Printers (SELPHY series) Inkjet Printers See the user guide supplied with the printer for more information on the printer and interface cables.
Separately Sold Accessories The following camera accessories are sold separately. Some accessories are not sold in some regions, or may no longer be available. Power Supplies AC Adapter Kit ACK800 This set includes Compact Power Adapter CAPS800 and power cord. This kit lets you power the camera using household power. Recommended for powering the camera for an extended period of time or when connecting to a computer or printer. Cannot be used to charge the batteries inside the camera.
Separately Sold Accessories Flash High-Power Flash HF-DC1 This attachable supplementary flash can illuminate subjects that are too distant for the light from the built-in flash to reach. Printers SELPHY series Canon-Brand PictBridge Compliant Printers By connecting your camera to a Canon-brand PictBridge compliant printer, you can print your images without having to use a computer. For more information, visit your nearest Canon retailer. Inkjet Printers Use of genuine Canon accessories is recommended.
2 Learning More This chapter explains the parts of the camera and what appears on the screen, as well as the basic operating instructions.
Components Guide Microphone (p. 29) Lens Shutter Button (p. 21) ON/OFF button Flash (pp. 53, 61) Lamp (pp. 25, 57, 58 , 105) Speaker Tripod Socket Memory Card / Battery Cover (p. 14) Strap Mount (p. 13) (Mode) Button Use the 40 button to change the Shooting mode. Auto Mode You can leave it to the camera to select settings for fully automatic shooting (p. 22). Movie Mode For shooting movies (pp. 28, 79). P Mode Choose settings yourself to take various types of pictures (p. 60).
Indicator Screen (LCD Monitor) (pp. 42, 118) Zoom Button Shooting: i (Telephoto) / j (Wide Angle) (p. 22) Playback: k (Magnify) (p. 88) / g (Index) (p. 84) 1 (Playback) Button (p. 26) (Mode) Button (p. 40) Indicator (p. 41) DC IN (Power Input) Terminal (p. 111) A / V OUT (Audio/Video Output) Terminal (p. 89) DIGITAL Terminal (pp. 34, 96) n Button (p. 45) e (Macro) (p. 61) / u (Infinity) (p. 62) / q Button b (Exposure Compensation) (p. 60) / d (Jump) (p. 85) / o Button m FUNC./SET (Function/Set) Button (p.
Screen Display ● Switching the Display Shooting [On] Information Display [Off] No Information Display You can change the display by pressing the n button, choosing the 4 tab, and [Shooting Info]. Playback [Off] No Information Display [Standard] Simple Information Display [Detailed] Detailed Information Display [Focus Check] Focus Check Display (p. 87) You can change the display by pressing the n button, choosing the 1 tab, and [Info Display].
Power Saving Function (Auto Power Down) Histogram during Playback High Low Dark Bright The graph that appears in [Detailed] (p. 42) is called the histogram. The histogram shows the distribution of brightness in an image horizontally, and the amount of brightness vertically. When the graph approaches the right side, the image is bright, but when it approaches the left side, the image is dark, and in this way you can judge the exposure.
FUNC. Menu – Basic Operations Commonly used shooting functions can be set with the FUNC. menu. The menu items and options differ depending on the mode (pp. 120 – 121). a shooting mode. 1 Choose ● Press the button, then press the opqr buttons to choose the desired Shooting mode. ● Press the m button. the FUNC. menu. 2 Display ● Press the m button. a menu item. 3 Choose ● Press the op buttons to choose a menu item. The available options for the menu item appear in the lower part of the screen.
MENU – Basic Operations Various functions can be set from the menus. The menu items are organized under tabs, such as for shooting (4) and playback (1). The available menu items differ depending on the mode (pp. 122 – 123). the menu. 1 Display ● Press the n button. a tab. 2 Choose ● Press the qr buttons, or press the zoom button to choose a tab. a menu item. 3 Choose ● Press the op buttons to choose a menu item.
Changing the Sound Settings You can silence or adjust the volume of camera sounds. ● Muting Sounds the menu. 1 Display ● Press the n button. [Mute]. 2 Choose ● Press the qr buttons to choose the 3 tab. ● Press the op buttons to choose [Mute], then press the qr buttons to choose [On]. ● Press the n button again to return to the normal screen. ● Adjusting the Volume the menu. 1 Display ● Press the n button. [Volume]. 2 Choose ● Press the qr buttons to choose the 3 tab.
Returning the Camera to Default Settings When you have mistakenly changed a setting, you can reset the camera to the default settings. the menu. 1 Display ● Press the n button. [Reset All]. 2 Choose ● Press the qr buttons to choose the 3 tab. ● Press the op buttons to choose [Reset All], then press the m button. the settings. 3 Reset ● Press the qr buttons to choose [OK], then press the m button. The camera will reset to the default settings.
Low Level Memory Card Formatting Perform low level formatting when you think that the recording/reading speed of a memory card has dropped. Performing a low-level format on a memory card erases all data on the memory card. As you cannot retrieve the erased data, exercise adequate caution before performing a low-level format. the menu. 1 Display ● Press the n button. [Format]. 2 Choose ● Press the qr buttons to choose the 3 tab. ● Press the op buttons to choose [Format], then press the m button.
3 Shooting in Special Conditions and Commonly Used Functions This chapter explains how to shoot in different conditions, as well as how to use common functions, such as the self-timer. • When you choose a Shooting mode that matches a particular set of conditions, the camera will automatically select any necessary settings. All you need do is press the shutter button to take an optimized picture. • This chapter assumes » mode is set for “Turning the Flash Off” (p. 53) to “Using the Self-Timer” (p. 57).
Shooting in Various Conditions The camera will select the necessary settings for the conditions in which you wish to shoot when you choose the matching mode. the Shooting mode. 1 Choose ● Press the button. ● Press the qr buttons to choose K, then press the op buttons to choose the type of scene you want to shoot. ● Press the m button. 2 Shoot. I Take portraits (Portrait) ● Produces a soft effect when photographing people.
Shooting in Various Conditions ’ Take indoor shots (Indoor) ● Lets you shoot indoors with natural colors. Take shots in low light conditions (Low Light) ● Depending on the scene, the ISO speed will be set higher and the shutter speed faster than in » mode so that you can shoot in dark places with reduced camera shake and subject blur. ● A recording pixel setting of will display, and the image will be fixed at 1600 x 1200 pixels.
Shooting in Various Conditions UShoot sunsets (Sunset) ● Lets you take shots of sunsets in vivid colors. t Take shots of fireworks (Fireworks) ● Lets you take shots of fireworks in vivid colors. In t mode, attach the camera to a tripod to prevent the camera from moving and blurring the image. In F, V or ’ mode, images may appear coarse because the ISO speed (p. 64) is increased to match the shooting conditions.
Turning the Flash Off Modes for other scenes In addition to the modes explained here, the following scene modes are also available. • " Face Self-Timer (p. 58) • ≈ Long Shutter (p. 78) Turning the Flash Off You can shoot with the flash turned off. 1 Press the r button. !. 2 Choose ● Press the qr buttons to choose !, then press the m button. Once set, ! will appear on the screen. ● To turn the flash back on, follow the steps above to return the setting to .
Zooming in Closely on Subjects (Digital Zoom) You can use the digital zoom to zoom up to a maximum equivalent of 13x and capture subjects that are too far away for the optical zoom to enlarge. The images may appear coarse, however, depending on the recording pixel setting (p. 62) and the zoom factor used. the zoom button toward i. 1 Press ● Hold the button until zooming stops.
Zooming in Closely on Subjects (Digital Zoom) ● Digital Tele-Converter The focal length of the lens can be increased by an equivalent of 1.4x or 2.3x. This enables a faster shutter speed and less chance of camera shake than the zoom (including digital zoom) used by itself at the same zoom factor. The images may appear coarse, however, depending on the combination of recording pixel (p. 62) and digital tele-converter settings used. [Digital Zoom]. 1 Choose ● Press the n button.
Inserting the Date and Time You can insert the shooting date and time in the lower right corner of an image. Once inserted, however, they cannot be deleted. Be sure to check beforehand that the date and time are correctly set (p. 17). [Date Stamp]. 1 Choose ● Press the n button. ● Press the qr buttons to choose the 4 tab. ● Press the op buttons to choose [Date Stamp]. the setting. 2 Accept ● Press the qr buttons to choose [Date] or [Date & Time]. ● Pressing the n button will restore the shooting screen.
Using the Self-Timer The self-timer can be used to shoot a group photo that includes the photographer. The camera will activate approximately 10 seconds after the shutter button is pressed. 1 Press the p button. Ò. 2 Choose ● Press the op buttons to choose Ò, then press the m button. Once set, Ò will appear on the screen. 3 Shoot. ● Press the shutter button halfway to focus on the subject, then press it fully. When the self-timer starts, the lamp blinks and the self-timer sound plays.
Using the Face Self-Timer To take a photo that includes the photographer, such a group photo, compose the shot, and press the shutter button. The camera will shoot two seconds after you enter the shot and it detects your face (p. 72). ". 1 Choose ● Follow Step 1 on p. 50 and choose ". the shot and press the 2 Compose shutter button halfway. ● Make sure a green frame appears on the face focused on and white frames appear on other faces. the shutter button fully.
4 Choosing Settings Yourself In this chapter you will learn how to use the various functions in G mode to progressively advance your shooting skills. • This chapter assumes that G mode has been chosen by pressing the button, then the qr buttons. • G stands for Program AE. • Before attempting to shoot using a function explained in this chapter in modes other than G mode, check if the function is available in those modes (pp. 120 – 123).
Shooting in Program AE You can choose the settings for various functions to suit your preferences. AE stands for Auto Exposure. G mode (p. 40). 1 Enter ● After pressing the button, press the qr buttons to choose G, then press the m button. the settings according to 2 Adjust your purposes (pp. 60 – 68). 3 Shoot.
Turning the Flash On You can make the flash fire every time you shoot. The flash range is approximately 30 cm – 3.0 m (12 in. – 9.8 ft.) from the end of the lens (when the zoom button is pressed toward j and held until the lens stops moving, which is the maximum wide angle setting of the lens), approximately 30 cm – 2.0 m (12 in. – 6.6 ft.) (when the zoom button is pressed toward i and held until the lens stops moving, which is the maximum telephoto setting of the lens). Choose h.
Shooting Far Away Subjects (Infinity) When it is difficult to focus because your shot contains subjects that are both near and far, you can change the focus range (the distance range from your subject) to focus more reliably on far away subjects (approx. 3.0 m (9.8 ft.) or more) only. Choose u. ● After pressing the q button, press the qr buttons to choose u, then press the m button. Once set, u will appear on the screen.
Changing the Compression Ratio (Image Quality) You can choose from the following two levels of compression ratio (image quality): (Fine), (Normal). the compression ratio 1 Choose setting. ● After pressing the m button, press the op buttons to choose . an option. 2 Choose ● Press the qr buttons to choose an option, then press the m button. The setting you chose will appear on the screen.
Changing the ISO Speed Approximate Values for Paper Size ● Suitable for sending images as e-mail attachments. ● For printing on wide size paper. A2 A3 A4, Letter size 5" x 7" Postcard size 3.5" x 5" Changing the ISO Speed the ISO speed. 1 Choose ● After pressing the m button, press the op buttons to choose . Choose an option. 2 ● Press the qr buttons to choose an option, then press the m button. The setting you chose will display on the screen.
Adjusting the White Balance The white balance (WB) function sets the optimal white balance for natural looking colors to match the shooting conditions. the white balance 1 Choose function. ● After pressing the m button, press the op buttons to choose . an option. 2 Choose ● Press the qr buttons to choose an option, then press the m button. The setting you chose will display on the screen. Auto Automatically sets the optimal white balance for the shooting conditions.
Continuous Shooting You can shoot continuously at a maximum speed of approximately 0.9 images/second while the shutter button is pressed fully and held. a Drive mode. 1 Choose ● After pressing the m button, press the op buttons to choose . an option. 2 Choose ● Press the qr buttons to choose W, then press the m button. 3 Shoot. As long as you hold the shutter button down, the camera will shoot successive images. • Cannot be used with the self-timer (pp. 57, 68).
Changing the Tone of an Image (My Colors) You can change the tone of an image to sepia or black and white when shooting. My Colors. 1 Choose ● After pressing the m button, press the op buttons to choose . Choose an option. 2 ● Press the qr buttons to choose an option, then press the m button. The setting you chose will display on the screen. My Colors Off — Vivid Emphasizes the contrast and color saturation for a vivid impression.
Shooting Using the Two Second SelfTimer The camera will shoot approximately two seconds after the shutter button is pressed, avoiding any camera shake that occurs when pressing the shutter button. Choose Î. ● After pressing the p button, press the op buttons to choose Î, then press the m button. Once set, Î will appear on the screen. ● Follow Step 3 on p. 57 to shoot. Customizing the Self-Timer You can set the time delay (0 – 30 seconds) and the number of shots (1 – 10 shots). $.
Shooting Using a TV Monitor • If the flash fires, the shooting interval may be longer. • If you set a high number of shots, the shooting interval may be longer. • If the memory card becomes full, shooting stops automatically. Shooting Using a TV Monitor You can use a TV to display the camera screen content while shooting. • Connect the camera to a TV as described in “Viewing Images on a TV” (p. 89). • Shooting procedures are the same as when using the camera screen.
5 Getting More Out of Your Camera This chapter serves as the advanced version of Chapter 4 and explains how to take pictures using various functions. • This chapter assumes that G mode has been chosen by pressing the button, then the qr buttons. • “Shooting Long Exposures” (p. 78) assumes you have set the camera to ≈ mode. To set this mode, press the button, and press the qr buttons to choose K mode, then press the op buttons to choose ≈ mode.
Changing the AF Frame Mode You can change the AF (Auto Focus) frame mode to match the conditions you want to shoot. Choose [AF Frame]. ● Press the n button, choose the 4 tab, and then choose the [AF Frame] menu item. Press the qr buttons to choose an option. ● Face AiAF • Detects people’s faces and sets the focus, exposure (evaluative metering only) and white balance ( only).
Magnifying the Focal Point You can reduce the AF frame size • Press the n button, choose the 4 tab, then choose the [AF Frame Size] menu item and [Small] option. • The setting is configured to [Normal] when the Digital Zoom (p. 54) or Digital Tele-converter (p. 55) is used. If the camera cannot focus when you press the shutter button halfway, the AF frame will turn yellow and will appear on the screen.
Shooting with the AF Lock The focus can be locked. After locking the focus, the focal distance will not change even when you release your finger from the shutter button. the focus. 1 Lock ● Keep the shutter button pressed halfway and press the q button. The focus locks and % appears on the screen. ● If you release your finger from the shutter button and press the q button again, % will disappear and the focus will unlock. 2 Compose the scene and shoot.
Shooting with the AE Lock You can lock the exposure and shoot, or set the focus and exposure separately to shoot. AE stands for “Auto Exposure”. the exposure. 1 Lock ● Point the camera toward the subject and press the o button while pressing the shutter button halfway. When & appears on the screen, the exposure will be locked. ● If you release your finger from the shutter button and press the o button again, & will disappear and the AE will unlock. 2 Compose the scene and shoot.
Shooting with Slow Synchro You can make the main subject, such as people, appear bright by having the camera provide the appropriate illumination with the flash. At the same time, you can use a slow shutter speed to brighten the background that the light from the flash cannot reach. …. 1 Choose ● After pressing the r button, press the qr buttons to choose …, then press the m button again. Once set, … will appear on the screen. 2 Shoot.
Red-Eye Correction You can automatically correct red-eye that occurs in images taken with the flash. [Flash Settings]. 1 Choose ● Press the n button, choose [Flash Settings] from the 4 tab and press the m button. the setting. 2 Adjust ● Press the op buttons to choose [Red-Eye Corr.] and press the qr buttons to choose [On]. Once set, Œ will appear on the screen. Red-eye correction may be applied to areas other than red eyes. For example, when red make-up has been used around eyes.
Shooting Long Exposures You can set the shutter speed to a range between 1 and 15 seconds to shoot long exposures. However, you should attach the camera to a tripod to prevent the camera from moving and blurring the image. ≈. 1 Choose ● Follow Steps 1 – 2 on p. 50 to choose ≈. the shutter speed. 2 Choose ● Press the o button. ● Press the qr buttons to select the shutter speed, then press the m button. the exposure.
6 Using Various Functions for Shooting Movies This chapter provides more advanced information than the “Shooting Movies” and “Viewing Movies” sections of Chapter 1. • This chapter assumes that E mode has been chosen by pressing the button, then the qr buttons.
Changing the Image Quality You can choose between three image quality settings. the image quality setting. 1 Choose ● After pressing the m button, press the op buttons to choose . an option. 2 Choose ● Press the qr buttons to choose an option, and press the m button. The setting will display on the screen. Image Quality Table Image Quality (Recording Pixels/Frame Rate) 640 x 480 pixels, 30 frames/sec. Content For shooting standard quality movies.
AE Lock/Exposure Shift You can lock the exposure or change it in 1/3 steps within a range of ±2 before shooting. 1 Focus. ● Press the shutter button halfway to focus. the exposure. 2 Lock ● After releasing the shutter button, press the o button to lock the exposure. The exposure shift bar appears. ● Press the o button again to release the lock. the exposure. 3 Change ● While watching the screen, press the qr buttons to adjust the brightness. 4 Shoot.
Playback Functions The following functions can be used in the same way as for still images. • • • • • • • • • Erasing Images (p. 27) Quickly Searching Images (p. 84) Searching for Images Using the Jump Display (p. 85) Viewing Slideshows (p. 86) Changing Image Transitions (p. 88) Viewing Images on a TV (p. 89) Protecting Images (p. 90) Erasing All Images (p. 91) Rotating Images (p. 91) Summary of Movie Control Panel in “Viewing Movies” (p.
7 Using Various Playback and Editing Functions This chapter explains various ways to play back and edit images. • Press the 1 button to enter Playback mode before operating the camera. • It may not be possible to play back or edit images that have been edited on a computer, had their file name changed, or have been taken on a different camera. • The edit function (pp. 92 – 93) cannot be used if the memory card does not have free space available.
Quickly Searching Images ● Searching Images Using Index Display Displaying multiple images at a time lets you quickly find the image you want. the zoom button toward g. 1 Press Images will display in an index. ● Press the zoom button toward g to increase the number of images. The number of images increases each time you press the button. ● Press the zoom button toward k to reduce the number of images. The number of images will reduce each time you press the button. an image.
Searching for Images Using the Jump Display When there are many images on the memory card, you can search them by a specified method or image unit. a jump method. 1 Choose ● In Single Image Playback, press the o button. The search method and the position of the currently displayed image will appear at the bottom of the screen. ● Press the op buttons to choose the desired search method. images. 2 Switch ● Press the qr buttons.
Viewing Slideshows You can automatically play back images recorded to a memory card. [Slideshow]. 1 Choose ● Press the n button, choose [Slideshow] from the 1 tab and press the m button. the setting. 2 Make ● Press the op buttons to choose an item, and press the qr buttons to adjust the setting. Repeat Repeats playback of images Play Time Display time for each image Effect Transition effects when switching between images [Start].
Checking the Focus You can magnify the area of a recorded image that was inside the AF Frame, or the area of a face that was detected, to check the focus. [Focus Check]. 1 Choose ● Press the n button, choose the 1 tab and [Info Display]. ● Press the qr buttons to choose [Focus Check], then press the n button. A white frame will appear where the AF frame or face was when the focus was set. A gray frame will appear on a face detected during playback. The area within the orange frame appears magnified.
Magnifying Images Press the zoom button toward k. Approximate Location of Displayed Area ● The display will zoom in on the image and will appear on the screen. If you continue to hold the zoom button, it will continue to zoom in up to a maximum factor of 10x. ● If you press the opqr buttons, you can move the location of the displayed area. ● Press the zoom button toward g to zoom out, or continue to hold it to return to Single Image Playback. ● When appears on the screen, press the m button to switch to .
Viewing Images on a TV Using the supplied AV Cable (p. 2), you can connect the camera to a TV to view images you have shot. 1 Turn off the camera and TV. the camera to the TV. 2 Connect ● Open the camera’s terminal cover and fully insert the cable plug into the camera’s terminal. ● Insert the cable plug fully into the video input terminals as shown in the illustration. White or Black Yellow Yellow Black on the TV and switch it to the 3 Turn input to which the cable is connected. Turn on the camera.
Protecting Images You can protect important images so that they cannot be accidentally erased with the camera (pp. 27, 91). [Protect]. 1 Choose ● Press the n button, choose [Protect] in the 1 tab, and then press the m button. an image. 2 Choose ● Press the qr buttons to choose an image, then press the m button. will appear on the screen. ● If you press the m button again, will disappear. ● To protect additional images, repeat the above procedure. images.
Erasing All Images You can erase all images at once. Since erased images cannot be recovered, exercise adequate caution before erasing. Protected images (p. 90) cannot be erased. [Erase all]. 1 Choose ● Press the n button, choose [Erase all] in the 1 tab, and press the m button. all images. 2 Erase ● Press the qr buttons to choose [OK], then press the m button. All images will be erased. ● Pressing the n button will restore the menu screen.
Resizing Images You can resize images to a lower pixel setting and save the resized image as a separate file. [Resize]. 1 Choose ● Press the n button and choose the 1 tab, then choose [Resize] and press the m button. an image. 2 Choose ● Press the qr buttons to choose the image and press the m button. Choose an image size. 3 ● Press the qr buttons to choose an option, then press the m button. The [Save new image?] screen will appear. the new image.
Correcting the Red-Eye Effect You can automatically correct red eyes in images and save them as new files. [Red-Eye Correction]. 1 Choose ● Press the n button, choose the 1 tab and [Red-Eye Correction], then press the m button. an image. 2 Choose ● Press the qr buttons to choose an image. the image. 3 Correct ● Press the m button. Red-eye detected by the camera will be corrected and a frame will appear around the corrected portion.
8 Printing This chapter explains how to choose images for printing, and print using a PictBridge compliant printer (sold separately, p. 38). Please also refer to the Personal Printing Guide.
Printing Images You can easily print the pictures you take by connecting the camera to a PictBridge compliant printer using the supplied interface cable (p. 2). 1 Turn off the camera and printer. the camera to the printer. 2 Connect ● Open the cover, and insert the small end of the plug firmly into the camera terminal in the direction shown. ● Insert the cable’s larger plug into the printer. For connection details, refer to the user guide provided with the printer. 3 Turn on the printer. on the camera.
Printing Images Print images. 6 ● Press the op buttons to choose [Print] and press the m button. Printing will start. ● If you want to print additional images, repeat Steps 5 and 6 after printing has completed. ● After printing has completed, turn off the camera and printer, and unplug the interface cable. • Refer to the Personal Printing Guide for details on printing. • Refer to pp. 36, 38 for Canon-brand PictBridge compliant printers.
Choosing Images for Printing (DPOF) You can choose up to 998 images on a memory card for printing and specify settings such as the number of copies so that they can be printed together or processed at a photo developer service. These selection methods comply with the DPOF (Digital Print Order Format) standards. ● Print Settings You can set the print type, date and file number. These settings apply to all images chosen for printing. [Print Settings].
Choosing Images for Printing (DPOF) • With [Index] chosen, the [Date] and [File No.] options cannot be set to [On] at the same time. • The date will be printed in the style set in the [Date/Time] function in the 3 tab (p. 17). ● Choosing the Number of Copies [Select Images & Qty.]. 1 Choose ● Press the n button and choose the 2 tab, then choose [Select Images & Qty.] and press the m button. an image. 2 Choose ● Press the qr buttons to choose an image, then press the m button.
Printing Images with DPOF Settings ● Clearing All Selections [Clear All Selections]. 1 Choose ● In Step 1 on p. 99, choose [Clear All Selections] and then press the m button. selections will be cleared. 2 All ● Press the qr buttons to choose [OK], then press the m button. Printing Images with DPOF Settings The following examples use the Canon SELPHY series printers. Number of copies to print the camera to the printer. 1 Connect ● Follow Steps 1 – 4 on p. 96. images.
9 Customizing Camera Settings You can customize various settings to suit your shooting preferences. The first part of this chapter explains convenient and commonly used functions. The latter part explains how to change shooting and playback settings to suit your purposes.
Changing Camera Settings You can customize convenient and commonly used functions from the 3 tab (p. 45). ● Turning Off the Start-up Image You can turn off the start-up image that displays when you turn on the camera. ● Choose [Start-up Image], then press the qr buttons to choose [Off]. ● Changing the File Number Assignment Images you shoot are automatically assigned file numbers in the order they were taken, from 0001 – 9999, and saved to folders of up to 2,000 images.
Changing Camera Settings ● Creating Folders by Shooting Date Images are saved into folders created each month, however, you can also create folders by shooting date. ● Choose [Create Folder] and press the qr buttons to choose [Daily]. Images will be saved into folders created on each shooting date. ● Changing the Lens Retract Time For safety reasons, the lens retracts about 1 minute after pressing the 1 button when in a Shooting mode (p. 26).
Changing Camera Settings ● Setting the Screen Shut-Off Time You can adjust the time the screen takes to shut off automatically (p. 43). This also works when [Auto Power Down] is set to [Off]. ● Choose [Power Saving], then press the m button. ● Press the op buttons to choose [Display Off], then press the qr buttons to choose a time. ● In order to save battery power, it is recommended to choose less than [1 min.].
Changing Shooting Function Settings You can set functions in the 4 tab after pressing the pressing the qr buttons to choose G (p. 45). button and Before attempting to shoot using a function explained in this chapter in modes other than G mode, check if the function is available in those modes (pp. 122 – 123). ● Turning off the AF Assist Beam The lamp will automatically light to assist focusing in low light conditions when you press the shutter button halfway. You can turn off the lamp.
Changing Shooting Function Settings ● Changing the Image Display Time Right After Shooting You can change the length of time the images display after shooting. ● Choose [Review], then press the qr buttons to choose an option. 2 – 10 sec. Displays images for the set time. Hold The image displays until you press the shutter button halfway. Off No image displays. ● Changing the Way the Image Displays Right After Shooting You can change the way the image displays after shooting.
Changing Playback Function Settings ● Displaying the Overlay You can display gridlines for vertical and horizontal guidance, or a 3:2 guide to confirm the printable area for postcard size prints. ● Choose [Disp. Overlay], then press the qr buttons to choose an option. Grid Lines A grid overlays the display. 3:2 Guide Gray bars will appear on the top and bottom of the display. This area will not print when printing on paper with a 3:2 aspect ratio. Both Both grid lines, and the 3:2 guide will display.
10 Useful Information This chapter introduces how to change the date/time battery, the use of the AC adapter kit (sold separately), troubleshooting tips, and contains lists of functions and things that appear on the screen. The index also appears at the end.
Replacing the Date/Time Battery The life of the date/time battery (back-up battery) is approximately 7 years. If the Date/Time settings screen appears every time the camera is turned on, replace the date/time battery with a new one (CR1220). 1 Turn off the camera. the cover and remove the 2 Open AA batteries (p. 14). the date/time battery 3 Remove holder. the battery. 4 Replace ● Insert the battery with (+) and (–) sides oriented correctly. 5 Insert the battery holder.
Using Household Power If you use AC Adapter Kit ACK800 (sold separately), you can use the camera without worrying about how much charge is left in the batteries. 1 Turn off the camera. the cord into the camera. 2 Plug ● Open the cover and fully insert the plug into the camera. the power cord. 3 Connect ● Connect the power cord to the compact power adapter, then plug the other end into a power outlet. ● You can turn the camera on to use it.
Handling Precautions • This camera is a high-precision electronic device. Do not drop it or subject it to strong impacts. • Never place the camera close to magnets, motors or other devices that generate strong electromagnetic fields. Exposure to strong magnetic fields may cause malfunctions or corrupt image data. • If water droplets have fallen onto, or dirt is stuck on the camera or screen, wipe with a dry soft cloth or eyeglass wiper. Do not rub or apply force.
Troubleshooting If you think there is a problem with the camera, first check the following. If the items below do not solve your problem, contact a Canon Customer Support Help Desk as listed on the included customer support list. Power You pressed the ON/OFF button, but nothing happened. • • • • Confirm that the batteries are properly inserted (p. 14). Confirm that the batteries are not depleted (p. 16). Confirm that the memory card/battery cover is securely closed (p. 15).
Troubleshooting • • • • Shoot the subject within the focusing distance (p. 126). Set the [AF-assist Beam] to [On] (p. 105). Confirm that functions which you do not intend to use (macro, etc.) are not set. Shoot using the focus lock or AF lock (pp. 69, 74). Even when you press the shutter button halfway, the AF frame does not appear, and the camera does not focus.
Troubleshooting Shooting movies Correct shooting time does not display, or stops. • Format the memory card in the camera, or use a memory card capable of recording at high speeds. Even when the shooting time does not display properly, the recorded video will be the length that it was actually shot (pp. 20, 30). appeared on the screen and shooting ended automatically. The camera’s internal memory was insufficient. Try one of the following: • Perform a low-level format of the memory card in the camera (p.
List of Messages That Appear on the Screen If error messages appear on the screen, try one of the following solutions. No memory card • The memory card is not installed in the correct direction. Install the memory card in the correct direction (p. 14). Memory card locked • The SD memory card, SDHC memory card or SDXC memory card’s write protect tab is set to “LOCK”. Unlock the write protect tab (pp. 14, 15).
List of Messages That Appear on the Screen Communication error • Images could not be transferred to the computer or printed due to the large amount of images (approx. 1000) stored on the memory card. Use a commercially available USB card reader to transfer the images. Insert the memory card into the printer’s card slot to print.
Information Displayed on the Screen ● Shooting (Information Display) Battery Charge Indicator (p. 16) Camera Orientation* White Balance (p. 65) My Colors (p. 67) Drive Mode (p. 66) Camera Shake Warning (p. 25) Metering Modes (p. 74) Image Quality (Compression) (p. 63) / Recording Pixels (pp. 62, 80) * 118 Still Images: Recordable Shots (p. 16) Movies: Remaining Time/Elapsed Time (p. 30) Self-Timer (pp. 57, 68) Disp. Overlay (p. 107) Digital Zoom Magnification (p. 54) / Digital Tele-converter (p.
Information Displayed on the Screen ● Playback (Detailed Information Display) Shooting Mode ISO Speed (p. 64) Exposure Compensation (p. 60), Exposure Shift Amount (p. 81) White Balance (p. 65) Histogram (p. 43) Image Editing (pp. 92 – 93) Compression (Image Quality) (p. 63) Recording Pixels (p. 62), AVI (Movies) (p. 80) Battery Charge Indicator (p. 16) Metering Modes (p. 74) Folder Number – File Number (p.
Functions Available in Each Shooting Mode Shooting modes » G ±0 — to ±2 — e — — h — … — ! Function Exposure Compensation (p. 60) Focusing Zone (pp. 61, 62) u Flash (pp. 53, 61, 76) Self-Timer (pp. 57, 68) Ò Î $ *2 AF Lock (p. 74) — AE Lock (p. 75)/FE Lock (p. 75) — AE Lock/Exposure Shift (p. 81) TV Display (p. 89) — — FUNC. Menu ISO Speed (p. 64) White Balance (p. 65) My Colors (p. 67) Light Metering (p.
Functions Available in Each Shooting Mode K I F V ’ "*4 *4 — — — — — — — — — — — *4 E w O P U*5 t ≈ — — — — — — — — — — — — — — — — — — — — — — — — — — — — *1 — — — — — — — — — *1 — *1 — —
Menus ● 4 Shooting Menu Shooting modes » G Face AiAF Center — Normal/Small — Standard/Off Function AF Frame (p. 72) AF Frame Size (p. 73) Digital Zoom (p. 54) Digital Tele-converter (1.4x/2.3x) AF-Point Zoom (p. 73) On/Off AF-assist Beam (p. 105) On/Off Flash Settings (pp. 77, 105) On/Off Red-Eye Lamp On/Off Shooting Info (p. 118) On/Off Review (p. 106) Off/2 – 10 sec./Hold Review Info (p.
Menus K I F V ’ "*2 *2 *2 w O P U*3 t ≈ E — — — — — — — — — — — — — — — — — — — *1 — — — — — — — — —
Menus ● 3 Set up Menu Item Options/Summary Ref. Page Mute On/Off* Volume Set all operation sounds (5 levels). p. 46 p. 46 Start-up Image On*/Off p. 102 Format Formats memory card, erasing all data File Numbering Continuous*/Auto Reset pp. 20, 48 p. 102 Create Folder Monthly*/Daily p. 103 Lens Retract 1 min.*/0 sec. Power Saving Auto Power Down: On*/Off Display Off: 10, 20 or 30 sec./1*, 2 or 3 min. p. 103 pp. 43, 103, 104 Date/Time Date and time settings p.
Menus ● 2 Print Menu Item Options/Summary Ref. Page Print Displays printing screen. p. 96 Select Images & Qty. Chooses individual images for printing. p. 99 Select All Images Chooses all images for printing. p. 99 Clear All Selections Cancels all settings for printing. p. 100 Print Settings Sets the printing style. p.
Specifications Camera Effective Pixels. . . . . . . . . . . . . Approx. 10.0 million Image Sensor. . . . . . . . . . . . . . . . . . . . . 1/2.3 type CCD (Total number of pixels: Approx. 10.3 million) Lens . . . . . . . . . . . . . . . . . . . . . . . . . . . . 6.6 (W) – 21.6 (T) mm 35mm film equivalent: 37 (W) – 122 (T) mm f/3.0 (W) – f/5.8 (T) Optical Zoom . . . . . . . . . . . . . . . . . . . . . 3.3x Digital Zoom. . . . . . . . . . . . . . . . . . . . . . Approx. 4.0x (Up to approx.
Specifications Data Type . . . . . . . . . . . . . . . . . . . . . . . Still images: Exif 2.2 (JPEG) Movies: AVI (Image data: Motion JPEG, Audio data: WAVE (Mono)) Number of Recording Pixels (Still images) . . . . . . . . . . . . . . . . . . . . . Large: 3648 x 2736 pixels Medium 1: 2816 x 2112 pixels Medium 2: 2272 x 1704 pixels Medium 3: 1600 x 1200 pixels Small: 640 x 480 pixels Widescreen: 3648 x 2048 pixels (Movies) . . . . . . . . . . . . . . . . . . . . . . . . . 640 x 480 pixels (30 frames/sec.
Index Numerics 3:2 Guide ............................................... 107 A AC Adapter Kit ................................ 37, 111 Accessories ............................................. 37 AE Lock ............................................. 75, 81 AF Frames ............................................... 23 AF Focus AF Lock .................................................... 74 AV Cable ............................................. 2, 89 B Battery Battery and Charger Kit ..................
Index Formatting (Memory Card) .............. 20, 48 FUNC. Menu Basic Operations ............................. 44 List ................................................... 120 G Green Leaves/Autumn Foliage (Scene Mode) ......................................... 51 Grid Lines .............................................. 107 H Histogram ................................................ 43 Household Power ................................. 111 I Image Quality Compression Ratio Images Display Time ..........
Index Resizing (Making Images Smaller) ....... 92 Rotating Images...................................... 91 S SCN (Scene Mode) ................................ 50 Screen Display Language ............................ 19 Information Display ................ 118, 119 Menu Operations ....................... 44, 45 Switching the Display ...................... 42 SD/SDHC/SDXC Memory Card Memory Card Self-Timer 10 second Self-Timer ...................... 57 Changing Delay and Number of Shots ....................
Disclaimer • Reprinting, transmitting, or storing in a retrieval system any part of this guide without the permission of Canon is prohibited. • Canon reserves the right to change the contents of this guide at any time without prior notice. • Illustrations and screenshots in this guide may differ slightly from the actual equipment. • Every effort has been made to ensure that the information contained in this guide is accurate and complete.