Introduction RAW Image Processing, Viewing and Editing Software Contents Digital Photo Professional Downloading Images 1 2 3 4 5 6 7 8 Ver. 4.2 Instruction Manual Viewing Images Sorting Images Editing Images Content of this Instruction Manual DPP stands for Digital Photo Professional. In this manual, the screens used in the basic operation instructions are from Windows 8.1. indicates the selection procedure of the menu.
READ CAREFULLY BEFORE USING! CANON SOFTWARE LICENSE AGREEMENT IMPORTANT - READ THIS AGREEMENT BEFORE USING THE SOFTWARE ON THE CD-ROM IN THIS BOX. BY USING THE SOFTWARE, YOU AGREE TO BE BOUND BY THE TERMS OF THIS AGREEMENT. This is a license agreement (the [Agreement]) between you and Canon Inc. ([Canon]).
Introduction Introduction Main Features of DPP Contents Following are the main tasks you can perform with images you have downloaded to your computer. * JPEG/TIFF indicates processing that can be performed with JPEG or TIFF images as well as RAW images.
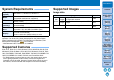
Introduction System Requirements OS (operating Windows 8.1, Windows 8, Windows 7* system) Model PC with one of the above OS preinstalled (Upgraded machines not supported) CPU Core 2 Duo 2.0 GHz or higher (recommended Core i series or later) RAM (memory) 2.0 GB or more of RAM (4.0 GB or more recommended) Hard disk drive Installation: Min. 300 MB of available space Operation: Min.
Contents Introduction Introduction ................................................................ 2 Main Features of DPP .................................................. 2 System Requirements .................................................. 3 Supported Cameras...................................................... 3 Supported Images ........................................................ 3 1 Downloading Images .............................................. 7 Starting up DPP .........................
Introduction Using a Picture Style File ......................... Adjusting Color Tone by Changing White Balance.................................................................. Adjusting Color Tone Using Click White Balance.................................................................. Advanced Adjusting White Balance with Color Temperature .......................................................... Advanced Tuning White Balance .............................. Adjusting Contrast ........................
Introduction Re-Editing an Image ................................. 88 JPEG/TIFF Utilizing Adjustment Contents (Recipe) .... 89 Copying a Recipe and Applying to Another Image..................................................................... 90 Saving a Recipe as a File ...................................... 90 Loading and Applying Recipes .............................. 91 JPEG/TIFF Adjusting by Comparing Multiple Images .......................................................................
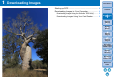
1 Downloading Images Introduction Starting up DPP......................................................... 8 Downloading Images to Your Computer.................... 9 Downloading Images Using the Software “EOS Utility”.......... 9 Downloading Images Using Your Card Reader............
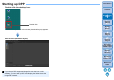
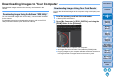
Starting up DPP Introduction Double-click the desktop icon. Contents 1 2 3 4 5 6 7 8 Downloading Images Viewing Images Double-click DPP starts up and the main window (thumbnail layout) appears.
Downloading Images to Your Computer Download the images saved on the memory card inserted in the camera. Downloading Images Using the Software “EOS Utility” You can download images with “EOS Utility”, communication software for the camera. For detailed instructions on downloading images, refer to the “EOS Utility Instruction Manual” (PDF electronic manual). Downloading Images Using Your Card Reader You can also download images to the computer using a third-party card reader.
2 Viewing Images Introduction Viewing Images in the Main Window (Thumbnail Layout) ........... 11 Changing the Thumbnail Display................................ 12 Advanced Using the Thumbnails Control Panel ........ 13 Advanced Displaying the Histogram Palette .............. 14 Enlarging and Viewing an Image in the Preview Window ............ 15 Enlarging and Viewing a Specific Area....................... 16 Displaying the Navigator Palette ............................
Viewing Images in the Main Window (Thumbnail Layout) Images downloaded to your computer are displayed as a thumbnails list in the main window (thumbnail layout). You can double-click an image to open the preview window (p.15) and display the image at large size. Main window Introduction Contents Toolbar 1 2 3 4 5 6 7 8 Downloading Images Viewing Images Sorting Images Editing Images Printing Images Processing Large Numbers of RAW Images Forward/Reverse Check marks (p.30, p.31) Rotate image Ratings (p.
Introduction Changing the Thumbnail Display You can change the size of the thumbnail images displayed in the main window and select the information displayed for thumbnails. Select the [Thumbnails] menu desired item. Contents 1 2 3 4 5 6 7 8 Downloading Images Viewing Images Sorting Images Editing Images Printing Images The display changes to the selected item. To display thumbnails with shooting information attached, select the [Tools] menu [Settings for thumbnails with shooting info].
Introduction Advanced Using the Thumbnails Control Panel Contents The thumbnails control panel integrates various settings for viewing thumbnails. By using this panel, you can view and specify the settings for thumbnails efficiently.
Introduction Advanced Displaying the Histogram Palette The histogram palette shows a histogram of the selected image. You can quickly check a histogram without opening a tool palette. Select the [View] menu [Histogram palette]. The histogram palette appears. Contents 1 2 3 4 5 6 7 8 Downloading Images Viewing Images Sorting Images Editing Images You can select any of the following four histograms from the menu that appears when you right-click with the mouse.
Enlarging and Viewing an Image in the Preview Window Introduction Contents Double-click 1 2 3 4 5 6 7 8 Downloading Images The preview window appears. Up to 36 windows can be displayed at the same time for the preview window. ( 32bit On 32-bit OSs, up to 4 windows can be displayed at the same time.
Introduction Enlarging and Viewing a Specific Area Click the area you want to enlarge. Advanced Displaying the Navigator Palette The navigator palette shows the enlargement area of a selected image. Select the [View] menu [Navigator palette]. The navigator palette appears. Click Contents 1 2 3 4 5 6 7 8 Downloading Images Viewing Images Sorting Images The area you clicked is enlarged to 100% (actual pixel size). Click again to revert to the full view.
Advanced Checking the Image in Detail Introduction Displaying the Main Window (Multi-layout) Contents By switching the main window to “multi-layout”, you can use the preview control panel to check the image in detail. Click a change layout button at the bottom of the main window (thumbnail layout). The main window (multi-layout) appears. In the main window (multi-layout), you can select from two layouts, with horizontal thumbnails or vertical thumbnails.
Introduction Checking an Image Using the Preview Control Panel With Preview control panel, you can check the image in detail. You can use this panel in the main window (multi-layout) and edit image window. If the preview control panel is not displayed, you can display it by selecting [Preview control panel] from the [Preview] menu. By default, the [ ] button and [ ] button are selected.
Introduction Displaying Multiple Images at the Same Time Displaying AF Points Contents Select multiple images, and click the [ ] button. The selected image is displayed. You can display up to 8 images. 32bit On 32-bit OSs, this function is not available. (The [ ] button is not displayed.) 1 Click the [ ] button beside the [ ] button, and select the item to display on the image on the menu that appears. Select [Show only AF points in focus] or [Show all AF points].
Introduction Displaying Areas Beyond the Set Range with Warning Indicators (Highlight/Shadow Warning) You can set up warning indicators for both highlighted and shadowed parts, which is effective for checking the clipped highlights and shadows and preventing excessive adjustment of an image. Where the area on the image has exceeded the set range, you can display the highlighted part in red and the shadowed part in blue. 2 Select an image and click the [ ] button.
Introduction Comparing Pre- and Post-Editing Images (before/after comparison) Arrange vertically/ horizontally (two-screen display) / Split vertically/horizontally (split-image display) You can display before and after versions of an adjusted image in the same window and check the adjustment results. This function allows you to adjust an image while comparing the original image and image being edited. Displaying Image Properties Display the shooting and recipe information for an image in the screen.
Introduction 3 Select an image and click the [ ] button. The image and properties selected in step 2 are displayed in the screen. If the recipe contents of an image being edited are displayed in before/after comparison (two-screen display/split-image display), edited items are displayed in red. Checking an Image in Multi-Function Preview The preview window shows the coordinates of the mouse cursor and the work color space.
Introduction Checking an Image in Second Windows Second windows are preview windows that you can open additionally for thumbnails and image previews. You can display up to 4 second windows for an single image to check the focus in all parts of the image, etc. Select an image, and then select [Show second screen] from the menu that appears when you rightclick with the mouse.
Opening and Closing Window Panels (Panes) Panels (panes) at the top, bottom, left, and right of each window can be closed to suit the tasks being performed. You can use DPP in an optimal layout. Click the [ ] for a panel to open or close.
Changing the Display Method and Order of Palettes For any palette (tool palette, navigator palette, histogram palette, quick check palette, and camera control palette), you can change how the palette is displayed (docked/floating), or the display order of multiple docked palettes. Changing the Display Method (Dock/Float) of Palettes Right-click on the palette’s title bar (where its name is shown) and click [Dock/float] in the dialog that appears.
Exiting DPP Introduction In the main window, select the [File] menu [Exit]. Contents 1 2 3 4 5 6 7 8 Downloading Images Viewing Images Sorting Images Editing Images Printing Images DPP exits. Processing Large Numbers of RAW Images Remote Shooting Specifying Preferences Reference/ Index A confirmation dialog box for saving the images appears when you try to exit DPP without saving the adjusted image. Click the [Yes to all] button to save the adjustment contents (recipe) to all the images adjusted.
3 Organizing and Sorting Images Efficiently Checking/Sorting Images ........................ 28 Sorting Images ........................................................... 30 Attaching Check Marks........................................... 30 Setting Ratings ....................................................... 30 Sorting Images in the Main Window ........................... 31 Attaching Check Marks in the Main Window .......... 31 Setting Ratings in the Main Window.......................
Efficiently Checking/Sorting Images You can enlarge images displayed as thumbnails in the main window and efficiently check each image. You can sort images into groups. 1 Select multiple images to check in the main window. 2 Display the quick check window. Introduction Click the [ ] or [ ] button to switch between 3 images to be checked. Quick check window Contents 1 2 3 4 5 6 7 8 Downloading Images Click the [Quick check] button. Viewing Images Sorting Images The quick check window appears.
Introduction 4 Click the area you want to enlarge. Convenient functions of the quick check window Click The area you clicked is displayed at 100% (actual pixel size). To change the display position, drag on the image. If you click the [ ] button, you can display the image at 50%. Click again to revert to the full view. To exit, click the [ ] button. In addition to 100% and 50%, you can display images at 12.5%, 25%, 200%, 300%, and 400%.
Introduction Setting Ratings Sorting Images You can sort images by attaching check marks or setting ratings (indicated with [ ] marks) for each subject or theme. Display the image you want to rate, and then click any one of the [ ]. Contents 1 2 3 4 5 6 7 8 Downloading Images Attaching Check Marks Display the image you want to attach a check mark to, and then click any one of [ ] to [ ]. Click Viewing Images Sorting Images Click The selected check mark appears in the upper left of the window.
Introduction Setting Ratings in the Main Window Sorting Images in the Main Window You can also sort images in the main window by attaching check marks or setting ratings (indicated with [ ] marks) for each subject or theme. Select the images you want to rate, and then click any of the [ ]. Contents 1 2 3 4 5 6 7 8 Downloading Images Attaching Check Marks in the Main Window Select the images you want to attach a check mark to, and then click any of [ ] to [ ].
Introduction To select multiple images in the main window Click on desired images while holding down the key. To select multiple consecutive images, click on the first image, and then click on the last image while holding down the key. Arranging Images in the Main Window You can arrange images in the order of the types of check marks you have attached to images, or in the order of date and time at which the images were shot. You can also freely arrange images by moving them individually.
Introduction Arranging Freely Drag and drop the image to the desired location. The image moves to the desired location. You can also select multiple images (p.32) and move them. The order of rearranged images is temporarily registered as [Custom] in [Sort] of thumbnails control area and maintained until you exit DPP or select another folder in the folder area. Select the [Thumbnails] menu [Sort] [File name] and [Ascending] to revert to the order before the images were rearranged.
Introduction Images added to the [Collection] window When you add a RAW image and JPEG image displayed as a single image to the [Collection] window, the single image is marked with the [ ] mark. However, because the RAW and JPEG images are actually added individually, the number of images shown on the [Collection] tab sheet increases by 2. Checking Image Information Select the image for which you want to check the image information. 1 2 Select the [View] menu [Info].
Introduction Shooting information is displayed in the [Exif Information] tab sheet, while IPTC* information appended to the image after shooting is displayed in the [XMP/IPTC Information] tab sheet. IPTC* information provides additional comments on images, such as captions, credits and the shooting location.
Organizing Images This section explains how to delete unwanted images, move or copy images, etc., to organize your images. Deleting an Unwanted Image Be aware that you cannot recover deleted images. Select an unwanted image in the main window. 1 2 Select the [File] menu [Move to Recycle Bin]. Introduction Moving Images You can move or copy images to a separate folder and sort by shooting date or themes. Drag the image to be moved or copied.
Introduction Moving Images in Folders You can move or copy folders that contain images, and sort the images by folders. Drag the folder to be moved or copied. To move: Drag the folder and release when the folder is in the destination folder. To copy: Drag the folder while holding down the key and release when the folder is in the destination folder. Registering Frequent-Use Folders (Bookmark Registration) You can register frequently used folders in bookmarks.
4 Editing Images Introduction RAW Images ............................................................ 40 RAW Images.............................................................. 40 RAW Development .................................................... 40 When RAW Development is to be Done.................... 40 Advantages of a RAW Image .................................... 40 Editing JPEG and TIFF Images ............................... 41 Editing with the Tone Adjustment Tool Palette .....................
Introduction Shooting Distance Information Slider ........................ Correcting Multiple Images at a Time ........................ Digital Lens Optimizer................................................ Compatible Lenses .................................................... Using the Digital Lens Optimizer ............................... Adjusting Image Sharpness....................................... 73 74 74 74 76 78 Editing with the Dust Delete/Copy Stamp Tool Palette .............................
RAW Images RAW Images A RAW image is image data that has recorded output data of imaging sensor. As image processing is not performed inside the camera when a photo is taken and the photo has been recorded in the special form of “RAW image data + Image processing conditions information at the time of shooting”, special software is needed to view or edit the image. * “RAW” means “in a natural condition” or “not processed or refined”.
Editing JPEG and TIFF Images With DPP, you can adjust JPEG and TIFF images in the same way as RAW images using the tool palettes below. • Tone Adjustment tool palette • Color Adjustment tool palette • Detailed Adjustment tool palette • Trimming/Angle Adjustment tool palette • Dust Delete/Copy Stamp tool palette • Settings tool palette Because adjustments made with these tool palettes (the recipe) only change the image processing conditions, the “original image data itself” remains unaffected.
Tool Palettes Introduction With DPP, you can adjust images with the tool palettes by switching between various tool palette windows according to your editing requirements. Since adjustments made with the tool palettes only change the image processing conditions, the “original image data itself” remains unaffected. As there is no image deterioration that normally accompanies editing, you can readjust your image any number of times.
JPEG/TIFF Editing with the Basic Adjustment Tool Palette The Basic Adjustment tool palette makes basic adjustments to RAW images. With this tool palette, you can adjust the image brightness, set Picture Style, adjust the white balance, adjust the contrast, adjust the color tone and saturation, adjust the dynamic range, apply the Auto Lighting Optimizer and adjust the image sharpness.
Introduction Picture Style Changing the Picture Style If the image looks different from what you visualized at the time of shooting, you can get it closer to what you expected by changing the Picture Style. Even if you have saved the image (p.86) with [Monochrome] (p.50) selected, you can still change to another Picture Style at any point by simply selecting a Picture Style other than [Monochrome].
Introduction Picture Style Description Displayed when selecting an image shot with the (Picture Style file Picture Style file registered in the camera. registered in the In the list, the name of the Picture Style file is camera) displayed in ( ). Contents 1 2 3 4 5 6 7 8 Downloading Images [Picture Style file The name of the Picture Style file applied in DPP is applied in DPP] displayed in [ ].
Introduction Advanced Using a Picture Style File A Picture Style file is a Picture Style extension file. With DPP, you can apply to RAW images Picture Style files that you have downloaded from Canon Web site effective for various scenes or Picture Style files created with “Picture Style Editor”. When using a Picture Style file, save it to your computer beforehand.
Introduction Adjusting Color Tone Using Click White Balance You can adjust white balance using a selected part of an image as the standard for white to make the image appear natural. Using click white balance is effective when using it in parts of an image where white color tone has changed under the influence of a light source. The color of the image is adjusted with the point you selected as the standard for white. If you click on another point in the image, the white balance is adjusted again.
Introduction Advanced Advanced Adjusting White Balance with Color Temperature Tuning White Balance White balance can be adjusted by setting a numerical value for color temperature. Select [Color temperature] from the [White balance adjustment] list box. 1 2 Set the color temperature. Contents This is a function that makes fine adjustments to the white balance. Using this function, you can achieve the same effects as third-party color temperature conversion filters and color correction filters.
Introduction Adjusting Contrast Advanced Modulation and degree of contrast can be adjusted. Move the slider to the right to make contrast stronger and to the left to make contrast weaker. Adjusting Brightness of Shadows/Highlights You can adjust the brightness of shadows and highlights in an image. By adjusting only shadows or highlights in an image, you can reduce the effects of clipping in shadows and highlights.
Introduction Changing Color Tone and Color Saturation Tone and overall color saturation can be adjusted. If Picture Style (p.44) is set to [Monochrome], [Color tone] and [Color saturation] switch to [Filter effect] and [Toning effect] (this page). Reverts the image to the original settings Adjusting Monochrome When the Picture Style (p.44) is set to [Monochrome], you can create monochrome photographs with effects similar to filtering, or with a look of monotone color photograph.
Introduction Filter effect: Creates a monochrome photograph where the white of clouds and the green of trees are emphasized. Filter Example of effect None General monochrome image without filter effect. Yellow Blue sky is reproduced more naturally and white clouds emerge clearly. Orange Blue sky becomes somewhat darker. The brightness of the setting sun increases further. Red Blue sky becomes quite dark. Autumn leaves become clear and bright.
Introduction [Linear] - A function for advanced adjustment Use [Linear] when you adjust images using image editing software that has advanced editing functions. Note that when [Linear] is checkmarked, the image becomes dim. [Contrast], [Highlight], [Shadow], and [Auto Lighting Optimizer] (p.53) will not function when [Linear] is checkmarked.
Introduction Using the Auto Lighting Optimizer Contents If the shooting result is dark or the contrast is low, you can use the Auto Lighting Optimizer function to auto-correct the brightness and contrast, and obtain a more favorable image. You can also change the setting of the image shot with the camera’s Auto Lighting Optimizer function. This function also can be used for JPEG/TIFF images in addition to RAW images. * ALO stands for Auto Lighting Optimizer.
Introduction Adjusting Image Sharpness You can make the overall atmosphere of an image sharper or softer. Adjustment can be made by selecting from two modes, [Sharpness] and [Unsharp mask]. Select [Sharpness] from the list box and adjust the setting. Reverts the image to the original settings [Sharpness]: Controls the sharpness of an image by adjusting the level of emphasis for the outline of the image.
Introduction Detailed Setting of Image Sharpness Select [Unsharp mask] from the list box and adjust the setting. Contents 1 2 3 4 5 6 7 8 Downloading Images Viewing Images Sorting Images Editing Images Printing Images Processing Large Numbers of RAW Images Remote Shooting Select [Unsharp mask] Enter a setting (in 0.1-stop increments) Drag the slider left or right Specifying Preferences Reference/ Index Adjust image sharpness with the window view set to [400%], [200%] or [100%].
JPEG/TIFF Editing with the Tone Adjustment Tool Palette With the Tone Adjustment tool palette, you can adjust images with the same functions as general image editing software. 1 Select an image in the main window, etc. 2 Display the Tone Adjustment tool palette. Introduction Adjusting Brightness and Contrast The brightness and contrast of an image can be adjusted.
Introduction Brightness: Move the slider to the right to make an image brighter and to the left to make an image darker. Contrast: Used to adjust modulation and degree of contrast of color. Move the slider to the right to make contrast of an image stronger and to the left to make contrast weaker. Adjusting Color Tone Using Click White Balance You can adjust white balance using a selected part of an image as the standard for white to make the image appear natural.
Introduction 2 Click on a point that is to be the standard for white. Advanced Adjusting Tone Curve You can adjust the brightness, contrast and color of a specific area by changing the tone curve (p.131). 1 Select the tone curve mode and interpolation method.
Introduction Example of a Tone Curve Operation 2 Make adjustments.
Introduction Advanced Adjusting Dynamic Range Dynamic range (width of gradation expression) from dark points to bright points in an image can be adjusted. Move downwards Output white points The setting range of black points is 0 to 247 (in 1-stop increments when entering a value). The setting range of white points is 8 to 255 (in 1-stop increments when entering a value). You can display pre- and post-editing histograms (p.59).
JPEG/TIFF Editing with the Color Adjustment Tool Palette With the Color Adjustment tool palette, you can adjust the hue, saturation and luminance in a specific color gamut for 8 color gamuts (red, orange, yellow, green, aqua, blue, purple and magenta). You can also adjust the hue and saturation for the entire image. Select an image in the main window, etc. 1 2 Display the Color Adjustment tool palette.
Introduction Adjusting hue and saturation for an entire image Use the sliders to make adjustments. You can also make adjustments by directly entering a numeric value. Hue: Move the slider to the right to make color tones more yellowish, and to the left to make color tones more reddish. Saturation:Adjusts the overall color intensity for the image. Move the slider to the right for more intense colors, and to the left for less intense colors.
JPEG/TIFF Editing with the Detailed Adjustment Tool Palette You can use the Detailed Adjustment tool palette to reduce the noise that occurs in images shot at night or at high ISO settings. This tool palette can also be used in conjunction with the sharpness adjustment functions. Note that you can use the functions in this tool palette with JPEG and TIFF images as well as RAW images. Select an image in the main window, etc. 1 2 Display the Detailed Adjustment tool palette.
Introduction Setting the same noise reduction level for several images You can set the same noise reduction level for several images by first selecting multiple images in the main window, and then adjusting the noise reduction level using the [Reduce luminance noise] and [Reduce chrominance noise] sliders. If [Reduce luminance noise] is set, resolution may be reduced along with reduction of noise. If [Reduce chrominance noise] is set, color bleeding may occur along with reduction of noise.
JPEG/TIFF Editing with the Trimming/Angle Adjustment Tool Palette You can crop only the part of an image you need, or change the composition of an image where an image shot horizontally becomes vertical. You can also adjust the angle of an image before cropping. 1 Select the image to be cropped. 2 Display the Trimming/Angle Adjustment tool palette. You cannot make adjustments with the Trimming/Angle Adjustment tool palette in a window that only shows thumbnails.
Introduction List of aspect ratios (width : height) [Free]: You can crop an image to any size, regardless of the selectable ratio. [Custom]: You can crop an image at the specified ratio. 5 Return to the main window. The trimming range frame is displayed in the cropped image (p.130). When the cropped image is displayed in a preview window or the edit image window, it is displayed in its cropped form.
Introduction * When shooting with EOS 5DS/EOS 5DS R, EOS 5D Mark III, or EOS 7D Mark II and [Add cropping information] is set in Custom Functions, aspect ratio information is only set and the image is not actually cropped, even for JPEG images. Operate using the menu Each operation can also be performed with the menu which appears when you right-click with the mouse on the image.
Editing with the Lens Correction Tool Palette With the Lens Correction tool palette, you can use the lens aberration correction functions and the Digital Lens Optimizer to correct lens aberration in your images and to improve their resolution. This tool palette can also be used in conjunction with the sharpness adjustment functions. Note that the lens aberration correction functions and the Digital Lens Optimizer can only be used with RAW images. 1 Select an image in the main window, etc.
Introduction Telephoto lenses EF 135mm f/2L USM EF 135mm f/2.8 (with Softfocus mechanism) EF 200mm f/2L IS USM EF 200mm f/2.8L USM EF 200mm f/2.8L II USM EF 300mm f/2.8L IS II USM EF 300mm f/2.8L IS USM EF 300mm f/4L IS USM EF 400mm f/2.8L IS USM EF 400mm f/2.8L IS II USM EF 400mm f/4 DO IS USM EF 400mm f/4 DO IS II USM EF 400mm f/5.6L USM EF 500mm f/4L IS USM EF 500mm f/4L IS II USM EF 600mm f/4L IS USM EF 600mm f/4L IS II USM EF 800mm f/5.6L IS USM Zoom lenses EF 11-24mm f/4L USM EF 16-35mm f/2.
Introduction EF-M lenses EF-M 22mm f/2 STM EF-M 11-22mm f/4-5.6 IS STM Contents EF-M 18-55mm f/3.5-5.6 IS STM EF-M 55-200mm f/4.5-6.3 IS STM 1 2 3 4 5 6 7 8 Downloading Images Viewing Images Sorting Images Editing Images Printing Images Processing Large Numbers of RAW Images Remote Shooting You can also correct RAW images taken with the compatible lens even when the extender is attached. You can also correct RAW images shot with EF 50mm f/2.5 Compact Macro fitted with Life Size Converter EF.
Introduction Making Corrections You can make corrections to any of the four aberrations as below, either one at a time or simultaneously. Peripheral illumination Chromatic aberration (color fringing which occurs in the periphery of an image) Color blur (blue or red color blur which sometimes occurs at the edge of the highlighted area of an image) Distortions Select an image in the main window. 1 the Lens Correction tool palette and 2 Display checkmark the items to be corrected.
Introduction Effects of Distortion Correction for Fisheye Lenses Shot settings By selecting this option, only the aberration corrections will be performed to correct the optical distortions. Emphasize Distance This converts the image to an “equidistant projection” style image. This projection method preserves distance relationships. Equidistant projection displays a distance in the same distance anywhere from the center to the periphery.
Introduction Emphasize Center This converts the image to an “orthographic projection” style image. With this projection method, the center is more emphasized. Since an orthogonal projection allows a subject of the same brightness to be displayed as occupying the same area in the image, this method has typical uses in photography for celestial luminance distributions and center-emphasized animal photography. By selecting this option, the center is stretched and may result in decreased resolution.
Introduction Correcting Multiple Images at a Time You can apply the same corrections to several images by first selecting multiple images in the main window, and then performing correction procedures (p.71). Also, you can apply same corrections by copying the recipe of the corrected image and pasting it onto the multiple images (p.90).
Introduction Telephoto lenses Macro lenses EF 135mm f/2L USM EF 200mm f/2L IS USM EF 50mm f/2.5 Compact Macro EF 100mm f/2.8 Macro USM EF 200mm f/2.8L USM EF 200mm f/2.8L II USM EF 300mm f/2.8L IS II USM EF 300mm f/4L IS USM EF 100mm f/2.8L Macro IS USM EF 180mm f/3.5L Macro USM _ MP-E 65mm f/2.8 1-5x Macro Photo EF 400mm f/2.8L IS USM EF 400mm f/2.8L IS II USM EF-S lenses EF 400mm f/4 DO IS USM EF 400mm f/4 DO IS II USM EF 400mm f/5.6L USM EF 500mm f/4L IS USM EF-S 60mm f/2.
Introduction Using the Digital Lens Optimizer 2 Click the [ ] button. the status of [Lens data] for [Digital Lens 1 Check Optimizer]. Contents 1 2 3 4 5 6 7 8 Downloading Images The [Add or Remove lens data] window appears. Viewing Images Sorting Images [Not Available] is displayed for an image shot with a noncompatible camera or lens, or for a non-compatible image such as a JPEG, TIFF, S-RAW, or M-RAW image. The function cannot be used for these images.
Introduction the checkbox for the lens used to shoot 3 Checkmark the image, and click the [Start] button. the [Digital Lens Optimizer] checkbox 4 Checkmark and adjust the image. Contents 1 2 3 4 5 6 7 8 Downloading Images Viewing Images Sorting Images Editing Images Printing Images Reverts to its condition before adjustment The lens data is downloaded to your computer. When the downloading of the lens data ends, the indication for the lens data changes to [Yes].
Introduction Use the slider to adjust the Digital Lens Optimizer effect. If no shooting distance information is saved to the image, the shooting distance slider is set automatically to the right end at infinity position and a [] appears above the shooting distance slider. Images cannot be corrected for [Chromatic aberration] in the lens aberration correction tool pallet if the Digital Lens Optimizer has been applied.
JPEG/TIFF Editing with the Dust Delete/Copy Stamp Tool Palette You can use this tool palette to erase dust and other marks in a shot image and to correct an image by copying part of the image and pasting it onto an unnecessary part of the image. Note that you can use the functions in this tool palette with JPEG and TIFF images as well as RAW images.
Introduction Additional information The dust-erased image can be reverted to its original condition at any time A dust-erased image is displayed or printed as a dust-erased image. However, since the dust on the image is not actually erased, you can always revert to the original image by clicking the [ ] button in the Dust Delete/Copy Stamp tool palette or performing the “Re-Editing an Image” procedure (p.88). Printing dust-erased images You can print as a dust-erased image by printing it in DPP.
Introduction Manually Erasing Dust (Repair Function) You can erase dust spots in an image by selecting them one by one. the dust spot to be erased within the [ 5 Place click. ] and window, select the image from which you 1 Inwantthetomain erase dust spots. 2 Display the Dust Delete/Copy Stamp tool palette. 3 Click the point from where dust is to be erased. The display changes to 100% view. The display position can be changed by dragging. the button that matches the dust spot to be 4 Click erased.
Introduction Additional information Click several times when dust spots are not erased completely Where unwanted dust spots are not erased even after performing step 5 once, they may be erased completely when you click several times. Mainly spots of dust can be erased with the repair function Spots of dust can be erased with the repair function. You may be unable to erase lines of dust. In this case, use the copy stamp function (p.83).
Introduction Erasing Unwanted Parts of an Image (Copy Stamp Function) You can correct an image by pasting a section copied from another part of the image to an unwanted part of the image. Follow steps 1 to 3 in “Manually Erasing Dust (Repair Function)” (p.81). 1 2 Specify the section to be copied. Click on the section that is to be the copy source after clicking the [Select Copy Source] button. To change the section that is to be the copy source, perform the operation above again.
Setting Work Color Space A different work color space (p.132) from the default settings (p.125) can be set for each image. Display the Settings tool palette select the color space to be set.
Using the Soft-Proof Colors Function By using the soft-proof colors function, you can apply a selected printing profile or CMYK simulation profile to the displayed image. The reliability of the soft-proof colors function depends on the monitor quality, the monitor and printer profiles, and surrounding lighting conditions where you are working.
JPEG/TIFF Saving Editing Results Saving Editing Contents to an Image All the contents adjusted with the tool palette (recipe) can be saved to the image or saved as a separate image. Select the [File] menu desired item. Introduction Saving as a separate image To view, edit and print a RAW image with software other than DPP, convert to a more versatile JPEG or TIFF image and save.
Introduction the necessary settings, and then click the 3 Specify [Save] button. Contents By default, the image is converted and saved to a JPEG image with the highest image quality, without changing the image size. Change the settings according to your requirements.
JPEG/TIFF Re-Editing an Image Only the image processing conditions are changed in images adjusted with the tool palette (p.41 to p.84), so the “original image data itself” remains unaffected. (The trimming range or dust-erasure information of a cropped image (p.65) or dust-erased image (p.79 to p.83) is simply saved to the image.) For this reason, you can undo any adjustments saved (p.
JPEG/TIFF Utilizing Adjustment Contents (Recipe) All the adjustment contents (recipe) made using the tool palette can be saved as an individual recipe file (extension “.dr4”) and loaded and applied to another image. You can edit images efficiently by selecting and adjusting one image from images shot with the same shooting environment and batch applying the adjustment results to a large number of images.
Introduction Copying a Recipe and Applying to Another Image You can copy a recipe of an edited image and then apply it to another image. Select the image with the recipe you want to copy. 1 copy all items of a recipe, select the [Edit] menu 2 To[Copy recipe]. To select and copy some items of a recipe, select the [Edit] menu [Copy selected recipe]. The recipe is copied. 3 Select the image to which the recipe is to be applied and then select the [Edit] menu [Paste recipe].
Introduction Loading and Applying Recipes 1 Select the image to which a recipe is to be applied, and then select the [Edit] menu [Read and paste recipe from file]. The [Open] dialog box appears. 2 Select a recipe and click the [Open] button. The recipe is applied to the image.
JPEG/TIFF Adjusting by Comparing Multiple Images You can synchronize the areas in different images to be displayed among multiple preview windows, and adjust images while comparing them. preview window, display the multiple images 1 Into the be compared. 2 Align the images. 5 Move the area to be displayed. If you move the enlargement display area in one of the preview windows, the enlargement display area will also change in all other preview windows.
JPEG/TIFF Editing Efficiently Editing in the Edit Image Window The thumbnail display and the preview window are combined, and images can be edited efficiently while quickly switching between images to be edited. Select the images to be edited beforehand in the main window. Introduction 3 Edit the image. Contents 1 2 3 4 5 6 7 8 Downloading Images 1 Inedit.the main window, select the images you want to 2 Switch to the edit image window.
Introduction 4 Click the area you want to enlarge. Changing the Thumbnail Display Position to Horizontal Select the [View] menu [Horizontal Thumbnails]. Contents 1 2 3 4 5 6 7 8 Downloading Images Viewing Images Click Sorting Images Editing Images The area you clicked is enlarged to 100% (actual pixel size). To change the display area, drag on the image or drag the enlargement display area (p.16) of the navigator palette. Click again to revert to the full view ([Fit to window]).
Introduction Gathering and Editing Images in the Collection Window You can gather selected images together in Collection folders for viewing, comparison and editing. You can gather images from several folders as well as from a single folder, allowing you to work with them efficiently. [+ Add collection] in the [Collection] area in the 1 Click main window. images or image folders in the main window. 3 Select Select the [File] menu [Add to collection].
Introduction 5 Check the displayed images. 6 Edit the images. Edit the displayed images. Displayed images are retained in the collection folders even after exiting DPP. To remove images from collection folders Removing selected images Select images in a collection folder, select images, and select [Remove from collection] in the [File] menu.
JPEG/TIFF Compositing Images You can combine two images into a single image. You can further combine images by adding another image to the composited image. Since the composited image is saved as a separate image, the original images remain as they are. Introduction 2 Select the [Tools] menu [Start Compositing tool]. Contents 1 2 3 4 5 6 7 8 Downloading Images 32bit On 32-bit OSs, this function is not available. This function can be used with all image types (p.3) supported by DPP.
Introduction 3 Select the image to combine. Select the image to combine from the [Foreground Image] list box. 4 Select a compositing method. Select a compositing method from the [Composite Method] list box. Contents 1 2 3 4 5 6 7 8 Downloading Images Viewing Images Sorting Images Editing Images Printing Images The selected image is displayed in the [Foreground Image] thumbnail display. A preview of the combined background image and [Foreground Image] is displayed in the composite preview.
Introduction 5 Position the images. Contents 1 2 3 4 5 6 7 8 Downloading Images Viewing Images Sorting Images Shift large amount (50 pixels) Shift small amount (1 pixel) Align image centers You can also directly enter the position coordinates of the [Foreground Image] to align it. Printing Images Processing Large Numbers of RAW Images Remote Shooting By default, the background image and the [Foreground Image] are displayed with their centers aligned.
Introduction 6 Click the [Save As] button. Specify the required settings in the window that appears and then click the [Save] button. By clicking the [Continue] button, images are combined to create a new background image, and you can continue by combining another image. To finish, click the [Close] button. Compositing Methods Add The background image and [Foreground Image] are added and images are combined.
JPEG/TIFF Creating HDR (High Dynamic Range) Images You can create images with a wide dynamic range where clipping in highlights and shadows has been reduced, and images that appear like paintings. This is suited for scenes such as still-lifes and landscapes. This function is most effective when using three images with different exposures for the same scene (negative exposure, standard exposure, positive exposure) to create an HDR image.
Introduction the required settings, then click the [Start 3 Specify HDR] button. 4 Make required selections to adjust the image. Contents 1 2 3 4 5 6 7 8 Downloading Images Viewing Images Sorting Images To change the selected image or add another image, click the [Browse] button, and in the [Open] dialog box that appears, select the image file and click the [Open] button. If you select two images of the same size, you can checkmark the [Auto Align] checkbox for auto image alignment.
Introduction [Detail Enhancement] [Strength]: Adjusts the overall contrast and contrast of details together. Move the slider to the right for a stronger effect. [Smoothness]:Adjusts the overall smoothness of the image. Move the slider to the right for a smooth and natural impression. [Fineness]: Adjusts the clearness of details. Move the slider to the right for a sharper outline.
Advanced Transferring a RAW Image to Photoshop A RAW image can be converted to a TIFF image (16bit) and transferred to Adobe Photoshop. Introduction Contents Select the [Tools] menu [Transfer to Photoshop]. Photoshop starts up and the transferred image is displayed. A single image can be transferred at a time Only one image can be transferred at a time. To send multiple images at a time, see p.115.
Advanced Customizing the Main Window Toolbar You can display buttons for frequently-used functions in the main window’s toolbar. You can also change how the buttons are laid out. 1 Select the [Tools] menu [Customize toolbar]. 2 Select functions to display in the toolbar. The [Configure Toolbar] window appears.
5 Printing Images Introduction Printing an Image .................................................. 107 Printing with Shooting Information......................... 108 Plug-in printing.......................................................
Printing an Image You can print images with a printer. As an example, the procedure to print one image on one sheet of paper is described here. 1 Select the image to be printed. 2 Select the [File] menu [Print]. Introduction Contents 1 2 3 4 5 6 7 8 Downloading Images Viewing Images Sorting Images Editing Images Printing Images Processing Large Numbers of RAW Images Remote Shooting The printer’s print settings dialog box appears. 3 Print.
Printing with Shooting Information You can freely layout one image on one sheet of paper and print together with titles and shooting information, etc. 1 Select one image to be printed. 2 Select the [File] menu [Print with detailed setting]. the required settings for printing, and then 3 Specify click the [Print] button. Introduction To maintain the settings The settings of each tab sheet in step 3 are memorized when the [Apply] button is clicked (excluding the contents of the [Text] tab sheet).
Plug-in printing Select the [File] menu [Plug-in printing] Plug-In 1 for the printer you use. The Plug-In starts up. the required settings for printing 2 Specify photographs and then print.
6 Processing Large Numbers of RAW Images Batch Apply White Balance to Images (Personal White Balance) ................................................................ 111 Registering Personal White Balance ........................ 111 Applying Personal White Balance ............................ 112 Batch Save as JPEG or TIFF Images (Batch Processing)............................................................ 113 Batch Transfer Images to Image Editing Software .........
Batch Apply White Balance to Images (Personal White Balance) The white balance adjustments made to a RAW image shot in a specific shooting environment can be registered as personal white balance. You can then perform efficient white balance adjustment by applying this personal white balance to a large number of RAW images shot in the same shooting environment. Personal white balance data for versions before DPP 4 cannot be applied.
Introduction Applying Personal White Balance In the main window, select the image to which a personal white balance is to be applied. 1 2 Select the [View] menu [Tool palette]. the personal white balance number button that 3 Click is to be applied. The tool palette appears.
Batch Save as JPEG or TIFF Images (Batch Processing) You can batch convert and save edited RAW images to highly versatile JPEG or TIFF images. The images are saved as separate images, so the RAW images remain unaffected. 4 In the processing dialog box, click the [Exit] button. Introduction Contents 1 2 3 4 5 6 7 8 Downloading Images In the main window, select multiple images to be converted. 1 2 Select the [File] menu [Batch process].
Introduction Saving images with recipe is not possible In the [Batch settings] window, you cannot perform [Save] or [Save As] (p.86) to edited RAW images. To save the developing/editing results for the version you are currently using DPP’s RAW image development processing technology is continually being improved upon so that you can perform the latest image processing more appropriately.
Batch Transfer Images to Image Editing Software You can transfer multiple images to image editing software. Unlike “Transferring a RAW Image to Photoshop” (p.104), you transfer images that have first been converted and saved as a separate image, so the transferred image will not be deleted after exiting the destination software. The software used here as an example is Adobe Photoshop. In the main window, select multiple images to be transferred. 1 2 Select the [File] menu [Batch process].
Batch Change the File Name of Images window, select multiple images of which 1 Inthethefilemain names are to be changed. 2 Select the [Tools] menu [Start Rename tool]. the required settings and click the [Execute] 3 Specify button. The rename window appears. Changing the File Name of Images in the Order in the Main Window When you change the order of the images in the main window, you can change in one operation the names of the files for the images, in the order they were rearranged.
7 Remote Shooting Introduction Remote Shooting...................................................
Remote Shooting You can perform remote shooting by using “EOS Utility” which enables communication with a camera in combination. For remote shooting, “EOS Utility Ver. 3.x” must be installed on your computer. For information on cameras compatible with “EOS Utility Ver. 3.x”, refer to “EOS Utility Ver. 3.x Instruction Manual” (electronic manual in PDF format). This function is not available on the EOS M3 or PowerShot G3X. the [Remote Shooting] button on the toolbar in 1 Click the main window.
Introduction You can change the [File Name] for Specify Remote Shooting Folder window. (If [Do not modify] is selected, images are saved with the file names set on the camera.) Contents 1 Click the [Settings] button to display the Set file name for captured Downloading Images image window. 1 2 3 4 5 6 7 8 Viewing Images Sorting Images You can perform shooting while checking the image by switching the window to multi-layout.
Introduction 5 Specify the required settings. 7 Specify the required settings. Contents 1 2 3 4 5 6 7 8 Downloading Images Viewing Images Sorting Images Editing Images Printing Images For detailed instructions on setting procedures, refer to “EOS Utility Instruction Manual” (PDF electronic manual). 6 Click the [Settings] button. Processing Large Numbers of RAW Images For detailed instructions on setting procedures, refer to “EOS Utility Instruction Manual” (PDF electronic manual).
Introduction Contents 1 2 3 4 5 6 7 8 Downloading Images Viewing Images Sorting Images Editing Images The shot image is displayed. The shot image will be saved in the folder created in step 2. The images in the folder mentioned above will be displayed in the thumbnail display area. You can also create a sub-folder in the folder mentioned above to save images.
8 Specifying Preferences Introduction Specifying Preferences.......................................... 123 General Settings....................................................... 123 Image processing ..................................................... 124 Color Management ................................................... 125 View Settings............................................................
Specifying Preferences You can change the various functions of DPP in the [Preferences] window. Check the contents of each window and set. Refer to the detailed explanations if available, as well as to each window. Introduction General Settings You can specify the folder that opens when DPP is started up, the display order of thumbnails, etc. Contents 1 2 3 4 5 6 7 8 Downloading Images Select the [Tools] menu [Preferences].
Introduction Image processing You can specify settings for processing images in DPP. Modified Picture Style settings If you checkmark the checkbox, setting values for [Color tone], [Color saturation], [Contrast], [Unsharp mask], [Sharpness], and other options will be retained for each Picture Style.
Introduction Color Management You can specify settings relating to color management, such as settings for work color space, conditions for color matching, etc. Changes are not applied to the edited image Even if the default setting is changed, the new default setting is not applied to edited (i.e., adjusted using the tool palette, cropped, dusterased) images. Change the settings individually. You can set a color space that is different from the default settings for each image (p.84).
Introduction View Settings You can set layout for screen display. Contents 1 2 3 4 5 6 7 8 Downloading Images Viewing Images Sorting Images Editing Images Printing Images User interface size and position By checkmarking the [Restore defaults at startup] checkbox, the positions and sizes of each window revert to their original settings for next time you start up DPP. The checkmark is also removed from the checkbox for the next startup.
Reference Introduction Troubleshooting..................................................... 128 Deleting the Software (Uninstalling) ...................... 129 Image Frame Information in the Main Window and Edit Image Window......................................... 130 Glossary ................................................................ 131 Index...................................................................... 133 About This Instruction Manual........................ 137 Trademarks .............
Troubleshooting If DPP is not operating correctly, refer to the subjects below. Installation can not be completed correctly Select an administrator-level privilege ([Computer administrator], [Administrator], etc.) when setting the user. You cannot install the software if the user setting other than an administrator-level privilege is selected. For detailed information on selecting an administratorlevel privilege, refer to your computer User’s Manual.
Deleting the Software (Uninstalling) Exit any applications before uninstalling the software. Log in under an administrator-level privilege when uninstalling the software. Uninstall the software according to the OS software uninstalling method. To prevent computer malfunctions, always restart your computer after you have uninstalled the software. Re-installing the software without first restarting your computer is particularly likely to result in computer malfunctions.
Image Frame Information in the Main Window and Edit Image Window (p.11, p.93) Introduction Trimming (cropping) range*2 (p.65) Contents Check mark (p.30, p.31) Pinned image setting mark (p.18) Multiple image display mark (p.19) 1 2 3 4 5 6 7 8 Downloading Images Viewing Images Sorting Images Editing Images Printing Images Image type*1 GPS mark*3 Rating mark (p.30, p.31) Digital Lens Optimizer mark (p.76) Processing Large Numbers of RAW Images File name Lens aberration correction mark (p.
Glossary Introduction RAW image bit number EOS DIGITAL camera RAW images are recorded in an uncompressed 14bit or 12bit format. Because RAW images are special images in an undeveloped status, you need software with development processing functions such as DPP in order to view them. The advantage of the undeveloped RAW images is that you can make a variety of adjustments to RAW images with almost no deterioration of the image. * “RAW” meaning “in a natural condition” or “not processed or refined”.
Introduction Color space CMYK simulation profiles A color space is the reproducible color range (color gamut characteristics). DPP supports the following five kinds of color space. sRGB : Standard color space for Windows. Widely used for the standard color space of monitors, digital cameras, and scanners. Adobe RGB : A wider color space than sRGB. Mainly used for printing for business purposes. Apple RGB : Standard color space for Macintosh. A slightly wider color space than sRGB.
Index Introduction A B Adjust JPEG Images........................................................................... 41 Adjust TIFF Images............................................................................. 41 Adjusting Adjustment Contents (Recipe) ..................................................... 91 Apply Adjustments........................................................................ 90 Automatic Adjustment (Gradation, Luminance)............................ 52 Brightness ..............
Introduction Color Setting of the Monitor (Profiles)............................................... 125 Color Setting of the Printer (Profiles) ................................................ 125 Color Space ...................................................................................... 132 Adobe RGB ................................................................................ 132 Apple RGB .................................................................................
Introduction H N HDR (High Dynamic Range) Images ................................................ 101 Highlight Area Warning Indicator ........................................................ 20 Histogram Palette ............................................................................... 14 Hue ......................................................................................... 42, 61, 62 Navigator Palette .................................................................................
Introduction R Rating............................................................................................ 30, 31 Rating mark....................................................................................... 130 RAW Image................................................................................. 40, 131 Re-Adjusting an Image ....................................................................... 88 Recipe.....................................................................................
Introduction V View Settings (Preferences) ............................................................. 126 Viewing Images in the Main Window (Thumbnail Layout) .................. 11 Contents W White Balance..................................................................................... 46 Click White Balance ............................................................... 47, 57 Color Temperature ....................................................................... 48 Personal White Balance .....