
Specifications


Authored by Simon Adams Product Support Specialist Canon UK RCC December 05
Revision 1.2 © Canon 2006
6
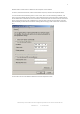
We will need to create a static IP address for the computer on the network.
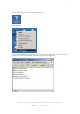
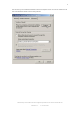
To do this, select the General tab, select Internet Protocol (TCP/IP) and click the Properties button.
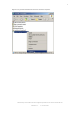
You should now see the following screen. In this screen, select “Use the Following IP address, and
enter a unique IP address for the computer. In this example we have used 192.168.0.10 which will be
the IP address which identifies the PC to the network. The Subnet mask should be set to 255.255.255.0
as the only number range in the IP address that is going to alter is the last set of numbers. Leave the
Default Gateway and the DNS entries blank. Nothing needs changing under “Advanced” so leave that
as is.
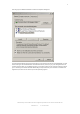
Click on OK to return to the Wireless Network Connection Properties screen.