
Manual

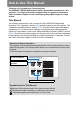


Table Of Contents
- To Start Menu
- How to Use This Manual
- Projector Highlights
- Quick Reference Guide
- Table of Contents
- Safety Instructions
- For Safe Use
- Before Use
- Projecting an Image
- Useful Functions Available During a Presentation
- Setting Functions from Menus
- Using Menus
- Setting Display Status (Input Settings)
- Selecting the Aspect
- Setup Using Auto PC
- Selecting an Input Signal
- Adjusting the Input Signal (Total dots)
- Adjusting the Input Signal (Tracking)
- Adjusting the Input Signal (Horizontal position)
- Adjusting the Input Signal (Vertical Position)
- Adjusting the Input Signal (Horizontal pixels)
- Adjusting the Input Signal (Vertical pixels)
- Adjusting HDMI Input Level
- Setting the HDMI Color Format
- Specifying HDMI Overscan
- Specifying Progressive Processing
- Specifying the Slideshow Interval
- Specifying Split- Screen Display
- Adjusting Image Quality (Image Adjustment)
- Specifying Image Priority in Split-Screen Mode
- Specifying the Image Mode
- Creating/Saving a User Profile
- Adjusting Brightness
- Adjusting Contrast
- Adjusting Sharpness
- Correcting Gamma
- Adjusting Colors
- Adjusting to the Ambient Light (Ambient Light)
- Reducing Image Noise (Noise reduction)
- Dynamic Gamma Adjustment
- Correcting Memory Color
- Fine-Tuning Colors (6-axis Color Adjustment)
- Fine-Tuning Gamma
- Controlling Contrast (Iris)
- Specifying the Lamp Mode
- Resetting Image Adjustment Settings
- Customizing System Operation (System Settings)
- Registering User Logos
- Positioning User Logos
- No Signal Screen
- Screen When Blank
- Selecting a Logo at Startup
- Specifying Auto Power-Off
- Specifying Direct Power-On
- Specifying Silence or Operating Tones
- Specifying Key Repeat Operation
- Locking Projector or Remote Buttons
- Assigning a Channel for Remote Control
- Reducing Motion Blur
- Specifying HDMI Input
- Selecting a Display Language
- Requiring a Password for Operation
- Setting a Password
- Restoring Original Gamma Settings
- Resetting the Lamp Counter
- Resetting the Air Filter Counter
- Updating the Firmware
- Resetting to the Default Setting
- Checking Projector Information
- Installation
- Before Installation
- Installation Procedure
- Connection Procedure
- Starting Projection
- Installation-Related Menu Settings
- Locking Installation Settings
- Flipping Image Display
- Specifying the Screen Aspect
- Specifying Keystone Correction
- Specifying Digital Image Shift
- Specifying Micro Digital Image Shift
- Adjusting Image Registration
- Specifying the Fan Mode
- Specifying Vertical Projection
- Selecting the Audio In Terminal
- Adjusting Colors to Suit the Screen Color
- Specifying a Menu Position
- Showing/Hiding the Guide Screen
- Showing/Hiding Input Status
- Showing/Hiding Overheat Warnings
- Specifying the Menu Display Time
- Showing/Hiding Lamp Replacement Warnings
- Showing/Hiding Filter Cleaning Warnings
- Showing/Hiding Split- Screen ID
- Showing/Hiding the Test Pattern
- Projecting from Multiple Projectors at Once (Edge Blending)
- Connecting to a Network
- Network Connection Overview
- Completing Projector Settings
- Locking/Unlocking Network Settings
- Enabling/Disabling the Network Password
- Registering a Network Password
- Enabling/Disabling Wired Network Functions
- Specifying Standby Power Consumption
- Viewing the IP Address
- Viewing the Gateway Address
- Viewing the MAC Address
- Enabling/Disabling DHCP
- Specifying TCP/IP Settings
- Initializing Network Settings
- Specifying PJLink Settings
- Specifying Use of AMX Device Discovery
- Specifying Use of Crestron RoomView
- Completing Computer Settings
- Maintenance
- Networked Multi- Projection Overview
- Operation in Each Mode
- Functions in All Modes
- Using the Session Selection Menu
- Using the Projector Selection Menu
- Using Layout Functions
- Switching Projectors Used for the Layout
- Controlling all Projectors at Once
- Projecting from Multiple Projectors (Multi-Projection)
- Switching the Primary/Secondary Monitor
- Temporarily Enlarge Images
- Projecting Session Information
- Fully Blanking Projection
- Blanking Projection from Your Computer
- Checking for Computers That Join or Leave Sessions
- Completing Application Projection Settings
- Reducing Windows to a Compact Size
- Tips for Better Networked Projection
- Restrictions
- Appendix
- Troubleshooting
- Relationship between Aspect and Screen Aspect
- When the image is projected on a 16:10 screen
- When the image is projected on a 16:9 screen
- When the image is projected on a 4:3 screen
- When projecting on a 16:10 screen in the aspect ratio of the connected device
- When projecting on a 16:9 screen in the aspect ratio of the connected device
- When projecting on a 4:3 screen in the aspect ratio of the connected device
- Displayed Test Patterns
- Supported Signal Types
- Product Specifications
- Index
- Option
- Menu Configuration

7
Table of Contents
Table of Contents
Operation.....................................................................47
Projecting an Image.........................................................................49
Step 1 Turn the Projector On............................................................... 50
Step 2 Select an Input Signal............................................................... 51
Types of Input Signals..............................................................................................51
Selecting an Input Signal .........................................................................................52
Step 3 Adjust the Image ....................................................................... 53
Setting the Display Resolution of the Computer ...................................................53
■ Windows 8...........................................................................................................53
■ Windows 7...........................................................................................................53
■ Windows Vista.....................................................................................................54
■ Windows XP........................................................................................................54
■ Mac OS X............................................................................................................54
Auto PC Adjustment .................................................................................................55
■ Performing the Auto PC Function .......................................................................55
Adjusting the Image Size..........................................................................................55
Adjusting the Image Position...................................................................................56
Adjusting the Focus..................................................................................................56
Step 4 Select an Aspect Ratio (Screen Aspect)
Matching the Screen............................................................................. 57
Selecting Screen Aspect ..........................................................................................57
Moving Image with 16:9 D. Image Shift...................................................................60
Moving Image with 4:3 D. Image Shift.....................................................................61
Resetting the Image Shift .........................................................................................62
Selecting the Aspect.................................................................................................63
Types of Aspect Ratios ............................................................................................63
Selecting an Aspect Ratio ........................................................................................64
Step 5 Correct the Image Distortion.................................................... 65
Adjusting Keystone Distortion ................................................................................65
■ Horizontal/Vertical Keystone Correction .............................................................65
■ Corner Adjustment ..............................................................................................66
■ Resetting the Keystone Adjustment ....................................................................67
Step 6 Select the Image Quality (Image Mode) .................................. 68
Image Modes .............................................................................................................68
■ Selecting an Image Mode ...................................................................................69
Step 7 Set Power-Saving Settings....................................................... 70
Step 8 Turn the Projector Off............................................................... 71