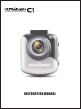
080P FULL HD DASHCAM INSTRUCTION MANUAL
Congratulations on the purchase of your new UltraDash C1 camera! We’d like to thank you for your purchase. We strive to bring you the highest quality products, allowing you to capture every memory. We know you’ll love using your UltraDash! The following instructions are written for optimized use of your UltraDash C1 camera. Each of the default settings have been designed to achieve the highest quality video while maintaining peace of mind when the camera is on.
TABLE OF CONTENT The UltraDash C1..................................................................................................01 Precautions .......................................................................................................... 03 Product Specs ...................................................................................................... 05 Package Contents ................................................................................................. 06 Product Features .
PRECAUTIONS Please read the following instructions carefully. Proper Use of the UltraDash C1 is necessary in order to avoid operational problems that may occur. WARNING: DO NOT expose UltraDash C1 to moisture under any circumstance. The camera is NOT WATERPROOF and will become defective and may put the user at risk of electric shock or fire exposure. DO NOT use UltraDash C1 for any illegal purpose or to infringe on another individual’s rights.
• Clean the device with a soft dry cloth. For tough dirt, please use a small quantity of water and a neutral detergent. Clean with a soft cloth. • Avoid contact with the UltraDash C1 lens as damage may be caused. • When necessary, clean the lens carefully by using lens cleaning fluid and a soft cloth.
PRODUCT SPECS Model Number / Name UltraDash C1 Power Requirements 5V / 1.5A; 12-24V DC Power Supply (Car power cable) Input: 12-24V DC Output: 5V DC Fuse Type: 32mm/2A Power Input Built-in super capacitor Sensor Resolution Sony Exmor, 2M Pixel Lens Type/Angle/Aperture 6G / 140° / F1.8 Recording Resolution 1080P @ 30fps (default) Screen Size 2.
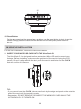
PACKAGE CONTENTS Please check the contents of your UltraDash product. UltraDash C1 Suction mount Car Power Cable USB Cable 3M Adhesive Mount Cable Clips * Product appearance may differ slightly to that shown above. PRODUCT FEATURES - 2.0” LCD Color Screen We developed a screen that perfectly fits your camera, without any loss of resolution. This design allows you to use the playback feature, instantly letting you view the shot you just captured.
CAMERA PARTS & CONTROL 7 6 1 2 3 4 5 1. Menu Button Press this button to open the menu of the current mode. Press this button twice to enter the general setting menu. 2. Up/Mute Button Up Navigate up within menus or go to the previous file in playback mode. Mute Turn on or off the audio recording function while in video mode. 3. Record/OK Button Record In Video mode, press to start or stop recording. In Photo mode, press to take a photo. OK The confirm button used to select options in menus. 4.
6. Screen UltraDash C1 is equipped with a standard 2.0” LCD color screen to let you view 7. Status LED Indicator Red: Power On Red (Flashing): Recording Blue: Charging 11 8 12 9 13 10 14 8. Power Button Press and hold the button for 2 seconds to turn the camera on/off. 9. Micro SD Card Slot Insert your micro SD card here. Push your memory card into the slot until you hear a click. 10. Mode/Screen Shot Button Mode This button allows you to navigate between video, photo and playback modes.
15 15. Reset Button On the rare occasions the camera has a problem, use the reset button to shut down the camera. Simply press the reset until the camera turn offs and press power button to turn on. IN-VEHICLE INSTALLATION For the first installation, follow the instructions below: 1. INSERT YOUR MICRO SD CARD INTO THE UltraDash C1 The UltraDash C1 is designed to allow a standard Micro SD card to record your footage. Before installing, make sure the gold end of the card is facing the LCD screen.
2. 2.1 CONNECT THE UltraDash C1 TO THE MAGNETIC MOUNT Attach the UltraDash C1 onto (e) the magnetic connector on the mount. Make sure you align the camera within the connector port for proper installation. 2.2 REPLACE THE SUCTION MOUNT WITH THE 3M ADHESIVE MOUNT (OPTIONAL): 3M Adhesive Mount Suction Mount (a) Suction release tab (b) Locking lever (c ) Locking ring (d) Power socket (e) Magnetic Connector There are two types of mounts included in the package.
How to use the 3M Adhesive Mount: I. Loosen the (c) locking ring on the suction mount and pull the (e) magnetic connector out. ii. Next, loosen the (c) locking ring from the 3M adhesive mount, and plug the (e) magnetic connector into the 3M adhesive mount. iii. Clean the installation area on the windshield and peel off the plastic covering. Adhere it to the windshield. Tigten Loosen 3.
TIPS: - When selecting a location for the suction mount, make sure it’s on a glass surface that is smooth and free of paint. - Before mounting, clean the area with a dry/clean cloth and add a small amount of moisture to the windshield. This allows a stronger bond to form between the glass and the suction mount. - Remember to place the mount within the area of the vehicle’s windshield wipers. - The (a) suction release tab allows you to release the cup from the glass to readjust your camera placement. 4.
6. THE FIRST-TIME SETUP When connecting the power, the UltraDash C1 will turn on and display the first-time setup guide below. - Select the Language Language English En Simplified Chinese Zh Traditional Chinese Cn Press OK to continue. - Select the Country and Time Zone Select Country Select Time Zone United State United State (EST) Canada United State (CST) China United State (MST) Mexico United State (PST) Press OK to continue. Press OK to continue.
- Select the Speed Unit Select Speed Units MPH mph KMH kmh Press OK to continue. TIP: You can reset the settings either by operating inside of the SETUP MENU, or by restoring defaults. From now on, the UltraDash C1 will automatically turn on and start recording once power has been made available from the 12 V outlet. Just start the vehicle and start driving! -If there is no 12V outlet or cigarette lighter for your vehicle, use the included USB power cord.
WARNING: ALWAYS pay attention to the road ahead of you. Driving with distractions on the road may result in penalties, accidents, or even death. PLEASE DRIVE CAREFULLY. Always place the mount in a location that will not obstruct the driver's view of the road. We recommend you place the mount behind the rearview mirror on the passenger side, within the windshield wiping area.
VIDEO MODE The following information will help you better understand the icons in VIDEO MODE and their relative functions. Some icons show up only when corresponding functions are activated. 1 2 3 4 5 6 FHD 7 00:00:59 1080P P 8 9 11:17:01 07/04/2018 13 1. 2. 3. 4. 5. 6. 7. 8. 9. 10. 11. 12. 13. 12 10 11 Mode: Indicates the UltraDash C1 is in video mode. Resolution: displays the current resolution. G Sensor: The current sensitivity level of G-Sensor.
VIDEO MENU Access the VIDEO MENU by pressing the MENU button while in VIDEO MODE. Resolution 10 80 P Video Length Exposure Parking Mode Sensor P OK Enter MENU Back Use the UP and DOWN buttons to select setting options and press the OK button to enter the sub-menu. Once you access the sub-menu, highlight the desired setting and press the OK button to confirm your selection and to return to the VIDEO MENU. Press the MENU button twice to return to video mode.
• G Sensor: G sensor is the sensor that can detect forces. When it senses any forces, it will protect the current file automatically. Adjust the sensitivity of G sensor here. OPTIONS: High/Medium (default)/Low/Off • GPS: Turn the GPS function ON or OFF. (GPS mount is sold separately.) OPTIONS: On/Off (default) • Speed Units: Adjust the unit for speed data. OPTIONS: MPH (default)/KMH • Screen Saver: UltraDash C1 has a function to let the screen shut down after a period of inactivity.
PHOTO MODE While in VIDEO MODE, press down on the MODE button to enter PHOTO MODE. In PHOTO MODE, you are able to take stationary photos. The following instructions will explain the icons in PHOTO MODE. Some icons show up only when corresponding functions are activated. 1 5 1. 2. 3. 4. 5. 2 11:17:01 07/04/2018 4 3 Mode: Indicates when the UltraDash C1 is in photo mode. Exposure: Indicates the current exposure level settings. Time: Displays current time. Date: Displays current date.
PHOTO MENU Access the PHOTO MENU by pressing the MENU button while in PHOTO MODE. Exposure Time & Date Stamp OK Enter MENU Back Use the UP and DOWN buttons to select setting options and press the OK button to enter the sub-menu. Press down on the MENU button twice to return to PHOTO MODE. • Exposure: Adjust exposure levels settings. OPTIONS: +2/+1/ 0(default)/-1/-2 • Time & Date Stamp: Turn ON or OFF the date stamp mark on the photos.
PLAYBACK MODE Use MODE button to access PLAYBACK MODE. In PLAYBACK MODE, you are able to review the videos and photos you have stored. DIRECTORIES Press the UP or DOWN buttons to navigate through the menu. PROTECTED: The directory for all protected videos. VIDEO: The directory for all unprotected videos. Note: If the video file is protected under playback mode, the file will remain in video directory. PHOTO: The directory for all photos.
Logo 07/04/2018 11:17:01 Date Time X:+3.80 Y:+1.02 Y:+1.65 30MPH N5° 41’33.15” Accelerator Speed Data W62”42”33.15 Latitude & Longitude UltraDash Stamp: Logo, can be turned on/off in SETUP MENU Time & Date Stamp: Date, Time, can be turned on/off in VIDEO MENU Information Stamp: Accelerator Data, Speed, Latitude & Longitude, can be turned on/off in SETUP MENU 1 3 2 00:00:58 7 07/04/2018 OK : / II MODE: UP: 11:17:01 4 DN: 5 6 1.
OK: PLAY/PAUSE. MODE: STOP playing video and go back to Video/Protected directory. UP: REWIND. DOWN: FAST FORWARD. MENU: DELETE or PROTECT the video. 6. Charging Indicator: Indicates if the camera is charging or not. 7. Protected File: Indicates the selected file is protected. PHOTO FILES 80/80 2018_0704_111701_001 2018_0704_111709_001 2018_0704_111815_001 11:17:01 2018_0704_111900_001 07.04.
1. 2. 3. 4. Mode: Indicates when the UltraDash C1 is in in PLAYBACK MODE. File Type: Indicates the file type is photo. Date & Time: Indicates the date and time of the recorded file. Playback Controls: Use the UltraDash C1 buttons as instructed below. DOWN: Next file UP: Previous file 5. Charging Indicator: Indicates if the camera is charging or not. DELETING FILES Highlight the DELETE option and press the OK button.
PROTECTING/UNPROTECTING FILES Highlight the PROTECT/UNPROTECT option and press the OK button. Protect/Unprotect Delete OK Enter MENU Back You will have the following options: Protect File Protect File Unprotect File Unprotect File Protect ALL Files Protect ALL Files Unprotect ALL Files Unprotect ALL Files OK Enter MENU Back OK Select Protect File, follow the onscreen instructions to protect the current file.
SETUP MENU Access the SETUP MENU by pressing the MENU button twice. Format SD Card Device Sounds Time & Date Time Zones / DST OK Enter MENU Back Use the UP and DOWN buttons to select setting options and press the OK button to enter the sub-menu. Once you access the sub-menu, highlight the desired setting and press the OK button to confirm your selection and to return to the SETUP MENU. Press the MENU button to return to the current mode.
• Country: Select a country and time zone setting. OPTIONS 1: United States/Canada/China/Mexico/Korea/Japan/Taiwan/Russia/ Spain/Norway/Finland/Sweden/Germany/France/Italy/Netherlands/ Belgium/Denmark/Poland/United Kingdom & Ireland/Others OPTIONS 2: -12/-11/-10/-9/-8/-7/-6/-5/-4/-3.5/-3/-2.5/-2/-1/GMT/+1/ +2/+3/+4/+5/+6/+7/+8/+9/+10/+11/+12 • Restore Defaults: Reset all the settings to UltraDash factory default. • System Info: Displays the firmware version.
VIDEO & AUDIO OUTPUT (OPTIONAL) The UltraDash C1 can be connected to most external video equipment that utilizes standard RCA Inputs. You will need to purchase the AV Cable in order to continue this process. Visit https://cansonic.com to purchase the correct AV Cable. Connect the AV Cable to your UltraDash C1 and the external device. Once you have done so, turn on the UltraDash C1 and the external device. The UltraDash C1’s screen will appear blank as the image is shown on the external device.
TROUBLE SHOOTING Blurred Image (Video) The UltraDash C1 comes with a protective lens cover for the cameras lens, be sure to remove it. Wipe the lens with a soft cloth until any debris/stains are removed. Clean your vehicles windshield where the camera is placed. Unable to insert Micro SD Memory Card Make sure the metal portion of the memory card faces the screen side. Once inserted, push the card until a CLICK sound is heard.
The suction cup does Be sure the protective film on the suction cup has been removed. not attach to the surface Before you place it, make sure the surface is clean and smooth. Wipe down the surface and add a small amount of moisture to the suction cup to allow for a stronger bond. Do not apply on a non-smooth surface or an area with paint. UltraDash C1 shuts down on its own Auto power off function will turn off C1 automatically after it loses its power supply.
A buzz is created when my UltraDash C1 is connected to my TV Be sure that your UltraDash C1’s AV cable is connected correctly. The audio jack (2.5mm) can be purchased on the Cansonic website. UltraDash C1 always turn on by itself. The parking mode function will automatically start recording a 30 second video clip and turn off when external forces are detected. If you want to turn off this function, go to SETUP menu -> Parking Mode Sensor, and turn it off.
Instagram: @cansonic_usa Facebook: @cansonicusa Youtube: Cansonic USA Official: www.cansonic.
ULTRADASHC120180630V01