Carbide 3D Step 1 Inventory Welcome… and Congratulations! You are now the proud owner of the Shapeoko XXL, an incredibly powerful and easy-to-use CNC machine… NOTE: This is a note - information that point out critical steps or reference future information.
PROTIP: This is a Pro-Tip. Anytime you see one of these, you will find helpful additional information. WARNING: This is a warning. Information in these boxes is very important. Pay close attention. Open The Box Your Shapeoko XXL should arrive in a single box. If you opted to include a compact router, it will be shipped in a second box. The primary shipping box has dimensions of 48 x 26 x 12”. The box weighs approximately 149lbs.
Remove the components After removing the lid, you will want to carefully remove the various boxes, boards and wrapped hardware inside. Some of the boxes are held tightly in place by cardboard inserts; rocking the boxes side-to-side can help release them from their insert holes. Remove and place all the items in a location where they will not be dropped or have something dropped on them. In particular, you will find two pieces of MDF board. These are the two halves of the Shapeoko XXL’s baseplate.
The two halves are thick and tough, but until you are ready to begin the installation it is recommended that you store these two pieces of MDF in a location where there is no risk of spilled liquids until you need them. Once the shipping box is emptied, you should have the following 9 items: Item Quantity Description Other Info A B C 1 1 1 White Packing List Envelope and Zip Ties XXL Final Components Assembly to complete Box assembly Package Dimensions 8.
Item Quantity Description Other Info D E 1 1 Y-Axis Left Left Y-Axis Carriage Assembly Y-Axis Right Right Y-Axis Carriage Assembly X/Z Assembly Package Dimensions Labeled Contains X and Z axis Labeled carriages Found F 2 MDF Pieces Below cardboard 42″ x 29.75″ x 0.75″ divider G 1 Aluminum Packaged 3 40″ x 7.5″ x Rails to a bundle 3.5 Contains 3 H 1 Cross Straps identical pieces Contains 2 I 1 End Plates identical pieces 40″ x 7″ x 1.5″ 45.
Once you’ve removed all the contents of the shipping box, it’s time to open and inventory the boxes and wrapped hardware. Below you will find a checklist that can be used to verify you have all the hardware needed to complete your Shapeoko XXL. PROTIP: Your Shapeoko XXL has been carefully hand-packed and checked for all the necessary components you’ll need to assemble the machine. However, sometimes errors are made.
Carefully open the XXL Final Assembly Box and inspect its contents. Many parts are packaged in small plastic bags, and smaller bags may be inserted into larger plastic bags for shipping purposes.
Item Description F Drag Chain Bracket Kit G Makita Bushing Adapter H Spindle Mount I USB Cable J Power Supply K Tie Downs and Zip Ties L Tool Kit (Allen Keys: (5, 4, 3, 2, 1.
below. The Right and Left Assembly components are mirror images, but the boxes they were shipped in are labeled; it is recommended that you leave the carriages in their boxes until needed. X/Z Assembly Box Open the box labeled X/Z Assembly and visually verify that the items inside match the image below. After verifying the X/Z Assembly, place it back in the box. The box should contain the X Carriage and Z Carriage as well as a bag containing two springs and a bag containing the Idler Assembly.
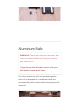
Aluminum Rails WARNING: These rails may look the same, but there are subtle differences that you need to pay attention to. If you do not identify the correct rails, you will have to undo work later. The three aluminum rails are packed together, each rail is wrapped in a cardboard shell and secured with plastic bands while leaving the ends exposed.
All three wrapped aluminum rails are then secured together as a single unit using plastic bands. Carefully cut all plastic bands and remove the cardboard from the three aluminum rails. Examine the three rails and identify the following: • Rail with the Shapeoko logo is the X-Axis Rail • Rail with two (2x) mounting holes is the Y-LEFT Rail • 1x Rail with no logo and no mounting holes is the Y-Right Rail After verifying the three aluminum Rails, place them back in the box until needed.
Cross Straps Box Dimensions: (40” x 7” x 1.5”) The Cross Straps are packed together in a single cardboard shell and secured with plastic bands. Carefully cut all plastic bands and remove the cardboard from the Cross Straps. Examine the container and identify the following: End Plates Box Dimensions: (45.
bands. Carefully cut all plastic bands and remove the cardboard from the End Plates. The End Plates are identical. After verifying the End Plates, place them back in the box until needed in Step 2.” Note that the End Plates have inserted PEM nuts which are threaded. These allow for the addition of threads in plates which otherwise would not be thick enough to have threads added, and to do so without the manual operations of drilling a precise hole and then forming the threads with a tap.
MDF Baseplates Box Dimensions: (42” x 19.75” x 0.75” each) The two MDF Baseplates are identical and packed unwrapped in the bottom of the shipping box. NOTE: After verifying the MDF Baseplates, store them where the risk of high humidity or liquids spilling on them is low. MDF is sensitive to moisture, so avoid having drinks or other liquids in the vicinity of the Shapeoko XXL to avoid damage to the MDF Baseplates.
After you have verified all the components, it is time to begin assembly. All the tools you need to assemble your Shapeoko 3 have been included, but a large table or workbench will be helpful during the assembly. The completed dimensions of the Shapeoko 3 are 45”W x 40-1/2”L x 16”H so a table larger than this is recommended. WARNING: The assembly should not be done on the floor.
© Carbide 3D 2020, All rights reserved.
Carbide 3D Step 2 - Base Frame Assembly The base frame is the main sub-structure of the machine. Supporting the rail and the gantry system, it is important that you follow each step in this section to ensure your machine base is stable and secure.
Item Description Quantity 1 Front and Rear End Plate 2 2 Cross Strap 3 3 MDF Wasteboard Half 2 4 Adjustable Leveling Feet 4 5 M5 x 25mm BHCS 18 Leveling Feet Carefully screw in the four leveling feet, two per End Plate. The feet will only fit in the outermost nuts on the bottom of the End Plates. Turn the Leveling Feet knobs clockwise until the top of the threads is flush with the backside of the nut.
MDF Baseplates Lay out the three Cross Straps (parallel to each other and with 12” of space between them) as shown in the image below. The Cross Straps will be placed so the flanged edges are facing down. Note that there are two threaded holes in the center of each Cross Strap. Rear Baseplate Place one MDF Baseplate across the back half of the Cross Straps as shown in the figure below.
away from the centers of the Cross Straps and the MDF Baseplate is flush with the edges of the Cross Straps. (This should reveal three holes running across the middles of the Cross Straps that will be used for the second MDF Baseplate.) Insert 3x M5x25mm screws into the three countersunk holes as shown in the figure below. Turn the screws until they stop but do not tighten. PROTIP: Some adjustability will be needed when installing the Y-axis rails.
Front Baseplate Place the second MDF Baseplate across the front half of the Cross Straps as shown in the image below. Place the MDF Baseplate so that the six countersunk holes on the long side are farthest away from the centers of the Cross Straps and the MDF Baseplate is flush with the edges of the Cross Straps. (This should cover the remaining three holes running across the middles of the Cross Straps.
Insert 3x M5x25mm screws into the three countersunk holes as shown in the image above. Turn the screws until they stop but do not tighten. Rear End Plate Carefully lift the rear edge of the Cross Straps/MDF Baseplate assembly and insert a single End Plate as shown in Figure X. Note that the flange on the End Plate will go beneath the Cross Straps and the six holes drilled into the End Plate will match up to the six countersunk holes running along the rear edge of the two MDF Baseplates.
Insert 6x M5x25mm screws into the countersunk holes of the MDF Baseplates and screw them in through the Cross Straps and the End Plates. Turn the screws until they stop but do tighten. PROTIP: Use one of the other hex keys to align the holes – insert a spare hex key through the MDF baseplate and cross strap as shown in the image below and adjust the End Plate until the hex key finds the matching hole. Use several hex keys if necessary.
Front End Plate Carefully lift the front edge of the Cross Straps/MDF Baseplate assembly and insert the remaining End Plate as shown in the image below. Once again, the flange on the End Plate will go beneath the Cross Straps and the six holes drilled into the End Plate will match up to the six countersunk holes running along the front edge of the two MDF Baseplates.
Insert 6x M5x25mm screws into the countersunk holes of the MDF Baseplates and screw them in through the Cross Straps and the End Plates. Turn the screws until they stop but do not tighten. NOTE: As you begin to assemble the machine, you should try to gradually bring the machine into square ― now is a good point to begin this. If you have a level use it to ensure that the table which you are working on is level, then adjust the leveling feet to ensure that the machine base is level as well.
Previous Step Back to Index Welcome Subscribe Index Next Step Carriages Share © Carbide 3D 2020, All rights reserved.
Carbide 3D Step 3 Carriages Layout the Aluminum Rail Extrusions Examine the three Aluminum Extrusions layed out in the photo below. Notice that all 3 are slightly different. WARNING: It is important to place extrusions as shown in the image below! If you do not follow this step, you will have to undo work later in the process. 1. The extrusion labeled Holes , has mounting holes for the Controller in its middle as shown in the image below.
3. The final Extrusion plain will be placed on the right side, running from the front End Plate to the rear End Plate as shown. Preparing the Carriages Remove the three Carriages from their boxes: • Y-Axis Right Assembly box • Y-Axis Left Assembly box • X/Z Assembly box and place them carefully on the MDF Baseplate The X/Z Assembly box also contains two extra packages; place these near the X/Z Carriage as show in the image below.
NOTE: It is recommended that you keep the YAxis Left Carriage on the left and the Y-Axis Right Carriage on the right as shown in the image below. to keep them in their proper orientation with respect to the front of the Shapeoko. However, they can easily be distinguished by examining the side with the bearings; the Y-Axis Left Carriage has the motor’s axle closer to the left side of the Carriage. Likewise, the Y-Axis Right Carriage has the motor’s axle closer to the right side.
XZ Assembly The X Carriage and Z Carriage are shipped together in the same box along with two small bags that contain two springs and the Idler Assembly. The Z Carriage is the smaller of the two carriages shown in the image below. Carefully remove the Z Carriage from its protective wrapping; ensure that the belt is not damaged or removed from its initial installation location. Install Idler The Idler Assembly ships already assembled in the proper order.
Carefully remove the nut while ensuring the remaining components stay on the bolt. Insert the bolt through the slot located at the bottom of the plate shown in the image below. Secure in place by finger-tightening the nut on the opposite side of the X Carriage. Once the idler assembly is through the slot, loosely attach the nut on the backside of the plate. Some adjustability will be required to get the belt in place, so leave this lightly finger tight for the time being.
Align the spindle mount with the bottom set of through holes on the Z-carriage. The carbide logo should go right side up, but the position of the pocketed hole on the spindle mount does not matter (left or right is fine). The fixed pulley location should be on the left side of the plate, as shown in the photo. For further reference: the eccentric nuts will be on the left side as well. NOTE: If you were to install the Z-carriage backwards (with the screws on the right), the Zaxis will operate in reverse.
through the back of the plate and into the rear of the spindle mount. Tighten these screws down at this point in the assembly. Using some thread locker will help keep them secure and reduce the chance of vibration causing the screws to become loose. Z-Carriage Flip the Z Carriage and orient the Z Carriage so it is as shown in the image below. NOTE: The bearings and belt will now be on the underside.
Align the Z-carriage with the bottom of the Xcarriage, making sure the eccentrics on the Zcarriage are positioned on the left side, as shown in the image below. When aligning the carriages, make sure the groove in the V-wheel is aligned with V-rail on the Xcarriage. The wheels will slide up the V, seating evenly and securely on both sides. Examine the four bearings on the Z Carriage and take note of the V-shaped gap between the two black wheels as shown in the image below.
Routing the Belt When the Z Carriage is attached to the rails properly, a portion of the belt should be exiting the top and bottom of the Z Carriage as shown in the image below. Slowly pull the bottom portion of the belt and loop it over the Idler as shown.
The Idler can move up and down in its groove. You may have to loosen the nut to move the Idler. Carefully wrap the upper portion of the belt around the top pulley as shown.
tension on the belt and finger-tighten again so the belt does not come off the Idler. Tension Screw Carefully place the X/Z Carriage on its back (resting on the motor) as shown in the image below. Slide the Z Carriage all the way to the top until it stops at the two posts shown in the image below. Ensure that you have only finger-tightened the Idler Assembly before tightening the Tensioning Screw.
Use the hex wrench to tighten the Tensioning Screw as shown in the image below. As the Tensioning Screw is tightened, it will push on the Idler Assembly. The belt should be tight enough that it doesn’t slip off the Idler and does not flex as the carriage moves up and down. When the belt is tight, use a 4mm hex key and 10mm wrench to tighten the Idler Assembly as shown in the image below. Install Springs Lay the X/Z Carriage on one of its sides as shown in the image below.
Pull up on the spring and attach the other loop to the X Carriage post as shown in the image below. Turn the X/Z Carriage on its other side and attach the second spring in identical manner as shown in the image below. Using the 2x M5x55mm screws, install into spindle mount. Do not tighten at this point, we will secure these screws after we install the spindle later in this guide.
Installing the Y-Axis Left Carriage Locate the bag labeled EXTRUSION that contains 24 M6x12mm button head cap screws. You will also need the 4mm hex key. The X-axis Extrusion Rail is the one with the Shapeoko sticker-label attached to it. Examine this rail and note it has two distinct sides. The V-Rail side, and the square side. NOTE: All of the carriages ride on the V-Rail side of the extrusion.
The Y-Axis Left Carriage will be bolted to the X-Axis Extrusion Rail using four (4x) of the M6x12mm screws. The bearings on the Y-Axis Left Carriage will ride on the V-rail of the left Extrusion Rail; this means the Y-Axis Left Carriage must be bolted to the X-Axis Extrusion Rail with the bearings facing outward (or to the left) and the motor pointing in (or to the right) as shown in the photo below.
Attach the Y-Axis Left Carriage to the X-Axis Extrusion Rail with four (4x) M6x12mm bolts as shown in the image below. Be careful not to crossthread the bolts. Note that the motor will be behind the X-Axis Rail when the Y-Axis Left Carriage is properly attached.
There is no need to tighten the bolts completely. Later in the installation, you will “square” the machine and tighten all bolts. Installing the X/Z Carriage Carefully slide the X/Z Carriage onto the X-Axis Extrusion Rail as shown in the image below. Use the empty carriage boxes to support the rail and be careful not to let the X/Z Carriage slide into the YAxis Left Carriage. Aligning the V-wheels on the X/Z assembly with the V-rail on the X-axis extrusion, slowly slide the assembly onto the rail.
Installing Right Y-Carriage The Y-Axis Right Carriage will be bolted to the XAxis Extrusion Rail using four (4x) of the M6x12mm screws. The bearings on the Y-Axis Right Carriage will ride on the V-rail of the right Extrusion Rail; this means the Y-Axis Right Carriage must be bolted to the XAxis Extrusion Rail with the bearings facing outward (or to the right) and the motor pointing in (or to the left) as shown in the image below.
Attach the Y-Axis Right Carriage to the X-Axis Extrusion Rail with four (4x) M6x12mm bolts as shown in the image below. Be careful not to crossthread the bolts. Note that the motor will be behind the X-Axis Rail when the Y-Axis Right Carriage is properly attached. There is no need to tighten the bolts completely. Later in the installation, you will “square” the machine and tighten all bolts.
Subscribe Share © Carbide 3D 2020, All rights reserved.
Carbide 3D Step 4 Rail System PROTIP: During this stage of the assembly, it is helpful to have another set of hands. The gantry system is large, heavy, and awkward for a single person to handle. Install Left Y Rail Carefully insert the V-shaped edge of the Left Extrusion Rail through the Y-Axis Left Carriage Vgroove bearings as shown in the image below.
Install Right Y Rail Carefully insert the V-shaped edge of the Right Extrusion Rail through the Y-Axis Right Carriage Vgroove bearings as shown in the image below. Position Assembly Move the assembly so the left Y Rail is sitting between the front and rear plates as shown in the image below. PROTIP: If you are having trouble sliding the rails in between the front and rear plates, loosen the screws holding the wasteboard to the end plates. This will provide more room to ‘tilt’ the end plates apart.
The front and back of the extrusions have screw holes tapped for four (4x) M6x12mm screws. These will match up to the holes in the End Plates as shown in the image below. Securing the Left Y Rail You will initially use only two (2x) M6x12mm screws to attach the Left Extrusion Rail. Lifting the rail to align at least one hole from the extrusion to the front plate, insert 1 screw into the front plate, and one screw into the back plate. Only finger thread the M6x12mm screws and do not tighten down completely.
These two screws will support the rail and give us a pivot point to help rotate the right rail into place. Securing the Right Y Rail Move to the right side of the assembly. Using the foam blocks from the Y-Left and Y-Right carriages, support the Y-Right rail as shown in the image below.
You will initially use only two (2x) M6x12mm screws to attach the Right Extrusion Rail. Insert 1 screw into the front plate, and one screw into the back plate. Only finger thread the M6x12mm screws and do not tighten down completely; leave a small gap between screw and plate around 1/16” or 1.5mm.
Completing Rail Assembly Once the Y-Left and Y-Right rails are loosely secured in place, use the remaining twelve (12x) M6x12mm BHCS to completley secure the rails to the baseframe. Do this by installing 3 additional screws into each end of the end plates. Each extrusion should be secured with 4 screws at each end. Do not completely tighten these screws, we’ll need some adjustment later when we begin to square the machine.
Previous Step Back to Index Carriages Subscribe Next Step Index Share © Carbide 3D 2020, All rights reserved.
Carbide 3D Step 5 Belting Installation of Belts Remove the three belts from their bag. Note that the three belts are of identical length. For all three belt installations, the following process will be followed: 1. One end of each belt will be inserted into a belt clip with the teeth down.
from the bottom in the gap nearest the end of the clip as shown in Step 1. 2. The belt is next inserted into from the top to the bottom in the second gap as shown in Step 2. 3. Pull the belt so that 2” returns in the direction of the top portion of the belt. Make certain the teeth of the top and lower sections of belt are interlocked as shown in Step 3.
With the M5x10mm screw installed, the belt clip should be attached to the carriage as shown in the image below. Run the belt (teeth down!) along the X-Axis Extrusion Rail to the Y-Axis Right Carriage. You will need to carefully feed the belt underneath the flanged bearings as shown in the image below.
Ensure that the belt does not twist and that the teeth remain facing down. Use your fingers on both sides of the flanged bearings to feed a portion of the belt up through the flanged bearings as shown in the image below. Push evenly and at the same rate on the belt and a loop of belt should move up between the flanged bearings.
Carefully reach in behind the lower X/Z Carriage motor with the 1.5mm hex wrench, as shown in the image below and pull the loop up and over the XAxis Motor Pulley. Ensure that the belt has not twisted and that the teeth are facing down as the belt is placed over the X-Axis Motor Pulley as shown in the image below.
Feed the free end of the belt into a belt clip. For the bottom portion of the belt, pull through enough so that a ¼” (~6mm) gap exists between the Y-Axis Right Carriage and the belt clip as shown in the image below. Insert a M5x10mm screw through the Y-Axis Right Carriage and into the belt clip.
shown in the image below. The belt should be tight enough to snap against the X-Axis Rail when gently lifted, but do not over-tighten as this could bend and damage the X-Axis Motor Pulley. Left Y-Axis Rail Belt Installation Insert one end of a belt through the belt clip as described above. Ensure that the bottom 2” portion of belt interlocks with the top portion and secure it to the front-left End plate as shown in the image below.
Run the belt (teeth down) along the Left Y-Axis Extrusion Rail as shown in the image below. Using your fingers or the 1.5mm hex wrench, feed a portion of the belt up through the flanged bearings as shown in the image below. Teeth Facing Down Pull enough belt to be fed over the Y-Axis Left Carriage Idler as shown in the image below. Ensure that the belt has not twisted and that the teeth are facing down as the belt is placed over the Idler.
Feed the free end of the belt into a belt clip. For the bottom portion of the belt, pull through enough so that a ¼” gap exists between the left rear End Plate and the belt clip as shown in the image below. Right Y-Axis Rail Belt Installation PROTIP: This is the same process used to install the Y-Left Belt. Insert one end of the remaining belt through the belt clip as described above.
portion and secure it to the front-right End plate as shown in the image below. Run the belt (teeth down) along the Right Y-Axis Extrusion Rail as shown in the image below. Using your fingers or the 1.5mm hex wrench, feed a portion of the belt up through the flanged bearings as shown in the image below. Pull enough belt to be fed over the Y-Axis Right Carriage Idler as shown in the image below. Ensure that the belt has not twisted and that the teeth are facing down as the belt is placed over the Idler.
Feed the free end of the belt into a belt clip. For the bottom portion of the belt, pull through enough so that a ¼” gap exists between the right rear End Plate and the belt clip. Insert a M5x10mm screw through the End Plate and into the belt clip and tighten down.
© Carbide 3D 2020, All rights reserved.
Carbide 3D Step 6 Wiring NOTE: As of July 2017, The Drag Chains come with all wiring pre-installed. Be careful to not pull on the exposed wiring or allow one of the wire end-plugs to be pulled or crushed.
and connecting all of the components to the controller. Install X-Axis Drag Chain Bracket The X-Axis Drag Chain Bracket is the smaller of the 2 stainless steel ‘L’ shaped brackets. Remove the protective film from bracket as shown in the photo below. (The underside of the film is black, the top side is a white/silver color.) Pick one corner of the film up, and pull slowly in a diagonal direction towards the other corner of the bracket.
Install the X-Axis Drag Chain Bracket by loosening the two rear screws on the top of the X plate as shown in the figure below. Note that when looking from the front of the Shapeoko XXL, the two screws are on the right side. The screws only need to be loosened enough to slip the bracket between the screw heads and the plate. Because thread lock is used at the factory to secure the connection, using a pair of pliers (not provided) to grip the standoff, may be necessary.
Installing the Y-Axis Drag Chain Bracket Remove the two top screws holding the motor to the Left Y-Axis Plate as shown below. NOTE: The Y-Axis Plate ships with shorter screws holding the motor to accommodate all three sizes of Shapeoko machines. The longer M5x16mm screws for the XXL are needed to attach the remaining Drag Chain Bracket. The M5x16mm screws can be found in the bag labeled Drag Chain Bracket.
The two M5x16mm screws can be seen protruding through the back of the plate in the image below. Note that nuts have not been added yet. With the two (2x) M5x16mm screws in place, take the remaining Drag Chain Bracket and remove its protective film as shown in the photo below.
Attach the Drag Chain Bracket as shown below and secure tightly with two (2x) M5 nuts using the 8mm wrench. NOTE: The Drag Chain Bracket is mounted with the nuts beneath the longer section of the bracket, not above it.
Installing the Controller The Controller will mount to the Left Y-Axis Rail (when viewed from the front). NOTE: The Left Y-Axis Rail is the rail with the 2 tapped holes in the center and facing left. Using the M6 hex key, remove the cover from the Controller by unscrewing the two (2x) M8 head cap screws found on either side of the cover. Inside is the Controller Board, a bag containing three (3x) rubber grommets (optional during assembly), and two (2x) M6x12mm button head cap screws as shown below.
Orient the Controller Board so the USB and Power ports are facing the REAR of the machine as shown in the photo below. Use the two (2x) M6x12mm screws to attach the Controller Board to the Left YAxis Rail by inserting the screws into the countersunk holes drilled in the aluminum plate and threading them into the rail. Loosely re-install the cover of the controller.
Wiring Harness Installation The Wiring Harness is pre-assembled at the factory for your convenience. All of the cables are routed correctly, and the Drag Chains are spaced the correct distance apart. You only need to attach the Wiring Harness to the Shapeoko XXL and then connect the various wires to their respective ports on the Controller Board. Locate the end of the Y-Axis Wiring Harness with the labeled female connectors, as shown in the photo below.
The Drag Chains will only roll/curl in one direction. It is important to look at the photos and make sure you are connecting the correct ends to the correct locations. Do not connect the wires to the Controller Board at this time. Attach the Y-Axis Drag Chain Use two (2x) M3x12mm flathead screws and two (2x) M3 nylon nuts to attach the Drag Chain to the Y-Axis Drag Chain Bracket as shown below.
Attach the X-Axis Drag Chain Using two (2x) M3x12mm flathead screws and two (2x) M3 nylon nuts, attach the Drag Chain to the XAxis Drag Chain Bracket as shown below. The screws are inserted down through the head of the Drag Chain and through the X-Axis Drag Chain Bracket.
Attaching the two Drag Chains to the brackets will make the Wiring Harness more manageable and the remaining steps of the installation much easier. The free ends of the two Drag Chains will be secured to the rails later in the assembly. Installing the Limit Switches With all of the wires connected and routed back to the controller, you can safely remove the controller cover again.
The Shapeoko XXL ships with three (3x) limit switches. One for the X axis, one for the Y axis, and one for the Z axis. Each limit switch is attached to a twisted-wire pair of black and yellow wires. The switches are pre-installed to their respective plates during the harness assembly in the factory. In this step we will connect those plates to their permanent locations on the machine.
The Z-Axis homing switch plate attaches to the front of the X/Z assembly using four (4x) M5x10mm button head cap screws. Make sure the limit switch is located in the bottom left corner of the plate (when viewed from the front of the Shapeoko XXL) before securing to the standoffs. You can identify the location of the switch by looking for the small hex nut on the outside of the plate.
When routing the Z-Axis Limit Switch wires to the ZAxis Switch, make sure it is behind or below the ZAxis Motor Switch. Look at the photo below for the proper way to route the cable. In the photo below, it is the yellow and black cable. X-Axis Limit Switch Using two (2x) M5x35mm socket head cap screws and 2 1” standoffs, attach the X-Axis Limit Switch to the rear of the X-axis Plate.
Note the orientation of the plate in the photo above. The switch is mounted to the outside of the plate, the screws go through the plate, then spacers on the opposite side. The screws will attach directly to the integrated nuts on the back of the X-Axis Plate as shown below.
Y-Axis Limit Switch The Y-Axis Limit Switch mounts to the Right Y-Axis Carriage. When attaching the switch to the carriage, the switch goes to the OUTSIDE. If placed on the inside, the switch will not activate when the carriage reaches the rear End Plate. Complete the installation by tightening the screws into the integrated threaded holes. When tightening the screws, insure the plate stays roughly perpendicular to the left Y-Axis Rail.
software configuration. After assembly is complete, head over to the Enable Homing Article to configure your software. Enable Homing Article NOTE: if you are having problems with your switches, please refer to the Homing Switch Troubleshooting article for help Homing Switch Troubleshooting Motor Extensions Each cable in the Wiring Harness has been labeled with its proper connection. The connectors are polarized and can only be connected one way.
Organizing all the wires is not necessary at this point and will be taken care of in the ‘Tidying Up’ section at the end. The X and Z motors on the rear of the gantry will be connected first. Leave their wire leads wrapped as you found them in the package, we will not need the extra length for this installation. The Z-Axis is the TOP motor, and the X-Axis is the BOTTOM motor. Connect each to their respective extensions shown in the image below.
The Y2 motor is mounted on the RIGHT Y-Axis Carriage (when viewed from front). This cable will stretch ¾ of the way across the back of the gantry and connect to the Right Y-Axis Carriage motor as shown below.
Leave the cables hanging down at this point; all cables will be routed and secured in the following assembly section. The Y1 motor is mounted to the Left Y-Axis Carriage (when viewed from front). Connect the wires as shown in the image below. Route the wires/cables through the first port on the bottom (the hole closest to the rear of the Shapeoko XXL) of the Controller Lid as shown in the image below.
The easiest order is as follows: 1. Insert the three (3x) Limit Switch Cables (the black and yellow twisted wires) through the hole first. 2. Insert each of the motor extensions individually through the hole. They will fit, but need to be routed through carefully at the center of the hole. Do not attempt to insert two or more extensions at the same time. Connecting the Limit Switches Each of the three limit switch cables are labeled (X, Y, and Z) at the factory prior to shipping.
near the 10-pin connector (white) running across the top right corner of the controller. From left to right, the X-Axis Limit Switch black-andyellow twisted wires should be plugged in first, followed by the Y-Axis Limit Switch wires, and then the Z-Axis Limit Switch wires. Four metal posts will remain as shown in the image below. Connecting the Stepper Motors The motor extension wires have connectors that are polarized and can only be connected properly when inserted as shown in the above image.
Each port is labeled along the bottom of the Controller Board. The labels are directly beneath each of the four ports. From left to right, the motors should be attached in the following order: Z, Y1, Y2, X.
© Carbide 3D 2020, All rights reserved.
Carbide 3D Step 7 Cleaning Up Secure Y-Axis Drag Chain Align the free end of the Y-Axis Drag Chain approximately 1” behind (towards the rear of the machine) the Controller Box as shown in the photo below.
Chain will rest. Cleaning the rail will provide a better contact point for the VHB tape used to secure the Drag Chain to the rail. Use one of the two provided VHB tape squares to secure the free end of the Drag Chain. Peel one side of the tape away and press it firmly on the rail where the Drag Chain will rest as shown in the image below. Peel off the upper side of the tape. Lift the Drag Chain slightly to clear the tape and center the free end above the tape.
NOTE: It is recommended you not stress this tape for at least three minutes after the initial application. Secure X-Axis Drag Chain Using the remaining alcohol wipe, clean the X-Axis Rail approximately three (3) inches from the Left YAxis Carriage. Using the same method to secure the Y-Axis Drag Chain, clean the X-Axis Rail with the alcohol wipe, allowing to dry if alcohol is still present.
Bundle Cables Secure the remaining wires with zip ties to reduce clutter. Start by pressing all of the wires that cross over the left Y-Axis Carriage down through the cutout as shown in the photo below. Insert the limit switch cables (black and yellow) first, then the stepper extensions (gray) on top of those.
Adding a zip tie to either side of the cutout will help keep your cables in place and prevent them from coming free from the cutout. Secure X/Z Wires The bundle of wires on the back of the X/Z Assembly can be secured to the back of the X-Axis Motor using one of the self-adhesive tie downs provided in the kit. You can see a portion of the self-adhesive tie down attached to the back of the bottom motor in the image below.
Securing Gantry Wires Moving across the back of the gantry, secure four self-adhesive zip tie mounts to the rails in the positions shown in the image below.
Measuring from the motor mounted on the Right Y-Axis Carriage (when viewed from the back of the Shapeoko XXL), the tie downs should be positioned at the following locations (in inches from the motor): 4”, 14”, 26”, 36” Using the image above as a reference, zip tie all of the cables at each of the locations shown above. Trim down each of the zip tie ends with a pair of flush cut pliers. Be careful not to cut or knick the cables, as they are very sensitive to damage.
Peel and apply the warning decal to the right side of the X-Axis rail, as shown PROTIP: Make certain that you record your Shapeoko XXL’s serial number in a secure location.
Previous Back to Step Index Wiring Index Subscribe Next Step Spindle Installation Share © Carbide 3D 2020, All rights reserved.
Carbide 3D Step 8 Spindle Installation The Shapeoko XXL supports the Dewalt DWP611 trim router and the Makita RT0701c trim router. Below you will find the installation steps for both these options. NOTE: For other spindle options, and more information about the spindle mount, see the support page. Makita Trim Router Carefully remove the Makita Compact Router from its packaging. You will only need the Compact Router, not the included straight guide or other accessories.
Remove the Trimmer Base by releasing the black latch. This will unlock the Trimmer Base and allow you to slide it off the Compact Router. Install the removable bushing into the spindle mount as shown in the following image.
With the removable bushing installed into the spindle mount, insert the Router into the Spindle Mount by pushing the Z-axis carriage DOWN until it has reached the bottom of its travel. This will provide enough clearance to install the router into the spindle mount.
The spindle should be fully seated in the mount. Slide the spindle down until the top of the body, just below where it begins to taper, is touching the top of the bushing. Slowly raise the Z-axis to its full upright position. Fully secure the router into the mount by tightening the M5x55mm screws into the front of the spindle mount as shown in the image below.
Dewalt Trim Router NOTE: The Makita bushing adapter is not required with the Dewalt Trim Router. The spindle mount is designed for the 69mm body of the Dewalt, so no bushing is required for a proper fit. Carefully remove the Dewalt Compact Router from its packaging. You will only need the Compact Router and tools, not the included straight guide or other accessories.
Remove the Base by pulling the black latch. This will unlock the base and allow you to slide it off the Compact Router by pulling it towards the end. With the base removed, unscrew the plastic collar with the dewalt logo. This is not required when using on the Shapeoko XXL.
To install the router into the Shapeoko XXL, you must push DOWN on the Z-axis carriage until it has reached the bottom of its travel. This will provide enough clearance to install the router into the spindle mount. WARNING: Be careful not to let go of the Z-axis carriage when you are pushing it down to install the spindle. The carriage is spring loaded and if released with slam violently against the end posts.
Slowly raise and then release the Z-axis carriage. With the spindle in the full up position, fully tighten the M5x55mm screws into the spindle mount as shown in the image below.
Routing Power Cable Push the X/Z Carriage (with Compact Router installed) all the way to the right (away from the Controller Box). Push the router down, and pull up on power cord until it reaches the top left standoff of the Z-axis limit switch plate. The Compact Router power cable will be routed to the right side of the Shapeoko XXL (away from the Controller Box).
Use the adhesive tie down on the back of the X-Axis motor to secure the power cord. Route the power cable back to the right side of the Shapeoko XXL and through the slot in the Y-Right carriage.
Previous Back to Step Index Tidying Up Index Subscribe Next Step Squaring the Machine Share © Carbide 3D 2020, All rights reserved.