Cardio Theater xTV-9TM Transmitter Installation and Maintenance Guide Input POWER S ig n a l xTV8TM Trans mitter T r a n s m it t e r Channel P rogram ®
Important Safety Guidelines Always follow basic safety precautions when using this equipment to reduce the chance of injury, fire, or damage. Read all instructions in this guide before installing and using the equipment. Follow any labels on the equipment. • Use the power adapter provided with the equipment. Plug the power adapter into an appropriate, grounded power outlet as marked on the equipment. • Route power cables so that they are not walked on or pinched by items placed upon or against them.
Product Recycling and Disposal This equipment must be recycled or discarded according to applicable local and national regulations. Product labels, in accordance with European Directive 2002/96/EC concerning waste electrical and electronic equipment (WEEE), determine the framework for the return and recycling of used equipment as applicable throughout the European Union. The WEEE label indicates that the product is not to be thrown away, but rather reclaimed upon end of life per this Directive.
Table of Contents Important Safety Guidelines .................................................1 Safety Approval ............................................................................... 1 Product Recycling and Disposal ................................................. 2 Regulatory Information .................................................................. 2 Before You Begin .....................................................................4 Obtaining Service ....................................
Before You Begin With the Cardio Theater® xTV wireless system, fitness facilities can add entertainment to exercise rooms without the high cabling costs usually associated with entertainment systems. The xTV wireless system gives people the choice of listening to music, radio, or programs shown on TVs while they exercise. The person simply plugs a stereo headphone into a receiver, selects the desired entertainment, and exercises while listening to high-fidelity sound.
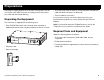
Preparations Remember to read and follow the instructions in this guide. If you do not install the xTV-9TM Transmitter according to these instructions, you could void the Limited Warranty.
Installation Requirements Review the following requirements before installation: • To ensure the best range and audio quality, select a location without any major internal obstructions, such as metal support posts, between the transmitter’s antenna and receivers installed on the exercise equipment. The antenna and receivers should also be installed so they are within 150 feet (50 meters) of each other and are in direct line of sight.
Table 2: Mode 3, xTV U.S., 32 channels Table 3: Mode 2, Australia LCS (Cardio), 24 channels Channel Frequency 1 905.00 19 907.60 1 916.20 13 920.60 2 906.20 20 908.80 2 917.40 14 921.60 3 923.60 21 910.00 3 918.00 15 923.20 4 924.40 22 911.20 4 919.40 16 925.80 5 925.60 23 912.40 5 920.20 17 915.80 6 910.60 24 913.80 6 922.40 18 917.00 7 911.80 25 915.00 7 924.00 19 918.40 8 913.40 26 916.20 8 925.00 20 919.80 9 914.20 27 917.40 9 922.
• The transmitter uses Automatic Level Control (ALC) circuitry to provide consistent sound levels to people using the receivers. With this feature, once the sound level on TVs and other audio components have been adjusted, the wireless system should not experience sound fluctuations, which have been inherent in other types of entertainment systems. To support this feature, the sound level from the connected TV and audio components must be set to a reasonable, median level.
Installing the Transmitter 1. Determine where you will install the transmitter and antenna. An RG-58 or RG-8 coax cable connects the antenna to the transmitter. Junction You can mount the antenna up to 25 feet (8 meters) from the transmitter: using a higher quality (lower loss) cable will allow a greater distance between the antenna and transmitter.
Programming the Transmitter 1. Determine the channel number you want to assign to each card in the transmitter. Each card requires a unique channel number. Assign channels in sequential order to make the wireless system easier to use. See Table 6. Note: Table 6 provides blank columns that installing technicians can use to note setup information.
Connecting Audio to the Transmitter 1. Connect one end of the RCA audio cable to the TV or audio source. Observe and follow the color code of the RCA audio cable connectors. If available, connect the RCA cable to the Line Audio Output connector on the TV or audio source. The Line Audio Output connector is recommended because it always provides a consistent sound level and cannot be modified by users. 2. Connect the other end of the RCA audio cable to the transmitter.
Maintaining and Troubleshooting In general, the xTV-9TM Transmitter requires little maintenance. Refer to Cleaning the Transmitter for information. Adding or Replacing Channel Cards Over time, you may find that you want to add one or more audio components to the transmitter. Each additional audio component will need its own channel card. The xTV-9TM Transmitter can have up to 12 channel cards installed, supporting up to 12 audio components.
7. If you plan to replace a card, gently remove that card. 8. If you plan to add one or more cards, remove the jumpers for the slots where you plan to install additional cards (see the existing card configuration for reference as needed). 9. If you plan to add one or more cards, remove the plugs associated with each slot that will be used. 10. Install the new channel card(s) into the appropriate slot(s). Make sure that the connector is fully seated. 11.
Problem Noisy sound Single receiver What to Do Problem • Make sure there are no major internal obstructions, such as metal support posts, between antenna and receiver. No sound What to Do Single receiver • Otherwise, most likely problem with receiver; see Maintenance and Troubleshooting in receiver guide. All receivers • Make sure the antenna and receivers are installed so they are within 150 feet (50 meters) of each other.
Limited Warranty PLEASE READ THESE WARRANTY TERMS AND CONDITIONS CAREFULLY BEFORE USING YOUR CARDIO THEATER PRODUCT. BY USING THE EQUIPMENT, YOU ARE CONSENTING TO BE BOUND BY THE FOLLOWING WARRANTY TERMS AND CONDITIONS. Limited Warranty. Precor Incorporated (“Precor”) warrants all new Cardio Theater products to be free from defects in materials and manufacture for the warranty periods set forth below. The warranty periods commence on the invoice date of the original purchase.
Disclaimer and Release. The warranties provided herein are the exclusive warranties given by Precor and supersede any prior, contrary or additional representations, whether oral or written. ANY IMPLIED WARRANTIES, INCLUDING THE WARRANTY OF MERCHANTABILITY OR FITNESS FOR A PARTICULAR PURPOSE THAT APPLY TO ANY PARTS DESCRIBED ABOVE ARE LIMITED IN DURATION TO THE PERIODS OF EXPRESS WARRANTIES GIVEN ABOVE FOR THOSE SAME PARTS. PRECOR HEREBY DISCLAIMS AND EXCLUDES THOSE WARRANTIES THEREAFTER.
® Cardio Theater is a registered trademark, and Cardio Theater PVS and Cardio Theater Quick Change Headphone Jack are trademarks of Precor Incorporated. www.cardiotheater.com A Division of Precor Incorporated 20031 142nd Ave NE Woodinville, WA USA 98072-4002 NOTICE: Due to continuing advancements in technology, Precor Incorporated reserves the right to make changes in hardware, packaging, and any accompanying documentation without prior written notice.