
User's Guide


CS 7600_User Guide (8J4071)_Ed07 65
To clear the scanner’s memory, follow these steps:
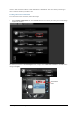
1 Start the CS 7600 image Acquisition interface.
2 Open the exam acquisition to which the images belong, or alternatively create a new temporary exam
acquisition in which you will save these images.
3 Select the scanner; it is indicated by the following full memory/error state icon:
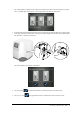
4 In the Scanner List, select the desired scanner and click the small arrow.
The list of No ID images for this scanner is displayed.
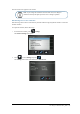
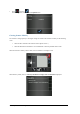
5 In the scanner memory panel select the image you wish to clear, and drag to the desired frame in the
images area template or delete by dropping to the Images Gallery.
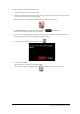
6 To delete all the images in the Images Gallery, click
7 To confirm, click YES.
All the images are removed from the Images Gallery.
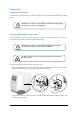
The scanner icon becomes highlighted green
indicating that the scanner is ready for use.