R22 220-240V ~ 50Hz 1Ph Harmony Floor / Under Ceiling Split Air Conditioners 53VMCT 18C-24C-30C-36C Cool Only 53VMCT 18H-24H-30H-36H Heat Pump O W N ER’S MANUAL Carrier is committed to continuously improving its products according to national and international standards to ensure the highest quality and reliability standards, and to meet market regulations and requirements. All specifications subject to change without prior notice according to Carrier policy of continuous development.
20-240V ~ 50Hz 1Ph R22 Harmony Floor / Under-Ceiling Split Systems IAQ LE Efficient AMS Smart LCD Wireless Control Auto Mode 3 Min.
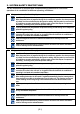
Thank you for selecting Carrier Air Conditioner Harmony split system is the optimum air conditioning solution for places which require floor or under-ceiling installations, elegant appearance and ultimate comfort combined with efficient and quiet operation, optimum air distribution, and efficient Indoor Air Quality (IAQ). Harmony is the very latest in slim line technology. CONTENTS PAGE NO. 1. GENERAL INFORMATION 1 2. SYSTEM SAFETY PROTECTIONS 2 3. TIPS OF ENERGY SAVING AND OPTIMUM COMFORT 3 4.
1. GENERAL INFORMATION PRECAUTIONS Installing and servicing of air conditioning equipment can be hazardous due to system pressure and electrical components. Only trained and qualified service personnel should install or service this equipment. Untrained personnel can perform basic maintenance function such as cleaning coil and filters. Trained service personnel should perform all other operations.
2. SYSTEM SAFETY PROTECTIONS The air conditioner is equipped with complete safety protections to ensure safe operation of air conditioner at different operating conditions : 2.1 Safety protections for Cool Only System Auto Restart Feature with backup memory. When the power failure is happened during the air conditioner operation, the microprocessor of printed circuit board will memorize the operation setting.
3. TIPS OF ENERGY SAVING AND OPTIMUM COMFORT In Summer • • Keep room temperature to comfort levels. Don’t remain in direct contact with cold air for a long period. This is harmful to health. • Don’t wait until it is too hot. Turn the air conditioner for cooling before that. • Don’t exaggerate on the temperature intensity, too cold. Extreme temperatures are harmful to your health and waste energy. In Winter • • Keep room temperature to comfort levels.
TIPS OF ENERGY SAVING AND OPTIMUM COMFORT (Cont.) Ensure a uniform air circulation in the room to be air conditioned Clean periodically air filter of indoor unit Air Filter every two weeks to assure adequate air Return grille circulation and maximum cooling or heating efficiency. Periodic service and maintenance of the air conditioner or upon customer request through carrier or carrier authorized dealer service center.
4. SPLIT SYSTEM DESCRIPTION Sizes 18 - 24 Indoor Unit 6 12 3 7 8 4 5 Outdoor Unit 9 Sizes 30 - 36 7 3 1 2 6 Indoor Unit 10 8 4 Outdoor Unit 5 9 1: 2: 3: 4: 5: Remote control signal receiver. Operating status leds. Supply air flap. Air return grille. Air filter ( behind return grille ). 6: 7: 8: 9: Supply air outlet. Characteristics nameplate. Refrigerant piping lines and electrical cables. Condensate drain line.
5. CONSIDERATIONS FOR REMOTE CONTROL 5-1 HOW TO INSERT BATTERIES : (a) Remove the cover of battery compartment at the back of the remote control by pressing the tab toward outside, in the direction of the arrow. (c) Press the button (at the front of remote control) with an object not sharp to operate the remote control. (b) Mount two batteries size AAA 1.5 Volt supplied with the remote control. Then close the cover of the battery component.
6. DESCRIPTION OF LEDS DISPLAY AND EMERGENCY BUTTON INDOOR UNITS 18 - 24 1 : Green Led 2 : Yellow Led 3 : Red Led 4 : Remote control signal receiver 5 : “Emergency” button Indoor unit LED’s • GREEN LED (1) shows the following conditions: - Fault codes (diagnostic); - During normal operation, the LED is lit. Once a failure occurs, the LED flashes at intervals of 0.5 seconds. The fault code is deduced from the number of times the LED flashes. Between one flash cycle and the next a pause of 5 seconds elapses.
DESCRIPTION OF LEDS DISPLAY AND EMERGENCY BUTTON (Cont.) INDOOR UNITS 30 - 36 1 : Green Led 2 : Yellow Led 3 : Red Led 4 : Remote control signal receiver 5 : “Emergency” button Indoor unit leds • GREEN LED (1) shows the following conditions : - Fault codes (diagnostic); - During normal operation, the LED is lit. Once a failure occurs, the LED flashes at intervals of 0.5 seconds. The fault code is deduced from the number of times the LED flashes.
7. USE OF REMOTE CONTROL CLOCK ADJUSTING FUNCTION Initial Setting or the Clock When batteries are inserted in the remote control, the clock panel will display ‘’12:00’’ and being to flash. Setting the clock Before you start operating the air conditioner, set the clock of the remote control using the procedures given in this section. The clock display on the remote controller will show the time regardless of whether the air conditioner is in use or not. 1.
USE OF REMOTE CONTROL (Cont.) COOL MODE START 1. Press MODE button to select COOL mode on the remote control display. 2. Press TEMP buttons or to select the set temperature on the remote control display. Set desired temp. between 17°C and 30°C. 3. Press FAN SPEED button to select the desired fan speed on the remote control display. 1 4 3 4. Press ON/OFF button to start the air conditioner. ON symbol appears on the remote control display.
USE OF REMOTE CONTROL (Cont.) HEAT MODE START 1. Press MODE button to select HEAT mode on the remote control display. or to select the set 2. Press TEMP buttons temperature on the remote control display. Set desired temp. between 17°C and 30°C. 3. Press FAN SPEED button to select the desired fan speed appears on the remote control display. 1 4 3 4. Press ON/OFF button to start the air conditioner. ON symbol appears on the remote control display.
USE OF REMOTE CONTROL (Cont.) AUTO MODE START 1. Press MODE button to select AUTO mode on the remote control display. or to select the 2. Press TEMP buttons set temperature on the remote control display. Set desired temp. between 17°C to 30°C . 1 4 3 3. Press FAN SPEED button to select the desired fan speed appears on the remote control display. 4. Press ON/OFF button to start the air conditioner. ON symbol appears on the remote control display.
USE OF REMOTE CONTROL (Cont.) DRY MODE START 1. Press MODE button to select DRY mode on the remote control display. or , to select the 2. Press TEMP buttons set temperature the remote control display. Set desired temp. between 17°C to 30°C . 1 3 3. Press ON/OFF button to start the air conditioner. appears on the ON symbol remote control display. OPERATION led will illuminate on the display panel of indoor unit.
USE OF REMOTE CONTROL (Cont.) FAN ONLY MODE START 1. Press MODE button to select FAN mode on the remote control display. 2. Press FAN SPEED button to select the desired fan speed on the remote control display. 3. Press ON/OFF button to start the air conditioner. 1 3 2 appears ON symbol on the remote control display. OPERATION led will illuminate on the display panel of indoor unit. FAN ONLY mode starts immediately. STOP If you want to stop the air conditioner, Press ON/OFF button again.
USE OF REMOTE CONTROL (Cont.) SWING FUNCTION Press button SWING repeatedly to choose the following flap : The louver will continuously swing up and down. “Swing” always assures optimal even air distribution in the room. Swing Range COOL HEAT • In Cool or Dry or Fan mode, the louver will swing in cooling range. • In Heat mode, the louver will swing in heating range.
USE OF REMOTE CONTROL (Cont.) SLEEP Function HEALTHY SLEEP TIMER FUNCTION Sleep function is useful when you go to sleep. When Sleep function is activated, the air conditioner automatically controls the selected temperature and consequently controls the room temperature to avoid overcooling or overheating and to have comfortable and healthy sleep.
USE OF REMOTE CONTROL (Cont.) TIMER ON FUNCTION ( Off → Start Operation ) TIMER ON function is useful when you want to start automatically the air conditioner at a desired setting time when you wake up in the morning or when you return home. Example: To automatically start the air conditioner at 6:00 in the morning Proceed with following steps : (1) Press TIMER button until the remote control display shows. TIMER ON indicator and the last setting time which is flashing.
USE OF REMOTE CONTROL (Cont.) TIMER OFF FUNCTION ( On → Stop Operation ) TIMER OFF function is useful when you want to stop automatically the air conditioner at a desired setting time after you go to bed. Example : To automatically stop the air conditioner at 23:00 in the evening proceed with the following steps : (1) Press TIMER button until the remote control display shows.
USE OF REMOTE CONTROL (Cont.) COMBINED TIMER ON → TIMER OFF FUNCTION ( Off → Start Operation → Stop Operation ) You can use this setting to automatically start operation of the air conditioner before you wake up and automatically stop it after you leave the home. Example: If you want to start operation of the air conditioner at 6:00 AM the next morning, and stop at 8:00 AM proceed as follows: Start Stop Off Set 6:00 8:00 1.
USE OF REMOTE CONTROL (Cont.) COMBINED TIMER OFF → TIMER ON FUNCTION ( On → Stop Operation → Start Operation ) You can use this setting to automatically stop the air conditioner after you go to sleep and start it automatically again in the morning when you wake up or you return home.
USE OF REMOTE CONTROL (Cont.) RESET Function F/C Function When you press the recessed RESET button, all current settings are cancelled and return to original factory settings. • The clock time “12:00” will flash • The mode displays “AUTO” • The fan speed displays “AUTO” • The temperature displays “24” Note : You will need to reprogram the clock setting after Pressing RESET button Used to select / display temperature settings in either “ Celsius ” or Fahrenheit.
8. AIR FILTERS CLEANING WARNING: It is necessary to stop the air conditioner and disconnect the power supply before cleaning air filters. - The air filters supplied with the unit are high-efficiency washable and recyclable filters. To establish, how frequently these should be cleaned, the operating conditions must be taken in to account. - REMOVAL OF AIR FILTERS FOR CLEANING: - Indoor Units 18 - 24 Indoor Units 30 - 36 To remove air filters To remove air filters 1.
9. INDOOR UNIT CLEANING Turn the unit off and switch the mains supply off. Use only a clean, damp and soapy cloth. Do not pour any liquids on the unit. Do not use flammable liquid, solvents or abrasive powders: these can damage the casing. Avoid any contact with sources of heat, as hot air can damage the unit casing. Clean the infrared control using a damp cloth.
10. PERIODICAL CHECKS WARNING: It is necessary to stop the air conditioner and disconnect the power supply before performing service and maintenance operations. For a good operation of the air conditioner it is recommended to carry out periodic service and maintenance of the air conditioner or upon customer request through Carrier or Carrier authorized dealer. Recommended service and maintenance works and intervals may vary depending on the installation environment, e.g. dusty zones, etc.
12. OPERATION TIPS The following events may occur during normal operation of the air conditioner: 1. A slight white mist (water vapor)coming out from the indoor unit during cooling A white mist may generate due to a large temperature difference between air inlet and air outlet on COOL mode in an indoor environment that has a high relative humidity. The cool air from the indoor unit is coming into contact with the room air.
13. TROUBLE SHOOTING TROUBLE After batteries have been placed into the remote control, the display is not lit. When pressing the recessed clock adjustment button, hour figures on display do not flash. When pressing any button, all symbols appear on display. REASON Batteries are exhausted or have the wrong polarity. ACTION Replace batteries or check polarity. Recessed button has not been pressed correctly.
TROUBLE SHOOTING (Cont.) TROUBLE REASON Air conditioner will not start. Main supply switch is OFF Fuses or main switch are blown Protection against frequent compressor cycling is ON Selected temperature is higher than the room temperature in the cooling mode (or lower in the heating mode). Air conditioner is not supplying Air flow cannot circulate freely enough cooling. Dirty filters reduce air quantity circulating. Doors and/or windows are open.
Harmony 18K - 24K 30K - 36K Floor / Under-Ceiling Split Systems 2 1 3 Wireless Remote Control AUTO COOL DRY HEAT FAN 5 4 9 SET TEMP. o Display of Remote Control CLOCK TIMER ON TIMER OFF SPEED AUTO LOW MED HIGH 6 7 3 ON/OFF indicator 4 SET TEMP.
Harmony Floor / Under-Ceiling Split Systems 18K - 24K 30K - 36K Wireless Remote Control Control Buttons 1 MODE selection button 2 Decrease temperature button 3 Increase temperature button 4 FAN SPEED selection button 5 ON/OFF button 6 SWING horizontal flap button 7 AIR DIRECTION horizontal flap button 8 SLEEP function button 9 CLOCK adjusting button 10 TIMER ON or TIMER OFF function button 11 CANCEL TIME function button 12 LED DISPLAY function button 13 RESET function button 14 F/C fu