Cinema 11a o o o o o o o o o o o o o o o o o o o o o o o o o o o o o o o o o o o o o o o o o o o o o o o o o o o o o o o o o o o o o o o o o o o o o o o o o o o o o o o o o o o OWNER’S MANUAL HD Surround Sound Processor NOTE: Before installing your new component, please read this manual carefully as it will inform you of the product specifications, proper installation and correct operating procedures for your unit.
TABLE OF CONTENTS Important Safety Instructions .......................................................... 3 Welcome Thank You ............................................................................................ Product Features ................................................................................... Unpacking and Installation ..................................................................... Format Descriptions ..........................................................................
TABLE OF CONTENTS Set Zone 2 Input ............................................................................. 44 Set Zone 2 Volume .......................................................................... 44 Advanced Settings ................................................................................ 45 Set Password ........................................................................................ 45 HDMI Audio Out .............................................................................
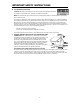
IMPORTANT SAFETY INSTRUCTIONS WARNING: To reduce the risk of fire or electric shock, do not expose this appliance to rain or moisture. The lightning flash with arrowhead symbol within an equilateral triangle is intended to alert the user to the presence of un-insulated dangerous voltage within the product’s enclosure that may be of sufficient magnitude to constitute a risk of electric shock to persons. CAUTION: To reduce the risk of electric shock, do not remove the cover.
IMPORTANT SAFETY INSTRUCTIONS 14. LIGHTNING: For added protection for the unit during a lightning storm, or when it is left unattended and unused for long periods of time, unplug it from the wall outlet and disconnect the antenna or cable system. This will prevent damage to the unit due to lightning and power line surges. 15.
IMPORTANT SAFETY INSTRUCTIONS 26. FCC INFORMATION FOR USER: CAUTION: ANY changes or modifications not expressly approved by the party responsible for compliance could void the user's authority to operate the equipment. NOTE: This equipment has been tested and found to comply with the limits for a Class B digital device pursuant to Part 15 of the FCC Rules. These limits are designed to provide reasonable protection against harmful interference in a residential installation.
WELCOME THANK YOU Congratulations on becoming a Cinema 11a owner! We, at Cary Audio Design, would like to thank you for purchasing the new Cinema 11a HD Surround Sound Processor. The Cinema 11a is the latest generation of our award-winning surround sound processors. The Cinema 11a is the ultimate in surround sound processors. Utilizing the Cirrus Logic CS49700 series chipset and HDMI v1.
WELCOME PRODUCT FEATURES The Cinema 11a is designed as an “audio only” surround sound processor. With the addition of the new Cirrus Logic CS49700 series chipset and HDMI v1.3, the new Cinema 11a has the ability to properly decode and playback both the raw bit stream and lossless linear PCM signals from all of the high resolution audio formats available today such as Dolby True HD, Dolby Digital Plus, DTS HD High Resolution Audio, and DTS HD Master Audio.
WELCOME UNPACKING AND INSTALLATION This section describes the unpacking and installation procedures for your new component. Unpacking All Cary Audio Design shipping cartons have been specially designed to protect their contents and special care has been taken to prevent damage under normal shipping conditions. Mishandling should be evident upon inspection of the shipping container. If shipping damage is found after visual inspection, take care not to destroy the evidence.
WELCOME dts-HD DTS-HD High Resolution Audio can deliver up to 7.1 channels of sound that is virtually indistinguishable from the original. DTS-HD High Resolution Audio delivers audio at high constant bit rates superior to standard DVDs – 6.0 Mbps on Blu-ray discs and 3.0 Mbps on HD-DVD to produce outstanding sound quality. It is capable of delivering up to 7.1 channels at 96k sampling frequency/24 bit depth resolution.
WELCOME DTS, DTS-ES Extended Surround, and Neo:6 are registered trademarks of Digital Theater Systems, Inc. DTS-ES Extended Surround is a new multi-channel digital signal format developed by Digital Theater Systems Inc. While offering high compatibility with the conventional DTS Digital Surround format, DTS-ES Extended Surround greatly improves the 360-degree surround impression and space expression thanks to further expanded surround signals.
WELCOME master, unlocking the true high-definition entertainment experience on next-generation discs. When coupled with high-definition video, Dolby TrueHD offers an unprecedented home theater experience that lets you enjoy sound as stunning as the high-definition picture. Manufactured under license from Dolby Laboratories. Dolby and the double-D symbol are trademarks of Dolby Laboratories.
WELCOME Dolby Digital EX creates six full-bandwidth output channels from 5.1-channel sources. This is done using a matrix decoder that derives three surround channels from the two in the original recording. For best results, Dolby Digital EX should be used with movies soundtracks recorded with Dolby Digital Surround EX.
SPECIFICATIONS The Cinema 11a is designed for long-term stability in virtually any home operating situation. However, if the unit is operated outside the parameters outlined in this owner's manual, damage may result. Please read this manual carefully before putting your new Cinema 11a processor into operation. The following section describes the Cinema 11a’s basic specifications. The specifications are subject to change without notice or obligation. AUDIO INPUTS / AUDIO OUTPUTS ............................
SPECIFICATIONS ........................................................................................................................................................................... Headphone Output 100mW into 32 Ohms at 0.2% THD+N ........................................................................................................................................................................... Volume Control Range Main - -90.0 dB to +15.5 dB (1.0 dB increments) Zone 2/Headphone - -90.
SPECIFICATIONS S/N Ratio (ref 2.0 Vrms) Analog - Direct Inputs Analog - DSP Inputs at 24/96 Digital Inputs at 24/96 108 dB 105 dB 107 dB ........................................................................................................................................................................... IMD (CCIF at 15 kHz) Analog - Direct Inputs Analog - DSP Inputs at 24/48 Digital Inputs at 24/48 0.001% 0.001% 0.001% ................................................................................
SPECIFICATIONS CONTROL ........................................................................................................................................................................... RS-232 Interface Connection Pinout (Statement DI side) Baud Rate Configuration DB-9F, straight-wired Pin 2: Tx, Pin 3: Rx, Pin 5: Ground 57600 8 data bits, 1 stop bit, no parity bits, flow control (RTS, CTS, NONE) ....................................................................................................
CONTROLS AND DISPLAYS FRONT PANEL 1 15 13 14 12 11 < SETUP Cinema 11a + 192kHz/24 bit D/A Converter Surround Sound Processor ENTER < POWER AM/FM HD RADIO < PRESET > 1 2 3 4 5 6 2 3 8 HDMI 1 HDMI 2 7.1 IN PRO LOGIC IIx MASTER VOLUME SUR. MODE NEO:6 4 5 7 6 CES 7.1 MODE INPUT TUNER 1 7 8 9 10 1. POWER • Press once to turn the power ON. • Press again to turn the power OFF. The Cinema 11a will enter STANDBY and the blue POWER LED will light. 2.
CONTROLS AND DISPLAYS 1 15 13 14 12 11 < SETUP Cinema 11a + 192kHz/24 bit D/A Converter Surround Sound Processor ENTER < POWER AM/FM HD RADIO < PRESET > 1 2 3 4 5 6 2 3 8 HDMI 1 HDMI 2 7.1 IN PRO LOGIC IIx MASTER VOLUME SUR. MODE NEO:6 4 5 7 6 CES 7.1 MODE INPUT TUNER 1 7 8 9 10 11. MASTER VOLUME KNOB • Use this knob to adjust the overall sound level. 12. INFRARED RECEIVING SENSOR WINDOW • This window receives infrared signals from the remote control. 13.
CONTROLS AND DISPLAYS REAR PANEL 19 17 18 16 15 2 HDMI 1 INPUT HDMI 2 INPUT AUTO SETUP MIC- IN ZONE 2 DIGITAL OUT AM LOOP 3 4 5 6 7 9 10 12 11 DIGITAL INPUT 1 ANTENNA FM 75 13 14 1 1 2 IR INPUT ZONE RS 232 8 8 2 3 TRIGGERS AC POWER [ ] 117V 50/60 Hz [ ] 220V 50/60 Hz 7.1 PREAMPLIFIER OUTPUT HDMI OUTPUT 1 2 3 4 5 6 7 8 FL SL CEN SBL FL SL CEN SBL FL SL FR SR CEN SBL LEFT RIGHT LEFT FR RIGHT ANALOG AUDIO INPUT 1 SR SW ANALOG 7.
CONTROLS AND DISPLAYS 19 17 18 16 15 2 HDMI 1 INPUT HDMI 2 INPUT AUTO SETUP MIC- IN ZONE 2 DIGITAL OUT AM LOOP 3 4 5 6 7 9 10 12 11 DIGITAL INPUT 1 ANTENNA FM 75 13 14 1 1 2 IR INPUT ZONE RS 232 8 8 2 3 TRIGGERS AC POWER [ ] 117V 50/60 Hz [ ] 220V 50/60 Hz 7.1 PREAMPLIFIER OUTPUT HDMI OUTPUT 1 2 3 4 5 6 7 8 FL SL CEN SBL FL SL CEN SBL FL SL FR SR CEN SBL LEFT RIGHT LEFT FR RIGHT ANALOG AUDIO INPUT 1 SR SW ANALOG 7.
CONTROLS AND DISPLAYS REMOTE CONTROL This section explains how best to use the remote control to set up and operate the Cinema 11a. 1. 2. POWER OFF: Press this button to turn the Cinema 11a OFF. BAND (FM): Press this button to switch to the FM frequency band reception. 4. BAND (HDAM): Press this button to switch to the HDAM frequency band reception. 5. 6. 7. 22 AM 3 FM 21 4 HDAM 20 5 HDFM TUNER SCAN: If INPUT is set to AM or FM, use this button to scan frequencies that have been PRESET.
CONTROLS AND DISPLAYS REMOTE CONTROL 13. SURROUND/DATA FORMAT: Press the PLIIx, SUR. MODE, NEO:96/24, or CES 7.1 button once to select a surround format. Press the same button again to cycle through the various processing models available for the selected format. POWER ON POWER OFF TUNER SEEK 23 1 22 14. VOLUME: Press this button to adjust the volume up and down from –90dB to +15dB. 15. INPUT SEEK: press this button to auto select the next active audio input source.
CONTROLS AND DISPLAYS ZONE 2 REMOTE CONTROL This section explains how to use the Zone 2 remote control in a remote room in your house. (2nd Zone room) 1. ZONE 2 POWER OFF: Press this button to power OFF Zone 2. 10 2. ZONE 2 PRESET: These buttons are used to preset desired broadcasting stations. 2 3. ZONE 2 VOLUME: Press this button to 3 adjust the Zone 2 volume up and down from -90dB to +15dB. 4. ZONE 2 INPUT SELECTOR: Use these buttons to select the Zone 2 desired source for your Cinema 11a.
INSTALLATION LOCATION To assure proper operation and to avoid the potential for safety hazards, place the unit on a firm and level surface capable of supporting its weight. When placing the unit on a shelf, be certain that the shelf and any mounting hardware can support the weight of the unit and any additional items in the equipment rack, or on the shelf. When positioning the Cinema 11a, make certain that it has adequate ventilation on all sides, as well as on the top and bottom.
INSTALLATION When using a TOSLINK optical input or output jack, always use a high-quality optical fiber cable. IMPORTANT: We strongly recommend that before you connect any loudspeakers to your amplifiers, you complete all needed connections and set up procedures to your Cinema 11a as outlined below. This will reduce the chance that a wrong connection or other error will produce a high volume audio output that might damage your speakers or other components.
INSTALLATION POWER CONTROL CONNECTIONS The TRIGGER jacks are used to remotely turn-on other devices in your system when the Cinema 11a is ON. Power is applied to the MAIN Trigger Output jack when the Cinema 11a is turned on from the Standby Mode. We recommend that this jack be used to turn on a power amplifier such as the Cary Audio Cinema 5 or Cinema 7B, but it may also be used to activate compatible products such as projection screens, lights or blinds. Connect a 3.
AUTO SOUND SETUP The AUTO SOUND SET UP feature of the Cinema 11a will automatically measure the sound characteristics of the main listening room where you have your home cinema system installed. It has a seven-band auto sensing function that will try to optimize the sound quality and the overall room frequency response for low bass, mid bass, mid range and high frequencies while you are using it in the AUTO mode.
AUTO SOUND SETUP balance with the other inputs to the main speaker channels so the Cinema 11a can make the balance between them. The subwoofer is the only channel in a normal system that has an independent volume control on it, and if it is set at too high or too low a setting, the Cinema 11a will not be able to balance the channels for subwoofer (low bass) and the other channels.
AUTO SOUND SETUP 6. When the speaker check ends, the following VFD appears on the display. Total: 8 speakers (or however many speakers are connected) Press ENTER now The results of the speaker check will be displayed. The front panel shows confirmation of the number of speakers detected. If some speakers are not detected, make sure that they are all connected properly. After confirming the total number of speakers, press the ENTER button. 7.
AUTO SOUND SETUP SBR........................... Set SBL ........................... Set SL ............................. Set SW............................ Set / / / / N/A N/A N/A N/A -15.0dB -15.0dB -15.0dB -15.0dB to to to to + + + + 15.0dB 15.0dB 15.0dB 15.0dB 10.
MANUAL SOUND SETUP SET SPEAKER CONFIGURATION The first step in configuring the Cinema 11a to operate with your speaker system is to set the type, number and crossover frequencies of your particular loudspeakers. You make these selections using the SPEAKER SETUP menu shown below. NOTE: The following selected menus appear on the Cinema 11a display: SETUP MENU LISTENING PROFILES 1. Press the SETUP button to enter the SETUP menu. The SETUP MENU/LISTENING PROFILES appears. 2.
MANUAL SOUND SETUP 7. Press the button to select BACK and press ENTER to return to the SETUP MENU, or press the SETUP button to exit to SETUP MENU. SET DISTANCE The DISTANCE SETUP is used to enter Speaker Distances (for proper sound delay). Setting the Speaker Distance Delays Setting the speaker delay is crucial to the proper performance of any surround decoder component like the Cinema 11a. Your home theater system will not perform properly if this process is not completed.
MANUAL SOUND SETUP 8. Press the button to select BACK and press the ENTER to return to the SETUP MENU, or press the SETUP button to exit the SETUP MENU. SET BALANCE This step adjusts the output level of each channel so that they are properly matched. This must be done to ensure a correct presentation of multi-channel sound sources. The adjustment must be as precise as possible, and it is almost impossible to accomplish by ear. Therefore, we recommend you use a Sound Level Meter.
MANUAL SOUND SETUP Repeat steps 5 and 6 until you have completed setting the level for each speaker in your system. Set all the levels to 75dB. 8. When you have finished adjusting the level for all the speakers in your system, select BACK to return to SETUP Menu. 9. Select BACK to return to the SETUP MENU, or press the SETUP button to EXIT the SETUP MENU. TO SET CHANNEL LEVELS USING THE TEST TONE FUNCTION 1. Select the TEST MODE ....... AUTO in the SET BALANCE menu.
MANUAL SOUND SETUP 1. Press the SETUP button to enter the SETUP MENU. The SETUP MENU / SPEAKER appears. 2. Press the ENTER button to enter the SPEAKER setup menu. 3. Press the button until SET CROSSOVER POINTS is selected. The SPEAKER / Set Crossover Points menu appears. 4. Press the ENTER button to enter the SET CROSSOVER POINTS setup menu. 5. Use the and buttons to adjust the FL (Front Left) Crossover.
MANUAL SOUND SETUP 3. Press the button until SET ROOM EQ is selected. The LISTENING PROFILES/ Set Room EQ menu appears. 4. Press the ENTER button to enter the SET ROOM EQ setup menu. 5. Use the and buttons to adjust the FL (Front Left) 80Hz output level. You can adjust the selected channel level in 0.5 dB steps across a range of -15dB to +15dB. 6. Press the button when you have made a selection. Repeat steps 5 for the 80Hz, 160Hz, 250Hz, 500Hz, 1KHz, 2KHz, 4KHz, 8KHz, 12KHz and 16KHz. FL ...........
SETUP MENU SET SPEAKER PHASE (FOR BETTER SOUNDS) The Cinema 11a 's SET SPEAKER PHASE feature uses phase correction measures to make sure your sound source arrives at the listening position in phase, preventing unwanted distortion and/or coloring of the sound. SET SPEAKER PHASE technology provides coherent sound reproduction through the use of phase matching for an optimal sound image at your listening position.
SETUP MENU ASSIGNED INPUTS Assign input sources to input Connectors. The following selected menus appear on the Cinema 11a display: Assigned Inputs Input 1 XLR Digital To assign inputs: 1. Press the SETUP button to enter the SETUP MENU. The SETUP MENU / LISTENING PROFILES appears. 2. Press the button until INPUTS is selected. The SETUP MENU/INPUTS menu appears. 3. Press the ENTER button to enter the inputs setup menu. The INPUTS/Assigned Inputs menu appears. 4.
SETUP MENU To change input names: 1. Press the SETUP button to enter the SETUP MENU. The SETUP MENU / LISTENING PROFILES appears. 2. Press the button until INPUTS is selected. The SETUP MENU/ INPUT menu appears. 3. Press the button to select the change INPUT names setup menu. 4. Press the ENTER button to enter the CHANGE INPUT NAMES setup menu. 5. Press the ENTER button to enter the 7.1 IN rename menu. 6. Press the ENTER button to start the 7.1 IN rename menu.
SETUP MENU SET ANALOG IN LEVEL SETTINGS This adjustment can be used to adjust 2-channel analog audio input levels for a selected input. Despite attempts at standardization, analog sources still have a wide range of input levels. To compensate for this, the Cinema 11a allows independent input level adjustment for each of the stereo analog audio input connectors. Input level adjustment is not available for the 7.1 channel analog audio input connector.
SETUP MENU To set Analog IN Configuration: 1. Press the SETUP button to enter the SETUP MENU. The SETUP MENU/LISTENING PROFILES appears. 2. Press the button until INPUT is selected. The SETUP MENU/ INPUT menu appears. 3. Press the ENTER button to enter the CHANGE INPUT NAMES setup menu. 4. Press the button until SET ANALOG IN CONFIG is selected. 5. Press the ENTER button to enter the INPUT 1 analog in config menu. 6. Use the and buttons to select the mode.
SETUP MENU LISTENING TO THE RADIO The following steps show you how to tune in to HDFM, HDAM, FM and AM radio broadcasts using the automatic (search) and manual (step) tuning functions. 1. Press the HDFM, HDAM, AM or FM button on the remote handset or front panel to select the band. 2. Tune to a station. There are two ways to do this: Automatic tuning and saving station To search for stations in the currently selected band, press TUNER SCAN button in the remote handset.
SETUP MENU you haven't done this already. Press AM or FM to select the band. Press the number on the remote control to recall the station preset. CONNECTION CHART Set Up the AM and FM Antenna DIGITAL INPUT 1 ANTENNA FM 75 2 HDMI 1 INPUT HDMI 2 INPUT AUTO SETUP MIC- IN ZONE 2 DIGITAL OUT AM LOOP 3 4 5 6 7 1 1 2 IR INPUT ZONE RS 232 8 2 3 TRIGGERS AC POWER [ ] 117V 50/60 Hz [ ] 220V 50/60 Hz 7.
SETUP MENU To improve AM reception, connect a 15 ft. to 18 ft. length of vinyl-coated wire to the AM LOOP terminals without disconnecting the supplied AM loop antenna. For the best possible reception, suspend horizontally outdoors. ZONE 2 Cinema 11a's front panel and main remote handset can control ZONE 2 output sources and volume control in the SETUP MENU. - Zone 2 - Zone 2 input - Zone 2 volume TO SET ZONE 2 INPUT 1. Press the SETUP button to enter the SETUP MENU. The SETUP MENU / SPEAKER appears. 2.
SETUP MENU 7. Use the and buttons to select the zone 2 output volume. You can adjust the zone 2 volume level from -90dB to +15dB. 8. Press the button to select GO TO MAIN MENU and press the ENTER to return to the ZONE 2 menu, or press the SETUP button to exit the SETUP MENU. ADVANCED SETTINGS Other options included in the SETUP menu are: Password........................... Off / On / Change HDMI Audio Out................. Off / On AV SYNC Delay .................. Off / 1-100ms (1 ms = approx.
SETUP MENU 8. Press the button to select BACK and press the ENTER to return to the PASSWORD menu, or press the SETUP button to exit the SETUP MENU. HDMI AUDIO OUT 1. Press the button until HDMI AUDIO OUT is selected. The ADVANCED SETTINGS / HDMI AUDIO OUT menu appears. 2. Use the and to select OFF mode or ON mode. When you elect OFF mode, the HDMI OUTPUT PORT will not output Audio data. When you select ON mode, the HDMI output port will output audio data same as Cinema 11a decoding format.
SETUP MENU 4. Use the button to advance to the next character space. The cursor will automatically wrap to the first character space when the last (twelve) character space is passed. 5. Use the button to return to the previous character space. 6. Press the ENTER to restore the custom input names. 7. Press the button to select BACK and press the ENTER to return to the EDIT CUSTOM NAME menu, or press the SETUP button to exit the SETUP MENU.
SETUP MENU 2. Use the and button to select the NORMAL mode or INVERT. When you select NORMAL mode, the Zone 1 Rear IR optional remote control sensor output Polarity is positive. When you select INVERT mode, the Zone 1 Rear IR optional remote control sensor output Polarity is negative. This setting selects the polarity of the Zone 2 rear IR sensor. To set Zone 2 Rear IR Mode: When you select NORMAL, the Polarity is positive. When you select INVERT, the Polarity is negative. 1.
SETUP MENU Note: This option only operates with a Dolby Digital or Dolby Digital EX source and one of these modes is active. This option allows you to set the 50% of Dynamic Range Compression used when the Cinema 11a is placed into the LATE Half mode and set 100% of Dynamic Range Compression used when you select the LATE mode in Full. This mode can also be selected by pressing the LATE button on the remote control.
SERVICE AND CARE CARE AND CLEANING The cabinet housing and front panel of the Cinema 11a may be cleaned with a soft cloth and Windex or a window cleaner. The frequency of cleaning will be governed by how many hours the Cinema 11a is operated and by operating environment cleanliness. FACTORY SERVICE Careful consideration has been given to the design of your Cinema 11a processor to keep maintenance problems to a minimum.
UNITED STATES LIMITED WARRANTY Cary Audio Design warrants to the original United States purchaser for use in the United States that Cary Audio Design vacuum tube or solid state power amplifiers, surround sound processors or preamplifiers shall be free from defects in parts or workmanship for three (3) years from the date of the original purchase.
1020 Goodworth Drive, Apex, NC 27539 phone 919-355-0010 fax 919-355-0013 www.caryaudio.