
User's Manual


11
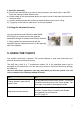
3. Install the Camera(s)
a) Position the camera where you want it, plug into power, and check video on the NVR.
Move the camera to obtain desired view.
b) Hold the base of the camera stand where you want to mount it and mark the location for
the screw holes.
c) Use the included screws and anchors to attach the base to the wall or ceiling.
d) Tug gently on the stand to make sure it is securely installed.
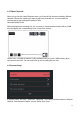
4.3UsingtheAntennaExtension
You can use the Antenna Extension cable (SKU#
EXTA10B) if your setup requires the signal be
transmitted through an obstacle that severely weakens
it. Simply replace the camera antenna with the
Antenna Extension cable and mount it on the opposing
side of the obstacle.
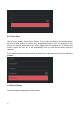
5. USING THE VS2072
Your system comes with 2 cameras. The monitor displays in quad view mode when you
power on both the monitor and camera.
The NVR has a built in a 7” touchscreen monitor. All of the operating menus can be
accessed on the touchscreen. You can also use a mouse to control all the menus (through
the USB port).
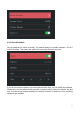
Here are some basic operations you may need when you use the system. You can
refer to content in the following manual for detail.
To… Do…
Change between quad and full
screen views
Tap the channel area twice on the screen. The monitor
will switch to that channel in a full screen display. Tap
twice again to go back to the quad view mode.
Hear audio from the camera
Make sure the audio on the camera is enabled. Check
the Menu--System Setup--Camera Audio Enable.
Set separately for each camera.
See 6.2.5 page 15