Electric Fireplace Model No.: □ IF-1330TCL □ IF-1336TCL □ IF-1340TCL □ IF-1350TCL□ IF-1360TCL CONSUMER SAFETY INFORMATION Read this manual before installing and operating this appliance Failure to follow these instructions may result in electric shock, fire property, or personal injury Do not store or use gasoline or other flammable liquids in vicinity of this appliance.
IMPORTANT SAFETY INFORMATION! WARNING Read all instructions before using this heater! This heater is hot when in use. To avoid burns, DO NOT let bare skin touch hot surfaces. If provided, use handles when moving this heater. Keep combustible materials, such as furniture, pillows, bedding, papers, clothes, and curtains at least 3 feet (0.9m) from the front of the heater, and keep them away from the sides and rear.
ALWAYS mount to wall bracket before use. DO NOT set on the floor, or other surface, to use. NEVER use a wall mount bracket from another manufacturer. This product is not intended to be a primary heat source. It is for supplemental heat only. INDOOR use only! NEVER use this heater outdoors! Doing so may result in electric shock! Risk of electric shock! DO NOT OPEN! No user-serviceable parts inside! ALWAYS turn this heater off before unplugging it from the outlet.
possible. You will need the following tools (not included): Phillips screwdriver; stud finder; level; tape measure; electric drill; 1/4” wood drill bit, hammer. PARTS & HARDWARE b. Wood Screws Remote control c-Drywall anchors d Wall Bracket e-Log set Fixed on back of firebox a.Fireplace f-Decorative Crystals Specification and Dimension T PRODUCT DIMENSIONS Model Number A B IF-1330TCL 30” 76.2cm 36” 91.5cm 40” 101.6cm 17.0” 43.2cm 17.0” 43.2cm 17.0” 43.
IF-1350TCL IF-1360TCL m 50” 127.0cm 60” 152.4cm 17.0” 43.2cm 17.0” 43.2cm 4.13” 10.5cm 4.13” 10.5cm 46.2” 117.3cm 56.2” 142.7cm 16.2” 41.2cm 16.2” 41.2cm 9.1” 23.2cm 9.1” 23.2cm 43.7” 111.0cm 53.7” 136.4cm Installation and Assembly Your appliance is a wall-mounted, recessed and /or mantel installed appliance. Select a suitable location that is not susceptible to moisture and is away from drapes, furniture and high traffic areas. NOTE: Follow all National and local electrical codes.
RECESSED TO WALL INSTALLATION Figure (A) Framing Hole Size STEP A. Selection a dry wall to open a hole for fireplace box. Size of hole as below chat Figure (A) Framing Hole Size Model Number W H IF-1330TCL 26.77”(68.0cm) 16.54”(42.0cm) IF-1336TCL 32.77(83.2cm) 16.54”(42.0cm) IF-1340TCL 36.77”(93.4cm) 16.54”(42.0cm) IF-1350TCL 46.77”(118.8cm) 16.54”(42.0cm) IF-1360TCL 56.77”(144.2cm) 16.54”(42.
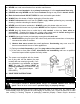
IF-1330TCL IF-1340TCL IF-1336TCL IF-1350TCL Figure (B ) 7
IF-1360TCL STEP B. Fix the four wall anchors in each side of the fireplace box according to the dimensions Showed on the drawing.
(C) (D) (E) STEP C. Take off the two screws in both sides of fireplace. Figure (C) STEP D. Have two person to take the glass panel out of the fireplace box. Place it to a soft and clean place. Figure (D) , taks two pcs of foam out of fireplace(E). (‘F) (G) (H) (I) STEP E. Have two person to move the fireplace box to the wall hole or fireplace mantel (F).
Wall Mounted Installation Due to the many different materials used on different walls, it is highly recommended that you consult your local builder before you install this appliance on the wall. A. Select a location that is not prone to moisture and is located at least 36”(914mm) away from combustible materials such as curtain drapes, furniture, bedding, paper, etc. B. Have two people hold the appliance against the wall to determine the final location. C.
NOTE: It is strongly Recommended that the mounting bracket(d) be screwed into the wall studs where possible. If the wall studs cannot be used, ensure that the supplied plastic anchors are used to affix the bracket to the wall and the bracket is adequately secured. F. With the wall mounting bracket installed have two people lift the appliance up and insert the two hooks on the bracket into the two slots on the back of the appliance.Use original 4x8mm screws to fasten wall bracket. G.
Logset /Crystal Ember Installation (Note: Please make the installation according to the embers which you bought or selected.) A. Glass front must be removed and the appliance must be mounted in its final location before the logset/crystal embers are installed. B. If your fireplace come with lotset, remove the logset from the package, put it to the fireplace designed place. Figure 1. C.
WARNING Read and understand this entire owner’s manual, including all safety information, before plugging in or using this product. Failure do to so could result in electric shock, fire, serious injury, or death. Power Plug the power cord into a 110-120V Volt 12 Amp grounded outlet (see IMPORTANT SAFETY INFORMATION on Pages 2 and 3).Make sure the outlet is in good condition and that the plug is not loose.NEVER exceed the maximum amperage for the circuit. DO NOT plug other appliances into the same circuit.
Touch panel/Remote control Operation BUTTON FUNCTION POWER ACTION&INDICATION ON: Enables control panel functions and remote 1. Press once. Indicator light turns on. Power turns control.Turn on flame effect. on. All functions enabled. OFF: Disables control panel functions and remote 2. Press again. Indicator light turns off. Power control.Turn off flame effect. turns on. All functions will off. Coadl bed COLOR button: Makes the coal bed’s color 1. Press once. Flame color effect gets changing.
Step1, remove back cap’s screws. Step 2, take back cap out off remote, insert 2x AAA batteries. Last, fasten back cap again, then scew it. NOTE: Remote control battery used depends on the remote control type which selected above. NEVER dispose of batteries in fire. Failure to observe this precaution may result in an explosion. Dispose of batteries at your local hazardous material processing center.
Metal: Buff using a soft cloth, slightly dampened with a citrus oil-based product. DO NOT use brass polish or household cleaners as these products will damage the metal trim. Glass: Use a good quality glass cleaner and dry thoroughly with a paper towel or lint-free cloth. NEVER use abrasive cleansers, liquid sprays, or any cleaner that could scratch the surface. Vents: Use a vacuum or duster to remove dust and dirt from the heater and vent areas.
3 Flame is not visible. 4 Log set and /or is not glowing. 5 Remote control does not work. 3. “Flame Rod” out of place due to rough transit/handing of the product. This issue can be corrected as simple as removing the glass, flipping the fireplace upside and down, removing a set of screws that are holding the bottom frame plate and placing the flame rod back into place. 1. Wiring is loose 1. Disconnect from power source and inspect wiring for loose connections and repair or replace if necessary. 2.