
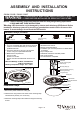
Installation Guide

The following parts are available for re-order if damaged or missing.
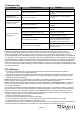
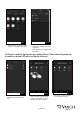
Function and Operation
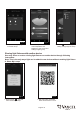
1. Bluetooth Control User Guide- See page 4
2. Wall Switch Controls
Choose the preset scene by switching the wall switch.
● The light has memory function setting. Light turns on at the same setting as the last time the power was turned off.
● Turn the wall switch “OFF” then turn it “ON” immediately, the light will enter warm light mode, which has 2700K
color temperature and full brightness.
● Turn the wall switch “OFF” then turn it “ON” immediately for the second time, the light will enter in daylight mode,
which has 5000K color temperature and full brightness.
● Light will cycle from “warm light mode” to “daylight mode” if continuing to quickly turn the switch "OFF" and "ON".
B
A
Turn on the power at fuse or circuit box
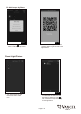
Plastic Shade
9821PS FOR C0124 ,C0125
9836PS FOR C0126, C0127
Page 2 / 8
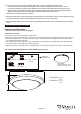
Spare Parts List:
Assembly Kit
5564MM (1 SET)
C0124&C0125: A: 12”
B: 3”
C0126&C0127: A: 16”
B : 4”
Mounting Strap (A)
Green Grounding
Screw (C)
Long Screw (D)
Mounting Screw (B)
Wire Nut (E)
160819
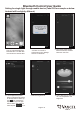
4. Pull out the source wires from the outlet box. Make wire connections using wire nuts as follows:
---Connect the hot wire (usually black insulation) from the fixture to the black wire from the power source.
---Connect the neutral wire (usually white insulation) from the fixture to the white wire from the power source.
---Attach the fixture grounding wire (usually green insulation or bare wire) to the mounting strap with the green
grounding screw, and then connect them to the house grounding wire with the wire nut.
Carefully put the wires back into the outlet box.
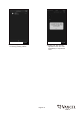
5. Attach the ceiling pan to the mounting strap by inserting two long screw heads into the key holes. Rotate the ceiling
pan until it is locked into place, and then tighten the long screws to secure it. (See Fig.1)
6. Attach the plastic shade back to the ceiling pan by aligning studs with slots, and turn it clockwise until it is locked in
place.