
User's Guide


55
Using a Computer
NOTE
• You can also import images directly from a memory card using a third-party card
reader or the card slot on the PC. Refer to the manual for your device for details.
. Connecting the camera to a PC to save files
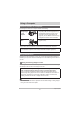
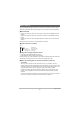
1. Switch off the camera and
connect it to a USB port on the
PC using a micro USB cable.
• The PC used should be compliant
with the IEC/UL/CSA/EN60950-1
or JIS C 6950-1, or with the
VCCI-B, FCC-B or CE standard.
The use of products that do not
comply with the specified
standards may result in lowered
resistance to external electromagnetic waves and/or an increase in unwanted
electromagnetic wave emissions.
• The PC should be kept at least 1.5 m (4.9') away from the patient during use.
A micro USB cable is not included with this camera.
The micro USB cable should only be connected to the camera to save data to a
PC.
2. Press [p] (Power) to switch the camera on.
When you switch the camera on, check that the camera’s operation check
indicator has changed to being lit green. Note that, at this point, the LCD monitor
is not switched on.
• The first time you connect the camera to a PC via a USB cable, an error
message may appear on the PC. In this event, briefly disconnect and then
reconnect the USB cable.
• Do not use the camera for observations while a micro USB cable is connected
to the camera.
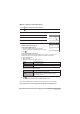
3. Windows 10: Click “Start” and then “File Explorer”, and then click
“This PC” in the sidebar.
Windows 8.1: Click “Desktop” and then “File Explorer”.
Windows 7: Click “Start” and then “Computer”.
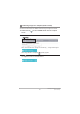
4. Double-click “Removable Disk”
• Memory cards and built-in memory are each recognized as a “Removable
Disk”.
5. Right-click the “DCIM” folder
6. Click “Copy” in the menu.
USB
USB port
Micro USB cable
H