IP Office Phone Manager User Guide 40DHB0002USAR Issue 13a (22nd September 2005)
Table of Contents Getting Started ........................................................................................................................... 7 Introduction................................................................................................................................................. 7 Phone Manager Feature Comparison ........................................................................................................ 9 Getting Started ....................................
Phone Manager Users Guide Call Handling ............................................................................................................................ 67 Make a Call............................................................................................................................................... 67 Hands Free .......................................................................................................................................... 67 PIN Restrictions ...............
Table Of Contents System Administration ............................................................................................................ 87 Hints & Tips for System Administrators .................................................................................................... 87 Glossary.................................................................................................................................... 89 Index..................................................................
Getting Started Introduction This guide covers Phone Manager Pro, Phone Manager PC Softphone and Phone Manager Lite applications. Which version you are running is indicated in the title bar of the program. All versions use the same software which runs as Phone Manager Lite unless suitable licenses are entered on the telephone system.
Phone Manager Users Guide Phone Manager PC Softphone: Phone Manager PC Softphone has almost all the same features as Phone Manager Pro. Phone Manager PC Softphone communicates with the IP Office system via the wireless LAN. The conversation takes place via a sound card or USB headset/handset connected to the PC and not via a physical terminal. Note: Any reference in the manual that indicates a feature is only available for Phone Manager Pro then the feature is also available for Phone Manager PC Softphone.
Getting Started Phone Manager Feature Comparison The following table highlights the difference between the three applications. Each of the items are described in detail in the following sections.
Phone Manager Users Guide Advice of charge indication (only supported in Greece and Germany) No Yes Yes Post Connect Dial (sending DTMF whilst connected to another party) Yes Yes Yes Requires licence key on PBX to operate No Yes Yes Identify a call by giving it a descriptive tag Yes Yes No Compact Mode No Yes Yes Amend the audio codec No No Yes * These features are only available when Microsoft Live Communications Server (LCS) is also available.
Getting Started Getting Started After Phone Manager is installed the Phone Manager application should start automatically. If the Phone Manager does not automatically start you can navigate to the Phone Manager by navigating from the Start manu. Start | Programs| IP Office| Phone Manager Logging In 1. In the Configure menu, select PBX 2. Enter the information into the PBX Configuration Information dialogue box. • Logging On: This button is not active if you are using Phone Manager Lite.
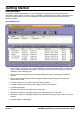
Phone Manager Main Window Phone Manager is divided into the follow areas: • Call Status. • Call History. • Call Handling Icons. • Call Park Area.
Phone Manager Users Guide Call Status The Call Status pane displays the current state of all active calls, incoming, outgoing, conference and hold. • Number Either the incoming telephone number or the telephone number being called will be displayed together with the relevant Call Status Icons. In the above example the external call CLI is shown. If the call was an internal call then just the extension number is displayed.
Phone Manager Call History Call History The Call History area of the Phone Manager can show a variety of information. What is displayed in the Phone Manager can be configured through the Configure Preferences The Call History pane is divided into the following tabs: • In Lists all calls received by your extension (Phone Manager Pro only). • Out Lists all calls initiated from your extension (Phone Manager Pro only). • Missed Lists unanswered calls to your extension.
Phone Manager Users Guide For Phone Manager Pro only, the following tabs will also appear in the Call History pane when their features are activated: • Status Appears when a call is in progress or is in Busy Wrap Up/Busy Not available. • Voicemail During a call to your Voicemail box, a tab will display all the messages together with buttons that can be used to control the messages. • Queue To monitor Hunt Group queues configured in the Queue ID tab in Configure Preferences.
Phone Manager In Phone Manager Pro only. The In tab lists all calls received by your extension This tab will display a maximum of 100 calls. When the maximum capacity is reached the oldest record is deleted when a new record is added. The following options are then available when you right click on a call: • Call Number back: Call the selected number. (If the outbound prefix e.g. 9 is not shown contact your System Administrator.
Phone Manager Users Guide Out Phone Manager Pro only. The Out tab displays all calls initiated from your extension. This may be a call manually dialed on the handset or dialed via Phone Manager Pro This tab will display a maximum of 100 calls. When the maximum capacity is reached the oldest record is deleted when a new record is added. The following options are then available when you right click on a call: • Call Number back: Call the selected number. (If the outbound prefix e.g.
Phone Manager Missed The Missed tab lists the unanswered incoming calls to your extension. This tab will display a maximum of 100 calls. When the maximum capacity is reached the oldest record is deleted when a new record is added. The following options are then available when you right click on a call: • Call Number back: Call the selected number. (If the outbound prefix e.g. 9 is not shown contact your System Administrator.
Phone Manager Users Guide All The All tab gives a list of all incoming, outgoing and missed calls at your extension. This tab will display information on a maximum of 100 calls. When the maximum capacity is reached the oldest record is deleted when a new record is added. The following options are then available when you right click on a call: • Call Number back: Call the selected number. (If the outbound prefix e.g. 9 is not shown contact your System Administrator.
Phone Manager Speed Dials The Speed Dials tab allows you to save regularly used internal and external numbers for future use. See Create a Speed Dial for details on how to create a Speed dial. There are two types of Speed Dials, Internal and External. A maximum of 15 for Phone Manager Lite and 1000 for Phone Manager Pro (You can add a maximum of of 10 speed dial groups with a maximum of 100 speed dials per group). The Speed Dial tab also contains the Phone Dialer.
Phone Manager Users Guide Speed Dial Options The following options are then available when you right click within the Speed Dial window part of the tab: • Call: Select the number from the Speed Dial entry you want to call. You can select from Work Phone, Home Phone, Mobile or Fax. • Default Number: Allows you to select the Default Number called when the Speed Dial is initiated. This will also change the icon in the Speed Dial Group window. This option is only active to External speed dials.
Phone Manager External Speed Dials • There are four types of speed dials, Work Phone, Home Phone, Mobile and Fax. The speed dial displayed will change based on the default number selected. • This icon is displayed if the Work Phone is recognized as an external speed dial and is set as the default number. If the number is recognized as in internal speed dial the internal speed dial icons are displayed. See Create a Speed Dial for more information.
Phone Manager Users Guide Account Codes Phone Manager Pro only. It allows you to assign system account codes to calls, either when making the call or during existing calls. Each icon on the tab can store a name, an account code and an optional telephone number. The account codes are selected from those available on the telephone system. The tab shows two types of icon: • Account Code Without Number Double-click to apply the associated account code to an existing call.
Phone Manager Voicemail Phone Manager Pro only with Voicemail Pro. On accessing your Voicemail box (either via Voicemail Ringback or by dialing *17 or via the Messages tab) a Voicemail tab will appear. This will display all new, old and saved messages. You can then use the control buttons (as below) to forward, replay, skip, pause, play, save, delete and play saved messages. To play a particular message double-click the message.
Phone Manager Users Guide Script Phone Manager Pro only. The Script tab will appear when a Directory Entry matching the called number has a Script file configured. For example, a Receptionist may be answering calls on behalf of more than one company. To ensure the call is answered with the correct company name a text file could be created with the company name and details. Phone Manager Pro can then be configured to display this text file whenever a call is received for that company. 1.
Phone Manager Call Park Area It is sometimes necessary to temporarily "park" a call to handle some other task (receive a new call) or deal with an interruption. To help you control this scenario efficiently the main system has four parking areas. These are available for use by all Users on the system. The park areas use Park ID 1, 2, 3 and 4.
Phone Manager Users Guide Configure Menu Configure Menu The Configure menu provides access to the following: • PBX Configuration Information Select this option to configure Phone Manager Pro to communicate with the PBX. • Configure Directory Directory allows you to create and edit a locally stored list of names and numbers that can be used for speed dialing or to identify incoming calls. • Configure Preferences Select this option to define your personal setting, eg. Forwarding options etc.
Phone Manager PBX Configuration Information This dialogue box allows you to configure Phone Manager to communicate with the telephone system. Click OK after entering your details. If incorrect details are entered a warning message is displayed. • User Name Enter your extension number (eg. 201) or User Name (eg. JohnS). This will be given to you by your System Administrator. Please note that the User Name is case sensitive. • Password Enter your User password.
Phone Manager Users Guide Configure Directory Phone Manager Pro only. The Configure Directory dialogue box allows you to create a personal directory of frequently used numbers. Each directory entry appears in the Call dialogue box for quick dialing. A maximum of 1000 entries can be added to the Directory. Directory entries can also be used to match the CLI or DID of incoming calls to a name. This can be used to play a media file or display a text file.
Phone Manager Directory Entry Phone Manager Pro only. When the New button is clicked from the Configure Directory screen the Directory Entry form appears. The Directory Entry menu contains the following fields and buttons: • Number: The telephone number (or Short Code) that will be dialed when this Directory Entry is selected in the Call dialogue box. • Name: The name you wish to associate with the number entered above.
Phone Manager Users Guide Configure_Preferences The Preferences option in the Configure menu allows you set up your personal settings for forwarding, Voicemail, etc. The following tabs are available: • Forwarding. • Do Not Disturb. • Voicemail. • Telephone. • Phone Manager. • Park ID. • Queue ID. • Door Release. • Agent Mode. • Short Cut Keys. • Screen Pop. • Audio Codec. • Compact Mode. • Date and Time Setting. • Clock Type. • Instant Messaging.
Phone Manager Forwarding This menu controls the forwarding of calls from your extension. • Follow Me To Number: Enter the number to which all calls are to be redirected. If this number is busy or not answered, then the call behaves as though your extension had failed to answer. (ie. If not answered then Forward On No Answer will be performed if set). • Forward Unconditional: Enter the number to which all calls are to be redirected. All incoming calls to your extension will be forwarded to this number.
Phone Manager Users Guide Voicemail This menu controls the Voicemail operation of your extension, assuming Voicemail is available on your system. • Voicemail: Selecting this checkbox will allow incoming callers to leave a message if your extension is busy or not . • Voicemail Ringback: When selected the System will automatically call your extension to inform you that you have a new message. Ringback occurs two seconds after you replace your handset when you have an uncollected Voicemail message.
Phone Manager Phone Manager This menu controls the features of Phone Manager. • Pop Phone Manager: When an incoming call is received the Phone Manager application will 'Pop' to the front and become the foreground application. • Hide on Close: Phone Manager Pro is minimized to the System tray on the Windows Taskbar when you close the application rather than exiting. • Play Sounds: Incoming calls are alerted by playing a sound. • Hide on no calls: Phone Manager Pro only.
Phone Manager Users Guide Queue ID Phone Manager Pro only. The Queue ID tab allows you to select up to two Hunt Groups. You will then be able to monitor the number of calls being held in their queues. See also Working with Queues. The Hunt Group must already exist on the System and must have Queuing enabled - please refer to your System Administrator. Each drop down box will give a list of valid Hunt Groups that can be chosen.
Phone Manager Short Cut Keys The Short Cut keys tab allows you to change the short cuts assigned to specific features or functions. To change Short Cut Keys: 1. Click the Command you wish to change. 2. Select the Short Cut Key from Select new shortcut drop down box. 3. Click Assign. Screen Pop Phone Manager Pro only. This enables integration to contact management packages. This allows Phone Manager to Screen Pop contact details. The following content management packages are supported ACT! 6.0, 7.
Phone Manager Users Guide Configuring your Screen Pop Software Follow the instructions below for configuring your screen pop software. • Pop Act! 1. Enter your Act! Database file name (.dbf) 2. Enter the Name of your Act! Database 3. Enter your password of the Act! Database 4. Click OK. The Act! Database will need to be open on your desktop. The record of the caller will be popped on receipt of the call. • Pop Goldmine 1. Enter the path of the Goldmine Server (gmw6.exe) 2. Click OK.
Phone Manager Audio Codec Only Phone Manager PC Softphone users (VoIP extension users) will see this tab. It allows you to configure the audio codec of the Phone Manager and to configure the Phone Manager for VoIP operation. • Please select your preferred audio codec for VoIP Select one of the four industry standard audio codecs, as the preferred audio codec for VoIP communication. • Use the & keys to select the audio codec required.
Phone Manager Users Guide Compact Mode Phone Manager Pro only. Compact Mode allows you to keep Phone Manager on your screen in a considerably reduced mode. Configuring Compact Mode Preferences You can configure a number of options in relation to compact mode. • Start in Compact Mode: Check the Start in Compact Mode check box to enable the Phone Manager upon start up to start in compact mode by default.
Phone Manager Using Phone Manager in Compact Mode When using Phone Manager in compact mode there are a number of ways to handle your calls. The Slider The slider allows you to manage your calls by providing information about the caller. Depending on the state, the controls on the slider will change automatically. Making a call You can make a call in compact mode by clicking the Make Call button. 1. Click the make call button .
Phone Manager Users Guide Date & Time Setting The Date & Time Setting tab allows you to customize the date as it is displayed in the Phone Manager call history pane. You can specify between the Windows Default Format for your operating system and region or choose a Custom Date Formats. Windows Default Format: Check this box to allow the Phone Manager to get the date format from your PC's operating system. Custom Date Format: Check this box to configure you date format from the settings below.
Phone Manager Clock Type Clock Type allows you to customize the time displayed in the Phone Manager call history pane. You can specify multiple formats; 12 hour, 24 hour and alter the presentation for all calls displayed in the call history pane. • 24 Hour Clock: Check the 24 Hour Clock check box to show the time in 24 hour clock format. • 12 Hour Clock: Check the 12 Hour Clock check box to show the time in 12 hour clock format.
Phone Manager Users Guide Instant Messaging In this release the Phone Manager provides support for Instant messaging with the Microsoft Live Communication Server (LCS). This will allow instant messaging to occur between internal contacts using the Microsoft Live Communication Server. See your System Administrator for configuring this functionality in Phone Manager. • Enable Instant Messaging Support: Check this box to enable Instant Messenger Support.
Phone Manager Personal Distribution Lists Phone Manager Pro Only. Personal Distribution Lists (PDL) are lists of mailbox numbers which allow you to distribute messages to groups of mailboxes. You can create your own lists and have as private lists or available to other users by making them Public. You can create up to 20 lists with a maximum of 360 members per list. • Select required mailbox: From this drop down box select the mailbox required. The default for this list is your extension.
Phone Manager Users Guide Creating a Personal Distribution List 1. Select required mailbox that you want the Personal Distribution List to be associated with. 2. Enter the List ID for the Personal Distribution List. 3. Enter the List Name that you want the List to be called. 4. Add the members mailboxes you want to include in the list. 5. Once you have added all the members, you want the list to be available to other IP Office users, Check the Public List checkbox. 6.
Phone Manager Profile Your can save your preferences and your Phone Manager configuration (Including speed dials, directory information and other settings). These setting can be used from another machine (if saved to the Local Area Network) or in the case of system failure. By Default the profile is saved to My Documents|Avaya|IP 400|PhoneManager|Profile. Profiles can be saved to another location if required; either on your local drive or on your Local Area Network (LAN). The profile is saved as an .
Phone Manager Users Guide Functions Menu The Functions menu gives access to a number of call handling commands: • Reclaim This function allows you to reclaim a call that has been accidentally transferred to the wrong person. Reclaim works even if the call has been successfully put through, even to Voicemail. It is also possible to reclaim a call that was originally ringing on your phone and has moved on to the next extension in your Hunt Group.
Phone Manager • Ringback when free (internal only) This function will set Ring Back When Free on a busy extension. When this extension becomes free your phone will ring and a call to the destination will be initiated once you have answered your ringing phone. If the busy extension has Call Waiting set you will be unable to use this function. • Park/UnPark1-4 (F9-F12) This function will allow you to park a call in one of the four park areas on the system.
Phone Manager Users Guide Call Enter the number of the person you wish to call into the Number field and click the Call button, the number will then be dialed. See also Make a Call. • Number: The telephone number (or Short Code) that will be dialed when the Call button is selected. The status of an internal number is displayed above the number field. Note: Please do not enter spaces in the Phone number entered. i.e. 123456 not 123 456 • Name: This is the name associated with number to be called.
Phone Manager Call (with Account Code) See also Using Account Codes. • Number: The telephone number (or Short Code) that will be dialed when the Call button is selected. The status of an internal number is displayed above the number field. Note: Please do not enter spaces in the Phone number entered. i.e. 123456 not 123 456 • Name: This is the name associated with number to be called. The name could be a User or Hunt Group or Directory Entry.
Phone Manager Users Guide Transfer Type the number of the person you wish to call into the Number field and click the call button, the number will then be called. See also Transfer a Call. • Number: The telephone number (or Short Code) that will be dialed when the Transfer Button is selected. Note that the status of the target extension/User is displayed above the number field. • Name: This is the name associated with number to be called. The name could be a User or Hunt Group or Directory Entry.
Phone Manager Account Code The Account Code form appears if you have either selected Account Code from the Functions menu or you have pressed F3. This form allows you to assign an Account Code to your current call. Please refer to your System Administrator for a list of valid Account Codes. See also Using Account Codes. Absent Status This dialogue box will allow you to assist internal callers when you are not at your desk.
Phone Manager Users Guide Call Handling Icons The icons on the right hand side of the main Phone Manager Pro window will help you to make and receive calls as follows: • Make a Call: See Make a Call. • Answer a Call: See Answer a Call. • Set Ringback when Free: See Set Ringback When Free. • Place a Call on Hold: See Place Call On Hold. • Add a Call to a Conference: See Create a Conference Call. • Hangup a Call: See End a Call. • Transfer a Call: See Transfer a Call.
Phone Manager If Phone Manager is being used in Agent Mode (Phone Manager Pro only) an additional set of icons appear: • Busy Wrap Up: Allows you to go in and out of busy wrap-up state. The Status tab shows "Busy Wrap Up" when in that state. • If the Busy Wrap Up icon is grayed out ( ), this mean that you are currently not a member of any group, see Select Group below.
Phone Manager Users Guide Hands Free Operation The Phone Manager Pro application can be used in conjunction with a Hands Free phone and/or headset. When using a Hands Free phone and/or headset the 'phone' should be left off-hook permanently. The "Off Hook Operation" option must be set under the Telephone tab of the Configure Preferences dialogue box.
Phone Manager Agent Mode Operation Phone Manager Pro only. Agent Mode allows Phone Manager to be used as a call center tool. It allows you to perform a number of call center functions without needing a specially designed call center telephone*, ie. one with dedicated keys for functions such as busy wrap up. Agent Mode is enabled through the Agent Mode tab within Configure | Preferences. • Note: Logging on and logging off is separate from Agent Mode and is enabled through the Configure | PBX menu.
Phone Manager Users Guide IP Office Conferencing Center The Phone Manager can be integrated with IP Office Conferencing Center. This allows you to book a conference and join a web conference. To use the IP Office Conferencing Center system Internet Explorer 5.5 or above is required. It is only available if permission is specified by your System Administrator and the IP Office Conferencing Center system is available to you.
Configuration Configuring your Preferences You can decide how your calls are going to be handled by setting your personal preferences as follows. • Take Your Calls from Another Extension. • Forward Your Calls to Another Location. • Set Do Not Disturb (DND). • Set a Do Not Disturb Exception Number. • Transfer Back to Forwarded Extension. • Turn Call Waiting On/Off. • Turn Voicemail On/Off. • Turn Voicemail Ringback On/Off. • Turn Off Hook Operation On/Off.
Phone Manager Users Guide Speed Dials Speed dials allow you to save regularly used internal and external numbers for future use. See Create a Speed Dial for details on how to create a Speed dial. There are two types of Speed Dials Internal and External. External Speed Dials There are four types of speed dials, Work Phone, Home Phone, Mobile and Fax. The speed dial displayed will change based on the default number selected.
Configuration Internal Speed Dials An internal Speed Dial can also act as a Busy Lamp Field, allowing you to see the status of your Speed Dial user. This icon shows an internal Speed Dial. If the user/extension is configured for Instant Messaging the Speed Dial icon will be green. If the user/extension is Busy, the speed dial icon will show a red circle with a white cross on it in the top left corner of the speed dial icon.
Phone Manager Users Guide Speed Dial Tooltips In addition to Speed Dials being used as Busy Lamp Fields. The Speed Dials have tooltips that can provide status information on a Speed Dial User. This is only available to internal Speed Dials. Name: This is the Name of the user associated with the Speed Dial. Number: This is the Number of the user associated with the Speed Dial. If an Internal user added from the IP Office Directory a name will be displayed here.
Configuration Edit Speed Dial Form The Edit Speed Dial form allows you to edit the Speed Dial settings for that particular Speed Dial. • Group Name: This is the Speed Dial Group where the speed dial is located. This will show you which Speed Dial Group the Speed Dial is in. You can only change this by selecting a particular Speed Dial Group and adding the Speed Dial to this group. • Name: This is the name you wish to associate with the Speed Dial icon. This is a Mandatory entry.
Phone Manager Users Guide Directory Entries Phone Manager Pro only. Directory Entries are used to store regularly dialed internal or external numbers. Directory Entries appear in the Call dialogue box (if the Show Directory option is checked) for quick dialing. Directory Entries can also be used to match the CLI or DID of incoming calls to a name. This can be used to play a media file or display a text file.
Configuration Create a Directory Entry from an Existing Call 1. Right click the Call in the Call History pane. 2. Select Add to Directory. 3. This will open the Directory Entry dialogue box. 4. Make changes if required. 5. Click OK or press Enter. 6. Click Close to exit the Configure Directory dialogue box. Create an MS Outlook Contact from an Existing Call 1. Right click the Call in the Call History pane. 2. Select Add to Outlook. 3. An MS Outlook Contact form will open with call information entered. 4.
Call Handling Make a Call There are a number of ways to make a call using Phone Manager. 1. Dial the number required. • Note: Please do not enter spaces in the Phone number entered. i.e. 123456 not 123 456 2. The outgoing call will appear in the Call Status pane. 3. The Call Status pane will then indicate when the call has been answered. 4. When you have finished your call, the call will disappear from the Call Status pane. 5. The call will now appear in the Call History pane under the Out tab.
Phone Manager Users Guide PIN Restrictions The Phone Manager release 2.1 introduces a feature called PIN Restrictions (PIN). PIN restrictions work by making the caller enter a PIN before the call is connected. PIN restrictions can be associated with types of number being dialed e.g. International numbers, External numbers PIN restrictions will be performed from: • Making A Call • Speed dials • Account code Speed dials Making a Call 1. Click or press F1 or on the Functions Menu, click Call. 2.
Call Handling Receive a Call 1. The incoming call will appear in Call Status. 2. Pick up handset to answer call. 3. The Call Status pane will then indicate when the call has been answered. 4. When you have finished the call, the call will disappear from the Call Status pane. 5. The call will now appear in Call History under the In tab. Place Call On Hold 1. Click . 2. Call Status will then indicate that the call is on hold. Take a Call Off Hold Click the call in the Call Status pane.
Phone Manager Users Guide Tag a Call Identifying a call by giving the call a descriptive tag. The tag will appear on the extension called if it has a suitable display. If you park the call using Phone Manager the selected Park Button will show the Tag text. Calls from a VoIP extension cannot be tagged. 1. Click or press F1. 2. Enter the number and name as per Make a Call. 3. In the Tag box type in the description. 4. Continue the call as per Make a Call. 5.
Call Handling Transfer a Call to Another User's Voicemail If a caller wishes to leave a message for a User, you can transfer the caller directly to that User's Voicemail. 1. Click or press F2. 2. Enter the number into Transfer dialogue box or select from the Directory. 3. Click the Voicemail button. 4. The incoming caller will be transferred to the User's Voicemail. 5. Hang up. Tag a Transferred Call Identify a transferred call with a text description. 1. Click or press F2. 2.
Phone Manager Users Guide Collect Your New Voicemail Messages 1. Select the Messages tab on the Call History pane. 2. Double click on the Voicemail box you would like to access (this will either be your personal Voicemail box or the Voicemail box for the Hunt Group of which you are a member) or Right click and select Call Voicemail. 3. If the phone is On-Hook it will ring once the Voicemail Server has been contacted. Pick up the phone and listen to your messages.
Call Handling Phone Manager User Guide IP Office Page 73 40DHB0002USAR Issue 13a (22nd September 2005)
Phone Manager Users Guide Call Tag Form Use this form to enter the description you wish to appear on the Park button to identify this call. Answer a Call You will be notified that there is an incoming call to be answered by either Phone Manager Pro popping to the front of your screen, a ringing sound from your PC speakers, the Phone Manager Pro Task Bar Icon flashing or the fact that your phone is ringing. Use the Answer Incoming Call button to answer the waiting call. 1.
Call Handling Set an Absent Message 1. From the Functions Menu select Absent or press F6. 2. From the list box select the message required, eg. On Holiday Until or Back Tomorrow. 3. Type additional information required in the box below so that the message will read in full, eg. "On Holiday until Monday". 4. Select whether you wish your extension to be set to Do Not Disturb and/or Forward Unconditional. (Forward option only available if Forward Number is set) 5.
Phone Manager Users Guide Making a Call with an Account Code Account Codes are used for project tracking. 1. From the Functions menu select Account Code. 2. Complete the Call dialogue as per Make a Call. 3. In the Account Code field select the code from the drop down list to be assigned to the call (please refer to your System Administrator for a list of valid Account Codes). 4. Click Call and the call will be made.
How To Take Your Calls from Another Extension If you wish to take your calls from another location, you can instruct the PBX to pass your calls to another internal or external number. This option must be set at your extension. 1. Click . 2. Select the Forwarding tab. 3. Enter the required number into the Follow Me to Number box. 4. Click OK or press Enter. 5. The title bar of Phone Manager Pro indicates that Follow to has been set. To cancel 1. Click . 2. Select the Forwarding tab. 3.
Phone Manager Users Guide Forward Your Calls to Another Location Your calls can be answered at another location by forwarding your calls to an internal or external number. You can decide whether all your calls are to be forwarded or only when your extension is busy or only when your extension is not answered (the No Answer Time is configured by your System Administrator). If you are a member of a Hunt Group you can also forward Hunt Group calls to this location.
How To Set Do Not Disturb (DND) This feature will ensure your phone does not ring when incoming calls are received. The caller will get the Busy tone or be passed to Voicemail. 1. Click . 2. Select Do Not Disturb tab. 3. Select Do Not Disturb option (click in box). 4. Click OK or press Enter. 5. The title bar of Phone Manager Pro indicates that DND is set. To cancel 1. Click . 2. Select Do Not Disturb tab. 3. Remove the check from the Do Not Disturb option (click in box). 4. Click OK or press Enter. 5.
Phone Manager Users Guide Transfer Back to Forwarded Extension If Forward Unconditional is set a forwarded call can not be transferred back to the original destination. The Forward on Busy and Do Not Disturb feature can be used to enable this facility. For example, you wish to forward all your calls to extension 203. You are expecting an important call that will be forwarded to extension 203, however you wish to speak to the caller.
How To Turn Off Hook Operation On/Off Off Hook operation allows the phone to be controlled via the Phone Manger Pro without having to physically lift the handset on or off the cradle. When using a Hands Free phone and/or headset the 'phone' should be left off-hook permanently. 1. Click . 2. Select the Telephone tab. 3. Select the Off Hook Operation option (click in the box). Select the Tabs to Show in Call History 1. Click . 2. Select the Phone Manager tab. 3. Select the options required.
Phone Manager Users Guide Create a Speed Dial Group Member 1. In the Call History pane. Select the Speed Dials tab. 2. Select the Speed Dial Group you wish to add the speed dial. 3. Right click within the select Speed Dial Group window. 4. Select New | Speed Dial Group Member 5. The Speed Dial dialogue box will open. 6. Enter a name into the Name box (This is a mandatory entry). 7. Enter the number in the Work Phone box (This is a mandatory entry).
How To Create a Speed Dial from the IP Office Directory 1. In the Call History pane. Select the Speed Dials tab. 2. Select the Speed Dial Group you wish to add the speed dial. 3. Right click within the Speed Dial Group window. 4. Select Add User 5. Select the User from the list available in the IP Office Directory. 6. Click OK. 7. The new speed dial icon will be displayed in the Speed Dial Group Tab you originally right clicked and selected Add User. Create a Instant Message Speed Dial 1.
Phone Manager Users Guide Edit a Speed Dial 1. In Call History, select the Speed Dials tab. 2. Right click the Speed Dial you wish to change 3. Select Edit. 4. The Edit Speed Dial dialogue box will open. 5. Edit the Speed Dial as required. 6. Click OK. Delete a Speed Dial 1. In Call History, select the Speed Dials tab. 2. Right click the Speed Dial required 3. Select Delete.
How To Make a Call Using a Speed Dial There are a number of ways of making a call from a speed dial. 1. In Call History, select the Speed Dials tab. 2. Select one of the methods below. • Drag & Drop: Simply Drag the Speed Dial onto the Call Status area. The call will then be initiated. • Double Click: Double Click the Speed Dial you want to call.
Phone Manager Users Guide Using Account Codes Using Account Codes Account Codes allow your System Administrator to track calls to specific external numbers. For example, a solicitor's office may wish to record the amount of time spent on calls to a client for billing purposes. Each client is given an Account Code and that code is used when making a call. A key feature of Phone Manager is that it allows the use of text account codes rather than just numbers.
System Administration Hints & Tips for System Administrators 1. When completing the PBX Configuration Information dialogue box a broadcast address, eg. 255.255.255.255, can not be used for the PBX Address. 2. The Call History tabs each display information on a maximum of 100 calls. The oldest record is then replaced. 3. Park ID's can contain a maximum 9 characters. 4. If a particular feature does not appear to work, try closing and opening Phone Manager Pro.
Phone Manager Users Guide 7. System Requirements Phone Manager can used with any IP Office system and supported telephones. Hands free operation is only supported on suitable Avaya phones. Phone Manager Lite/Pro • Minimum Pentium 266Mhz or above with 64MB RAM and 50Mb of free disk space. • Ethernet attached PC running Microsoft Windows 2000/XP Pro, in conjunction with TCP/IP Networking. • Sound card if audio features required. • Optional Microsoft Outlook 2000/2003/XP, Act! 6.0/7.0, Maximizer 7.5/8.
Glossary A Account Code: Account Codes are used to track calls. They can contain both numbers, letters and characters. For example, a solicitor may wish to record the amount of time spent on a call to a client. Each client is given an Account Code and that code is used when making a call. Your System Administrator can then record this call with the Account Code using an application called Call Logger. Please refer to your System Administrator for a list of predefined Account Codes to be used.
Phone Manager Users Guide Call Handling Button and by following the instructions provided in the Call Handling help text. Note that under normal operation nothing is heard in the headset when the 'phone' is left in the off-hook state. Ringing Tone is heard in the headset when an incoming call is presented to the extension. Clicking the Answer icon at this point answers the call (equivalent to picking up a normal phone).
Glossary assigned to a physical extension or can be given an extension number that does not physically exist. This means that users who are rarely in the office but still wish to use Voicemail, forwarding etc, can be given these facilities. V Voicemail: If your system supports Voicemail callers to your extension will be prompted to leave a message if your phone is busy or not answered.
Index A Absent Status 53 Account Code 53 Account Code Required 86 Account Codes 24 Agent Mode 36 Agent Mode Operation 57 All 20 Answer a Call 74 Answer a Call Waiting 74 Audio Codec 39 B Blind Transfer a Call 70 Busy on Held Calls 34 C Call 50 Call (with Account Code) 51 Call Handling Icons 54 Call History 15 Call Park Area 27 Call Status 14 Call Status Icons 14 Call Tag Form 74 Call Waiting 34 Callback an Unanswered Incoming Call 69 Clear a Call 70 Clock Type 43 Collect New Voicemail Messages 72 Collect
Phone Manager Users Guide Transfer Back to a Forwarded Extension 80 Transfer Your Calls from Another Extension 77 Turn Call Waiting On/Off 80 Turn Off Hook Operation On/Off 81 Turn Voicemail On/Off 80 Turn Voicemail Ringback On/Off 80 U Unpark a Call 72 USB Settings 43 User Name 11 Phone Manager User Guide IP Office Using Account Codes 86 Using an Account Code Once a Call is in Progress 86 V VoIP 56 VoIP Extension 35 W Working with Queues 76 Voicemail 25, 34 Voicemail Ringback 34 Page 94 40DHB0002U
Phone Manager Users Guide Performance figures and data quoted in this document are typical, and must be specifically confirmed in writing by Avaya before they become applicable to any particular order or contract. The company reserves the right to make alterations or amendments to the detailed specifications at its discretion. The publication of information in this document does not imply freedom from patent or other protective rights of Avaya or others.