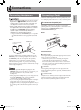
EN/ES English PX-560M Español USER’S GUIDE GUÍA DEL USUARIO Please keep all information for future reference. Guarde toda información para tener como referencia futura. This recycle mark indicates that the packaging conforms to the environmental protection legislation in Germany. Safety Precautions Before trying to use the Digital Piano, be sure to read the separate “Safety Precautions”. Esta marca de reciclaje indica que el empaquetado se ajusta a la legislación de protección ambiental en Alemania.
TO REDUCE THE RISK OF FIRE OR ELECTRIC SHOCK, REFER SERVICING TO QUALIFIED SERVICE PERSONNEL. IMPORTANT SAFETY INSTRUCTIONS 1. 2. 3. 4. 5. 6. 7. 8. 9. Read these instructions. Keep these instructions. Heed all warnings. Follow all instructions. Do not use this apparatus near water. Clean only with dry cloth. Do not block any ventilation openings. Install in accordance with the manufacturer’s instructions.
Contents General Guide EN-4 Installing the Music Stand . . . . . . . . . . . . . . . . . EN-5 Saving Settings and Using Panel Lock . . . . . . . EN-6 Returning the Digital Piano to Its Factory Default Settings . . . . . . . . . . . . . . . . . . . . . . . EN-6 Power Outlet EN-7 Using an AC Adaptor . . . . . . . . . . . . . . . . . . . . EN-7 Turning Power On or Off . . . . . . . . . . . . . . . . . . EN-7 Connections EN-9 Connecting Headphones. . . . . . . . . . . . . . . . . .
Contents Fingering Guide. . . . . . . . . . . . . . . . . . . . . . . . . . Chord Example List. . . . . . . . . . . . . . . . . . . . . . . Part and MIDI Channel Assignments and Diagram . . . . . . . . . . . . . . . . . . . . . . . . . . . . . . Block Diagram. . . . . . . . . . . . . . . . . . . . . . . . . . . A-1 A-1 A-3 English Information A-5 A-6 MIDI Implementation Chart Company and product names used in this manual may be registered trademarks of others. EN-3 PX560-ES-1B.
General Guide 1 3 4 5 6 bp bq 7 8 9 bk bn ∗ bl br bm 2 dm dn Front bo bs PHONES jacks bt ck cl cp cq cm cr cs cn ct co dl dk Back MIDI OUT/THRU, IN terminals DC 12V terminal USB port AUDIO VOLUME controller LINE IN R, L/MONO jacks AUDIO IN jacks DAMPER, ASSIGNABLE PEDAL jacks Bottom LINE OUT R, L/MONO jacks Pedal connector EN-4 PX560-ES-1B.
General Guide 1P (Power) button bsDial 2VOLUME controller btw/NO, q/YES buttons 3REC MODE button ckTONE button 4MIDI a button clRHYTHM button 5AUDIO a button cmTEMPO buttons 6TRANSPOSE w, q buttons cnMETRONOME button 7INTRO button coGRAND PIANO button 8NORMAL/FILL-IN button cpBANK button 9VARIATION/FILL-IN button cqREGISTRATION 1 button bkSYNCHRO/ENDING button crREGISTRATION 2 button bla button csREGISTRATION 3 button bmACCOMP ON/OFF button ctREGISTRATION 4 button bnK1 through K3 kn
General Guide LCD Panel The liquid crystal panel of the monitor screen uses high-precision technology that provides a pixel yield in excess of 99.99%. This means that some very small number of pixels may not light or may remain lit at all times. This is due to the characteristics of the liquid crystal panel, and does not indicate malfunction. Saving Settings and Using Panel Lock Your Digital Piano lets you save its current settings, and lock its buttons to protect against operation errors.
Your Digital Piano runs on standard household power. Be sure to turn off power whenever you are not using the Digital Piano. Turning Power On or Off 1. • Do not touch the keyboard, pedals, or buttons while the startup screen is on the display. Doing so will cause malfunction. Using an AC Adaptor Use only the AC adaptor (JEITA Standard, with unified polarity plug) that comes with this Digital Piano. Use of a different type of AC adaptor can cause malfunction of the Digital Piano.
Power Outlet Auto Power Off This Digital Piano is designed to turn off automatically to avoid wasting power after no operation is performed for a preset amount of time. The Auto Power Off trigger time is about four hours. • You can disable Auto Power Off, if you want. For details, see “Auto Power Off” under “SYSTEM SETTING Screen” (page EN-74). EN-8 PX560-ES-1B.
Connecting Headphones • Before connecting headphones, be sure to use the Digital Piano’s 2 VOLUME controller to turn the volume down to a low level. After connecting, you can adjust the volume to the level you want. • While sound output from the speakers is disabled,* the Digital Piano automatically optimizes sound for headphones and LINE OUT listening. During speaker output, it automatically switches to optimization for listening with speakers.
Connections z Expression Pedal You can use a pedal to control the volume level and effect application. Connect an expression pedal to the ASSIGNABLE PEDAL jack. Also, use “Pedal Edit” on the CONTROLLER screen to specify that an expression pedal is assigned to the ASSIGNABLE PEDAL jack. • Use a commercially available expression pedal that meets the specifications below.* Note that the polarity of the pedals of some manufacturers is different from the polarity required by this Digital Piano.
Connections An external source connected to LINE IN R (right) is output from the Digital Piano’s right speaker, while a source connected to LINE IN L/MONO is output from the left speaker. Use commercially available connection cords that match the equipment being connected to. When an external source is connected to LINE IN L/ MONO only, the input is output from both speakers. You can connect a smartphone or other music player to AUDIO IN.
Operations Common to All Modes Using the Display Screen Display Screen Layout When you turn on the Digital Piano, a MENU screen and a MAIN screen (which shows the current setup) appear on the display. You can use these screens to configure a variety of different functions. A quick palette of navigation icons along the right side of the display are for navigating between screens. ■ Quick Palette The Quick Palette is always displayed along the right side of the screen.
Operations Common to All Modes To use the touch panel Your Digital Piano has a touch panel. You can use the touch panel to configure a variety of different functions. To input text characters You can touch the keys of an on-screen touch keyboard to input data file names. The Digital Piano supports input of alpha characters and symbols. 1 2 3 4 English Performing Operations • Do not perform touch panel operations with a sharp or hard pointed object. Doing so can damage the LCD.
Operations Common to All Modes To select an item in a list To change a setting value An item that can be selected using a list is indicated by the “X” icon. A setting value that can be changed is indicated by a “ ” icon. 1. 1. 2. Touch the item whose setting you want to change. On the list that appears, touch the item to which you want to change. 2. Touch the item whose setting you want to change. Use the bs Dial or the bt w, q buttons to change setting value.
6 bn cm bp bq Selecting and Playing a Tone Your Digital Piano has 650 tones. Tones are divided into 13 groups. • Refer to the separate Appendix for details. 1. On the screen, touch bq MAIN. This displays the MAIN screen. 2. Touch the “Upper 1” tone. This displays the TONE SELECT screen. 5. cn co English Playing with Different Tones bt On the screen, touch bq MAIN to return to the MAIN screen.
Playing with Different Tones Splitting the Keyboard between Two Tones You can split the keyboard so the left side (lower range) plays one tone and the right side (upper range) plays a different tone. • On a split keyboard, a tone assigned to the low range is called a “split tone” (Lower 1). Example: When “GM Slap Bass 1” is selected as the split tone Split tone: GM Slap Bass 1 1.
Playing with Different Tones You can layer two different tones so they play at the same time when you press a keyboard key. • The Upper 1 tone is called the “main tone”, while the Upper 2 tone is called the “layered tone”. 1. On the screen, touch bq MAIN. This displays the MAIN screen. 2. 3. Select the main tone. Splitting the Keyboard for Duet Play You can split the keyboard in the center for duet play so the left and right sides have the same ranges.
Playing with Different Tones 2. Touch “Duet”. This turns on duet play. • Touch “Pan” to turn on Duet Pan. While Duet Pan is enabled (on), the left side keyboard tone is output from the left speaker, while the right side keyboard tone is output from the right speaker. The effects below are not applied.
Playing with Different Tones Use this procedure to adjust the volume balance between the main tone and the layered tone. 1. On the screen, touch bp MENU. This displays the MENU screen. 2. 3. Touch “BALANCE”. Touch the tone you want to adjust and then use the bt w, q buttons to adjust volume. Upper 1: Main tone Upper 2: Layered tone Lower 1: Split (main) tone Lower 2: Split (layered) tone 4. On the screen, touch bq MAIN to return to the MAIN screen.
Playing with Different Tones Changing the Tempo Setting There are two different methods you can use to change the tempo setting: using the cm TEMPO w, q buttons for gradual change, or by tapping a beat with the cm TEMPO TAP button (tap input). ■ Method 1: To adjust the tempo setting using the cm TEMPO w, q buttons 1. Using the Pitch Bend Wheel You can use the pitch bend wheel to slide the pitch of notes smoothly upwards and downwards.
• You can change the effects and functions assigned to the modulation wheel and knobs. See “CONTROLLER Screen” under “Configuring Digital Piano Settings” (pages EN-68 through EN-81). To change a function assigned to a knob 1. On the screen, touch bq MAIN. This displays the MAIN screen. 2. On the MAIN screen, touch the knob whose setting you want to change.
Playing with Different Tones Sounding Arpeggio Phrases Automatically (Arpeggiator) With the arpeggiator, you can play various arpeggios and other phrases automatically by simply pressing keys on the keyboard. You can select from a number of different arpeggio options, including playing arpeggios from a chord, playing various phrases automatically, and more. 1. 6. On the keyboard, play a chord or a single note.
English Editing a Tone bp bq br You can use the procedures below to edit tones and apply effects to the desired Upper 1 (main) tone. Editing a Tone 1. 2. 3. 4. 5. Specify Upper 1 as the tone to be edited. Touch bp MENU. On the MENU screen, touch “TONE”. Touch “Edit”. 13. Touch the destination tone number. • If the tone number already has data assigned to it, there will be an asterisk (*) next to it. 14. Touch “Execute”.
Editing a Tone Changing the Name of a Tone 1. 2. 3. 4. 5. 6. On the MENU screen, touch “TONE”. Touch “Edit”. Touch “Rename”. Touch the tone you want to rename. Input the new name. After you are finished inputting the name, touch “Enter”. Deleting a Tone 1. 2. 3. 4. 5. 6. On the MENU screen, touch “Edit”. Touch “Edit”. Touch “Clear”. Touch the tone you want to delete. Touch “Execute”. Touch “Yes”. • To cancel the delete operation, touch “No”. EN-24 PX560-ES-1B.
Editing a Tone Editable Parameters English • Shaded cells indicate a group made up of multiple setting items. Touching “Enter” displays the setting items of a group. ■ Editable Melody Tone Parameters Display Text Pitch Description Settings Pitch envelope. The editable parameters in this group affect the pitch of notes. Octave Shift Octave shift. Changes the tone of notes in octave units. Envelope • The figure below also applied to filter, amp, and other envelopes.
Editing a Tone Display Text Filter Description Settings Filter. This is a group of editable parameters associated with filters (tones). • With this group, the vertical (Level) axis in the pitch envelope diagram corresponds to how the filter is applied. Cutoff Cutoff frequency. Specifies the filter cutoff frequency. –64 to 0 to +63 Resonance Resonance. Specifies the resonance of the tone in the vicinity of the cutoff frequency. –64 to 0 to +63 Velocity Sense Velocity sense.
Editing a Tone Display Text Description Settings Low Frequency Oscillator. This is a group of editable LFO parameters applied to pitch, filter, and amp. Pitch Wave FilterAmpWave Wave type. Specifies one of the following wave types to be used for LFO. FilterAmpWave is shared by filter and amp. Sin (sine wave) Puls 1:3 (square wave 1:3) Tri (triangle wave) Puls 2:2 (square wave 2:2) Saw up (sawtooth up wave) Puls 3:1 (square wave 3:1) Refer to the cell to the left.
Editing a Tone ■ Editable Drum Tone Parameters Display Text Inst Edit Description Settings Instrument edit. This is a group of editable instruments assigned to each keyboard. • Press a keyboard key to specify the key to be edited. C-1 - G9 Inst Select Instrument number select. Specifies the number of the drum tone assigned to each key. See the “Instrument List” in the separate Appendix. Note Off Mode Note off mode. Turning on this setting causes note off to be performed when a key is released.
Editing a Tone Description Common effect. This is a group of editable effect function parameters. For details, see the melody tone “Effect” (page EN-26). • For details about the setting items below, see the melody tone “Effect” (page EN-26). Chorus Send, Delay Send, Reverb Send Pan Pan. This is a group of editable parameters associated with pan (sound stereo position) operation. • For details about the setting items below, see the melody tone “Pan” (page EN-27).
Editing a Tone ■ Editable Hex Layer Tone Parameters Display Name Description Settings Volume Volume. Overall hex layer volume. Keyoff Velocity Mode Key off velocity mode. Select “KeyOff” to use the key off velocity as the KeyOff, KeyOn, Both key off velocity, or “KeyOn” to select the key on velocity. Select “Both” to reflect both (key on and key off) velocities. 0 to 127 Layer Layer. This is a group of editable parameters for each layer.
Editing a Tone Description Settings Filter. For details, see the melody tone “Filter” (page EN-26). • For details about the setting items below, see the melody tone “Filter” (page EN-26). You can input a value in the range from 0 to 127. Cutoff, Resonance Filter Type Filter type. Specifies the range cut by the filter. LPF1: 6dB/oct filter for low-frequency band components. No resonance effect. Suitable for acoustic instruments. LPF2: 12dB/oct filter for low-frequency band components.
Editing a Tone Display Name Amp Description Settings Amp. For details, see the melody tone “Amp” (page EN-26). • For details about the setting items below, see the melody tone “Amp” (page EN-26). Volume, Velocity Sense • For details about the setting items below, see the drum sound “Amp” (page EN-28). Pan Envelope • For details about the setting items below, see the melody tone “Pitch Envelope” (page EN-26). You can input a value in the range from 0 to 127.
Editing a Tone Display Name Description Settings Pitch. The editable parameters in this group affect the pitch of notes. Detune Detune. Causes the tuning of Layers 1 through 6 to be slightly different from each other. A larger setting value increases the amount of detuning. The maximum value (31) results in a difference of 100 cents (semitones) between Layer 1 and Layer 6.
Editing a Tone ■ Editable DSP Parameters • Select “Through” if you want to disable application of DSP. - -: Through Select this option if you do not want to apply a DSP effect. There are no parameters that can be set while this option is selected. 01: Equalizer This is a three-band equalizer. Parameter Value Ranges: 1 :EQ1 Frequency (100, 125, 160, 200, 250, 315, 400, 500, 630, 800, 1.0k, 1.3k, 1.6k, 2.0k, 2.5k, 3.2k, 4.0k, 5.0k, 6.3k, 8.0k [Hz]) Adjusts the center frequency of Equalizer 1.
Editing a Tone Chorus Gives notes depth and breadth. Parameter Value Ranges: 1 :LFO Rate (0 to 127) Adjusts the LFO rate. 2 :LFO Depth (0 to 127) Adjusts the LFO depth. 3 :LFO Waveform (Sin, Tri) Selects the LFO waveform. 4 :Feedback (–64 to 0 to +63) Adjusts the strength of feedback 5 :Wet Level (0 to 127) Adjusts the level of the effect sound. 6 :Polarity (–, +) Inverts the LFO of one channel. 7 :Input Level (0 to 127) Adjusts the input level.
Editing a Tone 13: LFO Wah This is a “wah” effect that can automatically affect the frequency using an LFO. Parameter Value Ranges: 1 :Input Level (0 to 127) Adjusts the input level. The input signal can become distorted when the level of the sound being input, the number of chords, or the Resonance value is large. Adjust this parameter to eliminate such distortion. 2 :Resonance (0 to 127) Adjusts the strength of feedback 3 :Manual (0 to 127) Adjusts the wah filter reference frequency.
Editing a Tone 19: Delay 20: English Delays the input signal and feeds it back to create a repeating effect. Parameter Value Ranges: 1 :Delay Time (0 to 127) Adjusts the total delay time. 2 :Delay Ratio L (0 to 127) Adjusts the ratio of the left channel relative to the total delay time. 3 :Delay Ratio R (0 to 127) Adjusts the ratio of the right channel relative to the total delay time. 4 :Delay Level L (0 to 127) Adjusts the level of the left channel.
Using Auto Accompaniment cl 7 8 9 bk bl bm With Auto Accompaniment, simply select the accompaniment rhythm you want and the matching accompaniment (drums, guitar, etc.) will play automatically when you play a chord with your left hand. It’s like having your own personal backup group along with you wherever you go. bp bq br 3. cm bt Touch the group that contains the rhythm you want to use. • You can navigate between groups by touching “UU” or “II”. Playing an Auto Accompaniment 1.
Using Auto Accompaniment Press the bm ACCOMP ON/OFF button so its lamp is lit. This turns ACCOMP on, so all accompaniment parts sound. • Turning ACCOMP off so the ACCOMP lamp is unlit causes only the percussion instrument parts (Drums, Percussion) to sound. • Each press of the button toggles ACCOMP between on and off. Lit 7. Press the bk SYNCHRO/ENDING button. 10. When you are finished, press the bl a button again to stop Auto Accompaniment.
Using Auto Accompaniment To select a chord fingering mode You can select from among the following five chord fingering modes. Fingered 1 Fingered 2 Fingered 3 CASIO Chord Full Range 1. 2. 3. On the MENU screen, touch “RHYTHM”. Touch “Chord Input Type”. Touch the chord input method you want to use. This changes to the selected chord input method. ■ Fingered 1, 2, 3 With these three chord fingering modes, you play chords on the chord keyboard using their normal chord fingerings.
Modifying Auto Accompaniment Patterns There are six different Auto Accompaniment patterns, shown below. You can switch between patterns during accompaniment play and even modify patterns. Use buttons 7 through bk to select the pattern you want. 7 8 9 bk Using Recommended Tones and Tempos (One-Touch Presets) One-Touch Preset gives you one-touch access to tone and tempo settings that go well with the currently selected Auto Accompaniment rhythm pattern. 1.
Using Auto Accompaniment Adding Harmony to Melody Notes (Auto Harmonize) Auto Harmonize lets you add harmony to melody notes you play with your right hand for more melodic depth. You can select any one of 12 Auto Harmonize types. 1. On the screen, touch bq MAIN. This displays the MAIN screen. 2. Touch “Auto Harmonize” to turn it on. Red 7. Harmony will be added to your melody notes based on the chords you play.
6. Touch the display item for the instrument part you want to edit. Rhythm, tone: Touch the display item and then select from the list that appears. To change the settings of items other than those above, use the bt w, q buttons to change the displayed value. • Rhythm patterns are made up of the eight parts below.
Using Auto Accompaniment 15. Touch “Yes”. This stores the data. • To return to the screen in step 4 without saving, touch “No”. • Saving user rhythm data to a user rhythm number that already has data will cause the existing data to be replaced by the new data. • If the size of the accompaniment pattern or instrument part data is too large to be edited, a memory full message (Memory Full) will appear on the display. If that happens, select a different accompaniment pattern or instrument part for editing.
English Demo Song bl bm bt Playing the Demo Tunes 1. While holding down the bm ACCOMP ON/ OFF button, press the bl a button. This will start sequential playback of the demo songs, starting from song 1. • You can use the bt w, q buttons to change to another demo song. 2. Press the bl a button. This stops demo song playback. Playback of the demo songs will continue in an endless loop until you press the bl a button to stop it.
Music Presets bl bm Music Presets provide you with one-touch tone, rhythm, chord, and other settings that are optimized for specific musical genres and songs. In addition to built-in presets, you can create your own original Music Presets (user presets). There is a total of 305 built-in music presets, which are divided into nine groups. A tenth group is provided for user presets. • Refer to the separate Appendix for details. Recalling Preset Data 1. On the MENU screen, touch “MUSIC PRESET”.
Music Presets A music preset editor is provided to allow you to create your own original music presets (user presets). Up to 100 user presets can be stored in the user group. 1. Perform step 1 through 3 in the procedure under “Recalling Preset Data” (page EN-46) to select the preset you want to use as the basis for your user preset. 2. Touch “Edit”. 3. Edit the music preset parameters. 9. If the selected preset number does not have any data assigned to it, the message “Sure?” will appear.
Music Presets 3. ■ To insert a sequential series of steps After you are finished, touch br EXIT to return to the editing type selection screen (page EN-47). 1. • Up to approximately 999 measures can be contained in a single preset. If your edits cause this limit to be exceeded, the message “Measure Limit” will appear on the screen and further editing will become impossible. 2. 3.
Music Presets To change how an Auto Accompaniment is played On the editing type selection screen (page EN-47), touch “Parameter Edit” to display the auto accompaniment play editing screen shown below. Parameter 2. English 1. Setting Touch the parameter whose setting you want to change, and then use the bt w, q buttons to change the setting value. Parameter Description Setting Synchro Type: Synchro type Selects the synchro standby status and type when the music preset is selected.
Music Presets ■ Timing Setting and Chord Progression Playback This section explains how chord progressions are played in accordance with the “Timing Set” settings in step 2 under “To change how an Auto Accompaniment is played” (page EN-49). Note that this setting affects playback only. It does not change the chord progression data. z Normal Plays chords at the same timing as the recording. z Half Plays chords measure-by-measure at a timing that is half that of the recording.
z 3/4 Plays chords measure-by-measure at a timing that is 3/4 times that of the recording. This setting is best for use with a 6/8 time rhythm. Playing back a chord progression like that shown for “Half” above while “3/4” is specified results in the progression shown below.
Registering Tone and Rhythm Setups bt Registration memory lets you store Digital Piano setups (tone, rhythm, etc.) for instant recall whenever you need them. Registration memory simplifies performance of complex pieces that require successive tone and rhythm changes. You can have up to 96 setups in Registration memory at one time. To select a setup, use the cp BANK button and REGISTRATION buttons cq through ct.
Registering Tone and Rhythm Setups To recall a registration setup Press the cp BANK button to select the bank that contains the setup you want to recall. English 1. • The currently selected bank and area numbers are shown on the MAIN screen and button lamps. 2. Use the REGISTRATION buttons (cq through ct) to select the area whose setup you want to recall. This recalls the registration memory setup and automatically configure the Digital Piano settings accordingly.
Recording and Playback 345 bt Your Digital Piano can record what you play on the keyboard and play it back when you want. The Digital Piano has two recording functions: a MIDI Recorder and an Audio Recorder. Select the function that suits the needs for the type of recording you want to make. • CASIO COMPUTER CO., LTD. takes no responsibility for any damages, lost profits, or claims by third parties arising from the deletion of recorded data due to malfunction, repair, or for any other reason.
Recording and Playback Audio Recorder What you can do... Record to one track while playing back from the other track System Track Keyboard play 3 Track 1 · · · While playing back... Keyboard play What you can do...
Recording and Playback Recording to Digital Piano Memory (MIDI Recorder) Perform the steps below to record your keyboard play to Digital Piano Memory. 1. 3. On the MENU screen, touch “MIDI RECORDER”. Touch “New Data”. This enables recording of new data to the system track. 5. Play something on the keyboard. Recording starts as soon as you play something. • You can also start recording by touching “X”. • You also can configure the piano so Auto Accompaniment is included in the recorded data.
Recording and Playback You can record specific instruments, the left hand and right hand, or other parts of a song individually, and then combine them into a final song. ■ What is a track? A “track” is a separate recorded part of a song. The MIDI Recorder of this Digital Piano has a total of 17 tracks, one of which is a system track as described below.
Recording and Playback 8. After you are finished playing, touch “Y”. This enters the playback mode. Touch “X”to play back what you recorded up to this point. To stop playback, touch “Y”. • You can use the following procedure to turn specific tracks on (play enabled) and off (play disabled). This allows you to listen only to the track(s) you want when recording a new track. 4. This will start playback of the selected track. 5.
Recording and Playback You can use the following procedure to specify a particular range for punch-in recording. Start measure End measure ■ To re-record an area smaller than one measure Use the procedure below to specify a punch-in recording area that includes a part of a measure. Example: To re-record from beat 3 of measure 2 up to beat 1 of measure 4 English To re-record a specific range (Auto Punch-in Recording) Punch-in recording range 1. 2.
Recording and Playback 5. 6. Touch “YW” to return to the beginning of the song, or use “s” and “d” to adjust the position to start playback. Touch “0” to enter the recording mode and select the track where you want to perform punch-in recording. • For information about how to select a track, see steps 4 and 5 under “To record to a specific track (Part)” (page EN-57). 7. 8. 9. Touch “Rec Type”. Touch “Punch In A-B”. Touch “X”.
Recording and Playback 3. To stop playback, touch “Y”. • You can also stop playback by pressing the 4 MIDI a button. When play reaches the end of the section you want to repeat, touch “Set B”. This makes the measure where you touched “Set B” the “end measure”. • You can also make fine adjustments to the end point. After touching “Measure”, “Beat”, or “Tick” for Point B, you can then use the bt w, q buttons to adjust.
Recording and Playback To rename recorded MIDI data To delete recorded data 1. 1. 2. 3. 4. 5. 6. 7. 8. On the MENU screen, touch “MIDI RECORDER”. Touch the data name. Touch “User Data Edit”. Touch “Rename”. Touch the data you want to rename. Input the new name. After you are finished inputting the name, touch “Enter”. Touch “Yes”. • To cancel the rename operation, touch “No”. To copy recorded MIDI data 1. 2. 3. 4. 5. 6. 7. On the MENU screen, touch “MIDI RECORDER”. Touch the data name.
Recording and Playback 1. 2. 3. 4. 5. 6. 7. 8. On the MENU screen, touch “MIDI RECORDER”. Touch “Monitor”. To insert a blank measure at a specific position in a specific track 1. In the “Source” list, touch the track you want to copy. 2. 3. 4. 5. In the “Destination” list, touch the destination track. 6. Touch “Edit”. Touch “Copy”. Touch “Execute”. • To cancel the copy operation, touch “No”. 1. 2. 3. 4. 5. 6. 7. On the MENU screen, touch “MIDI RECORDER”. Touch “Monitor”. Touch “Edit”.
Recording and Playback To delete a specific measure from a specific track 1. 2. 3. 4. 5. 6. On the MENU screen, touch “MIDI RECORDER”. Touch “Monitor”. Touch “Edit”. Touch “Delete Measure”. Touch the track that contains the measure you want to delete. Touch the item whose setting you want to change, and then use the bt w, q buttons to change it. Measure: Specifies the measure number from which delete starts. Size: Specifies the number of measures to be deleted. 7. 8.
Recording and Playback 1. 2. 3. 4. 5. 6. On the MENU screen, touch “MIDI RECORDER”. Touch “Monitor”. Touch “Edit”. Touch “Key Shift”. Touch the track you want to key shift. Touch the item whose setting you want to change, and then use the bt w, q buttons to change it. Shift: Specifies the extent of the key shift. You can specify a value in the range of –24 to +24. Measure: Specifies the measure number from which key shift starts. Size: Specifies the number of measures to be key shifted. 7. 8.
Recording and Playback 3. Touch “0”. This turns on the recorder and enters recording mode. • Each touch of “0”cycles through modes as shown below. Playback mode • You can also enter the recording mode by pressing the 3 REC MODE button and then touching “AUDIO RECORDER”. To record keyboard play with playback from Digital Piano memory 1. 2. On the MENU screen, touch “AUDIO RECORDER”. Touch “0” to enter the recording mode. Unlit Recording mode Lit 3. 4. Flashing Touch “X”. Press the 4 MIDI a button.
Recording and Playback 1. On the MENU screen, touch “AUDIO RECORDER”. • The above step is not necessary if you are playing back recorded data immediately after recording it (while the AUDIO RECORDER screen is displayed). 2. Touch the file name. This displays the audio file selection screen. 5. • You can also stop playback by pressing the 5 AUDIO a button. To delete an audio file from a USB flash drive Files can be deleted one at time.
Configuring Digital Piano Settings 1 bn bs br ck bt On the MENU screen, you can change the selected tone and rhythm, and also change the keyboard key and touch settings, pedal and MIDI settings, and more. This means you can tailor Digital Piano operation to suit your particular needs. Configuring Digital Piano Settings 1. 2. 3. On the MENU screen, touch the menu for the settings you want to configure. Touch the item whose setting you want to change.
Configuring Digital Piano Settings ■ TONE Screen English Use this screen to configure tone and other keyboard settings. • You can also display the TONE screen by pressing the ck TONE button. Item Description Setting Upper 1, Upper 2, Lower 1, Lower 2 Turns each part on or off, and specifies its tone. Off, On Edit See page EN-23. – Octave Change the range of each part in octave units. –2 to 0 to 2 Auto Harmonize See page EN-42. Off, On Duet See page EN-17. Off, On Split See page EN-16.
Configuring Digital Piano Settings ■ BALANCE Screen Use this screen to adjust volume settings for the keyboard, Auto Accompaniment, etc. Item Upper 1 Volume Description See page EN-19. Setting 0 to 127 Upper 2 Volume See page EN-19. 0 to 127 Lower 1 Volume See page EN-19. 0 to 127 Lower 2 Volume See page EN-19. 0 to 127 Keyboard Volume Adjusts the volume levels of all parts that are controlled by the keyboard.
Configuring Digital Piano Settings ■ EFFECT Screen A) Digital Signal Processor (DSP) A collection of versatile Normal DSP effects help to enhance the sound of tones. For example, distortion can be applied to an electric guitar sound to make it sound more powerful. There are 20 different Normal DSP types, and the most appropriate one for the selected tone is applied automatically. English Use this screen to apply variety of acoustic effects to notes.
Configuring Digital Piano Settings Item Description Setting Chorus Edit Chorus Type Selects the chorus type. Chorus1, Chorus2, Chorus3, Chorus4, FB Chorus, Flanger1, Flanger2, Flanger3, Flanger4, Short Delay1, Short Delay2, Short Delay3, Short Delay4, Soft Chorus, Bright Chorus, Deep Chorus LFO Rate Adjusts the LFO rate. 0 to 127 LFO Depth Adjusts the LFO depth. 0 to 127 Feedback Adjusts the feedback amount. 0 to 127 Tone Adjusts the tone. 0 to 127 Delay Time Adjusts the delay time.
Configuring Digital Piano Settings Description Setting Adjusts the release time. Adjusts the time until the compression effect is released. 0 to 127 Position Selects the connection position with the compressor EQ. PreEQ, PostEQ Master EQ Edit English Item Release See page EN-81. Acoustic Simulator Hammer Response Controls the time deviation between when a key is pressed and the note actually sounds. 0 to 7: A greater value produces slower timing.
Configuring Digital Piano Settings ■ SYSTEM SETTING Screen Use this screen to configure global Digital Piano settings. Item Description Setting Speaker Specifies whether sound should be output from the Digital Piano speakers (On) or muted (Off).
Configuring Digital Piano Settings Description Setting When “On” is selected for this setting, the Digital Piano will remember its settings whenever it is turned off, and restore them when it is turned on again. When “Off” is selected, settings are reset to their initial defaults whenever the Digital Piano is turned on. Off, On Auto Power Off Specifies if Auto Power Off (page EN-8) is enabled (On) or disabled (Off). Off, On Exp.pedal Calibration – Performs an expression pedal calibration operation.
Configuring Digital Piano Settings ■ CONTROLLER Screen Use this to configure pedal and pitch bend wheel settings. Item Knob1-3 Edit Target Description Setting This is a group editable parameters for bn knobs (K1 to K3). Selects the parameters to be controlled by a controller. For example, the “CC67:Soft” setting specifies a soft pedal effect. • Two targets can be specified for a single controller. Refer to the information to the left. No Assign: No target specified.
Configuring Digital Piano Settings Description Setting This is a group of editable parameters for the pedal connected to the ASSIGNABLE PEDAL terminal. Details of the editable parameters are the same as “Knob1 Edit”, above. Pedal Type Specifies whether the pedal connected to the ASSIGNABLE PEDAL jack is to be used as a foot switch or an expression pedal. Do not change this setting while the pedal is depressed. Foot Switch, Exp.
Configuring Digital Piano Settings ■ MIXER Screen Use this screen to change the tone of each part, and to adjust its volume and reverb. Level meter Item Part Meaning Setting A part that is turned on is sounded. Turn off parts you do not want to sound. Off, On Tone Changes the tone. 650 Volume Adjusts the volume. The volume level of each part is shown by an on-screen level meter. 0 to 127 Pan Specifies the stereo pan position of the sound output by the Digital Piano.
Configuring Digital Piano Settings ■ MIDI Screen Item Description English Use this screen to configure MIDI settings. For information about MIDI channels assigned to each port, see “Part and MIDI Channel Assignments and Diagram” (page A-5). Setting Keyboard Channel Selects the channel for sending keyboard play MIDI data to an external device (keyboard channel). 01 to 16 Accomp Out Turn on this setting to send MIDI data corresponding to Auto Accompaniment to an external device.
Configuring Digital Piano Settings ■ REGISTRATION Screen You can specify which current settings should be left unchanged when parameter settings are recalled using the registration function. Item Description Setting Split Point Turning on this setting disables recall of the split point setting. Off, On Transpose Turning on this setting disables recall of the transpose setting. Off, On Tone Turning on this setting disables recall of TONE related settings.
Configuring Digital Piano Settings ■ EQUALIZER Screen English Adjusts the frequency characteristics of all tones. Item Description Setting Low Frequency Selects the low-range cutoff frequency. 50, 63, 80, 100, 125, 160, 200, 250, 315, 400, 500, 630, 800 (Hz) Low Gain Adjusts the low-range gain. –12 to 0 to +12 Mid1 Frequency Selects the low mid-range frequency. 100, 125, 160, 200, 250, 315, 400, 500, 630, 800, 1.0k, 1.3k, 1.6k, 2.0k, 2.5k, 3.2k, 4.0k, 5.0k, 6.3k, 8.
USB Flash Drive Your Digital Piano supports the following USB flash drive operations. z USB flash drive formatting z Data storage to a USB flash drive • Song data recorded with the Digital Piano’s MIDI recorder is stored on a USB flash drive as-is or stored as a MIDI file (SMF format 0). • Standard audio data from a computer (WAV files) can also be stored on a USB flash drive and played back on the Digital Piano. • Digital Piano play can be recorded directly to a USB flash drive.
USB Flash Drive and USB Flash Drive Port Handling Precautions • Be sure to observe the precautions provided in the documentation that comes with the USB flash drive. • Avoid using a USB flash drive under the following conditions. Such conditions can corrupt data stored on the USB flash drive.
USB Flash Drive Formatting a USB Flash Drive • Be sure to format a USB flash drive on the Digital Piano before using it for the first time. • Before formatting a USB flash drive, make sure it does not have any valuable data stored on it. • The format operation performed by this Digital Piano is a “quick format”. If you want to completely delete all of the data in USB flash drive, format it on your computer or some other device.
USB Flash Drive You can use the procedure below to load data from a USB flash drive into Digital Piano memory. • Place the data (file) you want to load into the MUSICDAT folder on the USB flash drive. 1. 2. 3. 4. 5. 6. Insert the USB flash drive into the Digital Piano’s USB flash drive port. Use the following procedure to delete USB flash drive data (files). 1. 2. 3. 4. On the MENU screen, touch “MEDIA”. Touch “Load”. Touch the data type of the data you want to import.
Connecting to a Computer You can connect the Digital Piano to a computer and exchange MIDI data between them. You can send play data from the Digital Piano to commercially available music software running on your computer, or you can send MIDI data from your computer to the Digital Piano for playback. Minimum Computer System Requirements The following shows the minimum computer system requirements for sending and receiving MIDI data.
Connecting to a Computer English • Once you are able to connect successfully, there is no problem with leaving the USB cable connected when you turn off your computer and/or Digital Piano. • This Digital Piano conforms to General MIDI Level 1 (GM). • For detailed specifications and connections that apply to MIDI data send and receive by this Digital Piano, see the latest support information provided by the website at the following URL. http://world.casio.
Reference Error Messages One of the error messages below appears on the display when a problem occurs. • To clear an error message and return to the normal display, touch br EXIT on the display. Display Message Cause No Media 1. The USB flash drive is not connected to the Digital Piano’s USB flash drive port. 2. The USB flash drive was removed while some operation was in progress. 3. The USB flash drive is write-protected. 4. The USB flash drive has anti-virus software.
Reference Problem Cause No sound is produced when I press a keyboard key. 1. The VOLUME controller is set to “MIN”. 2. Headphones or an adaptor plug is plugged into one of the PHONES jacks. 3. Upper 1 icon is off. 4. The “Speaker” SYSTEM SETTING is off. 1. Digital Piano tuning is incorrect. The pitch of the Digital Piano is off. Tones and/or effects sound strange. Turning power off and then back on again does not eliminate the problem.
Reference See Page When I press a button, the Performing a button operation while playing with the Duet Mode, Auto Accompaniment, the note that is sounding cuts out recorder, or other functions can cause such phenomena when the Digital Piano switches momentarily or there is a internal tone effects. It does not indicate malfunction. slight change in how effects are applied.
Reference Model PX-560MBE Keyboard 88-key piano keyboard • Velocity resolution: 16,256 maximum • Layer, Split • Duet: 4 octaves (–2 to 0 to +2) • Transpose: 2 octaves (–12 to 0 to +12) • Octave shift: 4 octaves (–2 to 0 to +2) • Key off velocity Sound Source • Number of Tones: 650 Melody Tones: Preset 532/User 280 Hex Layer Tones: Preset 100/User 100 Drum Sounds: Preset 18/User 20 • Maximum polyphony: 256 notes • Touch Response (3 sensitivity levels, Off) • Tuning: 415.5 Hz to 440.0 Hz to 465.9 Hz (0.
Reference Inputs/Outputs • • • • • • • • • • • PHONES jacks: Stereo mini jacks × 2 DAMPER PEDAL jack: Standard jack × 1 ASSIGNABLE PEDAL jack: Stereo standard jack × 1 Power: 12V DC MIDI OUT/IN terminals LINE IN R, L/MONO jacks: Standard jacks × 2 Input impedance: 9.0KΩ Input voltage: 200mV LINE OUT R, L/MONO jacks: Standard jacks × 2 Output impedance: 2.3KΩ Output voltage: 1.8V (RMS) MAX Audio In: Stereo mini jack Input impedance: 9.
Operating Precautions Be sure to read and observe the following operating precautions. • With a model that has a recording function or other data storage function, be sure to back up any data you want to maintain to another medium before submitting this product for servicing or repair. Stored data may be accessed or even deleted as part of servicing or repair procedures. ■ Location Avoid the following locations for this product.
Reference AC Adaptor Handling Precautions Model: AD-A12150LW 1. Read these instructions. 2. Keep these instructions on hand. 3. Heed all warnings. 4. Follow all instructions. 5. Do not use this product near water. 6. Clean only with a dry cloth. 7. Do not install near radiators, heat registers, stoves, or any other source of heat (including amplifiers). 8. Use only attachments and accessories specified by the manufacturer. 9. Refer all servicing to qualified service personnel.
Reference STLport English Copyright 1994 Hewlett-Packard Company Copyright 1996,97 Silicon Graphics Computer Systems, Inc. Copyright 1997 Moscow Center for SPARC Technology. Permission to use, copy, modify, distribute and sell this software and its documentation for any purpose is hereby granted without fee, provided that the above copyright notice appear in all copies and that both that copyright notice and this permission notice appear in supporting documentation.
Information/Información Fingering Guide/Guía de digitación Fingered 1, Fingered 2 Chords/Acordes Fingered 1, Fingered 2 C C6 *1 *3 Cm Cm6 *2 *3 Cdim Cadd9 Caug *3 Cmadd9 C 5 C69 *3 Csus4 *3 Cm69 *3 Csus2 *3 C7 ( 9) C7 C7 (9) Cm7 *3 C7 ( 9) C7 ( 11) CM7 CmM7 C7 ( 13) Cdim7 *3 C7 (13) CdimM7 Cm7 (9) C7 5 *3 Cm7 (11) *3 Cm7 5 *3 CM7 (9) CM7 5 CmM7 (9) Caug7 and 5th only) * C5 (Root (La raíz y la 5ta.
Information/Información Fingered 3, Full Range Chords/ Acordes Fingered 3, Full Range In addition to the chords that can be fingered with Fingered 1 and Fingered 2, the following chords also are recognized. Además de los acordes que se pueden digitar con Fingered 1 y Fingered 2, también se pueden reconocer los siguientes acordes.
PX560-ES-1B.
PX560-ES-1B.indd 197 Root C C /(D ) D (D )/E E F F /(G ) G (G )/A A • Since the chord input range is limited, this model may not support some of the chords shown above. • Debido a que el rango de entrada de acordes es limitado, es posible que este modelo no admita algunos de los acordes mostrados arriba.
Information/Información Part and MIDI Channel Assignments and Diagram/ Asignaciones de las partes y de los canales MIDI y diagrama Though this Digital Piano has a sound source that supports simultaneous play of 48 parts, the MIDI standard supports handling of information for up to a maximum of 16 parts. As a result, the 48 parts of the Digital piano are divided among three 16-part ports, resulting in the equivalent of three built-in 16-part MIDI sound sources.
Information/Información *1 The port that accepts MIDI In messages is specified by the “MIDI In Port” setting of the MIDI screen. *2 The MIDI Out channel is specified by the “Keyboard Channel” setting of the MIDI screen. *3 Auto Accompaniment MIDI data settings are configured by the “Accomp Out” setting of the MIDI screen. *4 Use “Not used.” parts when inputting performance information from an external source via MIDI In.
PX560-ES-1B.
PX560-ES-1B.indd 2 2016/12/15 15:39:23 Mode 1 : OMNI ON, POLY Mode 3 : OMNI OFF, POLY Remarks O O O O O X X X X X X O *3 Attack time Filter cutoff Vibrato rate Vibrato depth Vibrato delay DSP Parameter5*3 DSP Parameter6*3 DSP Parameter7*3 DSP Parameter8*3 Portamento Control High resolution velocity prefix Reverb send level Chorus send level Delay send level NRPN LSB, MSB RPN LSB, MSB *1 : Depende del tono *2 : Es posible asignar y enviar cualquier cambio de control de 0 a 101.
EN/ES English PX-560M Español USER’S GUIDE GUÍA DEL USUARIO Please keep all information for future reference. Guarde toda información para tener como referencia futura. This recycle mark indicates that the packaging conforms to the environmental protection legislation in Germany. Safety Precautions Before trying to use the Digital Piano, be sure to read the separate “Safety Precautions”. Esta marca de reciclaje indica que el empaquetado se ajusta a la legislación de protección ambiental en Alemania.