CASSIOPEIA User’s Guide Your CASSIOPEIA comes with a Hardware Manual in addition to this CASSIOPEIA User’s Guide. Be sure to read the Hardware Manual first. Before using your CASSIOPEIA for the first time, carefully read the Safety Precautions in the Hardware Manual. Keep this CASSIOPEIA User’s Guide on hand for reference whenever using your CASSIOPEIA.
Resetting the CASSIOPEIA If your CASSIOPEIA responds slowly, stops responding as expected, or “freezes,” try resetting it. A reset causes the CASSIOPEIA to restart and re-adjust memory allocation. Unsaved data in open windows may be lost. To reset the CASSIOPEIA, use the stylus to press and hold the Reset button for about two seconds. • CASIO COMPUTER CO., LTD. assumes no responsibility for any damage or loss resulting from the use of this manual. • CASIO COMPUTER CO., LTD.
Contents Chapter 1 Getting Started ...................................................... 8 1-1 Starting Up Your CASSIOPEIA .................................................................. 8 To start up your CASSIOPEIA ............................................................. 8 1-2 Programs ...................................................................................................... 9 Starting Up Programs Using the Icon Menu ....................................... 10 1-3 Top Menu ............
2-2-2 Viewing Calendar data ..................................................................... 36 Daily View ........................................................................................... 36 Weekly View ........................................................................................ 37 3-Month View ...................................................................................... 39 2-2-3 Making Calendar Settings ................................................................
3-4 Internet ....................................................................................................... 93 Using the Browser Screen ................................................................... 93 Configuring Internet Program Properties ............................................ 95 Displaying a Web Page ........................................................................ 96 Using Bookmarks ................................................................................
Displaying the File Properties of a Movie ........................................ 124 Making Playback Speed and Repeat Settings ................................... 125 Adjusting Playback Screen Brightness ............................................. 125 4-3 Music Player ............................................................................................ 126 Playback Screen Operations .............................................................. 126 Controlling Playback Using CASSIOPEIA Buttons ..
If you run out of CASSIOPEIA memory .......................................... 160 Screen freezes or responds slowly ..................................................... 160 Screen is blank .................................................................................. 161 Screen is dark .................................................................................... 161 Inaccurate response to stylus taps ..................................................... 161 Slow or no response .................
Chapter 1 Getting Started 1-1 Starting Up Your CASSIOPEIA NOTE When you start up your CASSIOPEIA for the first time, you must perform an Initial Setup procedure to configure the system. See the separate Hardware Manual for details about the initial setup procedure. The following assumes that you have already performed the initial setup procedure for your CASSIOPEIA. To start up your CASSIOPEIA 1. Open the CASSIOPEIA’s cover. 2. Press the power button.
1-2 Programs Your CASSIOPEIA comes with the following programs pre-installed. Icon Program Name This is an program for: Calendar Managing your appointments Contacts Managing your contact information (names, phone numbers, addresses, e-mail addresses, etc.
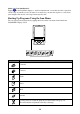
About “myCasio introduction” on the Top Menu displays a “myCasio introduction” screen that describes a portal for Tapping a wide range of contents services. In order to use myCasio, you must first register as a user from your computer. For details, visit “http://www.mycasio.com”. Starting Up Programs Using the Icon Menu You can start up certain programs by tapping their icons in the icon menu located under the CASSIOPEIA display screen.
1-3 Top Menu Press the Top Menu button to display the Top Menu. You can use the Top Menu to perform the following operations. • Start up programs • Uninstall programs • Assign a program to the icon menu The Main tab shows programs in main memory. The Card tab shows programs on the storage card loaded in the CASSIOPEIA. This is a list of installed programs. Top Menu Screen Important! • The Top Menu Main tab can display up to 32 programs, while the Card tab can show up to 64 programs.
NOTE • If you later need a program, you can re-install it from the bundled CD-ROM. See PC Connect online help for more information. Assigning a Program to the Icon Menu You can use the following procedure to assign a program to the far right icon menu icon. To assign a program to the icon menu 1. On the Top Menu, tap the program you want to assign to the icon. • You can skip the above step if the name of the program you want to assign is already highlighted. 2. Tap User Key. 3.
1-4 Common Program Operations This section describes operations that are common to all programs. System Tray The System tray is always on the display, below the CASSIOPEIA touch screen. (1) (2) (3) (4) (5) (1) Program Status Indicators • These icons show the status of any programs you currently have running. This area can show up to 30 icons at one time. • If all the icons cannot fit in the space provided, tap the button on the right to scroll the icons and view those that do not fit.
(2) System Status Indicators These icons provide information about the system. Tapping an icon displays one of the setting screens described below. This icon: Means this: And displays this screen when tapped: The card slot contains a card. This icon appears when the PC Card Unit is attached to your CASSIOPEIA. CF Slot Information dialog box Dial up connection is in progress. Current dial up connection status CASSIOPEIA is running under external power.
1-5 Inputting Text Use one of the on-screen input panels to input text. There are two types of input panels: a keyboard and a character recognizer. Keyboard: Tap the keys of the onscreen keyboard to input text. Character Recognizer: Use the stylus to write characters on the touch screen. Character Recognizer converts your characters into typed text. Important! • Use only unaccented English characters, numbers, and spaces, and the following symbol characters in file and folder names. !#$%&’()+,-.
NOTE • The currently selected input panel appears automatically whenever you encounter a situation that requires text input. You can temporarily hide the input panel and view the screen beneath it by tapping the input panel button. Typing with the Keyboard To type with the on-screen keyboard, tap the input panel switch and select Keyboard. Next, use the stylus to tap the keyboard keys. Characters appear as you type them. The keyboard has the input options described below.
Writing with Character Recognizer Your CASSIOPEIA comes with character recognition software that lets you write characters by hand. Character Recognizer supports word-by-word, non-cursive handwriting. To write using the character recognizer, tap the input panel switch and select Character Recognizer. Write in the designated input area in the lower part of the screen. The handwritten characters are converted to typed characters that appear at the cursor in the active application.
Starting up Notes displays a list screen like the one shown below. Tap to display a screen for creating a new freehand text document. Tap to display a screen for creating a new typed text document. Tap to return to the Top Menu. The Main tab shows Notes documents in main memory, while the Card tab shows Notes documents on the storage card loaded in the CASSIOPEIA. This is a list of stored files. Tapping a file name once selects it, and tapping a selected file name a second time opens the file.
NOTE • If you want to change the name of a document or move it to another location (in main memory or on a card), tap Edit L → Rename/Move. See “Naming a Document” on page 20 for more information. Creating a New Text Document Perform the steps below to create a new text document. To create a new text document 1. On the list screen, tap New Text. • This displays a blank text document screen. 2. Use the input panel to input the text you want.
3. After everything is the way you want, tap to save your document and return to the list screen. • Notes automatically assigns a name to the new document. NOTE • If you want to change the name of a document or move it to another location (in main memory or on a card), tap Edit L → Rename/Move. See “Naming a Document” on page 20 for more information. Creating a New E-mail Message Using a Text Document A simple operation creates a new e-mail message using the contents of the displayed Notes text document.
2. Type the name you want to give to the document in the Name box. • If you do not specify a file name, Notes will assign a name automatically. 3. Tap the Location box L button and select a storage location from the menu that appears. • You can specify Main (CASSIOPEIA main memory) or Card (Memory card) as the storage location. The Card option is available only when a storage card is loaded in the CASSIOPEIA. . 4.
Renaming and Moving Documents You can use the Rename/Move dialog box to both rename and move a document. To rename or move a document 1. On the list screen, tap the name of the document you want to rename or move to select it. 2. Tap Edit L → Rename/Move. • This displays the Rename/Move dialog box. 3. Type the name you want to give to the document in the Name box. • You can leave the current name as it is, if you want. 4.
1-7 Using Clock You can display the Clock screen by tapping Clock on the Top Menu (page 11) or by tapping the clock on the System Tray (page 13). You can perform the following operations with the Clock program. • You can make time and date settings, which are used by the CASSIOPEIA system. • You can specify two cities, one as your Home City and one as your Destination City, and display the current time in each on the Clock screen.
To make Clock settings 1. Display the Clock screen. 2. Select either Home City or Destination City. • Tap the button next to Home City or Destination city to select it. 3. Tap Time setting. • This displays the setting screen for the city you selected in step 2. 4. Make the settings you want. Tapping the L button displays a list of cities (and their GMT differentials) from which you can select the one you want.
To set an alarm 1. Display the Clock screen. 2. Tap Alarm. • This displays the alarm setting screen. 3. Make the settings you want. Select Once if you want the alarm to sound only once, or Everyday to have the alarm sound at the same time every day. Select this option if you want the alarm sound to be played when the alarm time is reached. Tapping the hour or minutes digits in the alarm time box displays an input panel for setting the alarm time.
Specifying the Date and Time Formats The date and time formats you specify with the following procedure are used on setting screens, programs (Calendar, etc.), and any other operation that uses a date or time. To set the date and time formats 1. Display the Clock screen. 2. Tap Display. • This displays the date and time format specification screen. 3. Make the settings you want. Click this button to display a menu of short version date formats.
1-8 Using Calculator Calculator provides you basic arithmetic, percent, and square root calculation capabilities. To display the Calculator screen, tap Calculator on the Top Menu (page 11).
Using the COPY Key Tapping the COPY key copies the calculation result on the calculator screen to the clipboard. You can then paste the copied result into any program that supports pasting (Notes, Mail, etc.) Exiting Calculator Tap the icon in the upper right corner of the Calculator screen to exit the calculator. About Calculation Errors An error indicator appears on the display and further calculation becomes impossible whenever an error occurs. Any of the following conditions produces an error.
Calculation Examples The following shows a number of examples that illustrate how to use Calculator. 0. 113. –31’779. V 53 + 123 – 63 = 963 × (23 – 56) = (56 × 3 – 89) ÷ 5.2 + 63 = 1234567890 × 741852 = 53 : 123 ; 63 > 23 ; 56 < 963 > 56 < 3 ; 89 = 5.2 : 63 > 1234567890 < 741852 > E i V 3×5= 3S<5> 78.1923076923 915.866658332 915.866658332 0. 8.6602540378 12 + 23 = 45 + 23 = 78 + 23 = 23 : : 12 > 45 > 78 > K+ K+ K+ 35 68. 101. 7 – 5.6 = 2 – 5.6 = 5.6 ; ; 7 > 2> K– K– 1.4 –3.6 2.3 × 12 = 4.
Chapter 2 Using the PIM Programs 2-1 What is a PIM program? The letters “PIM” stand for “Personal Information Manager,” which is a collection of programs that help keep your personal information in order. Your CASSIOPEIA comes with Calendar, Contacts, and Tasks PIM programs built in. Calendar ........... Calendar is a program for managing your appointments. Information about appointments, meetings, and other commitments you input into Calendar can be displayed in a variety of different formats.
2-2 Calendar Calendar is a program for managing your appointments. Information about appointments, meetings, and other commitments you input into Calendar, can be displayed in a variety of different formats. You can even set alarms to keep you reminded of appointments. Daily View Weekly View You can view Calendar data using a Daily View, Weekly View, or 3-Month View. See “2-2-2 Viewing Calendar Data” on page 36 for more information about the various views.
3. Input the date and description of the appointment. Times ................. The upper time is the start time, while the lower time is the end time of the appointment. You can specify a date using the calendar that appears when you tap a date L button, or you can input a date into a box. You can specify a time by selecting one from the list that appears when you tap a time L button, or you can input a time into a box. All Day Event ....
Show time as Free Tentative Busy Out of Office Data Color Turquoise Pink Blue Green • An appointment for which the Private option is selected is always displayed in red. Editing a Repeat Pattern You can use the Repeat box to specify an appointment that repeats on the same day of the week each week, on the same day of month each month, etc. ■ To edit a repeat pattern This shows the appointment data in accordance with the repeat type you select. Tap L and then select the repeat type you want. 1.
3. After you are finished making the settings you want, tap Finish. • This returns to the appointment input screen. Editing Appointments This section describes how to edit and delete existing Calendar data. It also explains how to cut, copy, and paste existing data. To edit an appointment 1. On the Daily View or Weekly View screen, double-tap the appointment you want to edit. • This displays the appointment input screen. 2.
To cut and paste an appointment 1. On the Daily View or Weekly View screen, tap the appointment you want to cut so it is highlighted (selected). 2. Tap Edit L → Cut to cut the appointment and place it onto the clipboard. 3. Display the Daily View screen for the date where you want to paste the appointment that is on the clipboard. • You can select a date using either the Weekly View or 3-Month View screen. 4.
Transferring Calendar Data to Mail 1. On the appointment input screen, tap Send to L → Mail. • This starts up Mail and displays a message editing screen with text document elements assigned as shown below. Calendar Description Description Start Date Start Time End Date End Time Location Notes Mail → Subject → Body Text 2. Specify the address of the recipient, and make any changes to the subject and body text that you want.
Daily View Operations • Tapping a date in the calendar selects that date and displays its Calendar data. • Tap the button above the calendar to change to the previous month’s calendar, or change to the next month’s calendar. to for the Weekly view or for the 3-Month view. These views all include the date • Tap where the date cursor is currently located in the Daily view. • Tap to jump to today’s date. • A Note icon ( ) is shown on the Daily view when there is a note attached to the appointment.
Weekly View Operations • Tapping a date selects it. • Tap the button to change to the previous week or to change to the next week. • Double-tap an appointment’s data to display an editing screen for that appointment. for the Daily view or for the 3-Month view. These views all include the date • Tap where the date cursor is currently located in the Weekly view. to jump to today’s date. • Tap • You can input a new appointment by dragging the start and end boundaries of the appointment time and then tap New.
Switching the Time between 12-hour and 24-hour Formats You can switch between 12-hour and 24-hour timekeeping using Clock (see “1-7 Using Clock” on page 23). The setting you select affects the time and timetable display on the Calendar Weekly View as shown below. • The current time display examples below show what appears at 9:00am and 3:00pm. 12-hour format 24-hour format Current Time 9:00A/3:00P 9:00/15:00 Timetable 12, 1, 2, ... 11, 12, 1, 2, ... 10, 11 0, 1, 2, ... 11, 12, 13, 14, ...
2-2-3 Making Calendar Settings This section describes the settings you can make with Calendar. Coloring a Date You can use seven colors to color dates on the Daily View and 3-Month View screens. You can color a single date by tapping it, or a series of dates by dragging the stylus across them on a calendar. To color dates 1. On the Tools menu, tap Date Color Setting to display the 3-Month date color setting dialog box. Color palette 2. 3. 4. 5.
To restore date color defaults for a specific period 1. From the 3-Month date color setting dialog box, tap All Reset to display the All Reset dialog box. 2. Specify the start month and end month of the period for which you want to restore date color defaults. 3. After the settings are the way you want, tap OK to return to the 3-Month date color setting dialog box. • The above procedure restores date colors to the following defaults.
2. Select either Sunday or Monday as the first day of the week. to apply your selection and close the dialog box. 3. After making the setting you want, tap Setting a Reminder Alarm Reminder alarms help to ensure that you do not miss important appointments. 1. On the Tools menu, tap Reminder Setting to display the Reminder Setting dialog box. Select this option when you want a message to appear on the screen when the alarm time is reached.
2-3 Contacts Contacts is the place where you can store the names, addresses, phone numbers, e-mail addresses and other information about friends, acquaintances, and family members. You can view Contacts records using either a list screen or a detailed data screen. List screen Data screen 2-3-1 Inputting Contacts Data This section describes how to input new Contacts data and how to edit existing records. Inputting New Data To input new data using Contacts 1.
4. To assign the record to a category, scroll the screen down, tap Categories and then select a category from the list that appears. Later you will be able to display records grouped by their categories. 5. If you want to input note text, tap Notes to display the note text input screen. to exit the note text input screen. • Tap to save the record and close the input screen. 6. After everything is the way you want, tap • Tapping the List button displays the list screen.
2-3-2 Viewing Contacts Data You can view Contacts records using either a list screen or a data screen. List Screen The list screen provides an abbreviated list of Contacts records. The records that appear depend on the category or categories that are specified. This Notes icon is shown when the currently selected record includes data in its Notes field. Tapping this icon displays the contents of the Notes field.
2. Tap the category whose records you want to view. • This displays the contents of the category you select in the list screen. • If you want to display the records for more than one category, tap Multiple Categories. This causes a dialog box like the one shown here to appear. Put a check mark into each of the categories whose records you want to . include, and then tap To create a new category 1.
Data Screen The data screen shows the details of each Contacts record. You can transfer data from the Contacts data screen to Mail as e-mail text, or to Notes as a text document. To display the data screen On the list screen, double-tap the Contacts record whose data screen you want to view. Tap to return to the list screen. Tap here to scroll to the previous record. Tap here to scroll to the next record. To transfer Contacts data to Mail 1.
To search for text 1. On the list screen or data screen, input the text you want to find in the text box at the top of the screen. Input the text you want to find here. Tapping L displays a list of the last 10 text strings you recently searched for. You can tap a text string in the list to input it again. 2. Tap the Find button to start the search. This icon indicates that the displayed records are search results. This is a list of records that match the search criteria you specified. 3.
2-4 Tasks Tasks is a program that helps to keep you reminded of things you need to do. Starting up Tasks displays a list screen like the one shown below. Tap to display online help. Tap to display a new task input screen. Tap to return to the Top Menu Tap a header title to sort documents by their checked/unchecked status, names, or priorities. Each tap of a header title toggles sorting between ascending and descending order. This is a list of tasks.
NOTE • To close the task input screen without saving the data you input, tap Edit L→ Cancel. This saves the task and returns to the list screen. To check and uncheck a task You can use the Tasks list screen to check a task after you perform it. Tap a check box to toggle it between being checked and unchecked. NOTE next to the check box) creates a checked task for • Checking a recurrent task (indicated by the currently scheduled task only. The recurrent task remains in effect.
NOTE • The confirmation message shown below appears when you perform step 2 of the above operation when the task you selected is a recurrent task. Tap Yes to delete all of the tasks in the recurrent series, or No to delete only the currently scheduled task of the series. To cancel without deleting anything, tap Cancel. Transferring Tasks Data to Another Program You can transfer task data from the Tasks list screen to Notes, Calendar, or Mail. To transfer Tasks data to Notes 1.
To transfer Tasks data to Mail 1. On the Tasks list screen, tap the task you want to transfer. 2. Tap Send to L → Mail. • This starts up Mail and displays a message editing screen with task elements assigned as shown below. Tasks Subject Completed Subject Priority Mail → Subject → Body Text 3. Specify the address of the recipient, and make any changes to the subject and body text that you want. • See “3-3 Mail” on page 67 for more information about writing and sending e-mail messages.
Chapter 3 Using the Internet 3-1 Introduction CASSIOPEIA Internet Functions Your CASSIOPEIA comes with three programs that let you perform data communication over the Internet. Internet ................... This Web browser program makes it possible for you to visit Websites on the Internet. In addition to being frames-capable, the Internet program also supports bookmarks and the saving of pages of off-line viewing. Mail ....................... Mail is a program for sending and receiving e-mail.
3-2 Connections Connections is a program that lets you configure various settings to enable data communication between your CASSIOPEIA and a computer. You can use Connections to configure the following settings. • Parameters (including mail server parameters) for connecting to the Internet using dial-up connection and LAN connections • Parameters for cable connection with a computer This section covers Internet connections only.
Configuring a Dial-up Connection Basically, you configure a dial-up setup by inputting information given to you by your Internet Service Provider. Make sure you get the following information from your provider. Telephone number ..... This is the phone number you need to dial to connect to your provider’s computer. Normally it is called the “access point.” You need to select an access point that supports the type of phone (mobile, analog, etc.) you are using. Connection ID ...........
To configure a dial-up connection setup NOTE With some data communication or modem cards, you need to insert the card into the CASSIOPEIA’s card slot before you perform the steps below. For details, see the instructions that come with the card you are using. 1. On the Top Menu, double-tap Connections. • This starts up Connections and displays a screen like the one shown below. Setups you already have configured are listed here. 2. Tap New Setting....
3. After you are finished, tap . • This displays a screen for configuring the access point setup. Input the access point phone number, and your connection ID and password as supplied to you by your provider. You can tap here to display a screen for configuring the number of tries when dialing, security protocol, and IP address. See “Configuring Advanced Dial-up Settings” on page 60 for more information. Access point setup screen 4. After you are finished, tap .
5. After you are finished, tap . • This displays a screen for configuring your mail account setup. Input information supplied by your provider. Input the name you want to be displayed along with your mail address in outgoing mail. Mail account setup 1 screen 6. After you are finished, tap . • This displays another screen for configuring your mail account setup. Input POP3 and SMTP server names supplied by your provider.
7. After you are finished, tap . • This displays a screen for configuring you Web browser settings. If your connection uses a proxy server for Web browsing, select this option and input the required information below. Check with your service provider for information about whether or not you can use a proxy server. Input the IP address and port number. Browser setup screen 8. If necessary, tap the button to backtrack through setting screens to check that settings are correct. 9.
Configuring Advanced Dial-Up Settings The following procedure describes how to configure advanced settings that appear when you tap the Advanced settings button on the Access Point Setup screen (page 57). 1. On the Access Point Setup screen, tap Advanced Settings. Use these settings to specify the number of tries and the interval between tries when a connection fails because your access point line is busy. Use this setting to specify whether authorization protocol is required when connecting.
Testing a Dial-up Connection Setup Perform the following steps to test a connection setup you created using the procedure under “To configure a dial-up connection setup”. 1. Turn off your CASSIOPEIA and connect it to the device you plan to use to dial-up your service provider. • You can connect to a mobile phone or install a modem card. See the separate Hardware Manual for details about using a cell phone or modem card. 2. Turn on your CASSIOPEIA. 3. On the Top Menu, double-tap Connections.
7. A dialog box like the one shown below appears when a dial-up connection is established. Your CASSIOPEIA is now connected to the Internet. This icon appears in the system tray while a dial-up connection is connected. • You can now use your CASSIOPEIA to browse Websites and to send and receive e-mail. See “3-3 Mail” on page 67 and “3-4 Internet” on page 93 for more information. 8. To terminate the dial-up connection, tap Disconnect.
Configuring a LAN Connection Use the LAN connection setup when you want to connect to the Internet through a LAN (network) at your office, etc. Note that you should contact the system administrator of the network to which you are connecting for the information you need when configuring the setup. To configure a LAN connection setup 1. On the Top Menu, double-tap Connections. • This starts up Connections and displays a screen like the one shown below.
3. After you are finished, tap . • This displays a screen like the one shown below. Tap here and then select the LAN card you are using for your LAN connection. If you want to use a fixed LAN IP address for the CASSIOPEIA, specify the address here. If you want the IP address detected automatically, select the Auto detect option. LAN setup 1 screen 4. After you are finished, tap . • This displays a screen like the one shown below. Input a domain name and DNS address.
5. After you are finished, tap . • This displays a screen like the one shown below. Select this operation to require verification when connecting to the LAN. After selecting this option, input a Connection ID and Password. LAN setup 3 screen 6. After you are finished, tap . • This displays a screen for configuring your mail account setup. • From here, perform steps 5 through 9 of the procedure under “To configure a dial-up connection setup” on page 56.
To copy an existing connection setup 1. On the Top Menu, double-tap Connections. • This starts up Connections. 2. Tap the connection setup you want to copy. 3. Tap Edit L → Copy Setting. • This creates a copy of the connection setup you selected in step 2. The setup copy is automatically assigned the same name as the original setup, with a number added at the end.
3-3 Mail “Mail” is an application that makes it possible for you to send and receive e-mail with your CASSIOPEIA. The following are some of the useful features and functions available with Mail. • Support for multiple accounts • Powerful mail management tools for creating folders, batch moving multiple messages, copying, deleting, and moving messages to a storage card, etc.
2. Tap Yes. • This creates mail accounts for all of the connection setups you have configured in Connections, and displays the account/folder list shown below. Existing accounts are listed here. The connection setup name you assign in Connections is displayed as the account name. Mail accounts are created for all the connection setups you have configured in Connections.
Starting Up Mail After Setting Up an Account After you set up one or more mail account the first time you start up Mail, starting it up again displays the account/folder list. Note, however, that if you added a new connection setup with Connections since the last time you used Mail, starting it up causes a message like the one shown below to appear. Tap Yes to configure a mail account for the new connection setup.
Account L Menu Use this menu to create a new account, and to select an existing account to edit or delete it. See “Managing Accounts” on page 70 for more information. Folder L Menu Use this menu to create a new folder, and to select a folder to rename or delete it. See “Creating Folders and Managing Mail Messages” on page 87 for more information.
5. After everything is the way you want, tap OK to save your changes. • If you changed the connection setup in step 4, the confirmation message shown below appears when you tap OK. • If you really want to change the setting, tap Yes to save the changes and return to the account/ folder list. • To cancel without changing anything, tap No. To delete an account 1. On the account/folder list screen, tap the account you want to delete. 2. Tap Account L → Delete Account.
2. In the Account name box, input the name you want to give to the new account. 3. Tap the L button next to the Use connection setting box, and then select a connection setup from the list of providers that appears. 4. Tap OK. • This creates the new account and returns to the account/folder list screen. NOTE If you do not want to select an existing setup in step 3 of the above procedure, tap New connection setup and then create a new setup.
5. Your CASSIOPEIA connects to the server and displays a dialog box like the one shown below. The receive operation is performed first, followed by send. 6. A dialog box showing the results of the session appears after the send/receive operation is complete. • The actual contents of the dialog box depends on the results of your session. 7. Tap OK. • If you are using a dial-up connection, the dialog box shown below appears.
Creating an Outgoing Mail Message This section tells you how to compose and send a Mail message, and how to edit an existing Mail message. To compose a new Mail message 1. Start up Mail and display the account/folder list. 2. Open a folder under the account you want to use to send the message by double-tapping it. • This displays a list of mail messages in the folder. The Queue folder will be used here as an example. 3. Tap New. • This displays the message editing screen. Input the subject of the message.
5. If you want to include Cc or Bcc addressees as recipients of the message, tap . • This expands the mail header. Tap the Cc or Bcc button and then input the applicable mail address in the text box to the right of the buttons. • Tapping returns the header to its original size. 6. After your Mail message is the way you want, tap Send L → Queue. • This stores your Mail message in the Outbox folder.
To input a mail address from Contacts 1. On the message editing screen, tap the Contacts button. • This displays the screen shown below. 2. Put a check mark next to all of the people you want to include as addressees of the message. . 3. Tap • This inputs all of the addresses you checked into the text box at the bottom of the screen. 4. If you want, tap the Cc and/or Bcc buttons and repeat steps 2 and 3 for Cc and Bcc mail addresses. . 5.
2. Tap the + next to the folder that contains the file you want to attach to expand the folder. 3. Tap the file you want to attach. displayed, which • This attaches the file and returns to the message editing screen with the indicates that a file is attached. 4. If you want to attach more files, tap . • This displays the attached file screen, which shows the names and sizes of any files you have attached up to this point. 5. Tap Add. • This displays a file selection screen 6.
Using Phrase Memory Phrase memory lets you store up to 255 frequently used words, expressions, and sentences for later recall when inputting Mail Text. To input text into phrase memory 1. On the message editing screen, tap anywhere inside the body text field. • This locates the cursor at the point you tap. • Make sure none of the body text is selected (highlighted). 2. Tap Edit L → Phrase memory. • This displays the phrase memory list. 3. Tap the New button.
To insert phrase memory text into Mail body text 1. On the message editing screen, move the cursor the location where you want to input the phrase memory text. • Make sure none of the body text is selected (highlighted). 2. Tap Edit L → Phrase memory. • This displays the phrase memory list. 3. Tap the phrase memory text you want to insert. 4. Tap the Use This button. • This returns to the message editing screen and inserts phrase memory text you selected at the cursor position.
Inputting Schedule Format Data Into a Mail Message You can exchange Calendar data between two BE-300 units by e-mail using a special “Calendar format.” The following procedure describes how to create a Calendar format mail message to send Calendar data to another BE-300 unit user. See “To transfer Calendar format body text of a received mail message to Calendar” on page 87 for information about what you need to do after you receive a Calendar format mail message. To create a Calendar format mail message 1.
Displaying a Mail Message A Mail list screen lets you see the subjects and other information for mail messages you have received and sent. You can also use a message browsing screen to view the body text and other details of a particular message Mail list screen The Mail list screen shows a list of all the mail messages contained in a particular folder (Inbox, Sent Items, or other folder). Double-tapping a folder on the account/folder list screen opens the folder and displays its Mail list screen.
NOTE • Double-tapping a mail message on the Drafts list or Output list screen displays the message contents in the message editing screen, not the message browsing screen. See “To compose a new Mail message” on page 74 for information about the operations you can perform on the message editing screen. Received Message Operations This section details the various operations you can perform on mail messages you receive from others.
To view the contents of an attached file A message that has a file attached to it is indicated by an attachment icon that appears on the message browser screen. Attachment icon 1. On the message browser screen, tap . • This displays the attached file screen.
2. Double-tap the attachment file whose contents you want to view. • If the attached file is an image file (JPG, BMP, GIF, etc.), a screen like the one shown below appears on your display. Tap to return to the attached file screen. NOTE • If the attached file is not an image file, double-tapping it causes the program associated with the file to start up, and then the file opens. • Your CASSIOPEIA cannot open any attached file that is not associated with a currently installed program.
Displaying an HTML Mail Message The message browser screen of HTML format mail messages have an html Mail button. Tapping the html Mail button starts up the Internet program (page 93), and displays the contents of the message in HTML format. To add a received message header address to Contacts 1. On the message browser screen header field (From, To, or CC), drag the stylus across the address you want to add to Contacts so it is highlighted. 2. Tap Edit L → Register in Contacts.
To list the hyperlinks in a received mail message 1. On the message browser screen of the message whose hyperlinks you want to list, tap Edit L → Hyperlinks. • This displays the hyperlink list screen like the one shown below, which shows all mail address and URLs contained in the mail message. 2. Tap to return to the message browser screen. To add a mail address inside of body text to Contacts 1. Display the hyperlink list for the message that contains the address. 2. Tap the Register in Contacts button.
To transfer Calendar format body text of a received mail message to Calendar 1. On the message browser screen of the message you want to transfer, tap Send to L → Calendar. • This starts up Calendar and displays a new appointment screen with Calendar format text elements assigned as shown below.
To delete a folder Warning! Deleting a folder also deletes all mail messages inside of it. 1. On the Mail account/folder list screen, tap the folder you want to delete. 2. Tap Folder L → Delete. 3. In response to the confirmation message that appears, tap Yes to delete the folder or No to cancel without deleting anything. To move mail messages from one folder to another 1. Display the message list screen of the folder that contains the message you want to move.
3. Place check marks into the boxes next to all the messages you want to move. • To check all of the messages in the folder, tap Edit L → Check All. To uncheck all of the messages, tap Edit L → Uncheck All. 4. Tap Edit L → Move to. • This displays a dialog box for selecting the destination folder. 5. Double-tap the folder to which you want to move the selected messages. • As soon as you do, all of the selected mail messages are moved to the destination folder.
To change the read/unread status of mail messages 1. Display the message list screen of the folder that contains the messages whose read/unread status you want to change. 2. Tap the Organize button. • This displays the message selection screen (page 88). 3. Place check marks into the boxes next to the messages whose status you want to change. 4. To make all of the checked messages unread messages, tap Edit L → Mark Unread.
Signature Tab • Input text you want to use as your signature block into the text box on this tab. Signature block text is added automatically to the end of mail messages you send. • If you do not want to use a signature block, simply leave the text box on the Signature tab blank. Write Tab (A) (B) (C) (A) Selecting this option causes the text in the text box below it to be input into the Subject field of all outgoing messages for which you do not input subject text.
Disp Tab (A) (B) (A) Checking this option causes word wrapping of text inside the body text field of the message browser screen. (B) Use this setting to specify one of three sizes for Mail program display text. This setting controls the body text field of the message editing screen and message browser screen.
3-4 Internet Internet is a Web browser program that lets you view Web pages on the Internet. The following are the functions available with the Internet program.
(STOP) Button Tap this button to stop loading of a page that is not fully loaded yet. Note that tapping this button does not disconnect you from your server, if you are connected. (Reload) Button Reloads the currently displayed page. (Bookmark) Button Displays the bookmark screen (page 97). / (Connect/Disconnect) Button Connects to or disconnects from the access point specified on the Internet Properties dialog box (page 95).
Configuring Internet Program Properties Before you use the Internet program to surf the Net, you must first configure its properties as described in this section. Important! Before trying to perform the following procedure, you should first configure a connection setup for Internet Web browsing. See “3-2 Connections” on page 54 for more information. 1. Start up the Internet program, and then tap Func L → Settings • This displays the Properties dialog box. 2.
Displaying a Web Page To display a Web page 1. Start up Internet. 2. In the address bar, input the URL of the page you want to view. button. 3. Tap the • The message shown below appears if you are not connected to your server at this time. Tap Connect. Note that the above message appears only when you are using a dial-up connection. 3. Once the connection is established and you are logged in, the page whose URL you specified in step 2 should appear on the browser screen. 4.
To display a full-screen view of a particular frame 1. When a page that contains frames is displayed on the browser screen, tap the button. • This displays a frame selection screen with the currently selected frame indicated by a red boundary around it. 2. Tap Func L → Full-screen Frame. • This causes the selected frame to be enlarged so it fills the entire screen. Using Bookmarks The Internet program’s bookmark function lets you save the URL’s and titles of pages for future reference.
4. Change the page title and URL, if you want. 5. After everything is the way you want, tap OK. • This returns to the bookmark screen. • To return to the browser screen from the bookmark screen, tap . To register a new bookmark manually 1. On the browser screen, tap the button. • This displays the bookmark screen. 2. Tap the New button. • This displays a dialog box for inputting the URL and title. 3. Input the page title and URL you want, and then tap OK. • This returns to the bookmark screen.
To create a new folder 1. On the browser screen, tap the button. • This displays the bookmark screen. 2. Tap the Organize button. • This displays the bookmark organizer screen. Click to display a folder tree. 3. Navigate to the folder in which you want to create a new folder. • To create a folder inside of an existing folder, double-tap the existing folder to display its contents.
To move a bookmarks and folders to another folder 1. On the browser screen, tap the button. • This displays the bookmark screen. 2. Tap the Organize button. • This displays the bookmark organizer screen. 3. Place check marks into the boxes next to all the bookmarks and folders you want to move. • Tapping Edit L → Check All checks all the bookmarks and folders. Tapping Edit L → Uncheck All unchecks all the bookmarks and folders. 4. Tap Edit L → Move to.
To delete bookmarks and folders 1. On the browser screen, tap the button. • This displays the bookmark screen. 2. Tap the Organize button. • This displays the bookmark organizer screen. 3. Place check marks into the boxes next to all the bookmarks and folders you want to delete. 4. Tap Edit L → Delete. 5. In response to the confirmation message that appears, tap OK to delete the selected bookmarks and folders, or Cancel to cancel without deleting anything.
To open a saved Web page 1. On the browser screen, tap Function L → Open Web Page. • This displays a dialog box like the one shown below. To open a page you have saved on a storage card, tap Card. 2. Double-tap the page you want to open. • This displays the page. Managing Saved Pages You can move and copy saved pages between main memory and a storage card. You can also rename and delete pages as required. To move saved pages between main memory and a storage card 1.
To delete Web pages 1. On the browser screen, tap Function L → Open Web Page. • This displays a dialog box for opening a Web page. 2. Tap the Organize button. • This displays a web page organizer screen. 3. Place a check mark into the boxes next to all of the pages you want to delete. 4. Tap Edit L → Delete. 5. In response to the confirmation message that appears, tap OK to delete the selected pages, or Cancel to cancel without deleting anything. twice. 6.
Chapter 4 Imaging and Music Programs 4-1 Photo Viewer Photo Viewer is a program you can use to view graphic images on your CASSIOPEIA screen. It includes a thumbnail index screen and a slideshow feature. With an optionally available Digital Camera Card, you can even use your CASSIOPEIA to record images for display using Photo Viewer Thumbnail index screen Camera screen NOTE To use Photo Viewer, you need to install it from the bundled CD-ROM.
Important! • You need to purchase an optionally available Digital Camera Card (JK-710DC) to record digital images. • Do not install the Mobile Camera Application that comes with the digital camera card onto your CASSIOPEIA. Recording Operations Getting Ready Check the following points before trying to record. • Make sure the Digital Camera Card is correctly installed into the card slot of your CASSIOPEIA. See the separate documentation that comes with the Digital Camera Card for details about installation.
5. Specify the image size. • On the control panel, tap the image size button to cycle through the image size settings shown below. ................... VGA (640 × 480) ................... 1/4 VGA (320 × 240) ................... 1/9 VGA (212 × 160) : This setting can be used for stop action only. ................... 1/16 VGA (160 × 120) : This setting can be used for stop action only. 6. Make white balance and other settings as required. button.
NOTE • In the Stop Action Mode, recording continues and the image on the display remains unchanged until all the images are recorded. • After image recording is complete, a dialog appears telling you that the images are being stored in memory. • You can specify how many images are recorded per second. See “Configuring Record Settings” on page 108 for details. Using Timer Recording You can set a timer for snapshot and stop action recording so the record operation starts after 10 button on the control panel.
Configuring Record Settings On the camera screen, tap to display the Record Settings dialog box.
To adjust the camera screen brightness 1. On the camera screen, tap Brightness to display the dialog box shown below. 2. Drag the sliders left to reduce brightness and right to increase brightness. • Note that the upper slider controls brightness under battery power, while the lower slider controls brightness under AC adapter power. • The brightness settings you make are applied to the record preview screen only. 3. After making the settings you want, tap OK to apply them.
Selecting the Thumbnail Index Screen Folder The thumbnail index screen shows all of the snapshots in the currently selected folder. To change to another folder, follow the steps below. 1. Tap Function L → Folder... or tap Folder name box. • This displays the Select Folder dialog box. Use this dialog box to create a new folder, or to rename or delete an existing folder. See “Folder Operations” on page 117 for more information. 2. Select the folder you want by tapping it. 3. Tap OK.
NOTE In step 1 of the above procedure, you could also display the snapshot screen of the image you want to attach and then tap . Changing to a Different Screen Use the following procedures when you want to change to another screen from the thumbnail index screen.
Using the Snapshot Screen There are four different snapshot screen views: compressed, uncompressed, zoom, and fullscreen. Compressed View Uncompressed View Zoom View Full-screen View Compressed View ......... This view displays the entire image so it appears like a photograph. Uncompressed View ..... This view displays the image in actual-size. In this view, you have to scroll the image to view the parts that do not fit on the screen. Zoom View ...................
Changing the Snapshot Screen View Use either of the following procedures to select compressed, uncompressed, zoom, or full-screen as the snapshot screen view. To change the snapshot screen view • On the Size menu, tap Compressed, Uncompressed, Zoom, or Full Screen. • Press the CASSIOPEIA’s OK button to cycle through the four views in the sequence: compressed - uncompressed - zoom - full screen. • Tapping the display while the full screen view is being used switches to the compressed view.
To display the file properties of a snapshot 1. On the snapshot screen, tap . 2. To close the file properties dialog box, tap OK. Changing to a Different Screen Use the following procedures when you want to change to another screen from the snapshot screen.
To display the slideshow screen On the thumbnail index screen or snapshot screen, tap . To return to the snapshot index from the slideshow screen, tap the button. Using the Slideshow Screen Status bar Control panel To control image playback with the on-screen control panel To do this: Do this: Start the slide show Images appear in the same sequence they are arranged on the thumbnail index screen, for the amount of time you set using the slideshow settings dialog box described on page 116. Tap .
Making Slideshow Settings Tapping Settings button displays a dialog box for controlling the playback interval and the repeat setting. Playback Interval ... Use this setting to specify how long each image should remain displayed before changing to the next one. Auto Repeat ........... Check this box if you want the slideshow to restart from the first image in the thumbnail index screen after the last image is reached. After making the settings you want, tap OK to close the dialog box.
2. Drag the sliders left to reduce brightness and right to increase brightness. • Note that the upper slider controls brightness under battery power, while the lower slider controls brightness under AC adapter power. • The brightness settings you make are used during slideshow playback only. 3. When the settings are the way you want, tap OK to apply them and close the dialog box. NOTE The brightness settings you make here do not affect the brightness of the preview screen during recording.
File Operations Use the commands on the thumbnail index screen Func L to perform operations on image files whose formats are supported by Photo Viewer. To rename a file 1. On the thumbnail index screen, tap the thumbnail of the image whose file name you want to change. 2. Tap Func L → Rename. • This displays the Rename dialog box. 3. Input the new name you want to give to the file and then tap OK. To move a file 1. On the thumbnail index screen, tap the thumbnail of the image you want to move. 2.
4-2 Movie Player Movie Player makes it possible for you to play movie files on the screen of your CASSIOPEIA. Thumbnail index screen Movie Playback Screen NOTE • To use Movie Player, you need to install it from the bundled CD-ROM. See Chapter 6 of this User’s Guide for information about installing programs on your CASSIOPEIA. • Movie Player makes it possible for you to play back CASIO original format CMF files on your CASSIOPEIA.
Thumbnail Index Screen Operations You can perform the following operations from the thumbnail index screen. • • • • • Select a folder Create, rename, or delete folders Rename, move, or delete files Automatically generate thumbnails on the thumbnail index screen Create a Mail message with an attached movie Each of these operations is described in detail in the following sections of this manual.
Refreshing a Thumbnail Index You should refresh the thumbnail index when the File Manager screen does not accurately show the movie file contents of a folder. The thumbnail index screens show only files for which thumbnails have been generated. Note that thumbnails are not displayed for movie files you move to the current thumbnail index screen folder using File Manager (page 135) or some other program. You can make such files appear by performing the thumbnail index refresh operation below.
4-2-2 Using Movie Playback Screen Playing Back Movies On the Movie Player thumbnail index screen, tap the thumbnail of the movie you want to play, and then tap . This displays the movie playback screen, which you can use to view the movie. You can also use the playback screen to capture still images from a movie. To playback a movie file 1. Start up Movie Player. 2. On the thumbnail index screen, select the thumbnail of the movie you want to play back, and to open the file.
Playback Screen Control Panel The following describes the functions of the buttons and sliders of the Playback Screen’s control panel. Volume slider Position slider Volume slider ......... Drag right to increase volume and left to decrease it. .......................... Jumps to the beginning of the movie during forward play or the end of the movie during reverse play. / .................. Toggles between forward play and reverse play .
Capturing a Still Image from a Movie Use the following procedure to capture a still image from a movie and save it as a JPEG file. To capture a still image from a movie 1. Play back the movie that contains the image you want to capture. 2. Stop playback so the image is on the Playback Screen. and buttons to maneuver to the image you want. 3. Use the 4. Tap the button. 5. In the dialog box that appears, tap Yes. NOTE • Screen capture files are stored in the nand disk in the My Documents\Photo folder.
Making Playback Speed and Repeat Settings Playback speed and repeat settings are made using the Options dialog box that appears when you tap Options. Playback Speed ............. Use this list box to select a faster or slower speed for movie playback. The speeds available depend on the type of file you currently have open. The message Disabled appears here if the file you currently have opened does not allow its playback speed to be changed. Auto Repeat ..................
4-3 Music Player Music Player makes it possible for you to play MP3 files on your CASSIOPEIA. Playback can be output through the CASSIOPEIA’s headphones plugged into the audio output jack. NOTE • Music Player can play only files stored in the nand disk My Documents\Music folder or a storage card My Documents\Music folder. It will not play files located in any other folder. • To use Music Player, you need to install it from the bundled CD-ROM.
Playback Screen Control Panel The following describes the functions of the buttons and sliders of the Playback Screen’s control panel. .......................... Starts playback. .......................... Stops playback. ................................ Pauses playback. Tapping this button again resumes playback from where it was originally paused. ................................ Skips back to the beginning of the previous file and resumes playback. ................................
Using Repeat Turning on repeat causes the currently selected play list to play in an endless loop, until you stop playback. On the playback screen, display the Settings menu and then tap Repeat to toggle repeat on and off. A check mark is next to the Repeat item on the Settings menu while repeat is turned on. NOTE • To turn off repeat, tap Settings and then Repeat again to uncheck it. Turning Off the Display You can conserve battery power during audio file playback by turning off the CASSIOPEIA’s display.
To display the play list screen On the playback screen, tap the Play List... button to display the play list screen. Currently selected play list Files contained in the currently selected play list To select a play list 1. On the playback screen, tap the Play List... button. • This displays the play list screen. 2. Tap the down arrow next to the Play List box, and select the play list from the menu of options that appears. to return to the playback screen. 3.
2. Tap the New button. • This displays the play list editing screen. All playable MP3 files in main memory and on the storage card My Documents folders Tap to select (check) all the tracks in the Total Tracks list. Tap to deselect (uncheck) all the tracks in the Total Tracks list. 3. Input the name you want to assign to the play list into the Play List Name box. 4. In the Total Tracks list, select the files you want to include in your play list. Next, tap the Add button.
Chapter 5 Utilities 5-1 Backup The Backup program lets you quickly and easily back up all data (Calendar, Contacts, Tasks, and Mail data, files, installed programs, setup information) in your CASSIOPEIA main memory data to a storage card. Backed up data can be used to restore your system should it start to malfunction due to some data error. Read this first! • Always reset your CASSIOPEIA before backing up or restoring data. Make sure you perform a reset operation.
• This starts up Backup and causes the dialog shown below to appear. If the storage card already contains backup data, the date of the last backup appears here. This area shows the amount of free space on the storage card and the amount of CASSIOPEIA data memory that is used. 5. Tap Backup now. • This causes the dialog shown below to appear. If you want to assign a password to the backup file, input up to 10 characters for the password here.
Restoring Data The following applies whenever you perform a restore operation. • If the same file or setup data exists in both CASSIOPEIA memory and on the storage card, the data in CASSIOPEIA memory is overwritten with the data on the storage card. • Any file or setup data in CASSIOPEIA memory for which there is no corresponding file or setup data on the storage card data is deleted. • All applications currently installed on the CASSIOPEIA are deleted and re-installed with the backed up versions.
Deleting a Backup File You can use the following procedure to delete the backup files you created using Backup. Delete a file when you no longer need it, when you want to free up space on a storage card, etc. Important! Deleting a back up file cannot be undone. Make sure you really do not need a file before you delete it. To delete a backup file 1. Insert the storage card that contains the backup file you want to delete into the CompactFlash Card slot of the CASSIOPEIA. 2.
5-2 File Manager File Manager provides you with the tools to perform a variety of different operations involving files and folders in main memory and on a storage card. File Manager Screen and Basic Operation Tapping File Manager on the Top Menu starts up File Manager and displays a list of files and folders. Tap to move to the next higher folder in the hierarchy. Tapping here displays a list that you can use to move to a higher folder in the file hierarchy.
To copy a file or folder NOTE You can use the same procedure to copy a file or a folder. The following shows the procedure for copying a file. 1. Select the file you want to copy by putting a check mark next to it. • You can select multiple files and copy them. 2. Tap EditL → Copy. • This specifies the currently selected file as the original file. 3. Display the folder to which you want to copy the file. 4. Tap EditL → Paste. • This copies the source file into the currently displayed folder.
Important! • Deleting a folder also deletes all files and folder inside it. • A file or folder delete operation cannot be undone. 3. In response to the confirmation message that appears, tap Yes to delete the file or folder, or No to cancel without deleting anything. Important! • Performing the reset operation causes all user files and folders that are not contained in the My Device\Nand Disk folder to be deleted.
Chapter 6 Using Your CASSIOPEIA with Your Computer 6-1 Getting Ready You can connect your CASSIOPEIA to your computer and perform the types of operations listed below.
• Outlook 97, 98, and 2000 are all supported. • Microsoft Outlook must be purchased separately. • See the user documentation that comes with Outlook for information about how to install it. (2) Install PC Connect on your computer. • Install PC Connect from the CD-ROM that comes bundled with your CASSIOPEIA. • See the separate Hardware Manual for information about computer system requirements for PC Connect. • See the Quick Start Guide for information about how to install PC Connect.
Chapter 7 Setting Up Your CASSIOPEIA 7-1 Setup Basics This section describes various hardware, system, and other settings you can make to setup the CASSIOPEIA to meet your specific needs. On the Top Menu, double-tap Settings to display the setup menu shown below. Setup Menu Select the menu item for the type of settings you want to change. To do this: • Input information about yourself. • Specify whether owner information should appear when you turn on the CASSIOPEIA. • Register a 4-digit numeric password.
MEMO See page 24 for information about setting the current time and date. Selecting a Setup Menu Item You can use any one of the following methods to select a setup menu item and display the corresponding setup screen. • Double-tap the menu item you want. • Tap the menu item you want once so it is highlighted, and then tap it again. • Use the up and down cursor keys to move the highlighting to the menu item you want, and the press the OK button.
Password Use this screen to configure the CASSIOPEIA so it requires input of a password when it is turned on. Data cannot be accessed unless the password is input. Use the on-screen keyboard to specify a 4-digit password. After you tap OK to register the password, you will not be able to access the password setup screen until you input the current password. Select this option to limit access only to those who can input the registered password.
Brightness The brightness setting screen has three tabs named Contrast, Brightness, and Auto-Dim. Contrast Tab Use this tab to change screen contrast, which affects the relative lightness and darkness of display colors. Watch this color sample to see how your setting affects display colors. Drag this slider or tap the H and J buttons to change the screen contrast setting.
NOTE You can also use the following button operations at any time to adjust screen brightness without displaying the brightness setting screen. To do this: Make the screen brighter Make the screen dimmer Perform this button operation: Hold down Power button and press the right cursor button. Hold down Power button and press the left cursor button. Auto-Dim Tab You can use this tab to set up the CASSIOPEIA so its screen dims automatically whenever it is left idle for a specific amount of time.
Volume & Sounds The Volume & Sounds setup screen has two tabs, named Volume and Sounds. Volume Tab Use the settings on this tab to turn the CASSIOPEIA’s buzzer sound on and off, and to adjust the volume level of the headphones. Drag this slider or tap the H and J buttons to turn the buzzer on and off. Drag this slider or tap the H and J buttons to change the headphone volume setting. Sounds Tab Use this tab to enable and disable the various sounds (alarm sound, screen tap confirmation sound, etc.
Power The Power setup screen shows you remaining battery capacity. You can also use it to configure auto power off, which turns off the CASSIOPEIA if it is left idle for a specific amount of time. Select this option to enable auto power off when you are running under battery power. Use these boxes to specify the idle time before auto power off is triggered. Select this option to enable auto power off when you are running under external power.
Task Manager Tab You can use the Task Manager tab to shutdown a specific program that is running, or to shutdown all programs that are running. Shutting down a program frees up program memory space. • In the Active Programs list, tap the program you want to end. • To end all programs that are currently running, tap Stop All. Increasing Available Storage Memory You can free up more storage memory by performing the following steps. • Move files from main memory to a storage card.
Appendix A: Character Recognizer Your CASSIOPEIA uses Decuma Character Recognizer developed by Decuma AB. The Decuma Character Recognizer supports word-by-word, non-cursive handwriting. Copyright © 2001 by Decuma AB. All rights reserved.
Start using Character Recognizer Introduction Character Recognizer converts your handwriting into typed text and can be used with any application to input text. Instead of pen and paper, you use the Stylus and the Touch Screen. Simply write in the designated input area in the lower part of the screen and the typed characters appear at the cursor in the active application. To select Character Recognizer, tap the Input panel switch and select Character Recognizer from the menu of available input panel types.
General characters Select the tab marked A a to write letters and accented letters. A B C D E F G H I J K L M N O P Q R S T UV W XY Z abcdefghijklmnopqrstuvwxyz ÀÂÁÄÅÇÈÊÉËÌÎÍÏÑÒÔÓÖÙÛÚÜ àâáäåçèêéëìîíïñòôóöùûúüß The numbers, punctuation marks, and special characters shown below are also supported in this mode if written with care. The number ‘0’ has to be written with a diagonal stroke, as shown in the Decuma Alphabet Outline below. This will distinguish the number ‘0’ from the letter ‘o’.
.,:;‘“-*+=()/<>[]{}%#¢$+£¥ Punctuation marks and special characters Select the tab marked @ & to write punctuation marks and special characters. .,:;‘“?¿!¡-_~/\=*+()<>[]{}|#@&%¢$+£¥§©®° Pen gestures You can insert a space or a carriage return, or delete a character by tapping the corresponding button on the Character Recognizer input panel. The same actions can also be performed using gestures. Gestures help you keep your focus on the input area and maintain the natural flow of your handwriting.
Personalizing Character Recognizer Options You can improve the recognition of your writing by teaching Character Recognizer your handwriting style. Character Recognizer also gives you the opportunity to define your own characters as shortcuts for lengthy text you write frequently. These features and other ways to customize Character Recognizer to suit your handwriting and needs, can be found by tapping the Options button on the Character Recognizer input panel.
Personalize Character Recognizer allows you to define personal characters you want to use as shortcuts. You might want to add a star to represent your e-mail address or a heart to represent the name of a close friend. Add your character by tapping the Personalize tab in Recognizer Options. You can add up to 15 personal characters. Write your character in the box representing the input area and write the interpretaiton in the text box next to it. The interpretation can contain up to 35 characters.
Settings The Recognizer Options Settings tab allows you to customize Character Recognizer features. All the features can be enabled or disabled to suit you and your way of writing. Version The Recognizer Options Version tab shows version of the Character Recognizer application on your CASSIOPEIA. Troubleshooting Since every style of handwriting is unique, you might experience problems with your way of writing.
Decuma Alphabet Outlines These outlines of written characters serve as a guide of how to form characters for Character Recognizer to recognize. The circles and numbers show where strokes begin and in what order they should be written. In addition to the characters shown here, a wide variety of handwritten characters are included in the alphabet library.
Yy Zz Accented characters Àà Ââ Áá Ää Èè Êê Éé Ëë Ìì Îî Íí Ïï Ôô Óó Öö Çç Ññ Òò 156 Åå
Ùù Ûû Úú Üü ß Numbers 0 5 1 6 2 7 3 8 4 9 Punctuation marks and special characters .
> [ ] { } | # @ & % ¢ $ + £ ¥ § © ® ° 158
Appendix B: Troubleshooting Resetting the CASSIOPEIA If your CASSIOPEIA responds slowly, stops responding as expected, or “freezes,” try resetting it. A reset causes the CASSIOPEIA to restart and re-adjust memory allocation. Note that unsaved data in open windows may be lost when you reset. To reset the CASSIOPEIA Use the stylus to hold down the Reset button for about two seconds. See the Hardware Manual for details. Batteries lose power An icon in the system tray shows your current battery capacity.
If you run out of CASSIOPEIA memory Memory on your CASSIOPEIA is shared between storage memory and program memory. Storage memory is used to store the information you create and programs you install. Program memory is used to run programs on your CASSIOPEIA. The CASSIOPEIA automatically manages the allocation between storage and program memory. However, in some situations, such as when memory is low, the CASSIOPEIA may not be able to automatically adjust the allocation.
Screen is blank If the CASSIOPEIA does not respond when you briefly press the Power button, press and hold the button for a full second. If that does not work, try the following steps, performing the next step only if the one you just performed did not solve the problem. 1. Plug the CASSIOPEIA into AC power. 2. Recharge the battery. 3. Adjust display brightness. While holding down the Power button, press the right or left cursor buttons to adjust brightness. 4. Adjust display contrast.
Can dial out but cannot make a proper connection • Make sure the network to which you are trying to connect supports the Point-to-Point Protocol (PPP). Your Internet service provider or network administrator can verify this. • Verify that you are using the right phone number for the modem you are trying to reach. • Make sure the “Wait for tone” option is selected on the Modem Setup screen of the modem you are using. See “To configure a dial-up connection setup” on page 56 for more information.
CASIO COMPUTER CO., LTD.