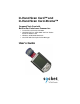
In-Hand Scan Card™ and In-Hand Scan Card-Xtreme™ CompactFlash Card with Built-in Bar Code Laser Scanner for: • Pocket PCs and Pocket PC 2002s • Handheld PC Pros, HPC 2000s and Pen Tablets based on Windows CE • Windows 9x/Me/2000 Notebooks • Casio BE-300 Cassiopeia Pocket Manager User’s Guide
How This Manual Is Organized This User’s Guide contains separate chapters covering the installation and use of the In-Hand Scan Card (and In-Hand Scan Card-Xtreme) on different Windows platforms. Chapter 1, “Introduction,” gives you an overview of the In-Hand Scan Card package. Chapter 2, “Windows CE Setup,” tells you how to install the In-Hand Scan Card on a mobile computer based on Windows CE (v2.11 or greater).
Table of Contents CHAPTER 1 INTRODUCTION 4 CHAPTER 2 WINDOWS CE SETUP 6 CHAPTER 3 CASIO BE-300 SETUP 18 CHAPTER 4 WINDOWS 9X/ME/2000 SETUP 24 APPENDIX A ISC SPECIFICATIONS 32 APPENDIX B BAR CODE LABEL SPECIFICATIONS 33 APPENDIX C CLASS 1 VS.
Chapter 1 Introduction Overview The Socket In-Hand Scan Card (ISC) gives you the freedom of scanning bar codes anytime anywhere with a variety of Windows-based mobile computers. Just pop in the scanner when you need it, then remove it when you’re done. Plus, the card’s compact design lets you scan with only one hand when used with a PDA. The world’s only bar code laser scanner built into a CompactFlash card, the ISC is sleekly designed with no cables or batteries.
Package Contents The In-Hand Scan Card (ISC) package includes: • The In-Hand Scan Card • The SocketScan Installation CD • The Socket Quick Start Guide for Bar Code Scanners • A product registration card If you purchased the In-Hand Scan Card with PC Card Adapter package, your package also includes a Type I CompactFlash-to-PC Card adapter that lets you use the ISC in a PC Card (PCMCIA) slot of a Windows computer. This adapter can be ordered separately as Socket part number AC4000-978.
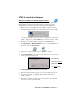
Chapter 2 Windows CE Setup This chapter shows how to install, configure, and use the In-Hand Scan Card (ISC) on any Windows Powered Pocket PC (including Pocket PC 2002) or Windows CEbased Handheld PC Pro, HPC 2000 or pen tablet. This chapter shows Pocket PC 2002 screens. Other Windows CE devices will have functionally equivalent screens except where otherwise noted. Installation Steps Summary STEP 1: Register the card. STEP 2: Uninstall any bar code scanning software already on your device.
STEP 3: Install the Software Software Installation for Internet Explorer Users Follow these steps for software installation BEFORE inserting the ISC. Internet Explorer must be the default web browser. If Netscape is the default browser on your host PC, please turn the page for instructions. 1. Make an active partnership between the mobile computer and a host PC. Internet Explorer must be the default web browser on the host PC.
Software Installation for Netscape Users Follow these steps for software installation BEFORE inserting the ISC. The SETUP.HTM file DOES NOT work with Netscape. Instead, you must use the SETUP.EXE file inside the SocketScan folder for Windows CE. 1. Make an active partnership between the mobile computer and host PC. An active partnership exists if data can move between the host PC and mobile computer via a serial/USB/Ethernet connection cable or cradle. 2.
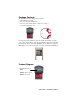
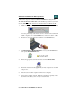
STEP 4: Insert the ISC into Your Device Plug directly into a CompactFlash I/O slot. OR Insert into an adapter, then plug the combined unit into a PC Card slot. STEP 5: Start SocketScan 1. Pocket PCs: Go to Start | Programs | SocketScan. HPCs: Tap on the SocketScan icon on your desktop. 2. Whenever SocketScan is running, either of two icons may appear in the task tray (visible from the Today screen for Pocket PCs). In-Hand Scan Card detected No scanning card detected 3.
STEP 6: Assign a Trigger Button Follow the appropriate directions for your device and refer to your device’s user documentation to assign a trigger button for the In-Hand Scan Card (ISC). Note: If SocketScan is not running yet, then pressing the assigned trigger button is a quick way to launch SocketScan. Pressing the trigger button will fire the laser only when SocketScan is open. Pocket PC These instructions are for a Pocket PC or Pocket PC 2002. 1. Go to Start | Settings | Personal | Buttons. 2.
Handheld PC Pro, HPC 2000 or Pen Tablet These instructions were based on a HP Jornada 720 Handheld PC 2000. The procedure for assigning a trigger key can vary from device to device. Consult your device’s user documentation if necessary. 1. Tap Start | Settings | Control Panel | HP hot keys: 2. The HP hot keys Properties screen will appear. 3. Under the Assign to: field, tap on the Browse button to select SocketScan. Tap OK. 4. After SocketScan appears in the Assign to: field, tap OK.
STEP 7: Scan Data into a Windows Program For information about bar code scanning applications, please email info@socketcom.com 1. If not already open, start SocketScan. You can press the trigger button to quickly launch the program. 2. Start the Windows application you want to receive the data (e.g., Excel, Notepad, etc.). Make sure a new document or spreadsheet is open. 3. Press the assigned trigger button and scan the code. An amber LED indicates the laser is on.
Optional: Select Symbologies The applet makes it quick and convenient to modify which symbologies you want SocketScan to recognize. This feature is only available for the InHand Scan Card (ISC) and In-Hand Scan Card-Xtreme (ISC-X) when used with Windows CE. By default, SocketScan is set to recognize nine of the most common symbologies. 1. Tap on the ISC icon in the task tray the Today screen for Pocket PCs). to launch the applet (visible in 2. In the pop-up menu, select Symbology Selector... 3.
Optional: Configure Prefix/Suffixes The SocketScan applet lets you specify prefix and/or suffix characters to be added automatically to the data you scan. This helps to further eliminate manual data entry. 1. Tap on the ISC icon in the task tray the Today screen for Pocket PCs). to launch the applet (visible in Note: You can configure prefix/suffixes if the “no scanning card detected” icon appears. 2. In the pop-up menu, select Prefix/Suffix... 3.
Optional: Run Scan Demo Scan Demo makes it easy to determine the symbology, number of characters, and decoded data (in either ASCII or Hex) of any bar code you scan. This is especially useful if you encounter a bar code that SocketScan will not decode. This SocketScan feature is only available for Windows CE. 1. Tap on the ISC icon in the task tray the Today screen for Pocket PCs). 2. In the pop-up menu, select Scan Demo. This will close SocketScan and open Scan Demo as a separate application. 3.
Optional: Configure Sounds The SocketScan applet lets you choose any WAV sound file to be played to indicate a successful scan. 1. Tap on the ISC icon in the task tray the Today screen for Pocket PCs). 2. In the pop-up menu, select Sounds... 3. In the screen that appears, select a sound for indicating successful scans. Tap ok. to launch the applet (visible in Browse box To you want to play a .WAV file, after selecting Play .wav file, you can search through files by tapping the browse box.
Optional: Configure Special Symbologies In addition to the eighteen symbologies supported by the Symbology Selector, you can also manually configure the ISC to accept or ignore specialized bar code symbologies and extensions. See Appendix D, “Default Parameters,” to see parameter numbers and default settings of each symbology. Also please refer to the Symbol 923 Programming Guide Chapter 5 for In-Hand Scan, available online in Adobe Acrobat PDF format at: www.socketcom.com/support/support_bar.
Chapter 3 Casio BE-300 Setup This chapter shows how to install, configure, and use the In-Hand Scan Card (ISC) on a Casio BE-300 Cassiopeia Pocket Manager. Installation Steps Summary STEP 1: Register the card. STEP 2: Uninstall any bar code scanning software already on your device. STEP 3: Install the software. STEP 4: Insert the ISC. STEP 5: Start SocketScan. STEP 6: Assign a trigger button. STEP 7: Start scanning data into a Windows program! OPTIONAL: Configure prefix/suffixes OPTIONAL: Configure sounds.
STEP 3: Install the Software Follow these steps for software installation BEFORE inserting the ISC: 1. Download the software for the BE-300 onto a host PC. The software is available at: www.socketcom.com/support/support_bar.htm DO NOT install the software from the installation CD onto a BE-300! 2. Use the USB/serial cable or cradle that came with the BE-300 to connect the BE-300 to a host computer. Perform a PC Connect. If you need help with PC Connect, refer to the BE-300 user documentation. 3.
STEP 4: Insert the ISC Plug the ISC into the device’s CompactFlash I/O slot. The CF icon should appear in the status bar at the bottom of the screen. STEP 5: Start SocketScan 1. Go to Main | SocketScan. 2. Whenever SocketScan is running, either of two icons may appear in the status bar of the BE-300. In-Hand Scan Card detected No scanning card detected 3. Make sure the “In-Hand Scan Card detected” icon appears. If the “no card detected” icon appears instead, you may have improperly inserted card.
STEP 6: Assign a Trigger Button Note: If SocketScan is not running yet, then pressing the assigned trigger button is a quick way to launch SocketScan. Pressing the trigger button will fire the laser only when SocketScan is open. 1. Tap on the ISC icon at the bottom of the screen. In the pop-up menu, select Enable Scan Buttons. 2. Press the key or button you wish to use as the trigger. You can use any of the seven shortcut keys at the bottom of the screen or the Launcher button (with the rocket icon).
STEP 7: Scan Data into a Windows Program For information about bar code scanning applications, please email info@socketcom.com 1. If not already open, start SocketScan. 2. Start the Windows application that you want to receive the data (e.g., Notes). Make sure a new document is open. 3. Press the assigned trigger button and scan the code. An amber LED indicates the laser is on.
Optional: Configure Prefix/Suffixes SocketScan lets you specify prefix and/or suffix characters to be added automatically to the data you scan. This helps to further eliminate manual data entry. 1. Tap on the ISC icon in the task tray . Note: You can configure prefix/suffixes if the “no scanning card detected” icon appears. 2. In the pop-up menu, select Prefix/Suffix... 3. In the Set Prefix/Suffix screen, enter the characters you want to be appended to each scan (128 character maximum). Tap ok.
Chapter 4 Windows 9x/Me/2000 This chapter explains how to install the In-Hand Scan Card on a Windows 9x/Me/2000 notebook. This chapter features screen images from Windows 98. Other Windows versions will have functionally equivalent screens except where otherwise noted. The ISC does NOT work with Windows XP or NT at this time. Installation Steps Summary STEP 1: Register the card. STEP 2: Uninstall any bar code scanning software already on your device. STEP 3: Insert the installation CD.
STEP 3: Insert the Installation CD Insert the SocketScan Installation CD into your CD-ROM drive. STEP 4: Insert the ISC into Your Computer Insert the ISC into a CompactFlash-to-PC Card adapter, then plug the combined unit into your computer’s PC Card slot.
STEP 5: Configure for New Hardware 1. Make sure the installation CD is still inside your computer. 2. Windows 2000: After you insert the ISC, a screen may appear reporting Digital Signature Not Found. Click Yes. 3. The first time you insert the ISC, a new hardware or device driver wizard will appear. 4. Follow the wizard to install the ISC drivers, making the appropriate selection below as prompted: a. Windows 95 — Select Other Locations... and specify your CD drive. b.
STEP 6: Start SocketScan Go to Start | Programs | SocketScan. Whenever SocketScan is running and the ISC is inserted, the ISC icon should appear in the your device’s status bar. The “no card detected” icon may denote an improperly inserted card. STEP 7: Assign a Trigger Button Note: If SocketScan is not running yet, then pressing the assigned trigger button is a quick way to launch SocketScan. Pressing the trigger button will fire the laser only when SocketScan is open.
STEP 8: Scan Data into a Windows Program Follow these steps to use the ISC to scan data into a Windows program. For information about bar code scanning applications (available separately), email info@socketcom.com 1. If not already open, start SocketScan. You can press the trigger button to quickly launch the program. 2. Start the Windows application you want to receive the data, such as Notepad, Word or Excel. Make sure a new document or spreadsheet is open that you can scan data into. 3.
Optional: Configure Prefix/Suffixes The SocketScan applet lets you specify prefix and suffix characters or functions to be added automatically to the data that you scan. This makes it easy to use the ISC with existing Windows applications. 1. Right-click on the SocketScan icon your screen. in the task bar at the bottom of 2. In the pop-up menu, select Settings… 3. Start the applet. In SocketScan Settings, click on the Prefix/Suffix tab. 4.
Optional: Configure Sounds The SocketScan applet lets you choose any WAV sound file to be played to indicate a successful scan. 1. Tap on the ISC icon in the task bar. In the pop-up menu, select Settings. Click on the Sound tab. 2. Select a sound for indicating successful scans, then click OK. To you want to play a .WAV file, after selecting Play .wav file, you can search through files by tapping the Browse button.
Optional: Configure Symbologies You can manually configure the ISC to accept or ignore certain bar code symbologies and extensions. Check Appendix B, “Default Parameters,” to see if the ISC is already configured for the symbology you need. Default symbologies include Code 39, Code 128, UPC/EAN, MSI Plessey, Code 93 and Codabar. To reconfigure your ISC for different symbologies, please refer to Symbol 923 Programming Guide Chapter 5 for In-Hand Scan, available in Adobe Acrobat PDF format at: www.socketcom.
Appendix A ISC Specifications Physical Characteristics: CompactFlash CF Card Size: 1.77 x 1.68 x 0.13 in (45 x 42.8 x 3.3 mm) Laser Scanner Size: 1.97 x 1.45 x 0.83 in (36.8 x 50 x 21 mm) Total Weight: approx. 1.8 oz (51.5 g) ISC Power Consumption with Class 1 or Class 2 Laser (3.3V supply): Idle: 4 mA (13 mW) Scanning: 75 mA (248 mW) (Also operates on 5V supply) ISC-X Power Consumption (3.
Appendix B Bar Code Label Specifications All bar code symbols/labels should satisfy the appropriate AIM Uniform Symbology Specification. Background Substrate: The bar code symbol should be printed on material (media) that is reflective and has a matte (not glossy) finish. A background diffuse reflectance of at least 70% to 80% is desirable for optimum contrast. Retro-reflective media should be used to obtain decode distances greater than 36 inches.
Appendix C Class 1 vs. Class 2 Laser Scanners This is a paper on bar code laser scanners that Jack Brandon, Product Marketing Manager of Scanner Products for Socket Communications, published in September 2001. You can download a copy of this paper at: www.socketcom.com/about/techbrief.htm Introduction Socket now offers the popular In-Hand Scan Card (ISC) with either a Class 1 or Class 2 laser. This document describes the differences between the two devices and the appropriate applications for each.
b. The label media — The media is the material a bar code is printed on. This is usually some type of paper but can also be a plastic or even metallic material. Because the reading mechanism in a bar code scanner is based on contrast, the whiter and more reflecting a media is, the farther away it can be scanned. Retro-reflective media (like a stop sign) is used for scanning very large bar code labels at distances of 20 feet and more. c.
aimed away from the person using the scanner, and (b) the beam oscillates 39 times per second over a 53 degree arc, making it impossible to stare into the beam. Additionally, using the lower powered Class 1 laser makes it even less likely that eye damage will occur. There are certain organizations in Europe, in fact, that require a Class 1 laser in bar code scanners to meet more stringent safety standards. The Socket In-Hand Scan Card with Class 1 laser meets these European safety standards.
Appendix D Default Parameters Check the table below to identify default parameters for the ISC. To program different settings, please use the Symbology Selector feature in SocketScan or the parameter number and refer to the Symbol 923 Programming Guide Chapter 5 for In-Hand Scan in Adobe Acrobat PDF format at: www.socketcom.com/support/support_bar.
UPC/EAN Convert UPC-E to A Convert UPC-E1 to A EAN-8 Zero Extend Convert EAN-8 to EAN-13 Type UPC/EAN Security Level UPC/EAN Coupon Code Parameter # 0x25 0x26 0x27 0xE0 0x4D 0x55 Default Disable Disable Disable Type is EAN-13 0 Disable Code 128 USS-128 UCC/EAN-128 ISBT 128 Parameter # 0x08 0x0E 0x54 Default Enable Enable Enable Code 39 Code 39 Trioptic Code 39 Convert Code 39 to Code 32 Code 32 Prefix Set Length(s) for Code 39 Parameter # 0x00 0x0D 0x56 0xE7 0x12 0x13 0x30 0x2B 0x11 Default Enable D
Discrete 2 of 5 Discrete 2 of 5 Set Length(s) for D 2 of 5 Parameter # 0x05 0x14 0x15 Default Disable 12 12 Codabar Codabar Set Lengths for Codabar Parameter # 0x07 0x18 0x19 0x36 0x37 Default Disable 5-55 5-55 Disable Disable Parameter # 0x0B 0x1E 0x1F MSI Plessey Check Digits 0x32 Transmit MSI Plessey Check Digit 0x2E Default Disable 6-55 6-55 One Disable MSI Plessey Check Digit Algorithm Mod 10/Mod 10 CLSI Editing NOTIS Editing MSI Plessey MSI Plessey Set Length(s) for MSI Plessey 0x33 APPEND
Appendix E Decode Zones The decode zones for the Class 1 and Class 2 lasers in the In-Hand Scan Card are shown below. The minimum element width (“X Dimension” or bar code “size”) is the width in thousandths of an inch (mils) of the narrowest element (bar or space) in the symbol. The figures shown are the typical scanning distances for selected bar code sizes. The maximum usable length of a bar code symbol (Width of Field) at any given range is also shown below.
Class 2 Laser Decode Zone Source: Symbol Technologies, Inc.
Appendix F PDF417 Bar Codes and the ISC-Xtreme About PDF417 Imagine a database that's totally portable - freed from the computer to go anywhere and yet be accessed immediately at any time. Or a paper-based communication medium that makes documents, labels and cards "live" with machine-readable information, including text, graphics, biometrics or other data. And imagine capturing this information quickly, easily and inexpensively. There's a technology that offers all this – it’s PDF417.
skewed or angled. The ISC-X should be held at a distance such that the horizontal beam line extends past the sides of the symbol. For best results, the scanner should also be held at an angle of at least 15 degrees from perpendicular to the surface of the bar code label, as the reflected light from the scanner can blind the reading mechanism.
Example 2: Scanning Angle CORRECT Pocket PC Bar Code label INCORRECT Pocket PC Bar Code Label For best results, the scanner should be held at an angle of at least 15 degrees from perpendicular to the surface of the bar code label. Managing Data from a PDF417 Bar Code PDF417 bar codes are almost always associated with a specific software application and the standard SocketScan keyboard emulation is typically of little use in a PDF417 application.
Appendix G Troubleshooting SYMPTOM: I get the “No Card Detected” icon in the system tray and can’t trigger the laser or scan any bar codes. POSSIBLE REASON Your mobile computer does not recognize the ISC. SOLUTION Make sure the ISC is inserted properly. If necessary, remove and reinsert. If using battery power, be sure to tap Yes if asked if you want to use battery power. SYMPTOM: While scanning, the laser fires, but no data appears on my screen, and the light eventually disappears.
Appendix H Technical Support If you have a technical problem while installing or using the In-Hand Scan Card, please refer to Appendix G, “Troubleshooting.” You are also welcome to visit Socket’s online users’ forum at www.socketforum.
Limited Warranty Socket Communications Incorporated (Socket) warrants this product against defects in material and workmanship, under normal use and service, for the following periods from the date of purchase: Plug-in card: 2 years Incompatibility is not a defect covered by Socket’s warranty.
Limited Software Warranty LIMITED WARRANTY. SOCKET warrants that the original disk or CD ROM is free from defects for 90 days from the date of delivery of the SOFTWARE. CUSTOMER REMEDIES. SOCKET’S entire liability and your exclusive remedy shall be, at SOCKET’S option, either (a) return of the price paid or (b) replacement of the SOFTWARE which does not meet SOCKET’S Limited Warranty and which is returned to SOCKET with a copy of your receipt.
March 2002 Document # 6410-00166 D Copyright Notice Copyright © 2002 Socket Communications, Inc. All rights reserved. Socket Communications, Socket, the Socket Communications logo, InHand Scan Card, In-Hand Scan Card-Xtreme and Mobility Friendly are registered trademarks or trademarks of Socket Communications, Inc. All other brand and product names are trademarks of their respective holders.
Regulatory Compliance This equipment has been tested and found to comply with the limits for a Class B digital device, pursuant to Part 15 of the FCC rules. This equipment is also CE EN55024:1998 and C-TICK compliant. These limits are designed to provide reasonable protection against harmful interference when the equipment is operated in a commercial environment.
Printed in U.S.A.