
User Manual


u
To zero adjust a custom probe
This procedure zero adjusts a custom probe and sets its intercept value based on an actual
sample using the applicable custom probe.
(1) Connect the Data Logger to your ClassPad, and connect the custom probe you want to
zero adjust to the Data Logger’s CH1 channel.
(2) What you should do next depends on whether you are calibrating a new custom probe or
an existing custom probe whose settings have been edited.
When calibrating a new custom probe:
• Perform steps (1) through (5) under “To configure a new custom probe” on page 3-12.
• You can skip step (2), if you want.
When calibrating an existing custom probe:
• Perform steps (1) through (6) under “To edit an existing custom probe” on page 3-14.
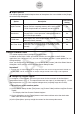
(3) Tap [Zero Adjust].
• This starts sampling by the sensor connected to the
CH1 channel and displays a Sampling... dialog box like
the one shown to the right. This is how the dialog box
appears during standby prior to the sample.
• If this dialog box is left on the display, sampling will
terminate and the dialog box will close automatically
after about five hours.
(4) Tap [Set] when you are ready to take the sample.
• This closes the Sampling... dialog box and returns to the Custom Probe dialog box.
• The value produced by the sample is entered automatically for [Intercept].
(5) After you are finished, tap [Set] to save the custom probe and close the Custom Probe
dialog box.
Tip
• An error occurs if the sample value in step (4) is not correct. If this happens, repeat the procedure
from step (3).
3-18
Setup