
User Manual


5-1
Executing a Sampling Operation
5 Executing a Sampling Operation
This chapter explains the procedure for executing a Data Logger sampling operation in
accordance with E-CON3 application settings. It also explains how to store sample data
collected with the Data Logger.
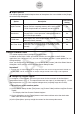
Note (EA-200 only)
• For information about operation when [CASIO] - [Speaker (
y
=
f
(
x
))] is selected as the
sensor on the Sensor Setup window, see “6 Outputting a Function to the Speaker”. When
[CASIO] - [Speaker (
y
=
f
(
x
))] is selected, sampling is not performed. Instead, the sound of
the waveform of a function input on the ClassPad is output from the EA-200’s speaker.
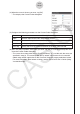
u
To get ready for sampling
(1) Connect the Data Logger to your ClassPad.
(2) Turn on the Data Logger.
(3) Connect the required sensor(s) in accordance with the setup you will be using for the
sampling operation.
(4) Set up the sampling environment with the material to be sampled, required equipment,
etc.
Starting the Sampling Operation
This section explains how to start the sampling operation, and describes the entire sampling
procedure right up to the end.
u
To start a sampling operation
(1) On the Sensor Setup window, select either the [Single] tab or the [Multiple] tab, in
accordance with the type of sampling you want to perform.
• You can also recall previously saved setup data (page 4-2).
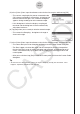
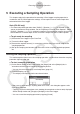
(2) To start sampling, tap
S
.
• This displays a dialog box like the one shown below.
If the warm-up time setting is anything other than “0 sec”, this dialog box appears after
warm-up is complete.
• Tapping [OK] on this dialog box starts sending the setup data on the currently displayed
Sensor Setup window tab ([Single] or [Multiple]) to the Data Logger.
• You can cancel the sampling operation by tapping [Cancel].