E CW-L300 User’s Guide • We recommend that you print on a disc* before you record anything on it. Printing on a disc that already has data recorded on it can cause the data to become corrupted. • Note that CASIO COMPUTER CO., LTD. shall not be held liable for any loss or corruption of data on discs arising through the use of this printer. * CD-R, CD-RW, DVD-R, etc.
GUIDELINES LAID DOWN BY FCC RULES FOR USE OF THE UNIT IN THE U.S.A. (not applicable to other areas). NOTICE This equipment has been tested and found to comply with the limits for a Class B digital device, pursuant to Part 15 of the FCC Rules. These limits are designed to provide reasonable protection against harmful interference in a residential installation.
Read This First! • CASIO COMPUTER CO., LTD. shall not be held liable for any loss or claims by you or any other person or entity that may arise through the use of this printer. • Reproduction of this manual in any form, either in part or its entirety, is forbidden without the express permission of CASIO COMPUTER CO., LTD. • The contents of the manual are subject to change without notice. • Windows is a registered trademark of Microsoft Corporation in the United States and other countries.
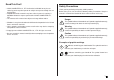
Danger Alkaline Batteries Power cord, AC adaptor, USB cable Perform the following steps immediately if fluid leaking from alkaline batteries ever gets into your eyes. 1. Do not rub your eyes! Rinse them with water. 2. Contact your physician immediately. Leaving alkaline battery fluid in your eyes can lead to loss of sight.
Warning Warning Dropping and rough treatment Continued use of the product after it has been damaged due to dropping or other rough treatment creates the risk of fire and electric shock. Immediately perform the following steps if the product should ever become damaged. 1. Turn off power. 2. Unplug the power cord from the wall outlet. 3. Contact your original retailer. Do not affix labels to a container to be used in a microwave oven.
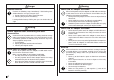
Caution Connection precaution Connect only items that are specified for the product to its connectors. Connecting a non-specified item creates the risk of fire and electric shock. Caution Loading and replacing batteries The springs inside of the battery compartment have sharp edges. Take care that you do not touch the springs with your fingers when loading or replacing batteries. Doing so creates the risk of personal injury.
Operating Precautions Contents Observe the following precautions to ensure that the printer provides you with the years of trouble-free operation for which it is designed. • Avoid use in areas subjected to direct sunlight, high humidity, and temperature extremes. Operating Temperature Range: 10°C to 35°C (50°F to 95°F) • Never allow paper clips, pins, or other similar objects to get inside the printer mechanism. • Never pull on the tape with excessive force or try to push it into the cassette.
Creating and Printing an Original (Free Design) Tape Label ..... 22 FREE DESIGN: Using Text Blocks ..................................... 22 FREE DESIGN: Using Multiple Lines in a Tape Label ...... 23 FREE DESIGN: Configuring Block Form Settings ........... 25 FREE DESIGN: Configuring Label Form Settings ............ 26 FREE DESIGN: Controlling the Length of a Tape Label ... 27 FREE DESIGN: Aligning Tape Label Text ..........................
Part 6 - Configuring the Printer Setup ............................... 55 Demo Printing ................................................................. 55 Reference ............................................................................. 57 Power Requirements .......................................................... 57 Caring for the Printer .......................................................... 58 Troubleshooting .................................................................. 59 DISC Mode .
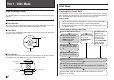
Part 1 - DISC Mode DISC Mode Disc Printing Terms Creating Disc Label Data The following defines a few disc printing terms that are used in this part of the manual. The following are the general steps when preparing data for disc labeling. After inputting the required data, you can then use it to print directly onto the disc, or for output on a tape that you can affix to the disc case. Getting Ready ■ Print Surface This is the side of the disc that the printer will print on.
Creating a New Label ■ To create a new disc label 1. Press This section explains how to specify the print area and select a label format for creating new disc printing data. • For information about printing data that you have previously saved to memory, see page 54. to turn on the printer. • A LAST DATA icon will also appear on the Main Menu if there is input data left over from the last time you used the printer.
7. Press SET. 5. Press SET. • Note that if you selected as the print pattern in step 4, pressing SET will display a screen for specifying the label format for the AREA B area. Repeat steps 6 and 7. • Pressing SET causes the text input screen to appear. 8. Input the text you want. Label format image Name of block where you are currently inputting text. ■ Label Formats The label format determines the types and positions of text and logo data for each block.
Inserting a Logo Into a Label When creating a label using a LOGO format (LOGO 1 through LOGO 4), you can insert one of the printer’s 10 built-in logos into the graphic block of the format. Built-in Logos Output Samples The following shows examples of labels that use logos.
To insert a logo into a label 1. Perform steps 1 through 5 of the procedure under “To create a new disc label” on page 9. 2. On the label format selection screen, use and to scroll through the label formats until one of the LOGO formats (LOGO 1 through LOGO 4) is displayed. 3. Press SET. 4. Use and to scroll through the logo data names, until the one you want is on the display. 5. Press SET. • This inserts the logo into the label.
Specifying Character Spacing Specifying Text Alignment There are two ways that characters can be spaced: proportional spacing and uniform spacing. You can select any one of the following four text alignments for your label text. Centering With proportional spacing, the amount of space between two characters depends on what those two characters are. Right Alignment With uniform spacing, all characters are separated by the same amount of space. Left Alignment To turn proportional spacing on and off 1.
To specify text alignment 1. While inputting text, press FORM. Printing Disc Case Labels 2. Use and to select ALIGN, and then press SET. Use the procedures in this section to print a tape label that can be affixed to the case of a disc. 3. Use and to select the alignment setting you want. 4. When the setting you want is selected, press SET. Creating and Printing a Disc Case Label 5.
4. Use 5. Use and to select PRINT, and then press SET . and • Pressing to select TAPE, and then press SET. and toggles the selection on the above screen between DISC and TAPE. 6. Use and to select the label area data you want to print first, and 10. Use and to select the label area data you want to print next, and then press SET. • Here we will select AREA B. 11. Repeat steps 7 through 9 above to print in the other label area. 12. The following screen will appear when printing is complete.
Part 2 - TAPE Mode ■ To create a new tape label 1. Press Creating a Tape Label The following are the general steps when preparing data for printing a tape label. to turn on the printer. • A LAST DATA icon will also appear on the Main Menu if there is input data left over from the last time you used the printer. If you want to continue working with the data from your previous session, use and to select LAST DATA, and then press SET. 2. Use and to select TAPE, and then press SET.
Creating and Printing a Sequentially Numbered Tape Label This label printer gives you a choice of six different numbering formats that you can use to print sequentially numbered labels from 0 to 99999. Important! • When printing sequentially numbered tape labels, printing is performed up to the number you specify. Before printing, make sure that the tape cartridge has enough tape left to finish the print operation.
6. Input the text for the COMMENT 1 box, and then press SET. Here we will input “File”. 12. Use and to select the tape cut mode (page 38), and then press SET. Shows the starting number. • Pressing SET starts the print operation and causes a screen like the one shown below to appear. • If printing reaches the number 99999, the next number printed is 00000. • If the message “LENGTH OF PRINT IS TOO LONG! ” “ TOO SHORT TO CUT!” appears, see pages 63, 67 for information about what you need to do. 7.
Creating and Printing a Large Tape Label Though your printer can print on tapes up to 24mm wide, there may be times that you need to produce even larger labels. You can do this by printing the large label in sections, and then assembling the sections into the final label. 6. Use 12mm 18mm 24mm Arranging the printed labels produces the large label. Example Big (printed on two pieces of 12mm tape) 1. Press 2. Use to turn on the printer.
10. The screen shown here appears after printing of the last piece is complete. Creating and Printing a Tape Label with a Logo Your printer comes with 10 built-in logos that you can incorporate into your tape labels quickly and easily. Built-in Logos Combine the tapes to create the large label. • If you use the above procedure to print on 18mm or 24mm tape, the tapes that are output will have blank margins along the bottom and/or the top of the upper tape and the top and/or the bottom of the lower tape.
■ To create and print a label with a logo 1. Press 2. Use to turn on the printer. and to select TAPE, and then press SET. • You can also press TAPE to enter the TAPE Mode. 3. Use and to select NEW, and then press SET. 4. Use the cursor keys to select , and then press SET. • This enters the Logo Mode. 5. Use the cursor keys to select the logo you want to use, and then press SET. 6. Use and to select PRINT, and then press SET. 7.
Creating and Printing an Original (Free Design) Tape Label This section describes what you can do with the Free Design mode of the printer, which lets you design your own tape labels. All of the following sections whose titles start with “FREE DESIGN:” indicate features and functions that are available in the Free Design mode only. ■ To create a basic Free Design 1. Press 2. Use to turn on the printer.
3. Input the text for the next first block. • Here we will input “Retail Package”. Indicates the block number where the cursor is currently located. FREE DESIGN: Using Multiple Lines in a Tape Label This section explains how to use multiple lines in a label or a specific block in the Free Design Mode. Note that the maximum number of lines depends on the width of the tape you are using. Important! • To delete a block mark, move the cursor to the symbol, and then press DEL.
1. In the Free Design Mode, input the first line of text. • Here we will input “New Branch”. 2. Press . The newline mark indicates a newline operation. Newline marks appear on the display only. They are not printed on the tape. 3. Input the second line of text. • Here we will input “In Operation soon!”. The character size is adjusted automatically in accordance with the number of lines. Label format The lines indicate the number of lines in the label. Line thickness indicates character size.
When this setting is selected: FREE DESIGN: Configuring Block Form Settings DIRECTION You can use the procedure in this section to configure direction, alignment, pitch, and block length settings for each individual block. • Specify a value from 0.0 mm (0") to 31.9mm (1 1/4"). Changing this setting also causes the tape length to change accordingly. • This setting cannot be changed when EQUAL is selected for the ALIGN setting, and when FIX is selected for the B-LENGTH setting.
FREE DESIGN: Configuring Label Form Settings Unlike the block form settings described in the previous section, label form settings are applied to the entire tape label, even if the label consists of multiple blocks. When this setting is selected: MARGINS • • • • • T-LENGTH • AUTO: Automatically adjusts tape length in accordance with the number of characters. • FIX: Maintains a fixed tape length in the range of 0cm (0") to 99.9cm (39 5/16"). See page 27 for more information.
Margins You can select from among the following four margin settings. Note • All of the margin measurements mentioned below are approximate. FREE DESIGN: Controlling the Length of a Tape Label Tape label length is normally adjusted in accordance with the size and number of the characters in the label. This section explains how you can control the length of your labels. NARROW 3.0mm (1/8") 3.
8. Press . Length value becomes highlighted. 9. Use the number keys, or the (decrease) and (increase) keys to change the block length setting. • The appearance of the block length value on the display will change in accordance with your setting as described below. ➜ [11.6cm] Label can be printed as-is. ➜ (9.6cm] Text is condensed horizontally, and label is printed as-is.
■ To control the overall label length using a fixed tape length 1. In the Free Design Mode, input the text you want. FREE DESIGN: Aligning Tape Label Text This section explains how to align tape label text within a block and how to align blocks within a tape label. 2. Press FORM. • If your label has only one block, advance directly to step 4 of this procedure. 3. Use and to select ALL FORM, and then press SET. 4. Use and to scroll to the T-LENGTH setting screen. 5.
7. After selecting the alignment setting, use B-LENGTH setting screen. 8. Use and and to scroll to the to change the setting to FIX, and then press . Example 2: Aligning blocks within a tape label LEFT EQUAL Length value becomes highlighted. CENTER 9. Use the number keys, or the (decrease) and (increase) keys to inRIGHT crease the length of the block, and then press SET. Important! • The block alignment setting is applied only when FIX is selected for the T-LENGTH setting.
6. Use the number keys, or the (decrease) and (increase) keys to change the label length setting. • Use a label length setting that is longer than the value that originally appears on the display. 7. Use 8. Use to scroll to the B-ALIGN setting screen. and • Each press or to select the alignment setting you want.
■ To specify the size of a string of characters Example: To change the size of “No Smoking” in the text “No Smoking ×3 here!” to 1× 1. In the Free Design Mode, input the text you want. 2. Press SIZE. 3. Use and to select CHARACTER, and then press SET. 4. With the highlighting located at the HEIGHT value, use and to change the value. • Here we will change the value to 1. • You can also input a value with the number keys.
Specifying the Size of Text Lines Number of Lines Format 24 or 18mm Wide 12mm Wide 9mm Wide A 1×1 1×1 1×1 – – B 1×1 1×1 2 × 2* – – C 1×1 2 × 2* 1×1 – – D 2 × 2* 1×1 1×1 – – You can specify the size of text lines by selecting a format as shown below.
Example: Line 1: 1×1 Line 2: 3×3 ( Two lines, Format E 18mm wide tape ) 1. In the Free Design Mode, input the text you want. 2. Press SIZE. 3. Use and to select LINE, and then press SET. 4. Use the cursor keys to select the format you want, and then press SET. Selected format Small Font • The printer has a Small Font setting, which it may select automatically depending on the number of lines (the number of text lines you input or the number of lines in the format you are using) and the tape width.
FREE DESIGN: Using Frames The printer comes with a selection of built-in frames that you can use in your tape labels. See page 69 for a list of frames that are available. Example 18mm wide tape, Frame Number 55 ■ To add a frame to a tape label 1. In the Free Design Mode, input the text you want. 2. Press FRAME. 3. Use the cursor keys to select the frame you want, and then press SET. • Here we will select 4. Use and . to select PRINT, and then press SET . 5.
Creating a Barcode Tape Label Example Your printer lets you create and print tape labels with barcodes. 18mm wide tape cartridge Supported Barcode Types ■ EAN EAN-13 EAN-8 UPC-A UPC-E ■ ITF ITF ■ CODE39 ■ CODABAR (NW-7) Important! • Use a 12mm or wider tape cartridge when printing barcodes. • You can input up to 60 characters of comment text above a barcode. • Be sure to check each barcode for proper reading.
Barcode Specifications Barcode Check Digit*1 EAN-13 Yes Printed Digits*3 Number of Input Digits*4 Automatically Added Digits Check Digit*1 Input Characters*8 13 digits 12 digits – 1 digit Numerals EAN-8 Yes 8 digits – 1 digit Numerals UPC-A Yes 12 digits 11 digits – 1 digit Numerals UPC-E Yes*2 6 digits 6 digits – – Numerals ITF No 4 to 22 digits 4 to 22 digits Even numbers only*5 – – Numerals Yes 4 to 22 digits 3 to 21 digits Odd numbers only*6 – 1 digit No 4 to
Cut Modes Using Tape Labels Tape Cut Modes When you are printing a series of tape labels, the tape cut mode controls whether or not a cut operation is performed for each label. You can also specify the type of cut operation that should be performed. Note that cutting certain types of tape can damage the cutter blade. Be sure to use the correct tape cut mode settings whenever printing on the type of tapes listed below.
■ FULL+HALF CUT ■ UNCUT • FULL+HALF CUT perform a full cut at the end of each label, and a half cut near the beginning of each label to make the backing paper easier to remove. • When UNCUT is selected, the printer does not perform any cut operation between labels. • This setting is best when you want to print labels without spaces between them, which saves label tape. • Be sure to select UNCUT when printing on magnetic tape and reflective tape.
Cut Modes and Margins The following shows how the tape cut type (full or half) and margin length are affected by the tape cut mode and margin settings. Cut Mode CONT HALF CUT Cut Trimming of Cutting Timing excess at between beginning each label of label Margin Cut Half cut Margin 18.5mm (3/4") NARROW Cut Half cut Margin 11.
Part 3 - Inputting and Editing Label Text This section describes everything you need to know about deleting and editing text you have already input. Basic Alpha Numeric Input The following operation shows you the basic procedures for inputting letters and numbers. Note that it assumes that a text input screen is already on the display. Moving the Cursor To input alpha-numeric characters Use the cursor keys to move the cursor around the display and position it for deleting and editing characters.
About the CODE key The CODE key makes it possible to input punctuation needed for a number of different languages. The following shows the key operations you should use for each of the characters formed using the CODE key. Inputting Symbols and Special Characters The SYMBOL menu provides you with a choice of symbols, dingbats, and special number formats, in addition to Greek and Russian letters.
Inputting Illustrations Deleting an Individual Character Your printer gives you a choice of 124 illustrations that you can use in your labels. You can delete an individual character with either the BS key or the DEL key. The only difference between the operations of these two keys is the location of the cursor. To input illustrations 1. With the cursor at the location where you want to input an illustration, press ILLUST to display the ILLUST menu. 2.
Clearing Input Text Text Editing Use the following steps to clear text on the input screen. You can set up the label printer so it either inserts new input between existing characters, or overwrites existing characters with new input. Note the following example. To clear all text 1. Press FUNCTION and then BS (CLS). • If you are deleting all text in the Free Design label mode, a screen will appear to offer you a choice between ALL or PART. Use and to select ALL, and then press SET.
Using Phrase Memory Phrase memory provides storage of nine phrases you can recall and input into your labels. Initially, phrase memory records 1 through 8 are preset with often-used label phrases. You can use these as they are or replace them with your own text. To create new phrase memory text 1. Press PHRASE MEMORY. 2. Use and to select [DATA EDIT], and then press SET. 3. Use and to select MAKE, and then press SET. 4. Use The following are the initial contents of the phrase memory records.
When you save input text in phrase memory • If the text includes character size marks, new line marks, block marks and so on, these characters are saved as spaces. • If the text includes 49 characters or more, the first 49 characters are saved as input text. 6. Use and to select the phrase memory where you want to store the text, and then press SET. 7. In response to the confirmation message that appears, press SET to save the phrase or ESC to abort. To edit a phrase memory record 1.
Using Copy and Paste User Characters You can copy text data you have input in one location, and paste it into another location. You can create up to four user characters and store them in memory. You can create a character from scratch, or you can use an existing character or symbol as a basis for your new character. ■ To copy text 1. Input the text you want to copy. 2. Press FUNCTION and then COPY.
■ To create a user character using an existing character 4. Use the following operations to draw the character you want. 1. Input the character or symbol you want to use as a basis for your new Do this: To do this: character and locate the cursor under the character. Move the cursor Use the cursor keys. Make the cursor jump to the left, right, top or bottom of the drawing screen Press FUNCTION followed Draw a black dot Press 1 so BLACK is highlighted on the display.
To recall a user character 1. With the cursor located in the input screen where you want to input the user character, press FUNCTION and then press USER CHR. 2. Use and to select RECALL and then press SET. 3. Use the cursor keys to select the user character you want to recall and then press SET. To delete a user character 1. Press FUNCTION and then USER CHR. 2. Use and to select DELETE and then press SET. 3. Use the cursor keys to select the user character you want to delete and then press SET.
Part 4 - Controlling the Appearance of Text The operations in this section explain how to select fonts, and how to use font attributes (styles and effects) to make text more attractive and eyecatching. • New Roman Italic (ROMAN ITC) You can specify a font for the text you have just input or you can specify a default font that is used automatically whenever you create a new label. The current font setting is indicated by the pointer along the right side of the display.
To change the default font setting 1. Press FUNCTION and then SET UP to display the SET UP menu. 4. Use 2. Use 5. Use and 3. Use and press SET. to select DEFAULT FONT and then press SET. to select the font you want to use as the default, and then and to move the cursor to the first character of the string of text to which you want to apply the FONT setting, and then press SET.
5. Use and to select the range of text for the STYLE setting you want, and then press SET. Using STYLE Menu Attributes The STYLE menu lets you apply the following attributes to your text.
■ To remove all EFFECT settings Using EFFECT Menu Attributes 1. Press STYLE. The EFFECT menu lets you apply the text attributes shown below to label text in the Free Design Mode. and to select EFFECT, and then press SET. 3. Use and to select CANCEL, and then press SET. • If you want to remove a particular EFFECT setting, use the cursor keys to select its name, and then press SET.*1 Examples SHADING 2. Use UNDERLINE BOX(CHARACTER) BOX(TEXT) 4.
Part 5 - Saving, Recalling and Deleting Labels To recall a label 1. Press to turn on the printer. 2. Use and to select DISC or TAPE, and then press SET. To save a label 1. Create the label you want to save. • You can also press DISC or TAPE to enter the DISC or the TAPE Mode. 3. Use and to select STORED DATA, and then press SET. 2. After you finish inputting text, the following screen will appear on the printer 4. Use and to select RECALL, and then press SET. 5.
Part 6 - Configuring the Printer Setup The printer has a SET UP screen that you can use to configure a variety of basic settings. ■ To configure the printer setup 1. Press to turn on the printer. and Demo printing uses built-in data to demonstrate the type of disc printing and tape label printing that can be performed by the printer. Important! • If there is label data from your last label layout session is still in memory, performing a demo print will delete it.
10. Use and to select the print area you want to print, and then press SET. • Both DATA 1 and DATA 2 print in both the upper print area and the lower print area of the disc. 13. After printing is complete, use and to select EXIT, and then press SET. 14. In response to the confirmation message that appears, press SET. ■ To perform tape demo printing 1. Make sure a tape cartridge is loaded in the printer. • See page 13 for the Startup Guide for information about loading tape cartridges. 2.
Reference 3. Replace the battery cover. Power Requirements You can run the printer by using its bundled AC adaptor to plug it into a power outlet. It can also run on commercially available alkaline batteries. ■ Using Batteries Note • The printer can run on eight AA-size alkaline batteries. Be sure to use alkaline batteries only. Important! • The printer may suddenly turn off during printing if battery power goes low. Because of this, use of the bundled AC adaptor is recommended to power the printer.
■ To clean with a cleaning tape Caring for the Printer Disc and tape label printing can become unclear if the printer's print head and rubber roller become dirty. Perform the following steps to clean the print head and rubber roller. ■ To use a cotton swab for cleaning Important! • Use only a cotton swab or some other soft material to clean the print head and rubber roller. Use of a very fine type cotton swab is recommended.
Consult the troubleshooting tables below whenever you start to have problems with the printer or application. If you can't find the solution to your problem below, contact your original retailer or your nearest authorized CASIO service center. Symptom Nothing appears on the display when I press . The printing operation is finished normally, but nothing is printed. Possible Cause Possible Cause Recommended Action Printing is not clear. Printing is poor quality. Printing is too light.
DISC Mode Recommended Action Symptom Possible Cause The printing operation is finished normally, but nothing is printed. The ink ribbon is used up. Printing is not clear. Printing is poor quality. Printing is too light. Any of the following can interfere with proper printing.
Symptom Possible Cause Recommended Action I cannot insert a disc into the printer. A tape cartridge is loaded in the printer. A disc cannot be inserted into the printer while a tape cartridge is loaded. Remove the tape cartridge and replace it with an ink ribbon cassette. (Startup Guide, page 11) Printing will not start. The disc is not positioned correctly in the printer. Remove the disc and then reinsert it straight into the left side of the slit along the top of the printer.
Symptom Possible Cause No tape comes out when I press PRINT. Battery power is low. The ink ribbon is coming out of the tape outlet together with the tape. Slack in the ink ribbon when the tape cartridge was loaded in the printer. The tape will not cut. E 62 The tape cutter is dull. Recommended Action Symptom Change to AC adaptor power or load a fresh set of batteries (supplied by you). (page 57) The tape will not cut. Remove the tape cartridge.
Message Error Messages Message Cause and Action • You are trying to operate the printer without initializing its memory first. ➜ Initialize printer memory. Startup Guide, page 8 ENTIRE PHRASE COULD NOT BE RECALLED! • The text in the phrase memory you are trying to recall will cause the number of characters to exceed the allowable limit for the location where you are inserting it. ➜ Re-input so the recalled phrase memory text does not cause the allowable number of characters to be exceeded.
Message LOW BATTERY! Cause and Action • Battery power is low. ➜ Replace the batteries or use the bundled AC adaptor to power the printer. See page: 57 Message • Battery power is low. ➜ Replace the batteries or use the bundled AC adaptor to power the printer. 45 NO INPUT TEXT! • You are attempting a print or preview operation when there is no text input. ➜ Input text before printing or previewing.
Message Cause and Action See page: NOT ENOUGH MEMORY! SET/ESC • There is not enough memory available to save the data you are editing. ➜ To edit and print without saving the data, press SET to continue. If you want to save the data, delete memory data you no longer need. 54 NOW PRINTING • The printer has overheated. ➜ Stand by and printing will resume as soon as the printer returns to normal temperature.
See page: Message Cause and Action PRINT ERROR! LOAD AN INK RIBBON CASSETTE! • There is no ink ribbon cassette loaded in the printer or the ink ribbon cassette is not loaded correctly. ➜ Check the ink ribbon cassette. Startup Guide, page 11 PRINT ERROR! NO INK RIBBON! • The ink ribbon cassete has reached its end. ➜ Replace the ink ribbon cassette PRINT ERROR! PLACE DISC IN PRINTER CORRECTLY! • The disc is not inserted properly into the printer. ➜ Insert the disc properly.
Message Cause and Action See page: TOO MANY CHARACTERS! SOME WERE NOT COPIED • You are trying to copy text that contains more than 49 characters. ➜ Decrease the number of characters you are copying. 47 TOO MANY CHARACTERS! SOME WERE NOT PASTED • Pasting copied text will cause the number of characters to exceed the allowable limit for the location where you are pasting. ➜ Re-input so the pasted text does not cause the allowable number of characters to be exceeded.
Illustrations ● NUMBER ● GREEK, RUSSIAN Symbols, Dingbats, and Special Characters ● SYMBOL ● DINGBAT E 68
Frames 69 E
Disc Label Formats Type FORMAT Number FORMAT 11 Vertical Size Maximum (mm/inch) Number 1 Format Input Item Vertical Size Maximum (mm/inch) Number TITLE 6/1⁄4" 24 ITEM1~4 3/1⁄8" 24 (×4) 12 TITLE1~4 3/1⁄8" 49 (×4) 13 ITEM1~8 3/1⁄8" 24 (×8) TITLE 6/1⁄4" 24 COMMENT 3/1⁄8" 49 1 18 (×4) TITLE 12/ ⁄2" 12 2 TITLE 9/3⁄8" 16 TITLE1 6/1⁄4" 24 TITLE2 1 6/ ⁄4" 24 ITEM1~4 2/ ⁄16" TITLE 9/3⁄8" 16 TITLE 6/1⁄4" 24 COMMENT 3/1⁄8" 49 ITEM1~4 2/1⁄16" 37 (×4) COMMENT 3
Type Number Format Input Item AUTO 1 2 Vertical Size Maximum (mm/inch) Number TITLE 15~3/9⁄16"~1⁄8" 49 TITLE1 6~3/1⁄4"~1⁄8" 49 TITLE2 6~3/1⁄4"~1⁄8" 49 Numbering Formats Number 1 Format Input Item Tape Width (mm) 24 18 12 9 6 NUMBER COMMENT, 2 NUMBER NUMBER, 3 COMMENT COMMENT1, NUMBER, 4 COMMENT2, COMMENT, 5 NUMBER NUMBER, 6 COMMENT 71 E
Tape Width and the Number of Lines and Character Sizes Supported Tape Widths The number of print lines and the vertical character size depends on the tape width and format being used.
Enlarged Label Printing Tape Widths and Character Sizes Tape Width (mm) 2 Pieces 3 Pieces 4 Pieces 6, 9 12 18 24 × × × 24/15/16" 30/13/16" 30/13/16" 36/1 7/16" 45/13/4" 45/13/4" 48/17/8" 60/23/8" 60/23/8" (mm/inch) ∗ Printing on 18mm or 24mm tape creates blank margins along the bottom and the top of each tape. Trim off these margins before combining the tapes, or print on transparent tape. Then you can combine the tapes without trimming, by laying one over the other.
Specifications Model : CW-L300 Input Keyboard Layout : Typewriter (QWERTY) Character Types Alpha : 52 (A to Z, a to z); 99 (Á, ß, Ç, etc.
CASIO Europe GmbH Bornbarch 10, 22848 Norderstedt, Germany
CASIO COMPUTER CO., LTD.