
User Manual
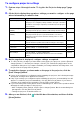
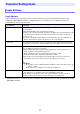
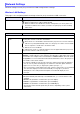
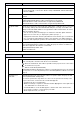
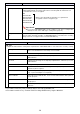
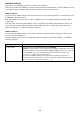
Table Of Contents
- Contents
- Establishing a Network Connection Between a Computer and the Projector
- Configuring Projector Network Settings
- Using a Computer to Configure Projector Network Settings
- Preparing for C-Connection
- Network Projecting a Computer Screen Image (Using C-Connection)
- C-Connection Details
- Advanced Operations
- Ports Used for TCP/UDP

18
Bandwidth Select “20MHz” (initial default) or “40MHz” as the wireless LAN channel width.
If you selected “B” or “G” for the “Mode” setting, “Bandwidth” will automatically be
fixed as “20MHz”.
Channel Select “Auto” (initial default) or a channel number from 1 to 11 for the wireless LAN
channel.
Security Configure wireless LAN communication encryption settings.
Disable (initial default): Wireless LAN communication not encrypted.
WPA-PSK: Wireless LAN communication encrypted using WPA-PSK.
WPA2-PSK: Wireless LAN communication encrypted using WPA2-PSK.
Passphrase/WEP
Key
Specify an encryption key (password) when “WPA-PSK” or “WPA2-PSK” is selected for
the “Security” setting. Since the initial default setting for “Security” is “Disable”, this
setting is null under initial default. To encrypt wireless LAN communication, be sure to
input an encryption key here.
You can use any of the following types of characters: numerals, alpha characters
(upper case or lower case), or single-byte symbols (except ”, ’).
A passphrase must have at least eight characters and can have up to 63 characters.
Use of a character string that mixes upper-case and lower-case alpha characters,
numerals, and single-byte symbols is recommended to create a secure passphrase.
SSID Broadcast Specify whether the projector SSID should be visible to terminals (computers and smart
devices) attempting wireless LAN access. When the projector SSID is not visible, its
SSID will not appear in the SSID list of a terminal.
Enable (initial default): Visible SSID
Disable: Invisible SSID
Use this item: To do this:
Client Mode
Enable Client Mode Enter the Client Mode and connect the projector to an external wireless LAN access
point. Selecting this check box exits the Access Point Mode.
: Enter the Client Mode. This makes it possible for the projector to be connected to
an external access point.
: Exit the Client Mode (initial default).
For detailed information about the procedure for connecting the projector to an external
access point, see “Connecting the Projector to an Existing Wireless LAN Access Point”
(page 7).
External Access
Point SSID
Manually input the SSID of the wireless LAN access point to which the projector will
connect (Initial Default Setting: Null).
You can also perform the steps below to scan for access points in the vicinity of the
projector, and select one from the list of SSIDs that appears.
1. Click the [Scan Access Point] button.
When scanning is complete, a down arrow button () appears on the right side of
the “External Access Point SSID” box.
2. Click the button. On the list that appears, click the SSID of the wireless LAN
access point you want to connect the projector with.
This inputs the SSID you clicked.
Use this item: To do this:
Access Point Mode