
User Manual


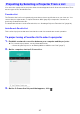
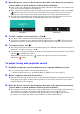
Table Of Contents
- Contents
- Establishing a Network Connection Between a Computer and the Projector
- Configuring Projector Network Settings
- Using a Computer to Configure Projector Network Settings
- Preparing for C-Connection
- Network Projecting a Computer Screen Image (Using C-Connection)
- C-Connection Details
- Advanced Operations
- Ports Used for TCP/UDP

26
Network Projecting a Computer Screen Image
(Using C-Connection)
Use C-Connection to perform network projection of a computer screen image. Before trying to
perform the operations in this section, install the C-Connection application on your computer (page
23).
Important!
Some functions are limited with the Chrome OS version of C-Connection. Before using the
Chrome OS version of C-Connection, be sure to read the information under “Differences in
Functions Provided by the Chrome OS Version of C-Connection” (page 38).
To perform the operation below, first obtain a One Click Connection file for the projector you plan to
use for network projection. A One Click Connection file can be downloaded using the procedure under
“Creating a One Click Connection File” (page 23) from the projector to be used for projection.
To project using a One Click Connection file
1.
Establish a network connection between your computer and the projector.
For connection procedures, see the information below.
– “Establishing a Direct Wireless LAN Connection Between a Computer and the Projector”
(page 5)
– “Connecting the Projector to an Existing Wireless LAN Access Point” (page 7)
2.
On the computer, open the One Click Connection file.
This starts up C-Connection. Network projection to the projector will start, and the
C-Connection window (Info Panel, page 32) will appear.
Projecting with One Click Connection