
User Manual
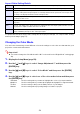
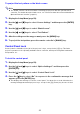
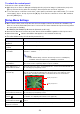
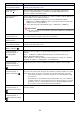
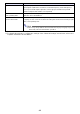
Table Of Contents
- Contents
- Safety Precautions
- Operating Precautions
- About the Light Source Unit
- Do not block light output or look directly into the lens!
- Laser Precautions (See the label on the projector)
- AC Adapter Precautions
- Battery (Optional YA-B10) Precautions
- Soft Inner Case (Optional YB-3) Precautions
- Other Precautions
- Precautions when Handling the Projector after Use
- Getting Ready
- Operating the Projector
- Cleaning the Projector
- Troubleshooting
- Appendix
- Specifications

51
Changing the Aspect Ratio of the Projected Image
Under initial default settings, projection is performed by maintaining the aspect ratio of the input
signal. You can also change the aspect ratio setting if you want.
1.
Display the Setup Menu (page 50).
2.
Use the [] and [] keys to select “Screen Settings” and then press the [ENTER]
key.
3.
Use the [] and [] keys to select “Aspect Ratio”.
4.
Use the [] and [] keys to change the Aspect Ratio setting.
The table below shows the settings available for each type of input source.
For details about the meaning of each setting, see “Aspect Ratio Setting Details” (page 52).
5.
After the settings are the way you want, press the [MENU] key.
Note
Pressing the remote controller’s [ASPECT] key will cycle through the available aspect ratio
settings and display the new setting in the upper right corner of the projection image.
Important!
Note that enlarging or reducing the size of an image for commercial purposes or public
presentation may infringe on the legally protected copyright of the copyright holder of the
original material.
Operations Using the Setup Menu
Input Source Setup
HDMI(PC) or Network Normal, Full, 16:9, 4:3, True
HDMI(DTV) Normal, 16:9, 16:10, 4:3, Letter Box