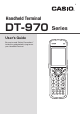
E Handheld Terminal DT-970 User’s Guide Be sure to read “Safety Precautions” inside this guide before trying to use your Handheld Terminal.
BLUETOOTH is a registered trademark owned by Bluetooth SIG, Inc. and licensed to CASIO COMPUTER CO., LTD. eneloop is a registered trademark of Panasonic Group. Information in this document is subject to change without advance notice. CASIO Computer Co., Ltd. makes no representations or warranties with respect to the contents or use of this manual and specif ically disclaims any express or implied warranties of merchantability or f itness for any particular purpose.
Contents Safety Precautions .........................................................................................E-3 Operating Precautions ...................................................................................E-8 About the Waterproofing/Dustproofing........................................................E-9 Regulatory Information ................................................................................E-10 Important ....................................................................
Connecting the USB Cradle (HA-E60IO) Power Supply ............................E-31 Connecting the Ethernet Cradle (HA-N62IO) Power Supply ....................E-33 Specifications ..................................................................................................... E-35 Adjusting the Laser Beam Width ................................................................
Safety Precautions Congratulations upon your selection of this CASIO product. Be sure to read the following Safety Precautions before trying to use it for the first time. Your neglect or avoidance of the warning and caution statements in the subsequent pages causes the danger of fire, electric shock, malfunction and damage on the goods as well as personal injury. Markings and Symbols The following are the meanings of the markings and symbols used in these Safety Precautions.
Warning Dust and Moisture • Though the Handheld Terminal is dust and water splash resistant, its options including the cradle are not. Keep loose metal objects and containers filled with liquid away from your Handheld Terminal and the options. Also, never handle the Handheld Terminal and the options while your hands are wet. Laser Light • The Handheld Terminal scans bar codes using laser light. Never look directly into the laser light or shine the laser light into the eyes.
Rechargeable Batteries Caution • Use Panasonic “eneloop” rechargeable AA batteries. Do not use other types of rechargeable battery. • Always charge the rechargeable batteries using the dedicated charger. • Rechargeable batteries cannot be charged while installed in the DT-970. • When using eneloop batteries with the charger, read the instructions for the eneloop batteries and charger to ensure that you use them correctly.
Caution • Incorrect use of the batteries could result in staining of the surroundings due to fluid leakage, or could cause the batteries to burst, resulting in fire or injury. Ensure that you observe the following: — Do not store the batteries in locations exposed direct sunlight, high temperatures or high humidity. — If the batteries will not be used for a long period, take them out of the Handheld Terminal. — Do not allow water or other fluids to come into contact with the batteries.
Power Supply / AC Adaptor Warning • Do not use the Handheld Terminal at a voltage other than the specified voltage. • Never modify, sharply bend, twist, or pull on the power cord. • Never use a detergent to clean AC adaptor and its power cable, especially on the plug and the jack. • When using the cradles, be sure to use the respective AC adaptors. Caution • Never pull on the power cord when unplugging it. Always hold the plug when unplugging it from the wall outlet.
Operating Precautions Your Handheld Terminal and its options are precision. Improper operation or rough handling can cause problems with data storage and other problems. Note and observe the following precautions to ensure proper operation. • Do not continue using the battery once it is exhausted. Doing so could result in data loss or corruption. When the battery is exhausted, replace it immediately.
About the Waterproofing/Dustproofing The DT-970 Series models are waterproof and dustproof. • Waterproofing: Performance complies with the IPX7 level set out in the IEC standards (waterproof for 30 minutes at a depth of 1 meter in still tap water at normal temperature). • Dustproofing: Performance complies with the IP6X level set out in the IEC standards.
Regulatory Information Europe DT-970 Options of DT-970 Manufacturer: CASIO COMPUTER CO., LTD. 6-2, Hon-machi 1-chome, Shibuya-ku, Tokyo 151-8543, Japan Responsible within the European Union: Casio Europe GmbH Casio-Platz 1, 22848 Norderstedt, Germany www.casio-europe.com • Please keep all information for future reference. • The declaration of conformity may be consulted at http://doc.casio.com • Products are for distribution within all member states of the EU.
Accessories and Options Handheld Terminal DT-970M50E DT-970M51E Accessories Please check the items in the box before using the Handheld Terminal for the first time.
General Guide Handheld Terminal (DT-970M50E/M51E) The illustration shows the DT-970M51E.
Barcode Reader Port Indicator Screen L Trigger Key R Trigger Key Cursor Key Keys Reset Switch Laser light is emitted from this window that reads bar codes. Three-color LED (red, green, blue). Shows the operating status and confirms barcode scanning. Lit green: Barcode scan successful. The indicator light specifications vary depending on the application used. Displays various data when a program is being run. Used to perform bar code reading. Used to perform bar code reading.
Center Trigger Key USB Port Buzzer Battery Cover (Backup Battery) Battery Cover Lock Switches Battery Cover (Main Batteries) Strap Holes Data Communication Terminal Power Contacts IR Port E-14 Used to perform bar code reading. Connects the optional USB cable (HA-N81USBC). Outputs operation confirmation tones. Opens the cover to allow the memory backup lithium battery to be installed. Used to lock the battery cover and to release. Opens the cover to allow the main batteries to be installed.
Ethernet Cradle (HA-N62IO), USB Cradle (HA-N60IO) The illustration shows the HA-N62IO. Left Top Right Selector Switch* Power Switch* Data Communication Terminal Terminal Detect Switch Power Contacts Front Back Mount Hooks LAN Port* AC Adaptor-Jack* Power Indicator LED* LAN Communication Status LED* LAN Connection Status LED* USB Client Port USB Host Port* * Ethernet Cradle (HA-N62IO) only. Not provided on the USB cradle (HA-N60IO).
USB Client Port USB Host Port Power Switch Selector Switch LAN Connection Status LED LAN Communication Status LED LAN Port AC Adaptor Jack Terminal Detect Switch Power Contacts Data Communication Terminal Power Indicator LED Mount Hooks E-16 This port is used to transmit data and files (download, upload) by connecting the cradle to a PC using a USB cable (DT-380USB-A). The dedicated driver must be installed in the PC before connecting the cradle to the PC.
Loading and Removing the Batteries Two types of battery are used in the Handheld Terminal. There are the main batteries used to operate the Handheld Terminal, and a backup battery used for memory protection. As the main batteries, use alkaline AA batteries or fully charged rechargeable AA batteries (eneloop). To use rechargeable batteries, you must change the setting. (See “Configuring the Main Battery Settings” below.) Use a lithium battery (CR2032) as the backup battery.
Configuring the Main Battery Settings You can choose either dry cell (alkaline) or rechargeable batteries as the main batteries. At shipment from the factory, the “DRY CELL” setting is selected. To use rechargeable (eneloop) batteries, you must change the setting. Select the setting as shown below.
Loading the Backup Battery 1. Loosen the 2 screws and remove the battery cover by opening the notch with your fingernail. Screws (2) Notch 2. Load the battery from the direction of the arrow, ensuring that the polarity (+ and -) is correct. 3. Re-install the battery cover and tighten the 2 screws. Removing the Backup Battery 1. As shown in the illustration, use a pointed implement such as a ballpoint pen to remove the battery.
Handling microSD Cards The Handheld Terminal supports microSD card. Since the microSD card slot is located inside the battery compartment, first remove the batteries when installing or removing a microSD card. Refer to pages 17 to 18 for information on “Loading and Removing the Main Batteries”. Install (or remove) a microSD card according to the procedure described below. Installing 1. Make sure that the power on the terminal has been switched off.
Removing 1. Make sure that the power on the terminal has been switched off. If the power is still on, press the power key to switch off. 2. Remove the batteries and open the microSD card cover. 3. Catch the projecting lip with your fingertip as shown in the illustration and pull the card out. 4. Close the microSD card cover and install the batteries. Important! • A microSD card must be inserted with the top and bottom properly aligned and in the proper direction.
Performing Communications IR Communication IR communication can be used to transmit data between two Handheld Terminals. When performing IR communication, orient the IR ports of both Handheld Terminals so they are pointing directly at each other. The ports can be in direct contact with each other, or they can be separated by up to 30cm (1113⁄16") (up to 20cm (7 7⁄8") for communication between units). Important! • A high-sensitivity communication element is used during IR communication.
Bluetooth® Communication Bluetooth® interface can also be used to transmit data between two Handheld Terminals. With Bluetooth® the two Handheld Terminals should be located within about 5 meters from each other, as long as there is nothing blocking the path between them. Important! Observe the following precautions to help ensure that Bluetooth communication is successful.
Resetting the Handheld Terminal Resetting the Handheld Terminal is the same as restarting a PC. Performing a reset causes all unsaved inputs and edits to be lost, but data that is already stored in the memory as well as all settings should be unaffected. Use reset to restore normal operation whenever the Handheld Terminal operates abnormally due to misoperation or some other reason. Use a stylus to press the reset switch on the front of the DT-970. This starts the reset operation.
Warning Label The illustration shows the DT-970M51E. The label location differs depending on the model. • This label is a warning and caution label for Class 2 laser products that comply with IEC60825-1:2014. • Although Class 2 laser light is only emitted momentarily, never look directly into the beam light. • The laser light emitted by this laser scanner has a maximum output of less than 1 mW and a wavelength of 650 nm.
DT-970 Specifications Model: CPU: Memory: Display: Laser Scanner: Readable symbologies: Scanning distance: DT-970M50E/M51E 32bit CPU 8MB RAM, 32MB Flash ROM (user area: approx. 28MB) 2.
Dimensional Drawings 54.0mm (Display) 25.0mm 173.5mm (Display) 26.9mm (Grip) 52.
Connecting the USB Cradle (HA-N60IO) Power Supply You can use the optional USB cable (DT-380USB-A) to connect the USB Cradle to a computer and use the computer as a power source. Before attempting data communication with the DT-970, connect the USB Cradle and the USB cable. See pages 15 to 16 for the name and operation of each of the components. 1. Connect the USB cable (DT-380USB-A) to the USB client port on the back of the USB Cradle, and then connect it to the PC. PC 2.
Important! • Water or other liquids on the data communication or power supply terminals can lead to an electric shock or fire. Note also that soiling on the terminals will impair the connection, leading to reduced power supply and communication functionality. As a safety precaution, disconnect the USB cable before wiping the data communication and power supply terminals clean with a dry cloth or cotton bud. • When loading the DT-970 into the cradle, ensure that it is securely slotted into place.
Specifications 1. USB Protocol: Transfer Rate: 2. Power Supply Output to Handheld Terminal: 3. Dimensions and Weight Dimensions: Weight: 4. Operating Environment Temperature: Humidity: E-30 USB Ver2.0 Full speed 12Mbps (max.) 5V DC 0.5A (max.
Connecting the USB Cradle (HA-E60IO) Power Supply Before using the cradle, fit the optional attachment kit (HA-N64AT). 1. Make sure that the USB Cradle’s power switch is turned off and then plug the optional AC adaptor (AD-S15050B-N5) into the AC adaptor jack on the back of the USB Cradle. 2. Connect the power cord to the AC adaptor before connecting the power cord to the electrical outlet.
3. Connect the USB cable (DT-380USB-A) to the USB port on the back of the USB Cradle and then connect it to the personal computer. 4. Line up the infrared interface on the bottom of the DT-970 and the infrared interface on the USB Cradle to mount the DT-970. 5. Turn on the power switch. The power indicator LED on the front of the USB Cradle lights green if the DT-970 is correctly mounted. Important! • This does not supply power to the DT-970.
Connecting the Ethernet Cradle (HA-N62IO) Power Supply Use the separately sold AC adaptor (AD-S42120C) for the power supply of the Ethernet Cradle. Always make sure to connect the AC adaptor to the Ethernet Cradle before performing communication with the Handheld Terminal. Power to the Handheld Terminal is supplied from the Ethernet Cradle. 1. Plug the AC adaptor into the AC adaptor jack on the back of the Ethernet Cradle. 2.
4. Before using the cradle ports, remove the caps from the ports. When using a LAN, connect one end of the LAN cable to the LAN port and the other end to the PC or hub. When using a USB connection, connect one end of the USB cable (DT-380USB-A) to the USB port and the other end to the PC. The USB host port is used for connecting the cradle with other USB peripheral device. PC PC or hub 5. Turn on the power switch on the right side of the Ethernet Cradle.
Important! • Always make sure to first remove the 970 from the Ethernet Cradle when switching the selector switch. • Water or other liquids on the data communication or power supply terminals can lead to an electric shock or fire. Note also that soiling on the terminals will impair the connection, leading to reduced power supply and communication functionality.
Adjusting the Laser Beam Width You can select the laser beam width used by the DT-970. Note that using this function may result in a laser beam width error. In this event, use the procedure below to adjust the laser beam width. 1. Turn the Handheld Terminal ON with the system menu. 2. Press the following keys in order to start up laser beam adjustment: and keys held down to start up the Startup Screen 4: ENVIRONMENT 4: BARCODE 4: CALIBRATION OBR CALIBRATION PLEASE PUSH TRG KEY TRG :START CLR :EXIT 3.
Print this page at its actual size (not reduced) to adjust the laser beam width.
CASIO COMPUTER CO., LTD. 6-2, Hon-machi 1-chome Shibuya-ku, Tokyo 151-8543, Japan PN430137-003 MO1705-C 2013 CASIO COMPUTER CO., LTD.