Palm-size PC User’s Guide For distribution with new Palm-size PCs only. Your Palm-size PC comes with a Hardware Manual in addition to this Palm-size PC User’s Guide. Be sure to read the Hardware Manual first. Before using your Palm-size PC for the first time,carefully read the Safety Precautions in the Hardware Manual. Keep this Palm-size PC User’s Guide on hand for reference whenever using your Palm-size PC.
• CASIO COMPUTER CO., LTD. assumes no responsibility for any damage or loss resulting from the use of this manual. • CASIO COMPUTER CO., LTD. assumes no responsibility for any loss or claims by third parties which may arise through the use of this product. • CASIO COMPUTER CO., LTD. assumes no responsibility for any damage or loss caused by deletion of data as a result of malfunction, repairs, or battery replacement. Be sure to back up all important data on other media to protect against its loss.
Contents Welcome .................................................................................... i About This User’s Guide .................................................................................... i Where to find additional information ................................................................ ii Part 1 Using the Palm-size PC ...................................1 Chapter 1 Palm-size PC Basics .............................................. 2 Palm-size PC Buttons ........................
Chapter 4 Pocket Outlook .................................................... 42 Calendar: Scheduling an Appointment ............................................................ 42 Contacts: Managing Business and Private Contacts ........................................ 44 Tasks: Keeping Track of Things You Need to Do ............................................ 45 Inbox: Sending and Receiving E-mail ............................................................ 47 Synchronizing Messages .....................
Part 3 Using the CASIO Programs ...........................95 Chapter 8 Menu .................................................................... 95 Using Menu ...................................................................................................... 96 Starting Up Menu ................................................................................ 96 Using the Main Menu ..........................................................................
i Welcome Congratulations on your selection of our Palm-size PC. Your new Palm-size PC comes with Microsoft Windows CE preinstalled, which means it can be used in conjunction with a Microsoft Windows based personal computer. You can use the Palm-size PC’s powerful software capabilities to take along the latest version of your appointments, contacts, and other data, while using your desktop or laptop for major input and editing work. You can even send and receive e-mail while on the go.
ii Where to find additional information Information Source Palm-size PC programs • This User’s Guide • Palm-size PC online help. On your Palm-size PC, tap Start and then Help. Data synchronization and file exchange with a desktop computer • This User’s Guide • Palm-size PC online help • Windows CE Services Help Topics. On the Mobile Devices window of your desktop computer, click Help and then Windows CE Services Help Topics.
iii Note • You must have Windows CE Services installed on your desktop computer before you can access Windows CE Services Help Topics. See the separate Quick Start Guide and Chapter 6 of this User’s Guide for information on installing Windows CE Services. • In this User’s Guide, the term “desktop computer” includes both desktop computers and laptop computers. • The modem card described in this User’s Guide is intended for use in the United States and Canada only.
Part 1 Using the Palm-size PC 1 Part 1 Using the Palm-size PC Part 1 of this User’s Guide provides an overview of basic operations and how to use the software on your Palm-size PC. Chapter 1 Palm-size PC Basics Basic Palm-size PC operations and information on how to customize your Palm-size PC. Chapter 2 Tutorial Hands-on experience entering data and performing other operations on your Palm-size PC. Chapter 3 Voice Recorder and Note Taker Introduction to using the Voice Recorder and Note Taker software.
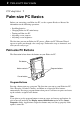
2 Palm-size PC User’s Guide Chapter 1 Palm-size PC Basics Before you start using your Palm-size PC, see the separate Hardware Manual for information on the following operations. • • • • • Installing batteries Charging Palm-size PC main battery Turning on Palm-size PC Adjusting screen contrast Adjusting screen brightness The first time you turn on Palm-size PC power, a Palm-size PC Welcome Wizard appears to guide you through a few setup steps.
Part 1 Using the Palm-size PC 3 Exit Button This button is similar to the Esc key on a desktop computer keyboard. Use it to interrupt an ongoing operation and to return to a previous screen or menu. Action control This versatile dial-type button can be used to perform a number of different operations. Press ................................... Pressing the Action control is similar to pressing the Enter key on a desktop computer keyboard.
4 Palm-size PC User’s Guide Touch Screen Operations Using the stylus to tap buttons and menu items on the touch screen is the same as clicking the item on a desktop computer. You can also double-tap (double-click) and drag as described below. Tap Lightly tap the touch screen once to perform the operation that is equivalent to clicking on a desktop computer.
Part 1 Using the Palm-size PC 5 Palm-size PC Programs Your Palm-size PC comes pre-installed with a collection of useful programs. These include Microsoft standard programs (Calendar, Contacts, etc.) and CASIO programs (Menu, etc.). You can select the program you want from the Start button or by pressing its program button. With your Palm-size PC, you do not need to quit a program after you are finished using it. You can simply select another program.
6 Palm-size PC User’s Guide Icon Program Calendar Keeps track of your appointments. Channels Downloads Web data from your desktop computer. Contacts Keeps track of your friends and business contacts. Inbox Sends and receives e-mail. Note Taker Provides a place for creating freehand or typed notes. Tasks Keeps track of things you need to do. Voice Recorder Records voice memos for later playback. Calculator Performs basic calculations.
Part 1 Using the Palm-size PC 7 Assigning a Program to a Program Button The first time you start up Palm-size PC, Voice Recorder, Calendar, Contacts, and Menu are assigned to the program buttons automatically. Menu Voice recorder button Contacts Calendar Use the following procedure to assign different programs to the program buttons. To assign programs to the program buttons 1. On your Palm-size PC, tap Start, Settings, and then Buttons. 2.
8 Palm-size PC User’s Guide Active Desktop You can use the Active Desktop to display important data, upcoming appointments and tasks. Think of the Active Desktop as the “cover” for your Palm-size PC. Owner data Calendar data Task data Desktop button Active Desktop You can display the desktop at any time by tapping the Desktop button in the lower right corner of the screen. To change the contents of the desktop, tap Start, Settings, Display, and then select Display Active Desktop.
Part 1 Using the Palm-size PC 9 Taskbar The Taskbar appears along the bottom of your Palm-size PC screen. 1 2 3 4 5 1 Start button .......................... Tap to display the Start menu. 2 Input panel button ................ Tap to display or hide the input panel (page 12). 3 Input method arrow .............. Tap to display a list of input methods (page 12). 4 Status icons .......................... Double-tap an icon to display information about the status of your Palm-size PC. 5 Desktop button ..
10 Palm-size PC User’s Guide Start Menu Tap the Start button to display the Start menu. 1 2 3 4 5 1 Palm-size PC Standard Software ........ Tap on the name of a program to start it up. 2 Programs Menu ................................. Tap here to display a sub-menu of CASIO programs, programs for data communication, etc. 3 Settings Menu .................................... Tap here to display a sub-menu of Palm-size PC settings. See “Customizing Your Palm-size PC” on page 15. 4 Find .....................
Part 1 Using the Palm-size PC 11 Command Bar The appearance of the command bar at the top of the Palm-size PC screen depends on what program you are currently using. The following explanation describes the Calendar command bar, which you can display by tapping Start and then Calendar. Command bar The command bar consists of a toolbar and a menu bar.
12 Palm-size PC User’s Guide Typing and Writing on your Palm-size PC Your Palm-size PC provides you with a selection of three different options for entering data. You can type with an on-screen keyboard, hand-write characters using character recognition, or draw graphics on the screen using the stylus. You can use the stylus to draw graphics on the screen for input into Note Taker, and for notes you attach to entries in Calendar, Contacts, and Tasks.
Part 1 Using the Palm-size PC 13 Note You can use the [Action] control and cursor key in combination to perform the operations described below. This combination: Performs this operation: Action + Cursor Up Alt Action + Cursor Down Space Action + Cursor Right Tab Action + Cursor Left Back Tab (Shift + Tab) Writing Using the Character Recognizer Your Palm-size PC comes with CIC® JotTM character recognition software that lets you write characters by hand.
14 Palm-size PC User’s Guide Tap here if this is the word you want to enter. Viewing Data Most of the pre-installed programs provide a list view that shows the items or files stored with a program. You can select a particular item or file in the list view and change to a detailed view of its contents. List View Detailed View • Tapping on a column heading sorts the items in the list on that column. Each time you tap a heading, the sort order changes between ascending and descending.
Part 1 Using the Palm-size PC 15 • In Note Taker, Voice Recorder, and Inbox, you can place files or messages into folders and then select the folder whose files you want to appear in the list view. See the online help and manuals that come with your Palm-size PC for more information about the different views and filtering capabilities of each program. Customizing Your Palm-size PC You can tailor the settings of your Palm-size PC to suit your particular needs.
16 Palm-size PC User’s Guide The following describes the settings that you can adjust with the Settings menu. Buttons For assigning programs to the program buttons and for making up/down control settings (for Action control and screen scroll button operations). Important! Do not assign a program installed on a CompactFlash card to a program button. Only assign programs that are installed in main memory.
Part 1 Using the Palm-size PC 17 Regional Settings For specifying the number system, currency, date, date and time formats and other settings for your region. Remove Programs For removing programs installed in RAM. Stylus For calibrating the touch screen and adjusting the double-tap speed. System For adjusting memory allocation between storage memory and program memory. Note You can allocate up to 16MB for storage memory. Taskbar For specifying which programs and items appear on the Taskbar.
18 Palm-size PC User’s Guide Chapter 2 Tutorial This chapter walks you through a number of procedures and helps you to become familiar with using the pre-installed programs of your Palm-size PC. This chapter covers the following topics.
Part 1 Using the Palm-size PC 19 To record a message with Voice Recorder 1. Hold down the voice recorder button. • Recording continues as long as you keep the voice recorder button depressed. 2. Speak into the microphone. 3. Release the voice recorder button to stop recording. • The Palm-size PC beeps to let you know recording is complete. Note • Press the Action control to playback the recording you just made. • Press the Action control to pause playback.
20 Palm-size PC User’s Guide To create a new Contacts record 1. Press the Contacts button ( then Contacts. ) on the front of your Palm-size PC, or tap Start and 2. Tap the New button. • This displays the new contact dialog. Personal button Business button Memo button • The business data input screen appears first. You can enter three types of data with Contacts: business, personal, and memo. 3. Enter the name, company, work address, work number, e-mail address and other data for the contact.
Part 1 Using the Palm-size PC 21 Creating a Calendar Appointment Your Palm-size PC’s Calendar program is just the thing for keeping track of appointments, meetings, and other important events. To create a Calendar appointment 1. Press the Calendar button ( then Calendar. ) on the front of your Palm-size PC, or tap Start and 2. Tap the date L button to display the calendar.
22 Palm-size PC User’s Guide 3. Tap the date of the appointment in the calendar, tap the line that corresponds to the time of appointment, and then tap the New button to display the dialog for entering a new Calendar appointment. 4. Tap the Description L button and then select the appropriate description from the list that appears. • If you cannot find the description you want in this list, tap the Description L button again and go to the next step. 5.
Part 1 Using the Palm-size PC 23 7. Tap OK to save the appointment and return to the Calendar screen. Important! Windows CE 2.11 counts the week that contains the January 1 as the first week of each year. Entering a Reminder in Tasks The Tasks program helps to effectively things you have to do each day. To enter a reminder in Tasks 1. Tap Start and then Tasks. Tap here to enter a new task. 2. Use the on-screen keyboard or handwriting recognition to enter the title of the task.
24 Palm-size PC User’s Guide 3. Tap on the keyboard or tap outside the handwriting input panel to add the new task to the list. To assign a category to a task 1. On the task list, double-tap the task to which you want to assign a category. • This displays a dialog that shows the details of the task. 2. Tap the button and then check the box next to the category (or categories) you want to assign to the task. You can check more than one category.
Part 1 Using the Palm-size PC 25 3. To save the task, tap OK. Tap here to display a menu of categories. Only the tasks that are assigned the currently selected category are shown in the task list. Selecting All Items shows all items, regardless of category. To assign a priority to a task 1. On the same screen for assigning a category to a task (page 24), tap the Priority L button. Select a priority from the list.
26 Palm-size PC User’s Guide 2. To save the task, tap OK. This symbol indicates priority. ! : High ↓: Low Creating a Note with Note Taker Your Palm-size PC’s Note Taker program is just like having a digital note pad with you wherever you go. Note Taker lets you type your notes on the spot and even edit data. To create a note with Note Taker 1. Tap Start and then Note Taker. If this is your first Note Taker note, the above step displays a blank input screen.
Part 1 Using the Palm-size PC 27 2. Use the on-screen keyboard or handwriting recognition to enter text, or draw a diagram right on the screen. 3. After the note is the way you want, tap OK to save it and return to the Note Taker list of notes. • Note Taker automatically names your note using the first characters of text in the note. To change the name or to move your note to a particular folder, highlight the note in the list. Next tap File and then Properties.
28 Palm-size PC User’s Guide • See “Typing and Writing on your Palm-size PC” on page 12 of this User’s Guide and Palm-size PC online help for more information about entering text. To enter freehand letters in a note While the horizontal lines are shown on the Note Taker screen (no input panel displayed), use the stylus to write the letters you want directly on the screen. You can write letters just as you would with a pencil and paper. You can also zoom in and out on the note to change its size.
Part 1 Using the Palm-size PC 29 If you draw another figure outside the existing graphic frame, the frame expands to incorporate the new figure. Viewing the Active Desktop The Active Desktop of your Palm-size PC shows you upcoming appointments and active tasks at a glance. To display the desktop, tap the Desktop button on the Taskbar. This is the Active Desktop. The initial default contents for the Active Desktop are owner data, upcoming appointments (from Calendar), and active tasks (from Tasks).
30 Palm-size PC User’s Guide To change the contents of the Active Desktop, tap Start, Settings, and then Display. On the dialog that appears, tap the Desktop tab and then select the items you want to include on the Active Desktop. What’s Next? This tutorial is a basic overview of just some of the many things your Palm-size PC can do for you. Here are some suggestions of places where you can find other important information. • See Chapter 3 and Chapter 4 for more information on Palm-size PC programs.
Part 1 Using the Palm-size PC 31 Chapter 3 Voice Recorder and Note Taker This chapter provides an overview of the Voice Recorder and Note Taker programs that come pre-installed on your Palm-size PC. Using Voice Recorder Voice Recorder lets you record your voice with the touch of a button for later playback when you need it. You can perform record and playback operations one-handed, which means you can operate Voice Recorder while doing something else.
32 Palm-size PC User’s Guide To select data for playback On the recording list, use the Action control to move the highlighting to the recording you want to play back. Selected recording is highlighted. To playback a recording Press the Action control to play back the recording whose name is highlighted on the recording list. To pause playback Press the Action control during playback to pause. Slider stops at the location where playback was paused.
Part 1 Using the Palm-size PC 33 To playback all the recordings in the file list Press the Action control twice to playback all the recordings in the file list, starting from the recording whose name is highlighted in the list. To fast-forward during playback While playback is in progress, rotate and hold the Action control downwards to fast forward. Normal playback resumes from the point where you release the Action control. Note Fast forward is disabled while playing a PCM recording (page 35).
34 Palm-size PC User’s Guide 1 Delete button Tap to delete the highlighted recording. 2 Properties button Tap to display a dialog that shows the properties of the highlighted recording. 3 Speaker Volume button Tap to display a dialog for controlling speaker volume. 4 Folder list Tap to display a list of folders. The recordings in the Voice Recorder list are those contained in the folder selected using this list. 5 Voice recorder button Tap to start recording. 6 Stop button Tap to stop recording.
Part 1 Using the Palm-size PC 35 To create, change the name of, or delete a folder Select Edit Folders here to display a dialog that lets you create a new folder, or change the name of or delete an existing folder. Recording Properties Recordings are automatically assigned default names that follow the sequence Recording 1, Recording 2, and so on.
36 Palm-size PC User’s Guide If recording quality is not a factor, you can get maximum recording time by changing the format to Mobile Voice, which compresses files so they are about one third the size of TrueSpeech files. Note • A desktop computer must have Windows CE Services installed in order to play back Mobile Voice files. See Chapter 6 for more information about installing Windows CE Services. • The slider does not move in real time during recording and playback of a Mobile Voice file.
Part 1 Using the Palm-size PC 37 2. On the Memory tab of the system properties dialog that appears, use the slider to reserve more memory for data storage. Note You can allocate up to 16MB for storage memory. If overall memory is in sufficient, try using a memory card. Using Note Taker Note Taker is just like having a digital note pad along with you wherever you go. Unlike paper, however, Note Taker lets you edit and format the contents of a note quickly and easily.
38 Palm-size PC User’s Guide This is the screen for typing text with the keyboard. On this screen there are no horizontal lines. A cursor shows the input position. You can change to input of freehand letters and graphics by tapping input panel. to hide the Freehand Letters and Graphics Use the stylus to draw the letters and graphics you want directly on the screen. If your figure extends across more than three horizontal lines, it is surrounded by a dotted-line frame, which identifies it as a graphic.
Part 1 Using the Palm-size PC 39 Note • Scrolling a screen that contains freehand graphics can cause the graphics to break up on the screen. Scroll some more and the graphics should return to normal. • Tapping View and then Full Screen hides the command bar and displays the maximum amount of data on the screen. Tap Restore to view the command bar again.
40 Palm-size PC User’s Guide You can use the the screen. button to increase or decrease the space between the elements on Note Instead of tapping , you can also hold down the Exit button while dragging the stylus across the text or figure. Saving a Note After the note is the way you want, tap OK to save it and return to the note list. Note Taker automatically assigns a name to the note according to the following rules. • The first 21 characters of the first line of typed text are used as the note name.
Part 1 Using the Palm-size PC 41 Managing Your Notes The easiest way to keep track of your notes is to give them easy-to-understand names and store them in folders. For example, you could create a folder named Project A and place all relevant notes in that folder. Selecting a folder in the note list causes all its notes to appear in the list.
42 Palm-size PC User’s Guide Chapter 4 Pocket Outlook Microsoft Pocket Outlook programs are Calendar, Contacts, Tasks, and Inbox. Using Windows CE Services, data from Calendar, Contacts and Tasks can be synchronized with Microsoft Outlook, Microsoft Schedule+7.0a and Microsoft Exchange running on a desktop computer. See Chapter 6 of this User’s Guide for more information about Using Windows CE Services to synchronize data. Inbox is a program for managing your e-mail.
Part 1 Using the Palm-size PC 43 Appointment List Creates a new appointment. Day, Week, Month, Year views Agenda view • Drag the tabs above and below the selected appointment to extend or shorten its time frame. • Drag inside the selected appointment to move it to another time. Tap to display or hide more data. • Tap the selected appointment to edit it. • Double-tap an appointment to display its appointment card.
44 Palm-size PC User’s Guide Scheduling a Meeting You can use Calendar to set up meetings with desktop computer users of Outlook or Schedule+, or with others who are using Pocket Outlook on a Palm-size PC. First, create a meeting appointment in Calendar, specifying who you think should attend and the location. Note that the e-mail addresses of attendees need to be already registered in Contacts.
Part 1 Using the Palm-size PC 45 Contact Card Note You can display a new contact card by holding down the Contacts program button ( ) on the front of your Palm-size PC for a few seconds. Saves the contact card contents. Tap to specify a category. Tap to display personal data. Tap to display business data. The e-mail address also appears in the Inbox address book. Tasks: Keeping Track of Things You Need to Do Use Tasks to keep track of things you need to do.
46 Palm-size PC User’s Guide Tasks List Specifies the category whose tasks are shown in the list. This mark indicates high priority. A checkmark indicates a task is complete. Double-tap a task name to view its task card. Task Card Tap this button and then tap the description box to the right to write a freehand memo. Displays the category list in the description box. Check this box to set a reminder alarm. Click the button to set the alarm time. Note All tasks must have a Due date specified.
Part 1 Using the Palm-size PC 47 Inbox: Sending and Receiving E-mail You can use Inbox to send and receive e-mail using either of the following two methods. • You can synchronize incoming and outgoing messages with Microsoft Exchange or Microsoft Outlook running on your desktop computer. Or you can transfer individual messages between your Palm-size PC and desktop computer. • You can send and receive e-mail using a dial-up connection to a service provider or your company’s server (page 58).
48 Palm-size PC User’s Guide Synchronizing Messages You can set up the ActiveSync Options of Windows CE Services so e-mail messages are synchronized along with other data. The following operations are performed when e-mail messages are synchronized. • Messages are copied from the Inbox folder of Exchange or Outlook on your desktop computer into the Inbox folder on your Palm-size PC.
Part 1 Using the Palm-size PC 49 Windows CE Inbox Transfer Installing Windows CE Services on your desktop computer adds the Windows CE Inbox Transfer command to the Exchange and Outlook Tools menu. You can use this command to copy or move specific messages between Exchange or Outlook and your Palm-size PC. Messages can be moved into the Inbox or into specific folders.
50 Palm-size PC User’s Guide Using a New Dial-Up Connection A dial-up connection is just what its name implies, you dial a number over a telephone line and connect to a computer at the other end. Note the following important points concerning a dial-up connection. • You must set up an e-mail account with a local service provider in order to send and receive e-mail over a dial-up connection. See Chapter 5 of this User’s Guide for more information about how to make dial-up connection settings.
Part 1 Using the Palm-size PC 51 4. Tap OK to display a dialog for entering the name of the service. Service provider name 5. Input a name for your service provider and then tap OK. 6. In the service provider settings dialog that appears, enter the required information. Tap here to display a list of connections you created under “To make Palm-size PC dial-up connection settings” on page 61. Select the one you want to use. Enter the correct information here that you received from your service provider.
52 Palm-size PC User’s Guide Selecting a Service If you have more than one service registered on your Palm-size PC, you should always check to make sure the proper one is selected before you create a new mail message or before you send and receive mail. In Inbox on your Palm-size PC, tap Service and tap the name of the service you want to use. The currently selected service is the one with a dot next to it. Note that you can use only one service at a time.
Part 1 Using the Palm-size PC 53 Selecting this option and then checking the checkbox underneath it lets you specify the maximum number of lines for each message. Entire messages are received when this option is selected. Note • For synchronization with a desktop computer, Inbox is initially set up to copy only 50 lines of each new message from Exchange or Outlook.
54 Palm-size PC User’s Guide Note The Inbox Size column shows both the downloaded size and the original file size. 1/2K, for example, means 1KB of a 2KB message was downloaded to the Palm-size PC from the server. To view the contents of a mail message, double-tap it in the Inbox. Note You can use Service, Properties to specify whether or not the connector should be terminated automatically following a mail send or receive operation. See online help for more information.
Part 1 Using the Palm-size PC 55 Sending an E-mail You can create an e-mail message either by writing a new one from scratch, or by replying to a message you received from someone else. Writing a New Message Tap to display a blank message screen. Tapping displays an address book from which you can select the e-mail address you want. Tap this button when you want to input addresses for CC (carbon copy) and BCC (blind carbon copy) addresses. Enter the text of your message here.
56 Palm-size PC User’s Guide Replying to a Message Display the received message or select its name in the Inbox. Next, tap tap Reply to Sender. Enter your reply here. and then The address of the person who sent the original message is automatically entered as the recipient of your reply. Text of the original message When your message is the way you want it, tap to place it in the Outbox folder.
Part 2 Communicating with a Computer 57 Part 2 Communicating with a Computer Part 2 of this User’s Guide takes you through the procedures for connecting Palm-size PC to a desktop computer or to a dial-up network. Chapter 5 Dial-Up Connections This chapter explains how to set up your Palm-size PC for a dial-up connection. It also describes the difference between an Internet service provider and a corporate network.
58 Palm-size PC User’s Guide Chapter 5 Dial-Up Connections A dial-up connection is any connection that enables communications between a Palm-size PC and a remote computer using telephone lines and a modem. Once the connection is established, you can send and receive e-mail, or even synchronize data when connected to your desktop computer. This chapter explains how to make the required settings for a dial-up connection.
Part 2 Communicating with a Computer 59 Corporate Network This configuration lets you dial up the server at your company. Your company’s network must be configured to allow external dial-in for you to be able to use this configuration. Once connected, you can send and receive e-mail to addresses on the network. The telephone number and any other information you need to set up your Palm-size PC for this type of connection should be provided by the system administrator of the corporate network.
60 Palm-size PC User’s Guide Remote Desktop Computer via Direct Dial-up Connection For this type of connection, you must have a modem connected to your remote computer and set up for communication. If you are going to perform remote synchronization, you must first install Windows CE Services and create a partnership using a direct cable connection as described in Chapter 6.
Part 2 Communicating with a Computer 61 To make Palm-size PC dial-up connection settings 1. On the Start menu, tap Programs, Communication, and then Connections. 2. To create a new connection, double-tap the Make New Connection icon.
62 Palm-size PC User’s Guide 3. Enter a name for the connection, select Dial-Up Connection, and then tap Next to advance to the Make New Dial-Up Connection dialog. 4. Tap the Select a modem box to open a list of available modems. Select the one you are using.
Part 2 Communicating with a Computer 63 5. Tap the Configure button to display the Device Properties dialog. Make the settings described below. Set the baud rate in accordance with the modem you are using and the speed of the remote device you are dialing up. Port Settings The default setting here is 120 seconds. Depending on the modem card you are using, you may have need to change this setting. See the ReadMe file on the Windows CE CD-ROM that comes with your Palm-size PC for more information.
64 Palm-size PC User’s Guide 7. Tap the TCP/IP Settings button to display the TCP/IP Settings dialog. Make the settings shown below. General Name Servers 8. After making the TCP/IP Settings you want, tap OK to close the dialog and return to the New Dial-Up Connection dialog. Then tap Next.
Part 2 Communicating with a Computer 65 9. Enter the telephone number of the server. 10. After everything is the way you want it, tap Finish to return to the initial Connection window. The Connection window now contains the new connection you just created. Note You have to use the above procedure to create a connection for each remote server (service provider, corporate network, or desktop computer) you plan to dial up.
66 Palm-size PC User’s Guide Setting the Dialing Properties Dialing properties control how the phone number you input in step 9 of the above procedure is actually dialed. To open the Dialing Properties dialog, tap Start, Settings, and then Dialing. A nine is dialed before the phone number if you select Work here. You can set up properties for each dialing location from which you dial.
Part 2 Communicating with a Computer 67 Setting Up the Remote Computer A remote computer must also be set up correctly before you can access it from your Palm-size PC. The following describes the required settings for each type of remote computer. Internet Service Provider or Corporate Network The server must be running for a connection to be made. Systems are sometimes down due to periodic maintenance or unforeseen problems.
68 Palm-size PC User’s Guide • For a remote connection to a desktop computer connected to a network, make the Windows CE Services Properties shown below. Check this box to enable mobile device connection. Confirm that the network connection is ready. Establishing a Dial-Up Connection After making all the required settings, you are ready to try establishing a dial-up connection with your Palm-size PC. Note • A CompactFlash modem card makes it possible for you connect to a standard analog telephone line.
Part 2 Communicating with a Computer 69 To establish a dial-up connection with a service provider or corporate network 1. Tap Start, Programs, and then Communications. This list shows all connections you created with the procedure under “To make Palm-size PC dial-up connection settings” on page 61. 2. Tap the connection to display the following dialog. Enter the user name and password. Check the Save Password option if you don’t want to input your password every time. 3.
70 Palm-size PC User’s Guide 4. Tap Connect to connect. • The dialog shown below appears telling you the connection is being established. The dialog closes automatically when the connection is established. • Now you can send and receive e-mail. Note You can also establish a dial-up connection directly from Inbox. See “How Mail is Sent and Received by Inbox” on page 52 for more information. To establish a dial-up connection with a desktop computer for synchronization 1.
Part 2 Communicating with a Computer 71 2. Tap the connection to display the following dialog. Enter the user name and password. Check the Save Password option if you don’t want to input your password every time. 3. Check to make sure that the phone number is correct. • If the phone number is not correct, refer to the procedure under “To make Palm-size PC dial-up connection settings” to correct it. 4. Tap Connect to connect. • A dialog appears telling you the connection is being established.
72 Palm-size PC User’s Guide Chapter 6 Windows CE Services and Channels Installing Windows CE Services on your desktop computer enables the following operation. 1. Synchronization of Pocket Outlook data (Calendar, Contacts, Tasks, Inbox) on your Palm-size PC with Microsoft Schedule+ for Windows and Microsoft Outlook 98 for Windows data on your desktop computer. 2. Downloading to your Palm-size PC of information from channels subscribed to on your desktop computer with Microsoft Internet Explorer 4.0. 3.
Part 2 Communicating with a Computer 73 • If your desktop computer is running Windows NT with a service pack, you will be informed during the set up that you may need to reinstall the service pack. Try connecting first. If you are not successful, reinstall the service pack. Note • Windows CE Services does not support data exchange or synchronization with a handheld PC running Windows CE 1.0. • Windows CE Services and H/PC Explorer (for Windows CE 1.0 Handheld PCs) cannot be installed on the same computer.
74 Palm-size PC User’s Guide 3. On the dialog that appears asking whether you want to restart your computer, click Finish. • The dialog shown below appears after your computer restarts. • With some computers, you may not need to restart. In such a case, click Next to display the dialog shown below. 4. Turn off your Palm-size PC and place it on its cradle. Make sure the Palm-size PC seats securely onto the cradle.
Part 2 Communicating with a Computer 75 5. Turn on Palm-size PC power and click the Start button on your computer’s screen. • Windows CE Services automatically locates the port where Palm-size PC is connected and configures the communications port. • If you are running Windows NT on your desktop computer, you will need to enter the user name and password you provided earlier in the installation procedure into your Palm-size PC.
76 Palm-size PC User’s Guide 7. Click Next, and the dialog shown below appears. • Use this dialog to specify a synchronization method. Normally you can leave the default Continuous setting as it is. 8. After you finish making the settings you want, click Next. • Use this dialog to specify what data you want synchronized. • Note that you later can change the settings you make in steps 7 and 8 using the procedure under “Changing Communications Settings” on page 79. 9. Click Finish.
Part 2 Communicating with a Computer 77 10. The Mobile Devices window shown below appears after synchronization is complete. • See “Using the Mobile Devices Window” on page 78 for more information about the Mobile Devices window. Note You can set up partnership between your desktop computer and more than one Windows CE device (Palm-size PCs running Windows CE 2.0 and handheld PCs). You can also set up partnership between two desktop computers, such as your home computer and work computer.
78 Palm-size PC User’s Guide Using the Mobile Devices Window To display the Mobile Devices Window, click the shortcut icon that is created automatically during installation. You can also display it by clicking Start, pointing to Programs, point to Microsoft Windows CE Services, and then clicking Mobile Devices. Icons show Palm-size PCs with which your desktop computer has a partnership. The name of each icon is the name you give the Palm-size PC during installation.
Part 2 Communicating with a Computer 79 Changing Communications Settings Use the procedure described here to make communications settings manually when Windows CE Services cannot detect your Palm-size PC during installation or when you want to set up for infrared synchronization. Note the following points before changing communications settings. • Verify that the correct communications port is selected on your desktop computer and that it is free.
80 Palm-size PC User’s Guide To change the baud rate setting of your Palm-size PC, tap Start, Settings, and then Communications. On the dialog that appears, click the PC Connection tab, and then select the baud rate setting you want. Synchronization Synchronizing between your Palm-size PC and desktop computer updates data so both have the latest version. Note that you have to install Windows CE Services on your desktop computer before you can perform synchronization. Synchronization does the following.
Part 2 Communicating with a Computer 81 • Double-click the Mobile Devices shortcut on your computer’s desktop. Double-click here. Next, to actually start synchronization, click the Tools menu on the Mobile Devices window and then click Synchronize Now. The progress of the synchronization is indicated in the lower right of the Mobile Devices window.
82 Palm-size PC User’s Guide Checking Synchronization Details The message “Palm-size_PC: Connected, Up-to-date.” appears at the bottom of the Mobile Devices window after synchronization is complete. Status bar The actual message shows the name of the Palm-size PC in place of the text “Palm-size PC” shown here. You can check the details of what was done during the synchronization operation by clicking Tools and then ActiveSync Status.
Part 2 Communicating with a Computer 83 Contacts, Calendar, Tasks Data on your Palm-size PC is synchronized with the corresponding Schedule+ or Outlook programs on your desktop computer. New items entered on one computer are copied to the other. Freehand drawing you enter on your Palm-size PC are saved on your desktop computer as metafiles (pictures) and added to Outlook. Freehand drawings are not added to Schedule+.
84 Palm-size PC User’s Guide • Voice Recorder files are .wav files on both your Palm-size PC and desktop computer. To play Voice Recorder .wav files on your desktop computer, however, you need a special decoder that is installed along with Windows CE Services. Channel Information Synchronization downloads the most recent channel information from the channels subscribed to with Microsoft Internet Explorer 4.0 on your desktop computer. See “Using Channels” on page 87 for more information about channels.
Part 2 Communicating with a Computer 85 Changing ActiveSync Options Settings Use the procedure below to change settings that affect when to synchronize and what data should be synchronized. Note You can perform this procedure even when your Palm-size PC is not connected to your desktop computer. To change ActiveSync Options settings 1. On your desktop computer, double-click the Mobile Devices icon to open the Mobile Devices window. 2. Click the icon of your Palm-size PC to select it. 3.
86 Palm-size PC User’s Guide Appointment Option Dialog • See Windows CE Services online help for more information about settings you can make with the options dialogs. Clicking the [?] button in the upper right corner of the dialog changes the cursor to a question mark. Clicking a setting in the dialog with the question mark cursor displays an explanation about that setting. 4. Use the dialog to make the settings you want. • See Windows CE Services online help for information about each setting.
Part 2 Communicating with a Computer 87 Using Channels A channel is a Web site or other Web-formatted content that is available for offline viewing on your Palm-size PC. Channels help you to keep informed with the latest news, stock quotes, movie schedules, and more while on the go. Once you subscribe to a channel from your desktop computer, information is updated on your computer, as it becomes available.
88 Palm-size PC User’s Guide Synchronizing Channel Information You must enable Channel information synchronization for it to work. In the Mobile Devices window of Windows CE Services, click Tools and then ActiveSync Options. In the dialog that appears, put a checkmark next to Channel Item. When you synchronize using the procedure under “Synchronization” on page 80, Channel information is copied to your Palm-size PC from your desktop computer.
Part 2 Communicating with a Computer 89 Chapter 7 Data Backup and File Transfer In addition to synchronizing data, your can use Windows CE Services to back up and restore Palm-size PC data, to copy and move files between your Palm-size PC and desktop computer, and to install and remove software on your Palm-size PC. Backing Up and Restoring Data It is a good idea to use Windows CE Services to regularly back up your Palm-size PC data on your desktop computer.
90 Palm-size PC User’s Guide Copying Files You can copy files between your Palm-size PC and desktop computer. To copy a file 1. On your desktop computer, open the Mobile Devices window. 2. Double-click your Palm-size PC icon to open the Explorer window. 3. Open the My Documents folder, which contains all the files in Palm-size PC memory. 4. Now you can drag and drop files between your desktop computer and the My Documents folder.
Part 2 Communicating with a Computer 91 The name of a file you copy to your Palm-size PC appears in the list view of the program that can open it. Note Taker List Note You can also synchronize the contents of your Palm-size PC’s My Documents folder with specified files on your desktop computer. See Chapter 6 of this User’s Guide for details. Installing and Removing Software You can install any program designed to run under the Microsoft Windows CE Operating System (Windows CE).
92 Palm-size PC User’s Guide 2. On the Mobile Devices window, double-click the icon of your Palm-size PC to open it. Next, double-click the Windows folder, Start Menu folder, and then the Programs folder. This opens the window shown below. 3. Drag the Windows CE program from your desktop computer and drop it into the Programs folder. 4. To run the program on your Palm-size PC, tap Start and then Programs. Next, tap the name of the program in the Programs menu.
Part 2 Communicating with a Computer 93 Transferring Data with Infrared Your Palm-size PC has an infrared port that you can use to exchange information with another Windows CE device. In Contacts, for example, you can send up to 25 cards at a time to another Windows CE device. In Voice Recorder and Note Taker, you can send individual files or notes. Note Taker Infrared Send Menu To transfer data with infrared 1.
94 Palm-size PC User’s Guide • The two infrared ports should be within about 30cm from each other. 2. On the sending unit, start up the program that contains the data you want to send. Select the items you want to send, and then tap File, Send To, and then Infrared Recipient. 3. On the receiving unit, start up the same program, and then tap File and then Receive. • The displays of both units show a message indicating that data transfer is being performed.
Part 3 Using the CASIO Programs 95 Part 3 Using the CASIO Programs Chapter 8 Menu Menu is an application launcher that runs for your Palm-size PC. It lets you assign applications and files to 12 buttons on its main menu, from which you can launch an application or open a file with a tap of your stylus. Menu also lets you create submenus and assign them to main menu buttons. Tapping a submenu button opens the submenu, which contains six more application and file buttons.
96 Palm-size PC User’s Guide Using Menu Starting Up Menu You can start up Menu either by pressing your Palm-size PC’s by using a menu program. program button or To start up Menu using the program button Press the program button to start up Menu and display is initial screen. • If your Palm-size PC is turned off, pressing the program button also turns on power. To start up Menu using a menu program 1. Turn on your Palm-size PC. 2. Tap Start, Programs, and then Menu.
Part 3 Using the CASIO Programs 97 • Tap a submenu button to display the submenu. Submenu button operations are identical to button operations on the main menu. Submenu • Close a submenu by tapping the close button in the upper right corner or by pressing the Palm-size PC’s Exit button. Using Action Control for Menu Button Operations You can also use Action control to perform the following main menu and submenu button operations.
98 Palm-size PC User’s Guide Configuring Menu Assigning Operations to Main Menu Buttons Use the following procedures to assign applications, files, and submenus to main menu buttons, and to edit and delete current button assignments. All of these operations are performed using the Button Selection Screen. To assign an application to a main menu button 1. On the main menu, tap to display the button selection screen. 2.
Part 3 Using the CASIO Programs 99 3. Perform steps 4 and 5 under “To assign an application to a main menu button” on page 98 to make the button settings you want. 4. After everything is the way you want, tap OK to return to the button selection screen. 5. Tap [x] to return to the main menu. Note Double-tapping a submenu button in step 2 of the above procedure displays the Submenu Settings dialog. See “Submenu Buttons” on page 100 for information about using this dialog. To change the icon of a button 1.
100 Palm-size PC User’s Guide 4. Tap the button to which you want to assign the settings you just cut. 5. Tap to paste the settings to the button you tapped in step 4. 6. After you are finished, tap [x] to return to the main menu. Note • You can also cut and paste button settings between main menu buttons and submenu buttons. • If you paste settings to a button that already has an application assigned to it, the original settings of the button are replaced with the pasted settings.
Part 3 Using the CASIO Programs 101 4. Tap [x] to return to the button selection screen, which now shows the submenu button with its new name. 5. Tap [x] to return to the main menu. To change the icon of a submenu button 1. On the main menu, tap to display the button selection screen. 2. Double-tap the submenu button whose icon you want to change. This opens the Submenu Settings dialog. 3. Tap Change Icon to display the Change Icon dialog. 4. Tap the icon you want to assign to the button. 5.
102 Palm-size PC User’s Guide Menus and Toolbars File Menu Command Define Close About Menu Description Displays the button selection screen. Returns from the button selection screen to the main menu. Displays version information. Edit Menu Command New Modify Delete Cut Paste Description Displays the New dialog. Displays the Define dialog. When a submenu button is selected, displays the submenu button selection screen. Deletes the settings of the selected button.
Part 3 Using the CASIO Programs 103 Chapter 9 Card Backup Tool Card Backup Tool lets you quickly and easily back up your Palm-size PC memory data to a memory card. Backed up data lets you easily restore your system should it start to malfunction due to some data error. Backed Up Data Card Backup Tool backs up the following three types of data in Palm-size PC memory. • Files Files are created using Voice Recorder, Note Taker, and other applications and addon programs.
104 Palm-size PC User’s Guide Using Card Backup Tool This section provides details about the backup and restore operations you can perform using Card Backup Tool. Be sure to read the following precautions before using Card Backup Tool for either backup or restore. Read this first! • Always reset your Palm-size PC before backing up or restoring data. Make sure you perform a reset operation.
Part 3 Using the CASIO Programs 105 4. Tap Start, Programs, Utility, and then Card Backup. • This starts up Card Backup Tool and causes the dialog shown below to appear. If the memory card already contains backup data, the date of the last backup appears here. This area shows the amount of free space on the memory card and the amount of Palm-size PC data memory that is used. 5. Tap Backup now. • This causes the dialog shown below to appear. 6.
106 Palm-size PC User’s Guide To interrupt a backup operation 1. Tap the [x] close button in the upper right corner of message box that is on the screen while a backup operation is in progress. • This causes the message “Do you really want to cancel?” to appear. 2. Tap Yes to cancel the backup operation or No to resume it. Restoring Data Performing the restore operation causes the following to happen.
Part 3 Using the CASIO Programs 107 4. Tap Start, Programs, Utility, and then Card Backup. • This starts up Card Backup Tool and causes the dialog shown below to appear. 5. Tap Restore now. • This causes the dialog shown below to appear. 6. Tap Yes to start the restore operation or No to close the dialog without restoring anything. • An hourglass icon on the screen indicates that the restore operation is being performed.
108 Palm-size PC User’s Guide To interrupt a restore operation 1. Tap the [x] close button in the upper right corner of message box that is on the screen while a restore operation is in progress. • This causes the message “Do you really want to cancel?” to appear. 2. Tap Yes to cancel the restore operation or No to resume it. Deleting a Backup File You can use the following procedure to delete the backup files you created using Card Backup Tool.
Part 4 Reference 109 Part 4 Reference Appendix A Handwritten Character Recognizer The CIC Jot character recognition software built into your Palm-size PC provides a quick and easy-to-use method for entering text in any program. Simply write each character on the input panel, and it is translated into typed text and displayed on the screen. This appendix explains how to use the Jot Character Recognizer.
110 Palm-size PC User’s Guide Input Panel Areas How the character recognizer interprets a character you draw depends on where you write it in the input panel. Write an uppercase or lowercase character in the uppercase area (ABC), for example, and it will be translated to an uppercase letter. Write here for lowercase. Write here for uppercase. You can also write punctuation and editing marks, and add or delete spaces in either of the letter areas (abc or ABC) of the input area.
Part 4 Reference 111 Symbols Use the symbol input area to input symbols like @ or #. You can display the symbol panel by tapping the Symb button on the input panel, or by drawing a vertical line from bottom to top anywhere on the panel. After you draw the symbol, the character recognizer automatically changes back to the main input panel (for letter and numbers) after a few moments. Or you can tap the Symb button again to return to the main input panel. Tap here for the symbol panel.
112 Palm-size PC User’s Guide Options A number of options are available that you can use to set up the character recognizer to suit your needs. To set character recognizer options 1. Tap Start, Settings, and then Input Panel. 2. Select Jot Character Recognizer as the input method, and then tap Options. Select the character set you want to use. The Simplified Uppercase Character Set is a good choice when you want to write faster. See “Simplified Uppercase Character Set” on page 117 for more information.
Part 4 Reference 113 Letters Letter Stroke Options Letter a n b o c p d q e r f s g t h u i v j w k x l y m z Stroke Options Letter Area Punctuation Marks Mark Stroke Options Mark period at comma double quote apostrophe tab question space exclamation backspace ampersand Stroke Options
114 Palm-size PC User’s Guide Letter Area Editing Marks Mark Stroke Options Mark forward delete paste cut undo copy carriage return Stroke Options Numbers Number Stroke Options Number 0 5 1 6 2 7 3 8 4 9 Stroke Options Number Area Punctuation Marks Mark Stroke Options Mark period / comma \ dash ( tilde ) + = * backspace Stroke Options
Part 4 Reference 115 Number Area Editing Marks Mark Stroke Options Mark cut undo copy tab Stroke Options paste Accented Letters Write the letter in the letter area and the accent in the number area.
116 Palm-size PC User’s Guide Symbol Panel Symbols Symbol Stroke Options Symbol Stroke Options Symbol .
Part 4 Reference 117 Symbol Stroke Options Symbol Stroke Options Symbol ç ¯ › ¿ ˙ ƒ ¡ ¬ S p ` s P ´ ˆ Đ 1 ~ ¯ ‘ Ø ™ ’ ø Œ “ ß œ ” µ ‰ ’ ¥ † ” Stroke Options Simplified Uppercase Character Set You can select this character set in the Options dialog described under “Options” on page 112. Since you write uppercase letters only, there are fewer stroke options with this set. This also simplifies input and makes it possible for you to write faster.
118 Palm-size PC User’s Guide Letters Letter Stroke Options Letter Stroke Options Letter A K U B L V C M W D N X E O Y F P Z G Q Ç H R æ I S ß J T Stroke Options Letter Area Editing Marks Mark Stroke Options Mark space copy back delete (backspace) paste forward delete undo cut carriage return Stroke Options
Part 4 Reference 119 Numbers Number Stroke Options Number 0 5 1 6 2 7 3 8 4 9 Stroke Options Number Area Punctuation Marks Mark Stroke Options Mark ( / ) ^ = % + .
120 Palm-size PC User’s Guide Accented Letters Write the letter in the letter area and the accent in the number area. Accent Mark Stroke Options Accent Mark à ã á ä â å Stroke Options Symbol Panel Punctuation Marks Use the punctuation area (punct) of the symbol panel to enter punctuation marks.
Part 4 Reference 121 Symbol Panel Symbols Use the symbol area (symb) of the symbol panel to enter symbols. Symbol Stroke Options Symbol Stroke Options Symbol ! ± P @ × Đ # ÷ $ 4 Ø % 2 ø & 3 ß * ® µ " © ¥ : § £ ; ¶ ¢ ? Æ ¤ + æ « = Ç » [ ç º ] ª - | º ¬ 1 ¸ ` 1 ¿ ´ 2 ¡ ¨ 3 p – .
122 Palm-size PC User’s Guide Symbol Stroke Options Symbol Stroke Options Symbol ™ ¯ ˜ Œ – ‘ œ ‹ ’ ‰ › “ † ƒ ” ‡ S ’ … s ” Stroke Options
Part 4 Reference 123 Appendix B Tips and Troubleshooting Tips This section provides you with useful tips about using batteries and protecting your Palm-size PC data. Conserving Battery power Conserving battery power is important, especially when you are on the go. Under normal conditions, a fully charged batteries supply enough power to provide you with many hours of use. Here are a few tips to make a charge last even longer. Use the AC adapter whenever possible.
124 Palm-size PC User’s Guide Charge batteries as soon as possible after the low battery warning appears. Charge the main batteries as soon as possible after appears in the Taskbar to warn you that main battery power is running low. Continued use while main battery power is low runs down the backup battery. When appears in the Taskbar, replace the backup battery as soon as possible. Remember that you must keep batteries fresh to protect against loss of data in Palmsize PC memory.
Part 4 Reference 125 Back up data to protect against accidental loss. You can back up your Palm-size PC data on your desktop computer, which provides you with a means to recover if Palm-size PC data is corrupted or accidentally deleted. Periodic backups using Windows CE Services are strongly recommended to protect your important data. For more information, see Chapter 7 of this User’s Guide. Note that software named “Card Backup Tool” also comes bundled with your Palmsize PC.
126 Palm-size PC User’s Guide Troubleshooting Use the advice in this section whenever you start to have problems with getting your Palm-size PC to do what you want. Note • When having problems with Windows CE Services, see its help for advice about what you should do. You can also find information in the “Troubleshooting” section of the separate Hardware Manual. • If you experience frequent problems with Palm-size PC operation, you may have to reset it. See the separate Hardware Manual for details.
Part 4 Reference 127 Important! • You may not be able to communicate using infrared with a device running a nonEnglish version of Windows CE or a version of Windows CE earlier than 2.0. • This Palm-size PC currently does not support IrCOMM communication with another device. The IrCOMM is equipped for communication that will be available in the future. Display Blank screen Perform the following steps. If one step does not correct the problem, move on to the next one. 1.
128 Palm-size PC User’s Guide Slow or no response • Check the “Troubleshooting” section of the separate Hardware Manual for possible solutions. If nothing works, reset your Palm-size PC. Other Forgotten password • Once you register a password, there is no way to access your Palm-size PC without it. If you forget the password, you will have to perform a full reset, which deletes all data in Palm-size PC memory.
Part 4 Reference 129 Appendix C Icon Lists The lists in this appendix explain the meanings of the icons that appear in the status area of your Palm-size PC screen Taskbar. Battery Icons Icon Meaning Backup battery is low. Main battery is low. AC adapter is connected.
130 Palm-size PC User’s Guide Synchronization Icons The icons listed below appear in the status area of your desktop computer’s Taskbar while your Palm-size PC is connected to your desktop computer. Icon Meaning Palm-size PC or other Windows CE device is connected. Waiting for Palm-size PC to connect. No Palm-size PC or other Windows CE device is allowed. Synchronization error Items that require synchronization have been found. Synchronizing (animated arrows) Synchronization items are up to date.
Part 4 Reference 131 Index .doc 83 .pwi 83 .
132 Palm-size PC User’s Guide Installing 91 Internet Explorer 4.
CASIO COMPUTER CO., LTD.