User Guide
Table Of Contents
- UNPACKING
- CONTENTS
- QUICK START BASICS
- INTRODUCTION
- GETTING READY
- SHOOTING A SNAPSHOT
- SHOOTING A MOVIE
- USING BEST SHOT
- ADVANCED SETTINGS
- Changing the Focus Mode
- Correcting Image Brightness (EV Shift)
- Controlling White Balance
- Specifying ISO Sensitivity
- Specifying the Metering Mode
- Using the Camera’s Filter Effects
- Controlling Image Sharpness
- Controlling Color Saturation
- Adjusting Image Contrast
- Date Stamping Snapshots
- Using the On-screen Histogram to Check Exposure
- Other Useful Recording Functions
- VIEWING SNAPSHOTS AND MOVIES
- EDITING IMAGES
- USING AUDIO
- MANAGING YOUR FILES
- DELETING FILES
- OTHER SETTINGS
- Configuring Camera Sound Settings
- Turning the Startup Screen On or Off
- Specifying the File Name Serial Number Generation Rule
- Changing the Camera Date and Time Setting
- Using World Time
- Changing the Display Language
- Changing the USB Port Protocol
- [_] (REC) and [>] (PLAY) Button Settings
- Formatting Built-in Memory
- PRINTING
- USING THE CAMERA WITH A COMPUTER
- APPENDIX

131
VIEWING SNAPSHOTS AND MOVIES
IMPORTANT!
• All button operations are disabled while the slideshow is
switching from one image to another. Wait until an image is
stopped on the display before performing a button
operation. If a button does not work, wait a bit and try
again.
NOT
E
• Selecting a movie when “One Image” is selected for
“Images” and then selecting a movie for the slideshow will
cause the movie to play back repeatedly within the time
specified by the slideshow “Time” setting.
• In image copied from a computer or an image recorded
with a different type of digital camera may remain on the
screen longer than the time specified by “Interval”.
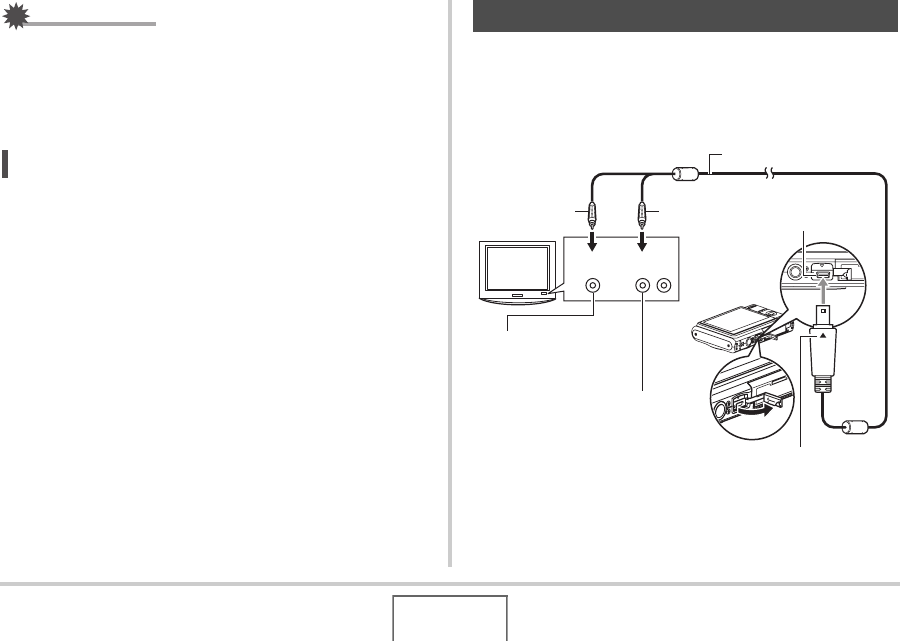
Use the procedure below to view snapshots and movies on a TV
screen.
1. Use the AV cable that comes with the camera
to connect the camera to a TV.
Viewing Camera Images on a TV
Yellow
VIDEO IN Jack
(Yellow)
White
TV
AUDIO IN Jacks
(White)
AV Cable
USB/AV
connector
Video Audio
Making sure that the T mark on the camera is aligned with
the S mark of the AV cable plug, connect the cable to the
camera.
B


