
User Guide


Table Of Contents
- UNPACKING
- CONTENTS
- QUICK START BASICS
- INTRODUCTION
- GETTING READY
- SHOOTING A SNAPSHOT
- SHOOTING A MOVIE
- USING BEST SHOT
- ADVANCED SETTINGS
- Changing the Focus Mode
- Correcting Image Brightness (EV Shift)
- Controlling White Balance
- Specifying ISO Sensitivity
- Specifying the Metering Mode
- Using the Camera’s Filter Effects
- Controlling Image Sharpness
- Controlling Color Saturation
- Adjusting Image Contrast
- Date Stamping Snapshots
- Using the On-screen Histogram to Check Exposure
- Other Useful Recording Functions
- VIEWING SNAPSHOTS AND MOVIES
- EDITING IMAGES
- USING AUDIO
- MANAGING YOUR FILES
- DELETING FILES
- OTHER SETTINGS
- Configuring Camera Sound Settings
- Turning the Startup Screen On or Off
- Specifying the File Name Serial Number Generation Rule
- Changing the Camera Date and Time Setting
- Using World Time
- Changing the Display Language
- Changing the USB Port Protocol
- [_] (REC) and [>] (PLAY) Button Settings
- Formatting Built-in Memory
- PRINTING
- USING THE CAMERA WITH A COMPUTER
- APPENDIX
21
INTRODUCTION
INTRODUCTION
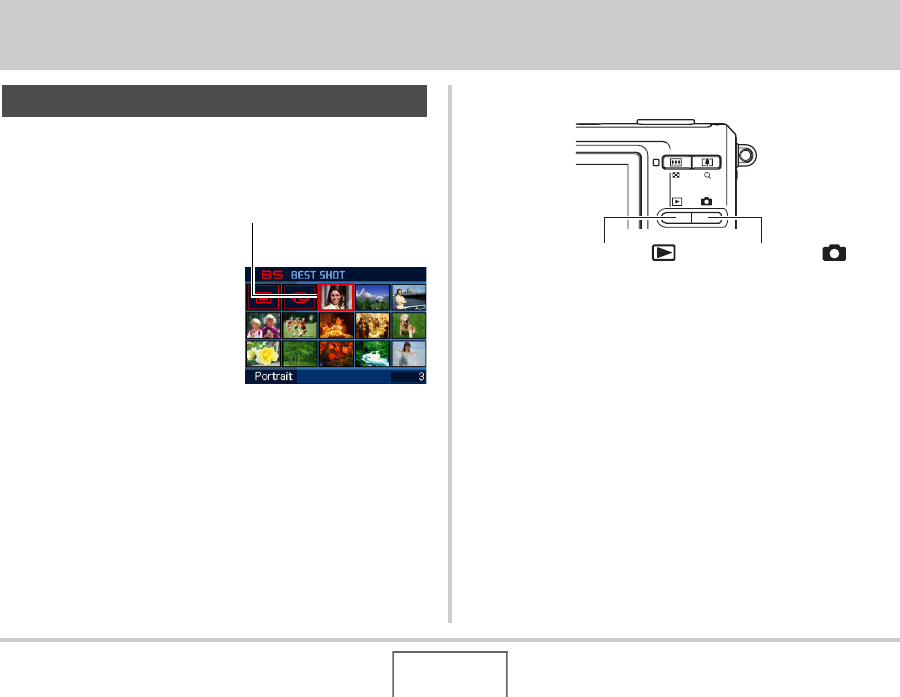
■ BEST SHOT for beautiful shots simply by
selecting a sample image built into the
camera
Simply select the scene that is
similar to what you want to shoot
(Night Scene Portrait, Flower,
etc.), for instant camera setups.
A dedicated [BS] button gives
you direct access to the BEST
SHOT library of sample scenes.
■ Direct Mode Power On
■ A powerful collection of useful recording
features
• Hand movement and subject movement reduction using high
shutter speed (page 89)
• High-sensitivity recording avoids dark images, even when the
flash is not being used (page 91)
• Quick Shutter, which helps you capture exactly the moment
you want (page 103)
• Movie recording (Motion JPEG Standard) (page 81)
Features
Example: Select for
beautiful
portraits.
To record, press [ ] to
power up in the REC mode.
To view images, press [ ]
to power up in the PLAY
mode.