
User Guide


Table Of Contents
- UNPACKING
- CONTENTS
- QUICK START BASICS
- INTRODUCTION
- GETTING READY
- SHOOTING A SNAPSHOT
- SHOOTING A MOVIE
- USING BEST SHOT
- ADVANCED SETTINGS
- Changing the Focus Mode
- Correcting Image Brightness (EV Shift)
- Controlling White Balance
- Specifying ISO Sensitivity
- Specifying the Metering Mode
- Using the Camera’s Filter Effects
- Controlling Image Sharpness
- Controlling Color Saturation
- Adjusting Image Contrast
- Date Stamping Snapshots
- Using the On-screen Histogram to Check Exposure
- Other Useful Recording Functions
- VIEWING SNAPSHOTS AND MOVIES
- EDITING IMAGES
- USING AUDIO
- MANAGING YOUR FILES
- DELETING FILES
- OTHER SETTINGS
- Configuring Camera Sound Settings
- Turning the Startup Screen On or Off
- Specifying the File Name Serial Number Generation Rule
- Changing the Camera Date and Time Setting
- Using World Time
- Changing the Display Language
- Changing the USB Port Protocol
- [_] (REC) and [>] (PLAY) Button Settings
- Formatting Built-in Memory
- PRINTING
- USING THE CAMERA WITH A COMPUTER
- APPENDIX
52
GETTING READY
All screen shots in this manual show what appears when the
Operation Panel is turned on.
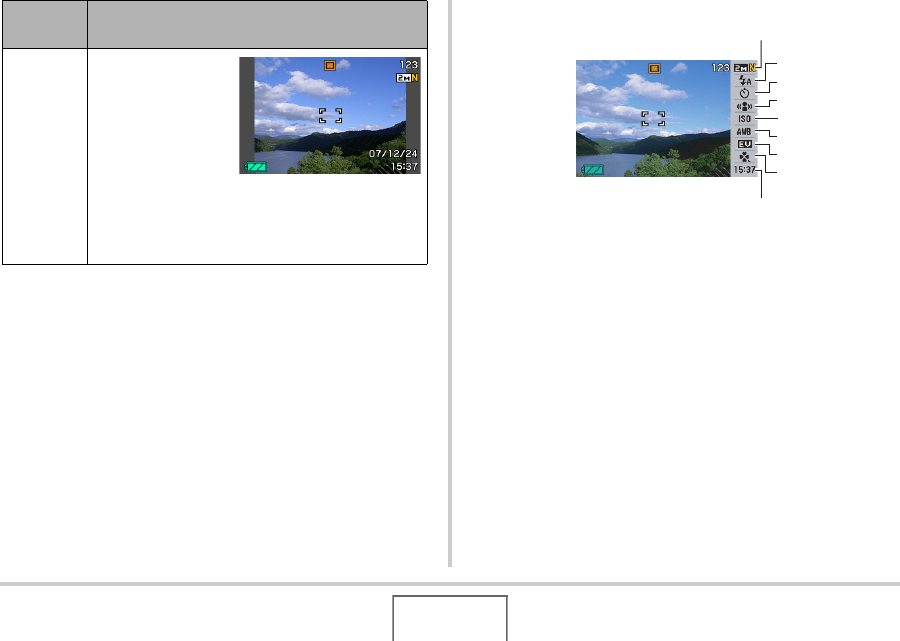
Panel (Operation Panel)
1
Image Size/Quality
*1
(pages 61, 63)
2
Flash Mode (page 71)
3
Self-timer (page 75)
4
Anti Shake (page 89)
5
ISO sensitivity (page 110)
6
White balance (page 108)
7
EV shift (page 106)
8
easy Mode (page 64)
9
Date/Time
*2,*3
(page 165)
Off
With this option,
the image being
composed
completely fills the
monitor screen.
This setting is best
when you want to
display the subject on a large 16:9 aspect ratio
monitor screen (page 62). Icons are
superimposed on the displayed image.
Panel
setting
Description
1
9
5
3
4
7
8
2
6