User Guide
Table Of Contents
- UNPACKING
- CONTENTS
- QUICK START BASICS
- INTRODUCTION
- GETTING READY
- SHOOTING A SNAPSHOT
- SHOOTING A MOVIE
- USING BEST SHOT
- ADVANCED SETTINGS
- Changing the Focus Mode
- Correcting Image Brightness (EV Shift)
- Controlling White Balance
- Specifying ISO Sensitivity
- Specifying the Metering Mode
- Using the Camera’s Filter Effects
- Controlling Image Sharpness
- Controlling Color Saturation
- Adjusting Image Contrast
- Date Stamping Snapshots
- Using the On-screen Histogram to Check Exposure
- Other Useful Recording Functions
- VIEWING SNAPSHOTS AND MOVIES
- EDITING IMAGES
- USING AUDIO
- MANAGING YOUR FILES
- DELETING FILES
- OTHER SETTINGS
- Configuring Camera Sound Settings
- Turning the Startup Screen On or Off
- Specifying the File Name Serial Number Generation Rule
- Changing the Camera Date and Time Setting
- Using World Time
- Changing the Display Language
- Changing the USB Port Protocol
- [_] (REC) and [>] (PLAY) Button Settings
- Formatting Built-in Memory
- PRINTING
- USING THE CAMERA WITH A COMPUTER
- APPENDIX

57
SHOOTING A SNAPSHOT
SHOOTING A SNAPSHOT
Holding the camera with one hand can result in accidental hand
movement. Hold the camera securely with both hands when
shooting snapshots.
• To protect against accidentally dropping the camera, attach
the wrist strap and make sure it is around your fingers or wrist
while you are operating the camera.
• The supplied strap is intended for use with this camera only.
Never use it for any other purpose.
• Never swing the camera around by its strap.
IMPORTANT!
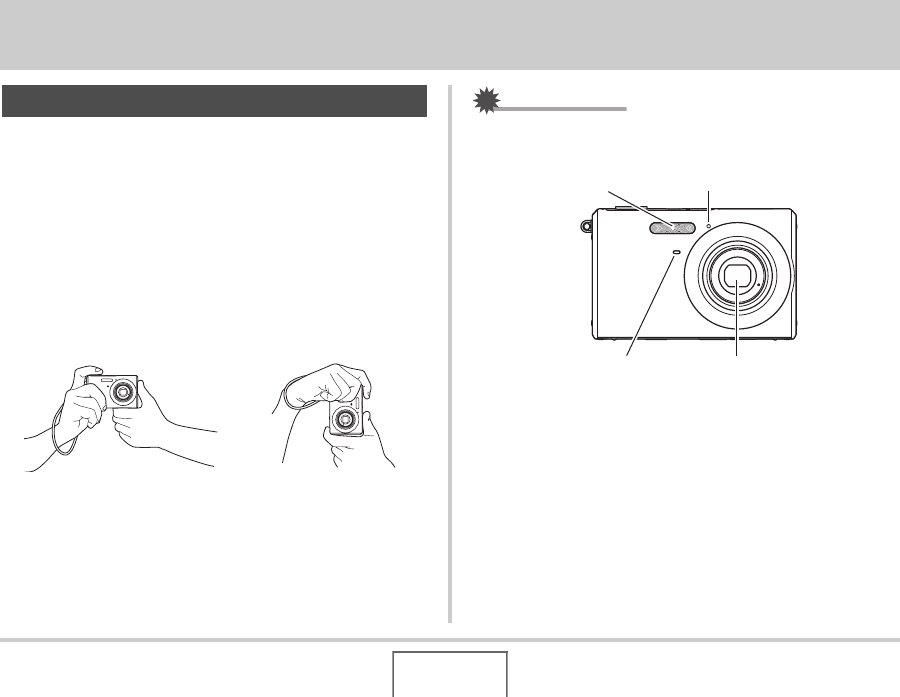
• Take care that your fingers and the strap do not cover any
of the areas indicated in the illustration.
Holding the Camera Correctly
Horizontal Vertical
Hold the camera as shown in the
illustration, with your arms firmly
against your sides.
Hold the camera so the
flash is above the lens.
Flash
Microphone
Self-timer Lamp
Lens


