
User Guide


Table Of Contents
- UNPACKING
- CONTENTS
- QUICK START BASICS
- INTRODUCTION
- GETTING READY
- SHOOTING A SNAPSHOT
- SHOOTING A MOVIE
- USING BEST SHOT
- ADVANCED SETTINGS
- Changing the Focus Mode
- Correcting Image Brightness (EV Shift)
- Controlling White Balance
- Specifying ISO Sensitivity
- Specifying the Metering Mode
- Using the Camera’s Filter Effects
- Controlling Image Sharpness
- Controlling Color Saturation
- Adjusting Image Contrast
- Date Stamping Snapshots
- Using the On-screen Histogram to Check Exposure
- Other Useful Recording Functions
- VIEWING SNAPSHOTS AND MOVIES
- EDITING IMAGES
- USING AUDIO
- MANAGING YOUR FILES
- DELETING FILES
- OTHER SETTINGS
- Configuring Camera Sound Settings
- Turning the Startup Screen On or Off
- Specifying the File Name Serial Number Generation Rule
- Changing the Camera Date and Time Setting
- Using World Time
- Changing the Display Language
- Changing the USB Port Protocol
- [_] (REC) and [>] (PLAY) Button Settings
- Formatting Built-in Memory
- PRINTING
- USING THE CAMERA WITH A COMPUTER
- APPENDIX
65
SHOOTING A SNAPSHOT
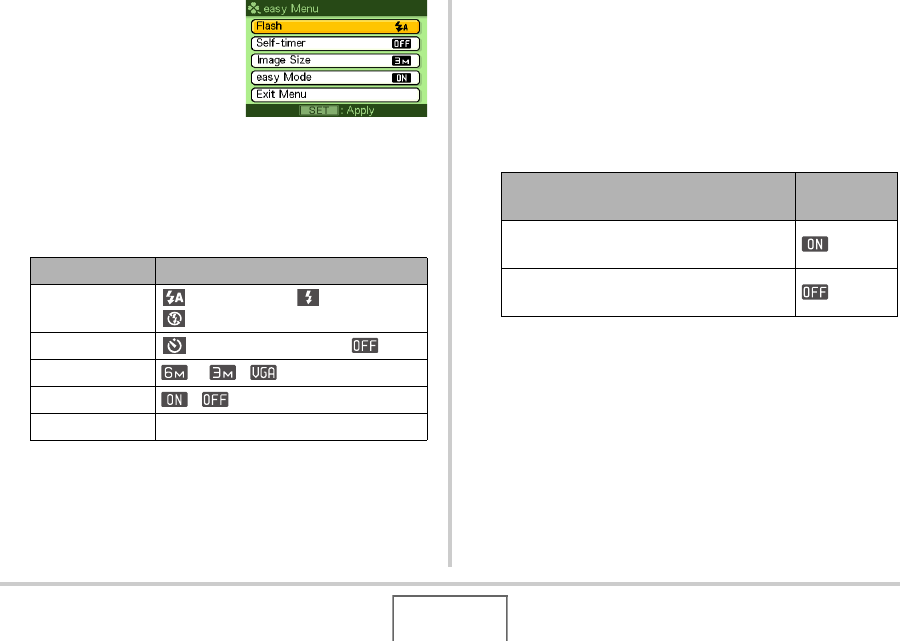
1. Press [MENU].
The easy menu displays
larger text than standard
menus.
2. Use [S] and [T] to select the menu item you
want, and then press [SET].
3. Use [S] and [T] to select the setting you want,
and then press [SET].
• An asterisk (*) indicates reset default settings.
• See the following sections for full details about the
“Flash”, “Self-timer”, or “Image Size” settings.
– Using the Flash (page 71)
– Using the Self-timer (page 75)
– Specifying Image Size (page 61)
• The following are the settings you can select for “easy
Mode”.
• On-screen pop-up help text provides a brief explanation
of each setting.
Menu Item: Available Settings:
Flash
(Auto Flash)* / (Flash On) /
(Flash Off)
Self-timer (10-second self-timer) / *
Image Size * / /
easy Mode / *
Exit Menu Exit the easy menu
To do this:
Select this
setting:
Stay in the easy mode, without switching
to another recording type
Switch from the easy mode to a standard
recording type