User Guide
Table Of Contents
- UNPACKING
- CONTENTS
- QUICK START BASICS
- INTRODUCTION
- GETTING READY
- SHOOTING A SNAPSHOT
- SHOOTING A MOVIE
- USING BEST SHOT
- ADVANCED SETTINGS
- Changing the Focus Mode
- Correcting Image Brightness (EV Shift)
- Controlling White Balance
- Specifying ISO Sensitivity
- Specifying the Metering Mode
- Using the Camera’s Filter Effects
- Controlling Image Sharpness
- Controlling Color Saturation
- Adjusting Image Contrast
- Date Stamping Snapshots
- Using the On-screen Histogram to Check Exposure
- Other Useful Recording Functions
- VIEWING SNAPSHOTS AND MOVIES
- EDITING IMAGES
- USING AUDIO
- MANAGING YOUR FILES
- DELETING FILES
- OTHER SETTINGS
- Configuring Camera Sound Settings
- Turning the Startup Screen On or Off
- Specifying the File Name Serial Number Generation Rule
- Changing the Camera Date and Time Setting
- Using World Time
- Changing the Display Language
- Changing the USB Port Protocol
- [_] (REC) and [>] (PLAY) Button Settings
- Formatting Built-in Memory
- PRINTING
- USING THE CAMERA WITH A COMPUTER
- APPENDIX

82
SHOOTING A MOVIE
Audio is also recorded while you shoot a movie. Audio is
monaural.
1. In the REC mode, press [BS].
2. Use [S], [T], [W], and [X] to select the “ ”
(Movie) scene and then press [SET].
This causes “ ” to appear on the monitor screen.
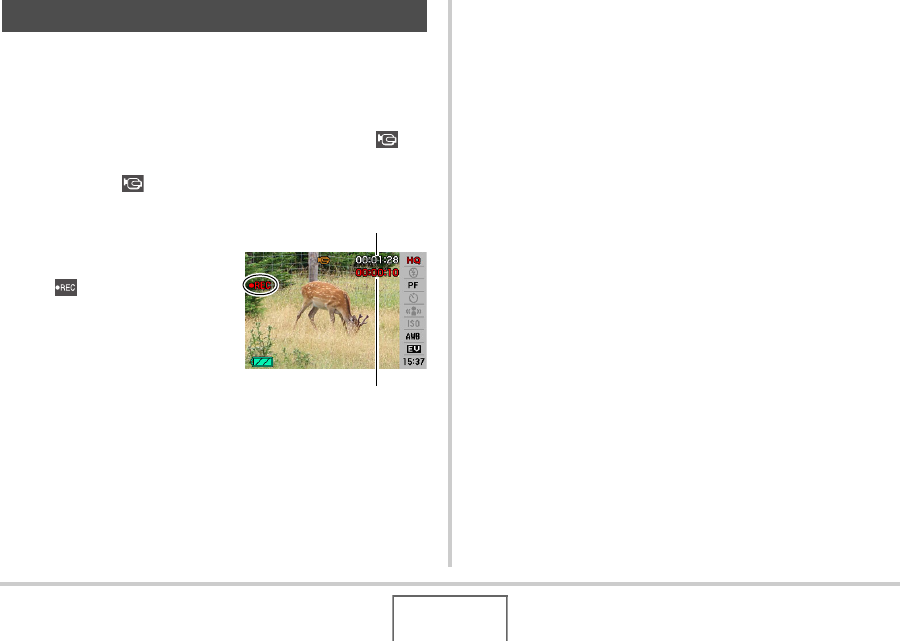
3. Press the shutter
button to start
shooting the movie.
• “ ” is displayed while
movie recording is in
progress.
• The maximum size
allowed for a single movie
file is 4 GB. Movie
recording stops
automatically when a file
becomes 4 GB.
4. Press the shutter button again to stop
shooting.
Movie recording also will stop automatically if memory
becomes full before you press the shutter button.
Shooting a Movie
Recording Time
Remaining Recording Time


