
User's Guide


70
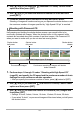
Snapshot Tutorial
You can use the procedure below to record a series of images over a specified period
(Interval Shot). This function is useful when recording the movement of stars, a
blooming flower, etc.
• When using this function, shooting with a tripod is recommended.
• To prevent loss of power while shooting, use a fully charged battery.
• Make sure the memory card you are using has sufficient unused space before
using this function.
• Focus is fixed at what they are when shooting is started.
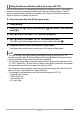
1. Align the mode dial with [F] (Time Lapse).
2. Press [SET].
3. Use [8] and [2] to select the (Time Lapse) Control Panel option,
and then press [SET].
This displays a menu of Time Lapse scenes.
4. Use [8], [2], [4], and [6] to select “ Interval Shot”, and then press
[SET].
5. Press [SET], use [8] and [2] to select the (Time Lapse Settings)
Control Panel option, and then press [SET].
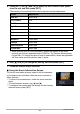
6. Use [8] and [2] to select “ Interval” or “ Shots”, press [6], and
then use [8] and [2] to change the setting.
7. Press [SET].
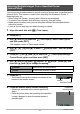
• The current Interval Shot settings are shown at the
bottom of the monitor screen.
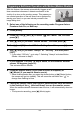
8. Press the shutter button to start recording.
• Shooting is repeated at the interval specified in
step 6.
• Recording stops when the recording time specified
in step 6 elapses or when the shutter button is
pressed again.
Shooting Multiple Images Over a Specified Period
(Interval Shot)
Interval Specifies the shooting interval.
Shots Specifies the number of shots.
Interval
Number of shots
Remaining
shooting time