
Digital Camera User's Guide EX-P505


Table Of Contents
- INTRODUCTION
- QUICK START GUIDE
- GETTING READY
- BASIC IMAGE RECORDING
- OTHER RECORDING FUNCTIONS
- Selecting the Focus Mode
- Exposure Compensation (EV Shift)
- Using the Built-in ND Filter
- Adjusting White Balance
- Specifying the Exposure Mode
- Using the BEST SHOT Mode
- Recording a Movie
- Instant Movie Setups (MOVIE BEST SHOT Mode)
- Recording Audio
- Using the Histogram
- REC Mode Camera Settings
- Specifying ISO Sensitivity
- Selecting the Metering Mode
- Using the Filter Function
- Specifying Outline Sharpness
- Specifying Color Saturation
- Specifying Contrast
- Turning the On-screen Grid On and Off
- Turning Image Review On and Off
- Using Icon Help
- Assigning Functions to the [<] and [>] Keys
- Specifying Power On Default Settings
- Resetting the Camera
- Using the Shortcut Menu (EX Menu)
- Installing the Lens Hood and a Lens Filter
- PLAYBACK
- DELETING FILES
- FILE MANAGEMENT
- OTHER SETTINGS
- USING A MEMORY CARD
- PRINTING IMAGES
- VIEWING IMAGES ON A COMPUTER
- USING THE CAMERA WITH A COMPUTER
- APPENDIX
97
OTHER RECORDING FUNCTIONS
3.
Press the shutter button half way.
• This causes the camera to configure the aperture
value automatically in accordance with the shutter
speed you selected. Then it focuses the image.
• The shutter speed and aperture values on the
monitor screen will turn amber when you press the
shutter button half way if the image is over-exposed
or under-exposed.
4.
When the image is focused, press the shutter
button all the way down to record.
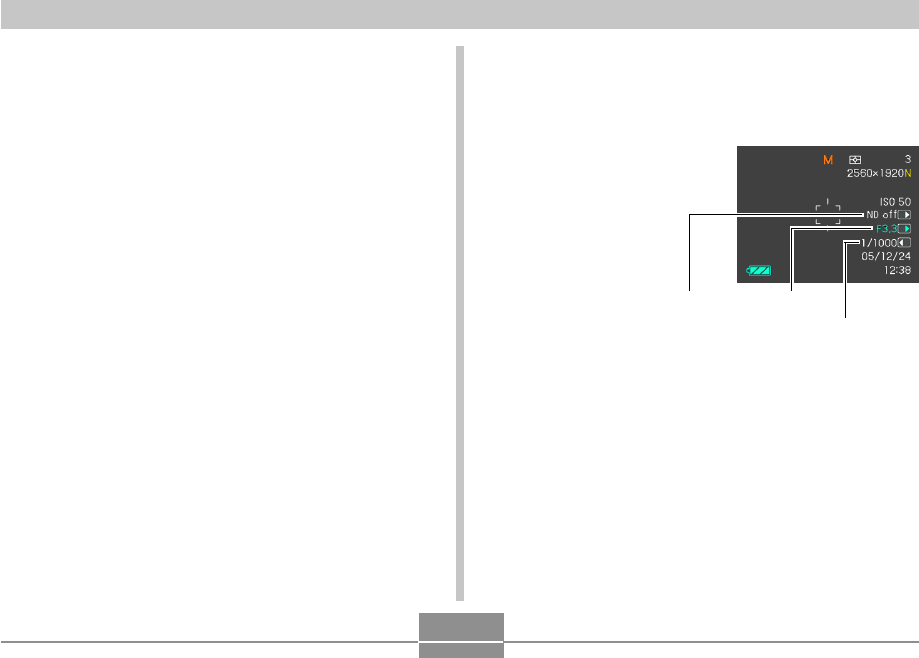
Setting Exposure Settings Manually
In the M mode (manual exposure), you can adjust shutter
speed and aperture manually.
1.
Align the mode dial
with “M” (Manual).
2.
Use [] and [] to select “ND”, and then use
[] and [] to turn the ND filter (pages 31, 90)
on or off, if you want.
Shutter speed
Aperture valueND filter