
User Manual
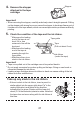
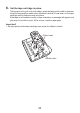
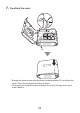

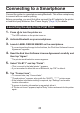


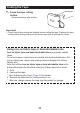
Table Of Contents
- Contents
- Safety Precautions
- Precautions During Use
- Printer and Bundled Accessories
- Operational Flow for This Printer
- Installing the App
- Names of Parts and Their Functions
- Power Supply
- Turning the Power On and Off
- Installing/Removing Tape Cartridges
- Connecting to a Smartphone
- Printing
- Cleaning
- Troubleshooting
- List of Printer Statuses and LED Indicator Displays
- Specifications

7. Tap the “KL-BT1_******” printer name to select this printer.
•
The printer name is displayed in the “product name” + “product-specific 6-
digit alphanumeric code”.
•
When this printer is selected, the LED indicator on the printer flashes several
times.
•
When the connection is completed, “Printer connection established.”
appears.
Launching the App Subsequently
1. Press to turn the printer on.
•
The LED indicator on the printer turns on.
2. Launch LABEL DESIGN MAKER on the smartphone.
•
The home screen appears.
3. Tap ( ) in the Settings tab.
•
The “Settings” screen appears.
4. Tap “Model”.
•
The printer model selection screen appears.
5. Select “KL-BT1” and tap “Back”.
•
If you are asked to allow the use of Bluetooth, tap “OK” to allow it.
6. Tap “Print Settings”.
•
The “Print Settings” screen appears.
7. Tap the printer icon ( ).
•
“Found printers.” appears, along with the “KL-BT1_******” printer name.
•
If the location information setting is required, tap “Settings” and enable
location information.
•
If access to location information is requested, allow it.
•
If “Printer not found.” appears, tap the “Retry” button and search for the printer
again.
8.
Tap the “KL-BT1_******” printer name to select this printer.
•
When this printer is selected, the LED indicator on the printer flashes several
times.
•
When the connection is completed, the “Print Settings” screen reappears
showing the connected printer.
26