
User Manual
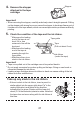
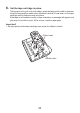
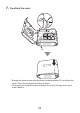

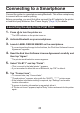


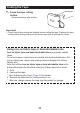
Table Of Contents
- Contents
- Safety Precautions
- Precautions During Use
- Printer and Bundled Accessories
- Operational Flow for This Printer
- Installing the App
- Names of Parts and Their Functions
- Power Supply
- Turning the Power On and Off
- Installing/Removing Tape Cartridges
- Connecting to a Smartphone
- Printing
- Cleaning
- Troubleshooting
- List of Printer Statuses and LED Indicator Displays
- Specifications

Changing the Settings
■ Changing the Print Density
1. Tap the Settings tab ( ) in the app’s top screen.
•
To change the setting while editing labels, tap the Settings icon ( ) in the
app screen. The “Print Settings” screen appears. Proceed to step 3.
•
The “Settings” screen appears.
2. Tap “Print Settings”.
•
The “Print Settings” screen appears.
3. Slide the “Print Density (Density)”
●
.
•
Higher numbers denote darker printing.
■ Setting Marks for Cutting Labels (Cut Marks)
This setting specifies whether cut marks are added when you plan to cut printed
labels with scissors.
•
The default setting when the app is installed is not to add cut marks.
•
Depending on the type of tape used, cut marks may not be printed clearly.
1. Tap the Settings tab ( ) in the app’s top screen.
•
To change the setting while editing labels, tap the Settings icon ( ) in the
app screen. The “Print Settings” screen appears. Proceed to step 3.
•
The “Settings” screen appears.
2. Tap “Print Settings”.
•
The “Print Settings” screen appears.
3. Tap the “Cut mark printing” switch.
•
Set this switch to ON to add cut marks and to OFF to print without cut marks.
28