
User Manual

USER’S GUIDE 2539
2
• The Remaining Memory screen shows remaining memory as a percent value and as
a graph.
• Memory is full when the percent value shows 0% and the remaining memory graph
forms a full circle.
• You can use the Password Setting screen to register, edit, or delete your password.
See “Using a Password to Protect e-DATA MEMORY Data” for more information.
To edit an e-DATA MEMORY record
1. In the e-DATA MEMORY Mode, use D (+) and B (–) to display the record you
want to edit.
2. Hold down A until the flashing cursor appears on the display.
3. Use C to move the flashing to the character you want to change.
4. Use D (+) and B (–) to change the character.
5. After making the changes you want, press A to store them and return to the
e-DATA MEMORY record screen.
To delete an e-DATA MEMORY record
1. In the e-DATA MEMORY Mode, use D (+) and B (–) to display the record you
want to delete.
2. Hold down A until the flashing cursor appears on the display.
3. Press B and D at the same time to delete the record.
• The message
CLR appears to indicate that the record is being deleted. After the
record is deleted, the cursor appears on the display, ready for input.
4. Input data or press A to return to the e-DATA MEMORY record screen.
Using a Password to Protect e-DATA MEMORY Data
You can register a 4-digit password to keep e-DATA MEMORY data secure.
Important!
Use a 4-digit password that is easy for you to remember, but difficult for others to
decipher. If you forget the password, you will have to have your watch initialized
(which deletes all data in memory) in order to access the e-DATA MEMORY again. To
have the watch initialized, contact the store or dealer where you purchased it, and ask
to have the AC operation performed.
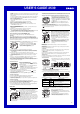
To register a new password
1. In the e-DATA MEMORY Mode, use D (+) and B (–)
to display the Password Setting screen.
• This displays a screen that shows
SET
PA55
.
2. Hold down A for about two seconds until
NEW
appears, with the first 0 flashing.
• This is the New Password Setting screen.
3. Use D (+) and B (–) to scroll through numbers at the first digit.
4. When the first digit is the number you want, press C to advance to the next digit.
• You cannot use C to advance to the next digit unless you input a value at the
current digit first.
5. Repeat steps 3 and 4 to input all four digits of the password you want.
• Pressing A while inputting a new password clears your input and returns to the
Password Setting screen.
6. After all four of the password digits are the way you want, press C to register
them.
• Pressing C causes the message
SET to appear for about one second as the
password is stored. After that, the Password Setting screen appears.
• After registering a password, you can input, recall, edit and delete data, if you want.
After you exit the e-DATA MEMORY Mode, you will have to input the password
every time you want to enter it again.
To input the password
1. Enter the e-DATA MEMORY Mode.
2. On the Password Input screen (
), press D or
B. This causes the first digit of the password to flash.
3. Input the password.
• Use D (+) and B (–) to scroll through numbers at
each digit.
• Press C to advance to the next digit.
• Pressing A while inputting the password clears your
input and returns to the Password Input screen.
4. After the password is the way you want, press C.
• If the input password matches the one registered, the message
appears,
followed by an e-DATA MEMORY screen.
• If the password does not match, the message
ERR appears, followed by the
Password Input screen.
To change the password
1. Enter the e-DATA MEMORY Mode by inputting the current password.
2. Use D (+) and B (–) to display the Password Setting screen.
3. Perform the procedure starting from step 2 under “To register a new password” to
specify the new password.
To delete the password
1. Enter the e-DATA MEMORY Mode by inputting the current password.
2. Use D (+) and B (–) to display the Password Setting screen.
3. Hold down A for about two seconds until
NEW appears, with the first 0 flashing.
4. Press B and D at the same time to delete the password.
• The message
CLR appears to indicate that the password is being deleted. After
the password is deleted, the Password Setting screen appears.
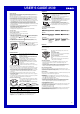
World Time
World Time shows the current time in 27 cities (29 time
zones) around the world.
• On the World Time Mode screen, the graphic analog
hands show the current Timekeeping Mode time.
• All of the operations in this section are performed in the
World Time Mode, which you enter by pressing C.
To view the time in another city code
In the World Time Mode, press D to scroll through city
codes (time zones) to the east or B to scroll to the west.
• For full information about city codes, see the “City Code
Table”.
• If the current time shown for a city is wrong, check your
Timekeeping Mode time and Home City code settings
and make the necessary changes.
Current time in the zone
of the selected city code
Timekeeping Mode time
City
code
• When the currently selected time zone is one that includes mostly ocean, a value
indicating the zone’s Greenwich Mean Time differential appears in place of a city code.
To toggle a city code time between Standard Time and Daylight Saving Time
1. In the World Time Mode, use B and D to display the
city code (time zone) whose Standard Time/Daylight
Saving Time setting you want to change.
2. Hold down A for about two seconds to toggle Daylight
Saving Time (DST displayed) and Standard Time (DST
not displayed).
• The DST indicator is on the display whenever you
display a city code for which Daylight Saving Time is
turned on.
• Note that the DST/Standard Time setting affects only the currently displayed city
code. Other city codes are not affected.
• Note that you cannot switch between Standard Time and Daylight Saving Time while
is selected as the city code.
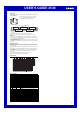
Alarms
You can set up to five independent multi-function alarms
with hour, minutes, month, and day. When an alarm is
turned on, the alarm tone sounds when the alarm time is
reached. One of the alarms is a snooze alarm, while the
other four are one-time alarms that sound for 20 seconds.
You can also input reminder text that appears when the
alarm time is reached.
You can also turn on an Hourly Time Signal that causes
the watch to beep twice every hour on the hour.
• The snooze alarm repeats every five minutes, up to
seven times.
• On the Alarm Mode screen, the graphic analog hands
show the current Timekeeping Mode time.
• Alarm settings (and Hourly Time Signal settings) are
available in the Alarm Mode, which you enter by
pressing C.
Alarm Types
The alarm type is determined by the settings you make, as described below.
• Daily alarm
Set the hour and minutes for the alarm time. This type of setting causes the alarm to
sound everyday at the time you set.
• Date alarm
Set the month, day, hour and minutes for the alarm time. This type of setting causes
the alarm to sound at the specific time, on the specific date you set.
• 1-Month alarm
Set the month, hour and minutes for the alarm time. This type of setting causes the
alarm to sound everyday at the time you set, only during the month you set.
• Monthly alarm
Set the day, hour and minutes for the alarm time. This type of setting causes the alarm
to sound every month at the time you set, on the day you set.
To set an alarm time
1. In the Alarm Mode, use D and B to scroll through the
alarm screens until the one whose time you want to set
is displayed.
Press .
Press .
• To set a one-time alarm, display one of the screens indicated by an alarm number
from
AL1through . To set the snooze alarm, display the screen indicated
by
SNZ.
2. After you select an alarm, hold down A until the hour setting of the alarm time
starts to flash, which indicates the setting screen.
• This operation automatically turns on the alarm.
3. Press C to move the flashing in the sequence shown below to select other settings.
Hour TextMinutes Month Day
• Selecting the text causes the text input cursor ( ) to appear. There are eight
spaces in the text, so you have to press C eight times to move to the Hour
setting.
4. While a setting is flashing, use D, B, and C to change it as described below.
Alarm time
(Hour : Minutes)
Timekeeping Mode time
Alarm
numbe
r
Setting
Hour, Minutes
Month, Day
Text
Screen Button Operations
Use D (+) and B (–) to change the setting.
• With the 12-hour format, set the time correctly as a.m.
(no indicator) or p.m. (P indicator).
• To set an alarm that does not include a month and/or
day, set xx for each setting.
Use D (+) and B (–) to cycle through characters at
the current cursor location, and C to move the cursor
to the right. See “Inputting Text”.
One-time alarm
on indicator
• Pressing B and D at the same time while any setting is flashing automatically
sets the time to AM12:00 and the date to xx-xx. It also clears any text that is
input for the alarm.
5. Press A to exit the setting screen.
• If you input reminder text, the text appears in place of
the alarm number.
• If the reminder text is more than three characters, it will
scroll form right to left.
• If an alarm includes a month and/or day settings, its
alarm screen alternates between the alarm time and
alarm date at two-second intervals.