YW-2L E Wireless Adapter Wireless LAN Connection Guide z Be sure to read the precautions in the User’s Guide (Basic Operation) that comes with the Data Projector. z Be sure to keep all user documentation handy for future reference. • Microsoft, Windows, Windows Vista, Aero and PowerPoint are registered trademarks or trademarks of Microsoft Corporation in the United States and other countries. • Other company and product names may be registered product names or trademarks of their respective owners.
Contents About this manual........................................................... 4 Terms and Conventions ................................................................................. 4 Minimum System Requirements.................................... 5 Performing a Presentation using a Wireless LAN (Projecting Computer Screen Contents Over a Wireless LAN).................................................................. 6 Requirements for Wireless LAN Connection .....................................
Advanced Wireless LAN Connection Settings......................................20 Web Setup ................................................................................................... 20 Enabling and Disabling Web Setup.............................................................. 22 Switching the Data Projector Connection Profile ......................................... 23 Assigning a Name to a Data Projector .........................................................
About this manual... This manual explains how to establish a wireless LAN connection between a CASIO Data Projector and a computer, and send computer screen shots to the projector for projection. Terms and Conventions z Unless expressly stated otherwise, the term “projector” in this manual refers to a CASIO Data Projector that supports wireless connection using a YW-2 wireless adapter* or to the CASIO YP-100 Multifunctional Presentation Kit.
Minimum System Requirements You need to install Wireless Connection 2 on your computer in order to send shots of your computer screen to and project them with the projector over a wireless connection. The following is the minimum operating environment for Wireless Connection 2. • Operating System: Microsoft® Windows Vista®, Windows® XP SP2, or 2000 Professional SP4 • Computer: IBM PC/AT or compatible that conforms to the following conditions.
Performing a Presentation using a Wireless LAN (Projecting Computer Screen Contents Over a Wireless LAN) Wireless LAN lets you establish a connection between the Data Projector and a computer without using a cable, and project the computer’s display contents with the Data Projector. Important! z Note that only shots of your computer screen can be sent from your computer to the Data Projector over a wireless LAN connection. Audio data cannot be sent.
Establishing a Wireless LAN Connection between the XJ-S35/YP-100 and a Computer Note the following precautions when trying to establish a wireless LAN connection between the XJ-S35/YP-100 and a computer. z The XJ-S35/YP-100 comes with Wireless Connection, which is a previous version of the wireless connection software. Do not try to perform the procedures in this manual using the older version of Wireless Connection. Be sure to install Wireless Connection 2, which is the newest version, on your computer.
Starting Up and Exiting Wireless Connection 2 To establish a wireless LAN connection between a computer and the Data Projector, Wireless Connection 2 must be running on the computer. To start up Wireless Connection 2 Perform either of the following operations to start up Wireless Connection 2 on the computer. • Double-click the icon on your Windows desktop. • On your computer’s Windows Start menu, select [All Programs] - [CASIO] - [Wireless Connection 2].
Using a Simple Connection Profile for a Wireless LAN Connection between the Data Projector and a Single Computer The following procedure uses the preset Simple Connection 1 connection profile to establish a wireless LAN connection between the Data Projector and a single computer for the first time. To establish a wireless LAN connection between a single computer and the Data Projector 1 Turn on the Data Projector. 2 Connect the CASIO YW-2 wireless adapter to the Data Projector’s USB port.
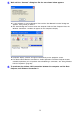
5 Wait until the “Connect” dialog box like the one shown below appears. z If your computer is running Windows Vista and the “Set Network Location” dialog box appears, click [Cancel] to close it. z The above dialog box will close when the computer finds the Data Projector. Next, the Wireless Connection 2 window will appear on the computer’s display. z Computer display contents will appear automatically on the projection screen.
Using a Manual Connection Profile for Wireless LAN Connection between the Data Projector and One or More Computers First Wireless LAN Connection between the Data Projector and Four Computers The following procedure uses the initial default settings of the Manual Connection 1 connection profile to establish wireless LAN connections between the Data Projector and four computers for the first time. Important! z The XJ-S35/YP-100 does not have manual connection initial values registered.
To establish a wireless LAN connection with Manual Connection 1 between the first computer and the Data Projector 1 On your computer, start up Wireless Connection 2. z If your computer is running Windows Vista, starting up Wireless Connection 2 will cause the “User Account Control” message to appear. When it does, click “Allow”.
z When the computer finds the Data Projector, a Connection dialog box like the one shown below will appear. If there are other Data Projectors with wireless adapters connected in the area, all that are detected will appear in the list. z If your computer is running Windows Vista and the “Set Network Location” dialog box appears, click [Cancel] to close it. 7 Move the highlighting to the Data Projector to which you want to connect and then click the [OK] button.
8 On the Wireless Connection 2 window, click one of the projection area position buttons and then click the button. z This will cause the contents of the computer screen to be projected so they fill the entire projection area. At this time the user name assigned to the computer will appear in the upper left corner of the projection area. z For information about the computer user name, see “Assigning a User Name to a Computer for Projection” (page 37).
To establish a wireless LAN connection with Manual Connection 1 between the second and subsequent computers and the Data Projector 1 On the computer, start up Wireless Connection 2. z If your computer is running Windows Vista, starting up Wireless Connection 2 will cause the “User Account Control” message to appear. When it does, click “Allow”.
6 Change the “IP Address” setting to “192.168.50.12” and then click the [Register] button. Important! The Data Projector and each of the computers (1 to 4) that will be connecting to the Data Projector over the wireless LAN all must have different IP addresses. 7 On the confirmation dialog box that appears, click the [OK] button. Next, on the Switch Connection Profile dialog box that appears, click the [Connect] button. 8 Wait until the “Connect” dialog box like the one shown below appears.
9 Move the highlighting to the Data Projector to which you want to connect and then click the [OK] button. z The computer will connect with the Data Projector and then the Wireless Connection 2 window shown below will appear. Projection area position buttons (Step 10) the Wireless Connection 2 window, click one of the projection area position 10 On buttons and then click the button. z A projection area that is already occupied by another computer will be indicated by a dimmed icon ( ).
the Data Projector’s remote controller, press the [ ] key. 13 On z This will display the user list screen, which shows thumbnails of the screen contents of each connected computer. On the Data Projector’s remote controller, use the [S], [T], [W] and [X] keys to 14 select one of the thumbnails and then press the [ENTER] or [ ] key. z This will cause the contents of the selected computer screen to be projected so they fill the entire projection area.
Subsequent Wireless LAN Connection between the Data Projector and Four Computers Important! You can use the following procedure when the following condition exists. z You already have performed the procedure under “First Wireless LAN Connection between the Data Projector and Four Computers” (page 11), and that you have not changed the Data Projector and/or computer settings since then.
Advanced Wireless LAN Connection Settings This section explains how to configure advanced settings for a wireless LAN connection between the Data Projector and a computer. Web Setup In order to modify the settings of a Data Projector manual setup profile and to configure advanced settings of other Data Projector settings, you need first to display a special web browser page named “Web Setup” on you computer screen.
3 Enter the password and then click the [OK] button. z The initial default password is “casio”. z The above step will display the Web Setup top page like the one shown below. Note z For security reasons, be sure to change the password to something else as soon as possible. For details, see “To change the Web Setup login password” (page 22). z You also can display the Web Setup page by selecting [Tools] - [Options] on the Wireless Connection 2 window.
To change the Web Setup login password 1 On the initial Web Setup page, click the [Change Password] button. 2 In the “Current Password” box, enter the current password (“casio” if you have not yet changed the initial default password) and then enter the new password into the “New Password” box. z This will display the change password page. z A password must have at least four single-byte characters and it can be up to 16 characters long.
Switching the Data Projector Connection Profile The Data Projector uses one of its six connection profiles to connect to a computer over a wireless LAN. You can use the following procedure to switch the connection profile as required. To view the Data Projector’s current connection profile information 1 While Wireless is shown in the projection area, press the [FUNC] key on the Data Projector’s remote controller. z This will display the Wireless function menu.
To switch the Data Projector connection profile 1 On the Data Projector’s remote controller, press the [ ] key. z This will cause the connection profile menu to appear in the projection area. The currently selected connection profiled is highlighted. 2 Use the [T] and [S] keys to move the highlighting to the connection profile you want to select and then press the [ENTER] key. z This displays the dialog box shown below.
To use Web Setup to modify the Data Projector connection profile from a computer Important! Performing the procedure below will terminate the current wireless LAN connection between the Data Projector and computer. To re-establish a connection, reconfigure the computer’s wireless LAN settings so they match those of the new Data Projector connection profile. 1 Perform the procedure under “To display and log into the Web Setup page” (page 20) to display the Web Setup top page.
Assigning a Name to a Data Projector You can use Web Setup to assign a unique name to each Data Projector, which comes in handy when you are using multiple projectors. The projector name you assign is displayed in the following locations. • In the “Projector Name” box of the Wireless “Standing by for connection...
Configuring a Connection Keyword A connection keyword protects the Data Projector against unauthorized access when there are multiple computers connected over a wireless LAN using a manual connection profile. You can specify whether or not input of the connection keyword is required (connection keyword on/off) to establish a wireless LAN connection with the Data Projector from a computer, and you can register and modify the connection keyword as required.
To turn connection keyword input on or off on the Data Projector 1 While Wireless is shown in the projection area, press the [MENU] key on the Data Projector’s remote controller. z This will display the setup menu. 2 Press the [T] key to move the highlighting to “USB” and then press the [ENTER] key. 3 Press the [T] key once to move the highlighting to “Setup” and then press the [ENTER] key. z This will display the Wireless setup menu with “Connection Keyword” highlighted.
Modifying Data Projector Manual Connection Settings The following are example cases in which you may want to modify Data Projector manual connection settings. • When you want to configure Data Projector settings to be compatible with information configured on the wireless LAN access point you are using • When you want to enhance security by modifying initial default settings You can modify manual connection settings using Web Setup.
Creating a Computer Connection Profile After you modify the settings of the Data Projector’s manual setting profile, you will also need to modify the existing wireless LAN connection settings (connection profile) of the computer accordingly, or you will have to create a new connection profile. This section explains the procedure for using Wireless Connection 2 to create a new profile or to modify the existing profile of a computer.
2 Perform the procedure under “To switch the Data Projector connection profile” (page 24) to switch the Data Projector connection profile to “Manual Connection 3”. z This will cause the “Standing by for connection...” screen to appear in the projection area. Confirm that the screen shows “Manual Connection 3” for the connection profile. 3 On the Wireless Connection 2 window, select “Switch Connection Profile” on the “Connection” menu. z This will display a dialog box for switching the connection profile.
6 7 After configuring all of the settings you want, click the [Register] button. 8 Click the [Connect] button. On the confirmation dialog box that appears, click the [OK] button. z This will register your settings as a new connection profile and return to the connection profile switching dialog box in step 1. z This closes the connection profile switching dialog box and displays the dialog box shown below.
To modify an existing computer connection profile 1 Display the Wireless Connection 2 window by double-clicking the icon on your computer desktop, or select the following from the windows Start menu: [All Programs] - [CASIO] - [Wireless Connection 2]. z This step is not necessary if the Wireless Connection 2 window is already displayed. 2 On the Wireless Connection 2 window, select “Switch Connection Profile” on the “Connection” menu.
Sending Settings from a Computer to the Data Projector You can use the Send Settings function of Wireless Connection 2 to send the settings to the Data Projector. To send connection profile settings from a computer to the Data Projector 1 Establish a wireless LAN connection between the computer and Data Projector. 2 On the Wireless Connection 2 window, select [Connection] - [Switch Connection Profile], which will display the Switch Connection Profile dialog box.
6 7 Enter the password and then click the [OK] button. Keep clicking the [OK] button on the dialog boxes that appear. z Clicking the [OK] button in response to the “Overwrite it?” message will cause the settings of the computer to be sent to the Data Projector. This will cause the Data Projector manual connection profile you selected in step 5 to be overwritten with the connection profile settings you selected in step 3.
Deleting a Computer Connection Profile You can use the procedure in this section to delete computer connection profiles you created with Wireless Connection 2 when you no longer need them. Wireless Connection 2 can also be used to delete the default connection profiles (Manual Connection 1, 2, and 3).
Assigning a User Name to a Computer for Projection User names make it possible to identify each computer when multiple computers are connected to the Data Projector at the same time. The user name assigned to a computer will appear in the projection area when the computer’s screen contents are projected. Use Wireless Connection 2 to assign a user name to each computer. To assign a user name to a computer for projection 1 On the Wireless Connection 2 window, select “Options” on the “Tools” menu.
Selecting the Network to Use for Wireless LAN Connection When connecting to the Data Projector with a computer that has multiple wireless LAN adapters, you can select a specific wireless LAN adapter to be used for connection with the Data Projector. To check the current network (wireless LAN adapter) 1 On the Wireless Connection 2 window, select [Connection] - [Select Network]. 2 To close the dialog box, click the [Cancel] button. z This will display the Select Network dialog box.
“Connect to an existing network” check box A “Connect to an existing network” check box also will appear on the “Select Network” dialog box if you are running Wireless Connection 2 under Windows XP or 2000. Select this check box only if you want to establish a connection between the computer and Data Projector via an existing wireless LAN access point.
Manual Connection Setting Reference This section provides detailed explanations of all of the manual connection settings. • See “To modify Data Projector manual connection settings” (page 29) for information about how to change Data Projector manual connection settings. • For information about creating a computer manual connection setting profile for wireless LAN connection with the Data Projector, refer to “To create a new computer connection profile” (page 30).
Note The initial default setting for each item is indicated by an asterisk (*). Setting Name Description Profile Name This is a name assigned to identify each individual manual connection. Input up to 10 characters. SSID Wireless network ID name. This is normally referred to as the SSID, ESS-ID, or network name. Input up to 32 single-byte alphanumeric characters.
Setting Name Description WEP Key Format You only need to configure this setting when “WEP” is selected for “Security Setup”. You can specify any one of the following formats for input of the WEP key. ASCII/64bit, ASCII/128bit, HEX/64bit, HEX/128bit* For more information about inputting the WEP key using the format specified here, see the “WEP Key / WPA/WPA2 Pass Phrase” item below. WPA/WPA2 Encoding You only need to configure this setting when “WPA-PSK” or “WPA2-PSK” is selected for “Security Setup”.
Setting Name Description Subnet Mask Configuration of this setting is required when “Off” is selected for “DHCP”. Enter a subnet mask value, which specifies the range of the IP address of the subnet to which the Data Projector/computer belongs. The subnet mask consists of four values in the range of 0 to 255, separated by periods (such as 255.255.255.0). Default Gateway Configuration of this setting is required when “Off” is selected for “DHCP”.
Returning Data Projector Wireless Settings to Their Initial Defaults You can return all Data Projector Wireless function settings to their initial defaults by executing “Initialize Wireless Setup”. The following are the Wireless initial default settings configured by this operation.
Viewing Wireless Connection 2 Help To view Wireless Connection 2 help, select “Help” on the Wireless Connection 2 window “Help” menu. Viewing Wireless Connection 2 Version Information To view Wireless Connection 2 version information, select “About Wireless Connection” on the Wireless Connection 2 window “Help” menu.
Wireless LAN Connection Troubleshooting Whenever you experience problems with the wireless LAN connection between the Data Projector and the computer, check the following points first. Check the following on the computer. • Is a wireless LAN utility other than Wireless Connection 2 running? If so, shut down the other utility. Check the following on the Data Projector.
You cannot establish a Manual Connection between the Data Projector and a single computer or multiple computers. Except for the IP address setting, all of the settings configured for the Data Projector and the computer(s) must match in order to establish a Manual Connection. Use the following procedures to display and check the Data Projector and computer settings. If there are any differences in the settings, change the settings on the computer(s) so they match.
The wireless LAN connection between the Data Projector and computer keeps dropping. This can be caused by the following. • Data communication can slow down and the connection may tend to drop when the Data Projector and computer are far from each other (in different rooms, on different floors, etc.) Move the Data Projector and computer as close together as possible. • Operation of a device that uses the 2.4 GHz frequency band (which is the same frequency band as the IEEE802.
Wireless Connection 2 Menus and Button Reference This section provides detailed information about the Wireless Connection 2 window menu commands and buttons.
Using Wireless LAN for Projection This section explains operations you can perform after a connection is established between the Data Projector and computer.
To display a mouse cursor in the projection area 1 Click the 2 Select the type of mouse cursor you want to use and then click the [OK] button. button or select [Mouse Cursor Emulation] on the [Tools] menu. z This will display a mouse cursor emulation dialog box. z This will display the selected mouse cursor in the projection area. The mouse cursor will be located at the same location as the mouse cursor on the computer screen.
Operations while Multiple Computers are Connected to the Data Projector over a Wireless LAN While multiple computers are connected to the Data Projector over a wireless LAN, you can check which computer’s screen contents currently are being projected, and you can switch projection between computer screens as required. Use the Data Projector’s remote controller to perform these operations. To check which computer’s screen contents currently are being projected.
To turn display of user names in the projection area on and off Note Under initial default settings, the user name is displayed in the upper left corner of the projection area whenever you switch projection from the contents of one computer screen to another, or when a single computer is connected to the Data Projector over a wireless LAN. 1 While Wireless is shown in the projection area, press the [MENU] key on the Data Projector’s remote controller. z This will display the setup menu.
MA0805-C