
User Manual


104
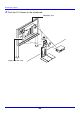
Projection Area Capture
2. Click the [White Balance Mode] down arrow button, and then select
“Manual” on the menu that appears.
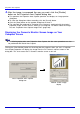
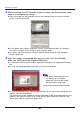
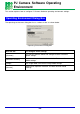
z This displays the dialog box shown below.
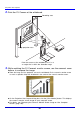
3. Point the PJ Camera at the paper.
z Make sure that the white paper completely fills the entire monitor screen.
4. When the PJ camera is aimed properly, click the [OK] button on the
dialog box that appeared in step 2.
z White balance adjustment will take about one second.
z Clicking the [Readjustment] button on the Projection Area Capture dialog box will cause
the dialog box in step 2 to reappear. You can then perform steps 3 and 4 again to
readjust white balance.
Projection Area Capture Image Files
Image files created with Projection Area Capture are saved in the folder at the directory path
shown below.
Folder (Initial Default):
Windows 2000/XP
C:\Documents and Settings\All Users\Documents\CASIO\PJ_System\Projection_Area_Capture
Windows Vista
C:\Users\Public\Documents\CASIO\PJ_System\Projection_Area_Capture
File Name:
File names are generated automatically in accordance with the recording date.
Example: 20070218T104525.JPG
(Year: 2007; Month: 2; Day: 18; Time: 10:45:25)
Image Resolution:
XGA (1024 × 768) 800 × 600 when an SVGA computer screen is being used.