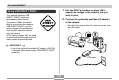
DELETING FILES DELETING FILES You can delete a single file, or you can delete all files currently in memory. Deleting a Single File Perform the following steps when you want to delete a single file. IMPORTANT! • Note that file deletion cannot be undone. Once you delete a file, it is gone. Make sure you really do not need a file anymore before you delete it. Especially when deleting all files, make sure you check all the files you have stored before proceeding. • A protected file cannot be deleted.
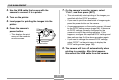
DELETING FILES IMPORTANT! Deleting All Files • If a file cannot be deleted for some reason, the message “This function is not supported for this file.” appears when you try to delete it. The following procedure deletes all unprotected files currently in memory. 1. In the PLAY mode, press [ ] ( ). 2. Use [ ] and [ ] to select “All File Delete”, and then press [SET]. 3. Use [ ] and [ ] to select “Yes”. • To exit the file delete operation without deleting anything, select “No”. 4.
FILE MANAGEMENT FILE MANAGEMENT The file management capabilities of the camera make it easy to keep track of images. You can protect files against deletion, and even use its DPOF feature to specify images for printing. Each folder can hold files numbered up to 9,999. Trying to store the 10,000th file in a folder causes the next serially numbered folder to be created. Folder names are generated as shown below. Example: Name of the 26th file Folders CIMG0026.
FILE MANAGEMENT 4. Use [ ] and [ ] to Protecting Files select “On”, and then press [SET]. Once you protect a file it cannot be deleted (page 102). You can protect files individually or you can protect all files in memory with a single operation. • A file that is protected is indicated by the mark. To protect a single file • To unprotect a file, select “Off” in step 4, and then press [SET]. 1. In the PLAY mode, press [MENU]. 5. Press [MENU] to exit the menu screen. 2.
FILE MANAGEMENT To protect all files in memory DPOF The letters “DPOF” stand for “Digital Print Order Format”, which is a format for recording on a memory card or other medium which digital camera images should be printed and how many copies of the image should be printed. Then you can print on a DPOF-compatible printer or at a professional print service in accordance with the file name and number of copies settings recorded on the card.
FILE MANAGEMENT 5. Use [ ] and [ ] to specify the number of To configure print settings for a single image copies. • You can specify up to 99 for the number of copies. Specify 00 if you do not want to have the image printed. 1. In the PLAY mode, press [MENU]. 2. Select the “PLAY” tab, 6. To turn on date stamping for the prints, press select “DPOF”, and then press [ ]. [DISP] so 12 1 is displayed. • To turn off date stamping for the prints, press [DISP] so is not displayed.
FILE MANAGEMENT 5. To turn on date stamping for the prints, press To configure print settings for all images [DISP] so 1. In the PLAY mode, press [MENU]. 12 1 is displayed. • To turn off date stamping for the prints, press [DISP] so is not displayed. 12 2. Select the “PLAY” tab, select “DPOF”, and 1 6. After all the settings are the way you want, then press [ ]. press [SET] to apply them. 3. Use [ ] and [ ] to select “All images”, and then press [ ]. 4.
FILE MANAGEMENT PRINT Image Matching II Exif Print Images include PRINT Image Matching II data (mode setting and other camera setup information). A printer that supports PRINT Image Matching II reads this data and adjusts the printed image accordingly, so your images come out just the way you intended when you recorded them. Exif Print is an internationally supported, open standard file format that makes it possible to capture and display vibrant digital images with accurate colors. With Exif 2.
FILE MANAGEMENT 1. Use the DPOF procedure on page 106 to Using USB DIRECT-PRINT specify the images in file memory that you want to print. Your camera supports USB DIRECT-PRINT, which was developed by Seiko Epson Corporation. When connected directly to a printer that supports USB DIRECT-PRINT, you can select images to be printed and start the print operation directly from the camera. DPOF settings (page 106) are used to determine which images and how many copies should be printed. 2.
FILE MANAGEMENT 3. Use the USB cable that comes with the 7. On the camera’s monitor screen, select camera to connect it to a printer. “Print”, and then press [SET]. 4. Turn on the printer. • This automatically starts printing of the images you specified with the DPOF procedure. 5. Load paper for printing the images into the • If you want to print the same batch of images again, press the power button on the camera. printer.
FILE MANAGEMENT IMPORTANT! Using the FAVORITE Folder • See the documentation that comes with your printer for information about print quality and paper settings. • Contact your printer manufacturer for information about models that support USB DIRECT-PRINT, upgrades, etc. • Never disconnect the USB cable, or perform any camera operation while printing is in progress. Doing so causes a printer error. • To interrupt an ongoing print operation, perform the required operation on the printer.
FILE MANAGEMENT 3. Use [ ] and [ ] to NOTES select “Save”, and then press [SET]. • Copying an image file with the above procedure creates a 320 x 240-pixel QVGA-size image in the FAVORITE folder. • A file copied into the FAVORITE folder is automatically assigned a file name that is a serial number. Though the serial number starts from 0001 and can go as high as 9999, the actual upper end of the range depends on built-in memory capacity.
FILE MANAGEMENT NOTE To display a file in the FAVORITE folder • Holding down [ ] or [ ] scrolls images at high speed. 1. In the PLAY mode, press [MENU]. 2. Select the “PLAY” tab, select “Favorites”, and IMPORTANT! then press [ ]. • Note that a FAVORITE folder is created in the camera’s built-in memory only. No FAVORITE folder is created on a memory card when you use one.
FILE MANAGEMENT IMPORTANT! To delete a file from the FAVORITE folder • You cannot use the delete operations on page 102 to delete images from the FAVORITE folder. Performing the memory format operation (page 128), however, does delete FAVORITE folder files. 1. In the PLAY mode, press [MENU]. 2. Select the “PLAY” tab, select “Favorites”, and then press [ ]. 3. Use [ ] and [ ] to select “Show”, and then press [SET]. 4. Press [ ] ( ). 5.
FILE MANAGEMENT To delete all files from the FAVORITE folder 1. In the PLAY mode, press [MENU]. 2. Select the “PLAY” tab, select “Favorites”, and then press [ ]. 3. Use [ ] and [ ] to select “Show”, and then press [SET]. 4. Press [ ] ( ). 5. Use [ ] and [ ] to select “All File Delete”, and then press [SET]. IMPORTANT! • You cannot use the delete operations on page 102 to delete images from the FAVORITE folder.