
Installation Instructions


Made in the U.S.A. | Allenton, WI
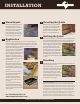
INSTALLATION
METAL LATH AND SCRATCH
COAT INSTALLATION
DIRECT TO
MASONRY
INSTALLATION
Installation Overview: Careful and proper installation is important for ensuring the long-lasting beauty of your Cast
Natural Stone. One advantage of Cast Natural Stone is its ability to be installed over dierent substrates.
Choose your appropriate installation method: While any stone installation can be done properly and securely with a metal lath and mortar scratch
coat system, certain masonry surfaces provide a substrate under which stone can be directly applied without using metal lath and scratch coat system.
See below to choose your installation method.
1
1
2
The following is a step by step guide to installing Cast Natural Stone over common substrates.
Instructional videos can be found at www.menards.com/castnaturalstone or www.castnaturalstone.com
Cement board (e.g., Permabase) may be used as an
alternative to the lath and scratch coat method over
the same substrates of OSB/Plywood and drywall.
Please note, it is important to follow cement board
manufacturers’ instructions for proper installation.
The following diagram is provided as a guideline for
exterior cement board installation
Surface
Preparation
Surface Preparation
Apply two layers of Weather Resistive Barrier (WRB) #15 Felt
or Grade D weather resistive building paper; or 1 layer of #15
Felt (or Grade D weather resistive building paper) and 1 layer
of house wrap over rigid sheathing; or any combination of 2
layers of weather resistive barrier.
Install from the bottom up ensuring upper layer laps lower
at least four inches. NOTE: Before nailing down lath, be sure
building paper is installed smooth. Lath needs to be tight;
any bubbles should be nailed or stapled down to prevent
“bounce”. Flashings should be installed at all sills, windows
and other wall penetration junctures. Weep screeds, as ap-
plicable by building codes should be installed at the bottom.
Metal Lath and Scratch Coat
Application
Metal Lath: Attach 2.5 lb. expanded, galvanized metal lath to each stud 6” on
center-vertically, penetrating the studs at least one inch. Be sure to attach the lath
horizontally. Lath should feel rough as you slide your hand upward. Install lath
with a minimum 1” overlap on horizontal and vertical seams. Lath on inside and
outside corners should be wrapped completely around the corner to the next stud
and attached every 6”.
Scratch Coat Application: All lathed surfaces should be
covered with a 1/2” coat of a Pre-Mix Stone Veneer Mortar
or Type N, or Type S mortar allowing to set approximately
30 minutes prior to installing stones. Brush with a soft
bristled brush (to roughen up surface to ensure a stronger
mechanical and chemical bond.). The stone veneer mortar
mix or N or S mortar is used for scratch coating, setting the stone and grouting the
joints. Ask your Menards Team Member for specic product recommendations
and mixing instructions.
...continue to Step 3
METAL LATH AND SCRATCH COAT installation
should be used for stone installations over:
• OSB/Plywood
• Painted or Coated Concrete Walls
• Drywall
• Insulated Concrete Forms
DIRECT TO MASONRY installation
can be used for stone installations over:
• Clean Masonry or
Concrete Walls
• Cement Board (e.g. Permabase)
over OSB/Plywood
1. Plywood or other structural sheathing
2. Weather Resistive Barrier (one layer)
3. PermaBase Cement board, or clean masonry
4. 4” Alkali-resistant mesh tape (for PermaBase)
5. Mason Mix (Type S), or Stone Mortar Mix.
(Concrete Bonding Additive recommended to improve performance)
6. Cast Natural Stone
Metal Lath and Scratch Coat
NEW APPROVED
INTERIOR/EXTERIOR
INSTALLATION!
Faster and simpler than traditional
metal lath installation
...continue to Step 3
®