CAND Series User’s Guide Network Attached Storage
Table of Contents 4 TABLE OF CONTENTS INTRODUCTION 6 Features 6 Accessories 7 Conventions & Safety Instructions QUICK START 11 Mapping 11 Web-based GUI 12 Printer 12 IP Address 12 FTP Service COMPLETE USER’S GUIDE Chapter 1 - Basics 1.1 - Quick Setup 15 1.1.1 - Wizard 16 1.1.2 - Add User 17 1.1.3 - Add Group 18 1.1.4 - Add Share Chapter 2 - Control Panel 2.1 - Users and Groups 21 2.1.1 - User Management 22 2.1.2 - Group Management 2.2 File and Print 23 2.2.
27 2.3.2 - Time Settings 27 2.3.3 - Turn Off 28 2.3.4 - Information 28 2.3.5 - Disk Usage 29 2.3.6 - Error Notification 2.4 Network Service 30 2.4.1 - DHCP Server 31 2.4.2 - Bonjour 2.5 Maintenance 32 2.5.1 - Disk Utility 33 2.5.2 - RAID Settings 34 2.5.3 - Firmware Upgrade 34 2.5.4 - Save Configuration 34 2.5.5 - Restore Configuration 34 2.5.6 - Factory Reset 34 2.5.7 - Software Update 2.6 Log File 35 35 35 35 35 2.6.1 - Samba Log 2.6.2 - FTP Log 2.6.3 - DHCP Log 2.6.
Introduction Features 10/100/100 Mbit/s LAN Speed Printer server capability with USB 2.
Conventions & Safety Instructions ! CAUTION: This symbol is to remind you to pay attention and read carefully. Failure to do so could result in injury or data loss. NOTE: This symbol is used to provide you with useful information. • • • • • • • • • Read through this entire manual and save for future reference. Place unit in a secure location to prevent being bumped or dropped. Do not place near a radiator or other heat sources. Do not use near water.
Quick Start Guide This portion of the manual gives a brief overview of the steps required to start transferring files. It also goes over the main features and functions of the NAS drive such as attaching a printer and determining the unit’s IP address. Advanced configuration of formatting and RAID settings are not required to use the unit. The drive is already preconfigured to RAID 1 and formatted to ext3.
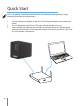
Quick Start NOTE: For optimal security and convenience, we recommend designating a single computer to handle all configurations. 1. 2. 3. 10 Connect the power adapter to the NAS. Then plug the adapter into an electrical outlet. Turn on the power; the “Power” LED light will indicate the unit is on. Insert the Ethernet cable to the LAN port on the back of the NAS and the other end to an Ethernet port on the network adapter of a router/switch/hub. The “Link” LED will indicate a connection.
Mapping Windows XP Users 1. Go to “My Network Places”, then click on “Entire Network” in the left hand panel. 2. Go to “Microsoft Windows Network” >> “Workgroup” >> “Cavalry” 3. Find and right-click “public” then click on “Map Network Drive...” 4. In the new window, designate a Drive Letter and click Finish. 5. When prompted, enter: Username: admin Password: admin 6. After successfully mapping the drive, the NAS will appear on “My Computer” and is ready for use. Windows Vista Users 1.
Printer (optional) 1. 2. Attach a network-capable printer to the NAS with the USB cable. Refer to your printer settings to properly configure it to the system. NOTE: GDI/Host-based printers are not supported. IP Address (optional) 1. 2. To find the IP address of the NAS unit, go to the command prompt - “cmd” in Run. Type “ping cavalry” to return the IP address of the NAS. FTP Service (optional) 1. 2.
Complete User’s Guide The remainder of this manual is optional and gives a more thorough guide to the features offered. A higher level of networking experience may be required for some of the more advanced features. The following three chapters corresponds to a menu item located on the top of the web-based GUI. Instructions to access the web-based GUI can be found in the Quick Start section.
Chapter 1 Basics 1.1 Quick Setup Click on “Quick Setup” on the left of the GUI to open a sub-menu. See the “Quick Start” section for instructions on how to access the GUI. 1.1.1 1.1.2 1.1.3 1.1.4 Wizard Add User Add Group Add Share 1.1.
1.1.2 Add User Step 1. Add user name and password Enter a new user name and password. (To simply create a new user with default settings, enter the username and password in the first step then click “Next” then click “Next” through the remaining 2 steps.) Designate a shared folder by checking the “Create Shared Private Folder” box and specify the location of the folder if needed. Specify the quota amount of megabytes (MB) this user will be allowed to use. Leave unchecked to allow unrestricted usage.
Step 3. Share Permission - Grant users access to existing group-shares. A group-share is a location in the NAS where multiple users can view and/or edit files. Choose any existing group-share(s) to grant users access to, and click “Read Only” or “Writable” . The group-share will move to the “Access Granted” column with the chosen permissions. “Read Only” will allow the user to access files in the group-share but will not be able to edit the contents.
Step 3. Give a group access to existing group-shares Choose any existing group-share(s) to grant access to, and click “Read Only” or “Writable” . The group-share will move to the “Access Granted” column with the chosen permissions. “Read Only” will allow the group to access files in the groupshare but will not be able to edit the contents. “Writable” gives the group full permission to make changes to the file.
Step 2. Grant users and/or groups access to the share Click on a user or group (groups are denoted by the “@” prefix) in the “Access Denied” column and click either “Read Only” or “Writable” to move the user to the “Access Granted” column. To remove a user or group, choose a user or group and click “Remove” Check the box next to “Grant access to all” to give all users and groups full access. Click “Next” to continue. See 2.2.2 to allow Windows network access. • • • • • Step 3.
Chapter 2 Control Panel 2.1 Users and Groups 2.1.1 User Management 2.1.2 Group Management 2.1.1 User Management To add a new user: To add a new user, type a new name in the “User Name” field Enter a password and retype to confirm. Check the “Create Shared private Folder” box to create a personal folder for this particular new user. Check “Enable Quota of” and enter a the amount of space (in MB) the user will be allowed to use. Click “Save”.
2.1.2 Group Management To add a new group: To add a new user, type a new name in the “Group Name” field Click “Save”. • • To edit an existing group Choose an “existing group” from the list. To add members to this group, click “Members” and follow section 1.1.3 To delete a group, choose an existing group and click “Delete Group” Click “Save”.
2.2 File and Print 2.2.1 File Server 2.2.2 Share Management 2.2.3 Printer Server 2.2.1 File Server • • • • • • Change the character set of the NAS to one appropriate for your region. Check the Windows Setting box (checked by default) to enable the NAS to be on a Windows workgroup network. FTP capability is enabled by default. Uncheck to remove feature. Check “Enable FTP with TLS” to enable Transport Layer Security. FTP capability is enabled by default. Uncheck to remove feature. Click “Save” .
2.2.2 Share Management Grant users and/or groups access to the share Choose an existing share from the list and click on “Windows, FTP Access” or “NFS Access” to configure preferred access method settings. • • Windows, FTP Access (FTP must be enabled. See 2.2.1) Click on a user or group (groups are denoted by the “@” prefix) in the “Access Denied” column and click either “Read Only” or “Writable” to move the user to the “Access Granted” column.
• NFS Access • • • • • Enter either an IP address or an IP subnet to grant access to. Click on “Add” to allow the IP address/subnet access to the NFS. To remove, click on the IP address/subnet on the left and click on “Remove” Alternatively, check “Grant access to all” to give all IP address/ subnet full access to the share. Click on “Save” . 2.2.3 Printer Server Set the NAS as a printer server for remote printing Enable the printer server capability by checking the “Enable” box.
2.3 System 2.3.1 LAN Settings 2.3.2 Time Settings 2.3.3 Turn Off 2.3.4 Information 2.3.5 Disk Usage 2.3.6 Error Notification 2.3.1 LAN Settings • • • 26 Select “Obtain IP Address automatically” and “Obtain DNS Server Address automatically” (These default settings are recommended and appropriate for most cases). If unsure, contact the network administrator. To alter the settings, simply change the host name and input a static IP or specific DNS server addresses.
2.3.2 Time Settings Adjust the NAS internal clock to the local time manually or automatically Manually change the date, time and time zone. Click “Save” Automatically change the time through a Network Time Protocol Server (NTP Server). Select your time zone then choose one of the default NTP Servers (requires internet access) or choose a user defined one. Click “Update Time” • • • • • 2.3.3 Turn Off Turns off or Resets the unit.
2.3.4 Information Displays the system information and the IP address of the NAS unit. Use the IP address when mapping / mounting the drive onto the computer. (See the Quick Start section) • 2.3.5 Disk Usage Displays the amount of disk space used / remaining View by summary or by individual users.
2.3.6 Error Notification Send error / malfunction notification email. Check the boxes of the warnings you wish to recieve. Enter the SMTP server address to set up an email service. Click “Send Test Email” to verify the email service works. Contact your email service provider for assistance.
2.4 Network Service 2.4.1 DHCP Server 2.4.2 Bonjour 2.4.1 DHCP Server • • • • • • 30 Check “Enable Server” to allow the NAS to act as a DHCP server. (Only on a LAN without an existing DHCP server) Optional settings (first red box) - mainly used is the NAS is not being used as a DHCP server. Set these settings to conform to customized LAN settings. Contact the Network Administrator for assistance.
2.4.2 Bonjour Enable Bonjour to connect network devices and applications and access shared music in iTunes Enable / Disable the Bonjour function by checking the box. Click on “iTunes enable” to allow iTunes to access shared music. Access the NAS volume from your computer and create a folder called “music” under the “public” directory (e.g. /public/music) Store your music in this folder. Start iTunes and the NAS will appear as a shared drive.
2.5 Maintenance 2.5.1 Disk Utility 2.5.2 RAID Setting 2.5.3 Firmware Upgrade 2.5.4 Save Configuration 2.5.5 Restore Configuration 2.5.6 Factory Reset 2.5.7 Software Update 2.5.1 Disk Utility View the status of and reformat the individual hard drives. (Only use this utility for JBOD configurations) To reformat, choose from the drop down menu of formats (must be non-RAID) Click “Scan” to run a test the status of each disk.
2.5.2 RAID Settings View or change current RAID configurations RAID level and File system information is displayed The “RAID Size” shows the total usable capacity of the NAS (e.g. RAID 1 is mirrored so half of the total capacity is usable) To change the RAID configuration, click on “Remove raid system” then click “OK” to confirm. • • • CAUTION: Reconfiguring the drive will erase all data. ! • • • • • Restart the NAS and log back into the GUI and return to “RAID Settings”.
2.5.3 Firmware Upgrade Update the NAS firmware Check if the “Current Firmware Version” is the most recent by visiting the Cavalry website: www.cavalrystorage.com >> Support >> Downloads • • • • • • If there is a newer version, download it to your computer. Click on “Choose File” to browse for and select the update. Click “Upgrade” Wait until the process is complete and do not power off the NAS. The system will automatically restart. 2.5.
2.6 Log File 2.6.1 Samba Log 2.6.2 FTP Log 2.6.3 DHCP Log 2.6.4 System Log 2.6.5 Administration Log 2.6.1 - 2.6.5 Logs • • View the respective logs for detailed activity information. Click on “Clean” to clear the logs.
Chapter 3 Personal Information 3.1 Personal Information 3.1.1 Account 3.1.1 Account • • • Change password, language preferences, and account description. View Disk Usage Share membership. Click “Save”.
Chapter 4 Help FAQ and Troubleshooting 4.1 Q: Why can’t I access the NAS setup page? A: Please connect the NAS directly to your computer via the RJ45 port. Open a web browser and key in the default IP address 192.168.1.1 Then type “admin” for both Account Name and Password to enter the NAS setup page. 4.2 Q: Why can’t I perform RAID functions under the FAT32 format? A: FAT32 format doesn’t support RAID functions, to perform RAID functions please use the ext2 or ext3 formats. 4.
4.7 Q: Why can’t Windows XP enter the SMB folder with a password via the NAS? A: Please update Windows XP to SP2 or higher. 4.8 Q: What is the NAS default login name and password? A: The default Login name: “admin”, default password: “admin”. 4.9 Q: How do I access the NAS via the Internet? A: If your NAS is using a public IP, please perform the following steps: (1) Enter the NAS’ web-based GUI and go to the FTP Server page to enable FTP Status. (2) Create User accounts and limits of authority.
4.14 Q: What is the protocol of network file sharing system using by the NAS? A: The NAS has the built-in Samba Server for file sharing; it is using a SMB (Server Message Block) protocol to integrate TCP/IP, NETBUEI and IPX/SPX protocol. In other words, if the client PC can support TCP/IP, NETBUEI or IPX/SPX, it will also be compatible with the NAS. You can also use the built-in FTP Server for file sharing with the internet client. 4.
Copyright © 2010 Cavalry Storage, Inc. All rights reserved. Cavalry, the names of series and the Cavalry logo are registered trademarks of Cavalry Storage. All other trademarks or registered trademarks are the property of their respective owners. When referring to hard drive capacity, one gigabyte, or GB, equals one billion bytes and one terabyte, or TB, equals one trillion bytes. Your computer’s operating system may use a different standard of measurement and report a lower capacity.
CAND Series 20100318 v1.