User's Manual LINE THERMAL PRINTER MODEL CBM-262
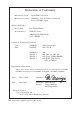
Declaration of Conformity : Japan CBM Corporation Manufacturer’s Name Manufacturer’s Address : CBM Bldg., 5-68-10, Nakano, Nakano-ku Tokyo, 164-0001, Japan Declare the Product Product Name Line Thermal Printer Model Number(s) CBM-262 Series (CBM-262-R, CBM-262-P) (S.No. 1001001 - ) Conform to the following Standards LVD EMC :EN60950 :EN55022 :1992+A1+A2:1993 :1995 Class B :EN50082-1 :IEC801-2 :IEC801-3 :IEC801-4 :1992 :1991 4KV CD, 8KV AD :1984 3V/m, 27MHz-500MHz :1988 0.
Cautions 1. Please read this user's manual thoroughly before attempting to use this printer. After reading, keep this manual in a secure place where it can be referred to easily if necessary. 2. The contents of this user's manual are subject to partial modification without prior notice. 3. Transfer of the contents of this user's manual, either in part or in whole, without permission is strictly prohibited. 4.
EMI COMPLIANCE STATEMENT FOR CANADIAN USERS This equipment generates and uses radio frequency energy and if not installed and used properly, that is, in strict accordance with the manufacturer’s instructions, may cause interference to radio and television reception. This digital apparatus does not exceed the Class A limits for radio noise emissions from digital apparatus set out in the Radio Interference Regulations of the Canadian Department of Communications.
Important Safety Instructions 1. Read all of these instructions and save them for later reference. 2. Follow all warnings and instructions marked on the product. 3. Unplug this product from the wall outlet before cleaning. Do not use liquid or aerosol cleaners. Use a damp cloth for cleaning. 4. Do not use this product near water. 5. Do not place this product on an unstable cart, stand or table. The product may fall, causing serious damage to the product. 6.
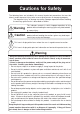
Cautions for Safety The following items are included in this manual to point out precautions that must be taken in order to prevent injury to the user or other persons or damage to property. • The degree of injury or damage caused by improper operation without heeding the warnings given herein is described as follows. Warning This indicates contents in which improper operation of this product without heeding the warnings given may lead to death or severe injury.
Cautions for Installation • Do not use or store this product in a place where there is fire or water vapor, where it will be exposed to direct sunlight, in a place where it will be exposed to heat or humidity conditions that it was not specified for, such as next to a heater or burner, or a place where there is a lot of oil, iron filings, dust or dirt, etc. Doing so could cause it to break down, emit smoke or catch fire.
Cautions for Handling The following methods of handling may lead to breakdown, so please do not use this printer by these methods. • Do not attempt to print without paper being set in the printer. • Be careful not to let paper clips, straight pins, screws or other foreign objects fall inside the printer. • Do not spill any liquids on this product, or let it absorb any chemicals. • Do not subject this product to a strong impact, such as stepping on it, dropping it or hitting it.
Contents Chapter 1 Outline ....................................... 1 Features ............................................................................................ 2 Accessories ....................................................................................... 2 Names and Functions of Parts .......................................................... 3 Printer Unit .................................................................................. 3 Operation Panel .................................
Chapter 6 Interfaces ................................ 31 Serial Interface ............................................................................... 32 Specifications ............................................................................ 32 Signal Lines and Pin Arrangement ............................................ 32 Explanation of Signal Names .................................................... 33 Input/Output Circuits .................................................................
1 Chapter 1 Outline This printer is a tandem type 2-station line thermal printer which accepts 58 mm wide paper, developed for use in PC-POS/ECR terminals and all types of data communications terminals, etc.
Chapter 1 Outline 1 Features • • • • • • • • Compact design with the two rolls of paper set front to back to keep the printer's width narrow. Power switch and operation panel are located on the front, and cable connections are made in an indented part, giving it a shape without projictions on the sides and rear, which makes installation easy. The thermal line head reduces noise and achieves high speed printing at 62.5 mm/ sec. An auto cutter is standard equipment in the receipt printer.
Names and Functions of Parts 1 Names and Functions of Parts Printer Unit Rear Cover Journal Window Front Cover Magnet Plate Coin Tray Operation Panel Power Switch. (Turns the power on and off.
Chapter 1 Outline Operation Panel 1 1 2 3 4 1 POWER Indicator (Green) Lights up when the power switch is turned on and power is being supplied to the printer. 2 RECEIPT Key Feeds receipt paper. Pressing once causes the paper to advance one line, based on the amount for a carriage return set previously. If the key is pressed continuously, the paper is fed continuously. 3 JOURNAL Key Feeds journal paper.
Names and Functions of Parts Connectors 1 DIP Switch Cover Interface Connector Drawer Kick Connector Power Connector Ground Cable Connection Tap (Ground Terminal) Bottom View 5
Chapter 1 Outline Factory DIP Switch Settings 1 ON ON 1 2 3 4 5 6 7 8 1 2 3 4 DIP Switch 1 DIP Switch 2 The above switches are shown in the OFF position. • 6 DIP switch 2 is used for the serial interface only. (See “Chapter 4 - Using the Printer,” on pages 25 and 26).
2 Chapter 2 Getting Started • • After all the connections are completed, insert the power cord plug in the receptacle. When redoing connections, be sure to turn off the power to the printer main unit and the terminal first.
Chapter 2 Getting Started 1 Connecting the Interface Cable 1. Insert the cable's connector into the interface connector. Align the top and bottom of the male and female connectors and connect the two connectors. 2 2. Fastening the Cable Terminals Fastening the Serial Interface Connector: After making sure the connector is inserted fully, tighten the screws to fasten the connector in place. • Use screws which can be tightened by hand to fasten the connector to the interface.
Connecting the Drawer Kick Cable Connecting the Drawer Kick Cable Connect the drawer kick cable to the drawer kick connector. Align the top and bottom of the cable connector and the drawer kick connector, then insert the connector until it makes a clicking sound. Connect the drawer ground wire to the ground terminal with a screw. • • Do not connect the connector for any other drawer (solenoid) to the drawer kick connector than that specified. Use a M3 X 6 self tapping screw to fasten the grand wire.
Chapter 2 Getting Started 1 Connecting the Power Supply 1. Connect the connector at the end of the AC adapter cable to the power supply connector. Align the top and bottom of the cable and connector to connect them. 2 When the AC adapter's plug is disconnected from the printer, grasp the plug with your fingers to pull it out. 2. Connect the AC power cord and the AC adapter. 3. Connect the power cord to the receptacle. Connect the AC adapter with the printer's power supply switched off.
Chapter 3 3 Paper Handling Setting the Receipt Roll Paper Setting the Journal Roll Paper Replacing Roll Paper Specified Paper and Printing Area 11
Chapter 3 Paper Handling Setting the Receipt Roll Paper 1. Press the I side of the power switch to turn the power on. The POWER indicator lights up and the ERROR indicator blinks. 3 2. Remove the front cover. 3. Place the roll paper in the paper holder as shown in the illustration. • • 12 Be sure the roll paper's winding direction is correct when inserting the roll. Make sure the roll paper turns smoothly in the paper holder.
Setting the Receipt Roll Paper 4. Make sure the head is in the down state. 3 5. Insert the end of the roll of paper straight into the printer's paper insertion slot. The proper amount of paper is then loaded automatically (auto loading). • If the end of the roll of paper is feathered or folded, cut off the end with scissors, etc. so that the end is squared off. When operation stops, then setting of the roll paper is completed.
Chapter 3 Paper Handling Setting the Journal Roll Paper 1. Open the rear cover. • Be sure to remove the front cover before opening the rear cover. 3 2. Remove the spool, then lower the writing table to the rear. 3. Place the roll paper in the paper holder as shown in the illustration. • • 14 Be sure the roll paper's winding direction is correct when inserting the roll. Make sure the roll paper is turning smoothly in the paper holder.
Setting the Journal Roll Paper 4. Lower the head up lever in the arrow direction. The head will move to the head down condition, with the head platen closed. 3 5. Insert the end of the roll of paper straight into the printer's paper insertion slot. The proper amount of paper is then loaded automatically (auto loading). • • If the end of the roll of paper is feathered or folded, cut off the end with scissors, etc. so that the end is squared off.
Chapter 3 Paper Handling 7. Move the writing table back to its original position and lock it. 3 8. Remove the spool partner from the spool temporarily, then insert the end of the roll of paper into the slot in the spool and wind up the paper on the spool two or three times so it will not come off the spool. Replace the spool partner on the spool. Spool Partner • 16 Wind up the roll paper, making sure it is winding in the correct winding direction when taking up paper from the roll paper.
Setting the Journal Roll Paper 9. Insert the spool in the spool holder while winding up the paper on the spool. While winding the paper onto the spool so there is no slack, make sure it is moving along the guide in the writing table. 3 • Make sure the gear of the spool is engaged in the printer gear. 10.Close the rear cover, then replace the front cover, following the procedure used for removing the covers in the reverse order. The ERROR indicator on the operation panel will go off.
Chapter 3 Paper Handling Replacing the Roll Paper If the amount of roll paper remaining becomes low, the ERROR indicator blinks, reminding the operator that it will soon be time to replace the roll paper. Printing will stop automatically if the printer runs out of roll paper. The print head and auto cutter are hot during or immediately after printing. Please wait until the print head and auto cutter have cooled sufficiently before replacing the roll paper. 3 1. Remove the cover. 2.
Replacing the Roll Paper 5. Set a new roll of roll paper. 3 • When replacing the journal roll paper, take out the spool and move the writing table back, then set the roll paper. • If the paper is inserted crooked, move the head up lever to move the head to the up condition, then correct the paper's path manually. • Remove the finished journal roll paper form the spool. Follow the procedure below when replacing the journal roll paper. 1. Press the JOURNAL key and wind about 30 cm of paper. 2.
Chapter 3 Paper Handling Specified Paper and Printing Area Specified Paper Type: Specified thermal printing paper. Paper Width: 58 +0/–1 mm Paper Thickness: 60~75µ Roll Diameter: 83 dia. mm or less Printing Surface: Roll Outside (Surface) Specified Paper: Mitsubishi Paper Co. (Ltd.) F220VP Shinoji Paper Co. (Ltd.) PD160R, PD160R-N Nihon Paper Co. (Ltd.) TF 50KS-E2C • Print density may differ depending on the paper used. In such cases, please adjust the print density.
Chapter 4 Using the Printer 4 Settings Using the Operating Buttons Setting the DIP Switches 21
Chapter 4 Using the Printer Operation Panel Keys Use the RECEIPT key and JOURNAL key, in accordance with the query printing system, to set the printer internally. Items which can be set are as follows. • Receipt print density. Adjusts the receipt print density. (See the table below.) • Journal print density. Adjusts the journal print density. (See the table below.) • Cover Open Sets the cover sensor on enabled or disabled. • Auto Cutter Sets the auto cutter on enabled or disabled.
Operation Panel Keys Entering Configuration Mode Select YES (R) or NO (J) to the printed question and set it. If YES: Press the RECEIPT key. If NO: Press the JOURNAL key. • Perform the operation with the front cover removed. 1. With roll paper set, switch the power on while pressing both the RECEIPT key and the JOURNAL key. This causes the printer to enter the printer configuration setting mode, and the printer will print the following text in accordance with the selected menu for each item. 1.
Chapter 4 Using the Printer Test Printing Test printing can be done by turning the printer's power switch ON while pressing the RECEIPT key.
Setting DIP Switches DIP Switches DIP switches are located inside the DIP switch cover on the bottom of the printer. Loosen the screws, then turn the DIP switch cover. • Turn the power off before setting the DIP switches. The contents of DIP switches are as shown in the following tables. DIP Switch 1 No.
Chapter 4 Using the Printer DIP Switch 2 No. Content 1 2 3 4 (Bold character indicates Factory Default) OFF ON Baud Rate See Table (1) below. Parity See Table (2) below. (1) Baud Rate Settings SW2-2 SW2-1 SW2-4 SW2-3 OFF OFF 9600 OFF OFF No Parity OFF ON 4800 OFF ON Odd Parity ON OFF 2400 ON OFF Even Parity ON ON 19200 ON ON – 4 • 26 Baud Rate Setting (2) Parity Settings DIP switch 2 is included only in the case of a Serial interface.
Chapter 5 Sensors and Error Indications 5 This chapter explains the various sensors that this printer is equipped with and the error indications accompanying them.
Chapter 5 Sensors and Error Indications Sensors Printer Cover Open Sensor This sensor reacts when the front cover is removed, indicated by the ERROR indicator (cover open error). Printing is halted. Head Up Sensor If the head is moved to the head up position using the head up lever, it is indicated by the ERROR indicator (Head Up Error.) Printing is halted.
Sensors Paper Near End Sensor This sensor is located on the roll paper holder on the receipt side and the journal side. When the winding diameter of the roll paper becomes small, it is indicated by the ERROR indicator. Since the amount of roll paper remaining may differ depending on the thickness of the winding core, the near end sensor can be set so as to correspond to the thickness of the winding core. Setting Method 1. Loosen the adjustment screw holding the sensor lever. 2.
Chapter 5 Sensors and Error Indications Error Indications Error contents and error indications, as well as recovery instructions in each case, are as shown below. Error Content 5 Indication POWER LED ERROR LED System Error Lights up. Cover Open Lights up. Head Up Lights up. Head Overheat Lights up. Paper End or Paper Near End Lights up. Cutter Motor Lock Lights up. (Blinks fast + blinks slow.) Macro Execution Wait Lights up. (Blinks twice.) 30 Lights up. (Blinks slowly.
Chapter 6 Interfaces 6 Serial Interface Parallel Interface Drawer Kick Connector 31
Chapter 6 Interfaces Serial Interface Specifications Transmission Method Start-Stop Synchronous Full Duplex Communications Signal Level RS-232C Baud Rate 2400, 4800, 9600, 19200 Data Length 7 or 8 bits Start Bit 1 bit Stop Bit Receiving 1 bit; Transmitting 2 bits or more Parity Even, Odd, No Parity Connector Printer Side Compatible with DDK 17LE-13250-27 Signal Lines and Pin Arrangement 13 1 25 14 Pin No. Signal Name Direction 1 F.
Serial Interface Explanation of Signal Names F. GND (Frame Ground) Connected to the printer case. TXD (Transmit Data (Send Data)) Transmission line for sending serial data from the printer to the Host. RXD (Receive Data) Transmission line for the printer to receive serial data from the Host. DSR (Data Set Ready) Signal line which indicates to the printer that the Host is ready to receive. A low level reset can be carried out through the menu setting. S.
Chapter 6 Interfaces Reset by DSR Resets if the voltage becomes -15V ~ -3V. TRS Reset by INIT Resets if the voltage becomes +2V ~ +15V.
Serial Interface Protocols X-ON/X-OFF Protocol Control is by output of the codes for the data transmission request signal X-ON (11 Hex) and the data transmission stop signal X-OFF (13 Hex). When sending the printer's status to the Host, this is sent irrespective of the level of the DSR signal. Conditions for Output of the X-ON Code • • • When all errors have been cleared. When the remaining buffer capacity is greater than Non bytes. After the power is turned on, when in the Ready to Receive state.
Chapter 6 Interfaces Parallel Interface Specifications Transmission Method 8 bit Parallel Signal Level TTL Level Connector Corresponds to DDK 57RE-40360-803B. Timing Chart [At Power On] (If the printer goes Online.) Power on *RESET : BUSY : *ACK : SELECT : The * means negative logic signals. [During Data Reception] 6 DATA1-8 : *STROBE : BUSY : *ACK : a b c d a: Min. 0.5 µ Sec* b: Min. 0.5 µ Sec* c: Min. 0.5 µ Sec* 36 d: Approx. 2.9 µ Sec *: Value at the receiving end.
Parallel Interface [When Receiving the INIT Signal] 1 µSec or longer *INIT : BUSY : *ACK : *FAULT : SELECT : Within 200 µ Sec Level does not change. Level does not change.
Chapter 6 Interfaces Input/Output Circuits Input Circuit Signal Name Configuration 3.3K DATA1-8 VH=2.0V VL=0.8V *INIT 3.3K CMOS 3.3K *STROBE VH=1.8V 100 3.3K VL=0.9V 1000p CMOS (Schmidt) Output Circuit Signal Name Configuration SELECT *FAULT *ACK PE BUSY DRAWER KICK STATUS 3.3K Compatible with 7406.
Parallel Interface Signal Lines and Pin Arrangement Pin No. Signal Name Direction Function 1 *STROBE IN Synch signal for reading DATA 1-8. 2 DATA1 3 DATA2 4 DATA3 5 DATA4 IN 8-bit parallel data 6 DATA5 (DATA1: LSB, DATA8: MSB) 7 DATA6 8 DATA7 9 DATA8 Data request signal output when ready for receiving 10 *ACK OUT data. Goes “Low” when ready to receive data, and “High” when not ready. Goes “High” under the following conditions. 11 BUSY OUT • Printer is in an error state.
Chapter 6 Interfaces Pin No. Signal Name Direction 31 *INIT IN 32 *FAULT OUT 33 34 35 36 • GND DRAWER KICK OUT STATUS FUSE OUT Function When this signal goes “Low,” the printer becomes BUSY. It is initialized after all the data are printed. BUSY is not cleared until this signal goes “High.” A pulse width of 1 µ sec or longer is required at the receiving end. (See “When Receiving the INIT Signal.”) This signal indicates that the printer is in the error state.
Drawer Kick Connector Drawer Kick Connector Specifications Drawer Kick Drive Signal Outputs a pulse signal specified by the ESCp command. Also, the status of SW (+) can be known from pin 34 of the interface connector in the case of the parallel interface and by the GSr, for instance command in the case of the serial interface. Electrical Characteristics Drive Voltage: DC 24 V Drive Current: Max. 0.8 A (should be within 510 ms) SW Signal: Signal level “L”= 0~0.
Chapter 6 Interfaces Connector Connection Diagram NO. Signal Name Function 1 FG Safety ground. 2 DRAWERI Drawer 1 drive signal. 3 DRSW Drawer switch input. 4 VDR Drawer drive power supply. 5 DRAWER2 Drawer 2 drive signal. 6 GND Common ground in the circuit. 6 1 Connector Used: TM5RJ3-66 (Hirose) Compatible Connector: Compatible with TM3P-66P (Hirose) 6 • • • • 42 No signals are output during printing. Both drawers 1 and 2 cannot be driven simultaneously.
Drawer Kick Connector Drive Circuit +24V 1.
Chapter 6 Interfaces 6 44
Chapter 7 Print Control Codes 7 List of Control Codes Input Data Format 45
Chapter 7 Print Control Codes List of Control Codes Character Horizontal tab 49 2 LF Line feed 49 3 CR Print comand 49 4 FF Printing in the page mode and return 50 5 CAN Canceling of print data in the page mode 50 6 RS Journal tab 50 7 DLE EOT Sending the status in real time ENQ Real time enquiry to printer 9 ESC FF 10 11 50 54 Printing of data in the page mode 54 SP Setting the space between characters 55 ! Specifying the print mode all at once 56 12 $ Specifying the
List of Control Codes Character Command Specifying/Clearing 90 degree right rotated Page 30 ESC V 31 W Setting the printing area in thePage mode 72 32 \ Specifying the relative printing position 74 33 a Arranging the printing position 75 34 c0 Selecting the printing sheet 75 35 c1 Selecting the setting sheet 76 36 c3 37 c4 38 c5 Enabling/Disabling the panel switch 77 39 d Print and feed paper n lines 78 40 i Full cut 78 41 m Partial cut 78 42 p Generates a spe
Chapter 7 Print Control Codes Character 48 Page 55 L Setting the left margin 89 56 M Specifying/Clearing reduced character printing 90 57 P Setting the basic calculation pitch 91 58 V Cutting of paper 92 59 W Setting the print area width 93 Specifying the relative position of characters in 60 \ 61 ^ 62 a 63 f Selecting the font of HRI characters 100 64 h Selecting the bar code height 100 65 k Printing bar codes 101 66 r Sending of the status 103 67 w Selectin
Input Data Format Input Data Format (1) Horizontal tab (HT) Code: [09] h Moves the printing position to the next horizontal tab position. The horizontal tab position is set by ESC D. Initial horizontal tab positions are set at every eighth character in Font A (9th, 17th, 25th and 33rd columns). (2) Line feed (LF) Code: [0A] h Menu Setting: The operation differs according to the contents set by the CR operation.
Chapter 7 Print Control Codes (4) Printing in the page mode and return (FF) Code: [0C] h The data developed in the entire printing area are printed all at once and the printer returns to the Standard mode. • All the developed data are cleared after printing. • The printing area set by ESC W is initialized. • The paper cut is not executed. • The head of the line is made the next printing position. • This is valid only in the Page mode.
Input Data Format • • • • • • • Each status shows the current state. Also, each status is 1 byte of data. The status is sent without confirming the receiving ready state of the host computer. Executed in the off-line state, when the receiving buffer is full and in the error state. This command is processed during reception.
Chapter 7 Print Control Codes (1) Printer Status (when n=1 is specified) Bit Function 0 1 0 Not used Fixed at 0 1 Not used Fixed at 1 2 Status of drawer pint No.
Input Data Format (3) Error Factor Status (when n = 3 is specified) Bit Function Value 0 1 0 Not used Fixed at 0 1 Not used Fixed at 1 2 Fixed at 1 — — 3 Auto cutter error generated 4 Not used 5 Unrecoverable error No error 6 Auto recovery error generated No error 7 Not used Error No error occurred Fixed at 1 Error occurred Error occurred Fixed at 0 Bit 3: If this error is generated due to a paper jam, etc.
Chapter 7 Print Control Codes (8) Real time enquiry to printer (DLE ENQ n) Code: [10] h + [05] h + n * (1 ≤ n ≤ 2) Data are expressed in Hex code. The printer responds to the requests from the host in real time according to the specification of n. n = 1: Resumes printing from the head of the line where an error occurred after recovery from that error. n = 2: The printer recovers from the error after clearing the receiving buffer and the print buffer.
Input Data Format (10) Setting the space between characters (ESC SP n) Code: (1B) h + [20] h + n * (0 ≤ n ≤ 20) Data are expressed in Hex code. The space to the right of characters is set in [n x basic calculated pitch] inches. • When the horizontal magnification of characters is 2 or greater, the amount of space on the right becomes larger at the same magnification. (1) This does not effect Kanji.
Chapter 7 Print Control Codes (11) Specifying the print mode all at once (ESC ! n) Code: [1B] h + [21] h + n * (0 ≤ n ≤ FF) Data are expressed in Hex code. This command specifies the print mode. • Each bit of n is as shown in the following table.
Input Data Format (12) Specifying the absolute print position (ESC $ n1 n2) Code: [1B] h + [24] h + n1 + n2 * (0 ≤ n1 ≤ FF) (0 ≤ n2 ≤ 3) Data are expressed in Hex code. The next printing start position is specified as an absolute position with the left margin position as the reference. The next printing start position is [(n1 +n2 x 256) x basic calculation pitch] inch from the left margin position. • A specification that exceeds the printing area is disregarded.
Chapter 7 Print Control Codes (14) Defining download characters (ESC & s n m a (D1 D2~Dn)) Code: [1B] h + [26] h + s + n + m + a + Dn * (s = 03) (20 ≤ n ≤ 7E) (20 ≤ m ≤ 7E) (In the case of Font A, (0 ≤ a ≤ 0C) (In the case of Font B, (0 ≤ a ≤ 09) Data are expressed in Hex code. This command defines download alphanumeric characters. • s indicates the number of bytes in the vertical direction. • n indicates the starting character code and m indicates the end character code.
Input Data Format Example • In the case of Font A 12 Dots p1 p4 p7 p34 MSB 24 Dots p2 p5 p35 LSB p3 p6 p36 7 p1=H p4=<30>H p7=<40>H ... p2=<03>H p5=<80>H p8=<40>H ... p3=<00>H p6=H p9=<20>H ...
Chapter 7 Print Control Codes • In the case of Font B 9 Dots d1 d4 d7 d25 MSB 24 Dots d2 d5 d26 d3 d6 d27 LSB 7 60 d1 = <03>H d4 = <01>H d7 = <02>H ... d2 = H d5 = <00>H d8 = <00>H ... d3 = H d6 = <20>H d9 = <10>H ...
Input Data Format (15) Specifying a bit image (ESC * m n1 n2 D1~Dn) Code: [1B] h + [2A] h + m + n1 + n2 + Dn * (m = Bit Image Mode (See the following table.) (0 ≤ n1 ≤ FF) (0 ≤ n2 ≤ 03) Data are expressed in Hex code. Data are printed in a bit image in accordance with the Bit Image mode specified by m. • The number of dots printed in the horizontal direction is divided by 256, with n2 being the product and n1 the remainder. • The total number of dots printed as the bit image is n1 + (256 x n2).
Chapter 7 Print Control Codes Relationship between bit image data and printed dots 8-dot bit image Bit Image Data d1 d2 d3 MSB d1 d2 d3 Bit Image Data LSB Printing Data represent dots. Printing Data Single Density 24-dot bit image Double Density Bit Image Data d1 d2 d3 d4 d5 d6 d7 d8 d9 d1 d4 d7 MSB 7 d2 d5 d8 d3 d6 d9 Bit Image Data LSB Printing Data represent dots.
Input Data Format (16) Specifying/Clearing underline (ESC – n) Code: [1B] h + [2D] h + n * (0 ≤ n ≤ 02, 30 ≤ n ≤ 32) Data are expressed in Hex code. This command specifies or clears underlines. • Underlines are applied to the full width of all the characters printed, but portions skipped with a horizontal tab (HT) or by a relative/absolute print position specification (ESC (, ESC $), and characters which are rotated 90 degrees to the right, are not underlined.
Chapter 7 Print Control Codes (18) Specifying the line feed amount (ESC 3 n) Code: [1B] h + [33] h + n * (0 ≤ n ≤ FF) Data are expressed in Hex code. This command sets the line feed amount per line in [n x basic calculation pitch] inches. • Sets the line feed amount for a set sheet selected by ESC c1.
Input Data Format (19) Controlling data input (ESC = n) • Code: [1B] h + [3D] h + n * (0 ≤ n ≤ FF) Data are expressed in Hex code. Each bit of n is as shown in the following table. Value • • • Bit Function 0 Printer 1 Not defined 2 Not defined 3 Not defined 4 Not defined 5 Not defined 6 Not defined 7 Not defined 0 1 Disable Enable If the printer is not selected, all the data received are destroyed until the printer is selected by this command.
Chapter 7 Print Control Codes (21) Printer initialization (ESC @) Code: [1B] h + [40] h Clears data stored in the internal print buffer and sets each setting in its initial state (default state). • Data in the internal input buffer are not cleared. • Macro definition contents are not cleared. (22) Setting the horizontal tab position (ESC D n NUL) Code: [1B] h + [44] h + n + [00] h * (1 ≤ n ≤ FF) Data are expressed in Hex code. This command sets the horizontal tab position.
Input Data Format (24) Specifying/Clearing double strike characters (ESC G n) Code: [1B] h + [47] h + n * (0 ≤ n ≤ FF) Data are expressed in Hex code. This command specifies and clears double strike characters. • The least significant bit (n0) in n is valid. • Control by the least significant bit (n0) is as follows. n0 = 0: Clears double strike characters. n0 = 1: Specifies double strike characters. • In this printer, the effects of double strike printing are the same as those of bold printing.
Chapter 7 Print Control Codes (26) Selecting the page mode (ESC L) Code: [1B] h + [4C] h This command switches the printer from the Standard mode to the Page mode. • This command is valid when it is input at the top of a line. • This command is invalid when input in the Page mode. • The printer returns to the Standard mode after printing by FF is completed, or by execution of ESC S. • The character development position is the starting point specified by ESC T within the printing area specified by ESC W.
Input Data Format (27) Selecting international characters (ESC R n) Code: [1B] h + [52] h + n * (0 ≤ n ≤ 0D, n = 40) Data are expressed in Hex code. This command carries out selection of international characters. • The international character set is set by the value of n, as shown in the following table. n(Hex) 0 U. S. A. 1 French 2 German 3 U. K.
Chapter 7 Print Control Codes (28) Selecting the standard mode (ESC S) Code: [1B] h + [53] h This command switches the printer from the Page mode to the Standard mode. • This command is valid only when input in the Page mode. • Data developed in the Page mode are erased. • The top of the line is made the next printing position. • The printing area set by ESC W is initialized.
Input Data Format (29) Selecting the character printing direction in page mode (ESC T n) Code: [1B] h + [54] h + n * (0 ≤ n ≤ 3) (30 ≤ n ≤ 33) Data are expressed in Hex code. This command selects the character printing direction and starting point in the Page mode.
Chapter 7 Print Control Codes (30) Specifying/Clearing 90 degree right rotated characters (ESC V n) Code: [1B] h + [56] h + n * (0 ≤ n ≤ 1, 30 ≤ n ≤ 31) Data are expressed in Hex code. This command specifies or clears 90 degree right rotated characters. • 90 degree right rotated characters cannot be underlined. • The following is determined by the value of n. n = 0, 30: 90 degree right rotated characters are cleared. n = 1, 31: 90 degree right rotated characters are specified.
Input Data Format • • • If there is a fraction as a result of calculations, interpolation is carried out at the mechanism's minimum pitch. Remainders are cut off. The basic calculation pitch (x) is used in calculating the horizontal starting point and the horizontal length and the basic calculation pitch (y) is used in calculating the vertical starting point and the vertical length.
Chapter 7 Print Control Codes (32) Specifying the relative printing position (ESC \ n1 n2) Code: [1B] h + [5C] h + n1 + n2 * (0 ≤ n1 ≤ FF) (0 ≤ n2 ≤ FF) Data are expressed in Hex code. This command specifies the next printing start position with the current position as the reference point. the next printing start position is a position [(n1 + n2 x 256) x basic calculation pitch] inches from the current position. • This command is disregarded if the specification exceeds the printing area.
Input Data Format (33) Arranging the printing position (ESC a n) • • • • • • Code: [1B] h + [61] h + n * (0 ≤ n ≤ 2, 30 ≤ n ≤ 32) Data are expressed in Hex code. This command arranges all the print data on one line in specified positions. Printing arrangement is executed as follows in accordance with the value of n. n = 0, 30: Specifies left alignment. n = 1, 31: Specifies centering. n = 2, 32: Specifies right alignment. This command is valid only if input at the head of a line.
Chapter 7 Print Control Codes (35) Selecting the setting sheet (ESC c 1 n) Code: [1B] h + [63] h + [31] h + n * (1 ≤ n ≤ 3) Data are expressed in Hex code. Selects the sheet which is the object of line feed settings set by ESC 2 and ESC 3. • Each bit of n is as shown in the following table.
Input Data Format (37) Selecting the paper end sensor that is effective for stopping printing (ESC c 4 n) Code: [1B] h + [63] h + [34] h + n * (0 ≤ n ≤ FF) Data are expressed in Hex code. Selects which paper end sensor will stop printing.
Chapter 7 Print Control Codes (39) Print and feed paper n lines (ESC d n) Code: [1B] h + [64] h + n * (0 ≤ n ≤ FF) Data are expressed in Hex code. This command prints the data in the print buffer and feeds the paper n lines. • The set amount does not remain. • The next printing start position is the head of the line. • If the paper feed amount exceeds 40 inches, paper feeding of 40 inches only is executed. (40) Full cut (ESC l) Code: [1B] h + [69] h Executes a full cut of the receipt paper.
Input Data Format (43) Selecting the character code table (ESC t n) Code: [1B] h + [74] h + n * (0 ≤ n ≤ 6, n = FF) Data are expressed in Hex code. Selects the page n of the character code table. n PC437 (USA) 1 Katakana 2 PC850 (Multilingual) 3 PC860 (Portuguese) 4 PC863 (Canadian-French) 5 PC865 (Nordic) 6 PC858 (Multilingual II ) FF • Character Type 0 Blank page The initial value is “n = 0 or 2”. Depending on the setting of DIP switch.
Chapter 7 Print Control Codes (44) Peripheral sevice status signal (ESC u n) Code: [1B] h + [75] h + n * (n = 0) Sends the current status of pin No. 3 of the drawer kick connector. • n is as follows. n = 0: Drawer kick connector pin No. 3. • The status sent is 1 byte. The contents are as shown in the following table. • If nothing is connected to the connector, bit 0 of n is always "1.
Input Data Format (45) Sending the printer status (ESC v) Code: [1B] h + [76] h + n This command sends the current printer status. • The status sent is 1 byte. The contents are as shown in the following table. • In the case of DTS/DSR control, after confirming that the host is ready to receive (the DSR signal is High), one byte only is sent. In the case of XON/XOFF control, one byte only is sent without confirming the status of the DSR signal.
Chapter 7 Print Control Codes (46) Specifying/Clearing printing of the same data by the receipt and journal printers (ESC z n) Code: [1B] h + [7A] h + n * (0 ≤ n ≤ FF) Data are expressed in Hex code. This command specifies and clears the printing of the same data by the receipt and journal printers. • In n, the least significant bit (n0) becomes enabled. • The least significant bit (n0) is as follows. n0 = 0: Printing of the same data is cleared. n0 = 1: Printing of the same data is specified.
Input Data Format (48) Specifying the character size (GS ! n) Code: [1D] h + [21] h + n * (0 ≤ n ≤ FF) Data are expressed in Hex code. However, 1 ≤ Vertical Enlargement Rate ≤ 8, 1 ≤ Horizontal Enlargement Rate ≤ 8 This command specifies the character size (vertical enlargement rate/horizontal enlargement rate). Bit 0 1 2 3 4 5 6 7 Function Value Enlargement Rate Vertical enlargement rate specification See the following Table 1. Horizontal enlargement See the following Table 2.
Chapter 7 Print Control Codes • • • • • • • Except for HRI characters, this command is valid for all characters. If the setting of either the vertical enlargement rate or the horizontal enlargement rate deviates from the definition range, this command is disregarded. In the Standard mode, the vertical direction indicates the paper feed direction and the horizontal direction indicates the direction perpendicular to the paper feed direction.
Input Data Format (50) Defining a downloaded bit image (GS * n1 n2 Dn) Code: [1D] h + [2A] h + n1 + n2 + Dn * (1 ≤ n1 ≤ FF) (1 ≤ n2 ≤ 30) (n1 x n2 ≤ 600) Data are expressed in Hex code. This command defines a downloaded bit image with the number of dots specified in n1 and n2. • The number of dots in the horizontal direction is n1 x 8 and the number of dots in the vertical direction is n2 x 8. • Dn is the bit image data.
Chapter 7 Print Control Codes (51) Printing a downloaded bit image (GS / m) Code: [1D] h + [2F] h + m * (0 ≤ m ≤ 3, 30 ≤ m ≤ 33) Data are expressed in Hex code. This command prints a downloaded bit image in the mode specified by m. • The modes selected by m are as shown in the following table.
Input Data Format (52) Starting and ending a macro definition (GS :) Code: [1D] h + [3A] h This command specifies starting and ending of a macro definition. • Up to 2048 bytes can be used as contents in defining a macro. Any portion where this 2048 bytes is exceeded is not defined. • The definition contents are not cleared even when ESC @ (printer initiation) is executed, so ESC @ can be included in the contents of a macro definition.
Chapter 7 Print Control Codes (53) Specifying/Clearing Black/White reverse printing (GS B n) Code: [1D] h + [42] h + n * (0 ≤ n ≤ FF) Data are expressed in Hex code. This command specifies or clears printing of black/white reversed characters. • In n, the least significant bit (n0) becomes enabled. The least significant bit (n0) is as follows. n0 = 0: Clears printing of black/white reversed characters. n0 = 1: Specifies printing of black/white reversed characters.
Input Data Format (55) Setting the left margin (GS L n1 n2) Code: [1D] h + [4C] h + n1 + n2 * (0 ≤ n1 ≤ FF) (0 ≤ n2 ≤ FF) Data are expressed in Hex code. This command sets the left margin specified by n1 and n2. The left margin is [(n1 + n2 x 256) x basic calculation pitch] inch. Printable Range Left Margin • • • • • • • • • Width of Print Area This command is valid only when input at the head of a line.
Chapter 7 Print Control Codes (56) Specifying/Clearing reduced character printing (GS M n) Code: [1D] h + [4D] h + n * (0 ≤ n ≤ FF) Data are expressed in Hex code. However, bits 1, 2, 4, 5, and 6 should be 0. This command specifies or clears printing of reduced characters.
Input Data Format (57) Setting the basic calculation pitch (GS P x y) Code: [1D] h + [50] h + x + y * (0 ≤ x ≤ FF) (0 ≤ y ≤ FF) Data are expressed in Hex code. This command sets the basic calculation pitch in the horizontal direction at (1/x) inch and the basic calculation pitch in the vertical direction at (1/y) inch. When x = 0, the horizontal basic calculation pitch returns to the initial value. When y = 0, the vertical basic calculation pitch returns to the initial value.
Chapter 7 Print Control Codes (58) Cutting of paper (GS V m, GS V m n) Code: (1) [1D] h + [56] h + m (2) [1D] h + [56] h + m + n * (1) (0 ≤ m ≤ 1) (30 ≤ m ≤ 31) Data are expressed in Hex code. (2) (41 ≤ m ≤ 42) (0 ≤ n ≤ FF) Data are expressed in Hex code. This command executes the specified paper cut. m Full Cut 1,31 Partial Cut (1 point left) 41 42 • • • 7 92 Function 0,30 (Cutting position + [n x basic calculation pitch] ) paper feed and full cut.
Input Data Format (59) Setting the print area width (GS W n1 n2) Code: [1D] h + [57] h + n1 + n2 * (0 ≤ n1 ≤ FF) (0 ≤ n2 ≤ FF) Data are expressed in Hex code. This command sets the print area width specified by n1 and n2. • The print area width is [(n1 + n2 x 256) x Basic calculation pitch] inch. Printable Area Left Margin • • • • • • • • Print Area Width This command is valid if it is input at the head of the line.
Chapter 7 Print Control Codes • When the first character at the head of a line is developed, if the print area width is too small for the horizontal width of the character you are attempting to develop (including the right space), the following processing is carried out for that line only. (1) The printer enlarges the print area to the right to a size where that character can fit as long as it doesn't exceed the printable area.
Input Data Format (60) Specifying the relative position of characters in the vertical direction in the page mode (GS \ n1 n2) Code: [1D] h + [5C] h + n1 + n2 * (0 ≤ n1 ≤ FF) (0 ≤ n2 ≤ FF) Data are expressed in Hex code. This command specifies the position in the characters' vertical direction of the data development start position as the relative position with the current position as the reference, in the Page mode.
Chapter 7 Print Control Codes (61) Execution of a macro (GS ^ n1 n2 n3) Code: [1D] h + [5E] h + n1 + n2 + n3 * (0 ≤ n1 ≤ FF) (0 ≤ n2 ≤ FF) (0 ≤ n3 ≤ 1) Data are expressed in Hex code. This command executes the contents defined by a macro. • The meanings of n1~n3 are as follows. n1: Number of times the macro is executed. n2: Wait time when a macro is executed. The printer waits n2 x 100 msec each time a macro is executed. n3: Macro execution mode n3 = 0: Specifies continuous execution.
Input Data Format (62) Enabling/Disabling automatic sending of the status (GS a n) Code: [1D] h + [61] h + n * (0 ≤ n ≤ FF) Data are expressed in Hex code. This command selects the status that is the object of automatic status sending (ASB: Automatic Status Back). • • • • • • Value Bit Status that is Object of ASB 0 1 0 Status of drawer kick connector pin No. 3.
Chapter 7 Print Control Codes • If DLE EOT, GS I and GS r are used, it is necessary to distinguish between the status from these commands and the ASB status. For the identification method, see pages 49 ~ 51. (1) First Byte (Printer Information) Bit Status Value 0 1 0 Not used 0 — 1 Not used 0 — 2 Drawer kick connector pin No.
Input Data Format (3) Third Byte (Paper Sensor Information) Bit Status Value 0 1 0 Journal near end sensor status Paper present No paper 1 Receipt near end sensor status Paper present No paper 2 Journal end sensor status Paper present No paper 3 Receipt end sensor status Paper present No paper 4 Not used 0 — 5 Not defined — — 6 Not defined — — 7 Not used 0 — (4) Fourth Byte (Paper Sensor Information) Bit • Status Value 0 1 0 Not defined — — 1 Not defined — —
Chapter 7 Print Control Codes (63) Selecting the font of HRI characters (GS f n) Code: [1D] h + [66] h + n * (0 ≤ n ≤ 1, 30 ≤ n ≤ 31) Data are expressed in Hex code. This command selects the font of HRI characters when printing a bar code. • n has the following meanings. n(Hex) • Font 0, 30 Font A 1, 31 Font B The initial value is “n = 0”. (64) Selecting the bar code height (GS h n) Code: [1D] h + [68] h + n * (1 ≤ n ≤ FF) Data are expressed in Hex code. This command selects the bar code height.
Input Data Format (65) Printing bar codes. (GS kn 1 Dn NUL) Code: [1D] h + [6B] h + n1 + Ds + [00] h ........1 0 ≤ n1 ≤ 6 Data are expressed in Hex code. Code: [1D] h + [6B] h + n1 + s + Ds ........2 41 ≤ n1 ≤ 49 * Data are expressed in Hex code. This command selects the bar code system and carries out printing. • The head of the line is made the next printing start position. • n is as follows.
Chapter 7 Print Control Codes 7 In the case of (1): • This command is ended by a NULL code. • In the case of UPC-A and UPC-E, the bar code is printed at the point when 12 bytes of bar code data have been input, then data following next are processed as ordinary data. • In the case of JAN13, the bar code is printed at the point when 13 bytes of bar code data have been input, then data following next are processed as ordinary data.
Input Data Format (66) Sending of the status (GS r n) Code: [1D] h + [72] h + n * (1 ≤ n ≤ 2) (31 ≤ n ≤ 32) Data are expressed in Hex code. This commands sends the specified status. n = 1, 31: Sends the paper sensor status. n = 2, 32: Sends the drawer kick connector status. • When the printer has Serial interface specifications: In the case of DTR/DSR Control: After confirming that the host computer is ready to receive, the status is sent.
Chapter 7 Print Control Codes • 7 104 Drawer Kick Connector Status (n = 2, 32 ) Bit Printer Status 0 1 Value 0 1 Status of Drawer Kick Connector Pin No.
Input Data Format (67) Selecting the horizontal size of a bar code (GS w n) Code: [1D] h + [77] h + n * (2 ≤ n ≤ 6) Data are expressed in Hex code. Selects the horizontal size of a bar code. • n indicates the number of dots of a fine bar in the horizontal direction. • The initial value of the horizontal size is “n = 3”. (68) Specifying and Clearing smoothing (GS b n) Code: [1D] h + [62] h + n Data are expressed in Hex code. This command specifies or clears smoothing.
Chapter 7 Print Control Codes 7 106
Chapter 8 Character Code Tables 8 Code Page Japanese Code Table International Character Code Table 107
Chapter 8 Character Code Tables Code Page 8 108
Code Page 8 109
Chapter 8 Character Code Tables 8 110
Japanese Code Table Japanese Code Table 8 111
Chapter 8 Character Code Tables International Character Code Table Note) n indicates the ESC R parameter.
Chapter 9 Appendices Journal Protection Key Maintenance, Cautions Specifications External View 9 113
Chapter 9 Appendix Journal Protection Key If a printer with optional specifications is used, the rear cover can be locked using the journal protection key that is included.
Maintenance, Cautions Maintenance, Cautions Removing Paper Jams [Caution] The print head and auto cutter become hot. Do not touch the print head cover or the outside of the auto cutter with bare hands during printing or immediately after printing. When removing jammed paper, first check to make sure the temperature of the print head and auto cutter has dropped sufficiently. 1. Set the printer in the head up condition with the head platen open. 2. Remove the jammed paper with utmost care.
Chapter 9 Appendix Cautions in Handling of Roll Paper • • • If chemicals or oil touch the paper, it could become discolored and the printed data could fade away. Do not scrape the paper with fingernails or with hard metal objects, etc. This could cause the paper to become discolored. Discoloration begins from a temperature of approximately 70°C. (158°F) Be careful of the effects of heat, moisture and light, etc. on the roll paper.
Specifications Specifications Model Classification Different models are differentiated by the following model naming method.
Chapter 9 Appendix Basic Specifications Item Printing Method Printing Width Dot Density Paper Feed Pitch Printing Speed Number of Printing Columns Types of Characters Emulations Bar Code Types Line Interval Paper Interfaces Input Buffer Power Supply Voltage Power Consumption Weight External Dimensions Operating Temperature and Humidity Storage Temperature and Humidity Reliability 9 118 Content Line Thermal Printing Method 54mm, 432 dots (Total dots in head: 448 dots) 8 dots/mm (Horizontal/Vertical) 0.
Specifications Paper Specifications (1) Specified Paper Type: Thermal Recording Paper Paper Width: 58 +0/-1 mm Paper Thickness: 60~75 µ m Roll Diameter: ø83 mm or less Printing Surface: Outside of roll (front) Specified Papers: Mitsubishi Paper Co. (Ltd.) F220VP Shinoji Paper Co. (Ltd.) PD160R, PD160R-N Nihon Paper Co. (Ltd.) TF 50KS-E2C (2) Print Area Paper Width 58 mm 2mm Printing Area 54 mm 2mm (3) Head and Cutter Positions p Exit o ß Paper Paper Feed Direction Approx.
Chapter 9 Appendix External View 162. 359.
Information Systems Division CBM Bldg.