FW820 extra large integrated larder fridge Manual for Installation, Use and Maintenance Customer Care Department • The Group Ltd. • Harby Road • Langar • Nottinghamshire • NG13 9HY T : 01949 862 012 F : 01949 862 003 E : service@cda.eu W : www.cda.
Important The CDA Group Ltd cannot be held responsible for injuries or losses caused by incorrect use or installation of this product. Please note that CDA reserve the right to invalidate the guarantee supplied with this product following incorrect installation or misuse of the appliance.
Before first use You must allow the fridge to settle for at least twenty four hours prior to switching the power on. It is recommended that you clean the interior of the appliance prior to first use, using a solution of bicarbonate of soda and warm water and then thoroughly drying the interior. The fridge may have an odour to it at first use. This will disappear as the appliance cools. Do not load the fridge with food until at least 2 hors have passed and the fridge is closed to correct temperature.
Care and cleaning Always disconnect the appliance from the power before any cleaning or maintenance. • The refrigerator should be cleaned using a solution of bicarbonate of soda and lukewarm water. • Do not use abrasive products or detergents. After washing, rinse and dry thoroughly. • Clean the shelves and balconies separately by hand using soap and water. Do not put them in the dishwasher.
Troubleshooting If you have any problems with your appliance, you should check the troubleshooting prior to calling CDA Customer Care to prevent unnecessary service calls and potential cost. If the appliance is not working • Check there is power to the appliance. • The house fuses are intact and the fuse in the plug has not blown. • The thermostat is not set to 0 (off position). • The plug socket is functioning fine. To check this, plug another electrical appliance in to see if the socket is working.
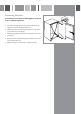
Installation And Ventilation This appliance must never be installed close to heat sources i.e. heating elements, cookers or in damp places The diagram shows the ventilation requirements for your product. Failure to provide adequate ventilation can lead to increased running costs and premature failure and may invalidate the warranty provided with the product. 540 1780-1783 540 fig.
Reversing the door It is possible to reverse the door on this appliance, if required. To do so, follow the steps below: 1. Loosen the top hinge fixing screws and remove the top hinge, taking care to support the weight of the door. 2. Lift the door from the bottom hinge and place on a soft surface to protect the door from damage. 3. Refit the hinge taken from the top to the opposite lower corner, as in figure 3. 4. Replace the door and refit the hinge taken from the lower corner to the opposite top corner.
x4 Mounting the Fascia Door • Using a screwdriver, fix the mounting brackets to the • appliance door, as shown in figure 4. • Position the appliance within the unit. Ensure that there is a gap of 3 to 4 mm between the non-hinged side and the cabinet wall. • Locate the slider in the bracket and fix the slider to the fascia door 20 to 22 mm from the edge of the fascia as shown in figure 5, ensuring that the slider is positioned centrally and horizontally within the bracket. Tighten securely by hand.
Electrical information Warning! This appliance must be earthed. The mains lead of this appliance has been fitted with a BS 1363A 13 amp fused plug. To change a fuse in this type of plug, follow the steps below: 1. Remove the fuse cover and fuse. 2. Fit replacement 13A fuse, ASTA approved to BS 1362 type, into the fuse cover. 3. Replace fuse cover. Important: Do not use the appliance without the fuse cover in position.
To contact our Customer Care Department, or for Service, please contact us on the details below. Customer Care Department • The Group Ltd. • Harby Road • Langar • Nottinghamshire • NG13 9HY T : 01949 862 012 F : 01949 862 003 E : service@cda.eu W : www.cda.