MC50 & MC60 Microwave Manual for Installation, Use and Maintenance Customer Care Department • The Group Ltd. • Harby Road • Langar • Nottinghamshire • NG13 9HY T : 01949 862 012 F : 01949 862 003 E : service@cda.eu W : www.cda.
INSTALLATION MOUNTING THE APPLIANCE FOLLOW THE SUPPLIED separate mounting instructions when installing the appliance. PRIOR TO CONNECTING CHECK THAT THE VOLTAGE on the rating plate corresponds to the voltage in your home. DO NOT REMOVE THE MICROWAVE INLET PROTECTION PLATES located on the side of the oven cavity wall. They prevent grease & food particles from entering the microwave inlet channels. ENSURE the oven cavity is empty before mounting. ENSURE THAT THE APPLIANCE IS NOT DAMAGED.
IMPORTANT SAFETY INSTRUCTIONS READ CAREFULLY AND KEEP FOR FUTURE REFERENCE DO NOT HEAT, OR USE FLAMMABLE MATERIALS in or near the oven. Fumes can create a fire hazard or explosion. DO NOT USE YOUR MICROWAVE oven for drying textiles, paper, spices, herbs, wood, flowers, fruit or other combustible materials. Fire could result. IF MATERIAL INSIDE / OUTSIDE THE OVEN SHOULD IGNITE OR SMOKE IS OBSERVED, keep oven door closed and turn the oven off.
PRECAUTIONS GENERAL THIS APPLIANCE IS DESIGNED FOR DOMESTIC USE ONLY! THE APPLIANCE SHOULD NOT BE OPERATED without food in the oven when using microwaves. Operation in this manner is likely to damage the appliance. IF YOU PRACTICE OPERATING the oven, put a glass of water inside. The water will absorb the microwave energy and the oven will not be damaged. DO NOT USE THE CAVITY for any storage purposes. REMOVE WIRE TWIST-TIES from paper or plastic bags before placing bag in the oven.
ACCESSORIES GENERAL THERE ARE a number of accessories available on the market. Before you buy, ensure they are suitable for microwave use. ENSURE THAT THE UTENSILS YOU USE are oven proof and allow microwaves to pass through them before cooking. WHEN YOU PUT FOOD AND ACCESSORIES in the microwave oven, ensure that they do not come in contact with the interior of the oven. This is especially important with accessories made of metal or metal parts.
CLOCK KEEP THE DOOR OPEN while setting the Clock. This gives you 5 minutes to complete the setting of the Clock. Otherwise, each step must be accomplished within 30 seconds. NOTE: When the appliance is first plugged in or after a power failure, the display is blank. If the clock is not set, the display will remain blank until the cooking time is set. 1. PRESS THE CLOCK BUTTON (3 seconds) until the left-hand digit (hour’s) flicker. 2. PRESS THE +/- BUTTONS to set the hours. 3. PRESS THE CLOCK BUTTON AGAIN.
COOK & REHEAT WITH MICROWAVES USE THIS FUNCTION for normal cooking and reheating, such as vegetables, fish, potatoes and meat. 1. PRESS THE +/- BUTTONS to set the time. 2. PRESS THE POWER BUTTON repeatedly to set the power. 3. PRESS THE START BUTTON. 3 Jet Defrost Power ONCE THE COOKING PROCESS HAS BEEN STARTED: The time can easily be increased in 30-second steps by pressing the Start button. Each press increases the time with 30 seconds.
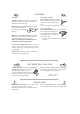
JET START THIS FUNCTION IS USED for quick reheating of food with a high water content such as; clear soups, coffee or tea. 1. PRESS THE START BUTTON. Jet Defrost THIS FUNCTION AUTOMATICALLY STARTS with maximum microwave power level and the cooking time set to 30 seconds. Each additional press increases the time with 30 seconds. YOU MAY ALSO ALTER THE TIME by pressing the +/buttons to increase or decrease the time. Power JetStart Stop .
JET DEFROST USE THIS FUNCTION for defrosting Meat, Poultry, Fish, Vegetables and Bread. JET Defrost should only be used if the net weight is between 100 g- 2.0 kg. ALWAYS PLACE THE FOOD on the glass turntable. 1. PRESS THE JET DEFROST BUTTON. 2. PRESS THE + / - BUTTONS to set the weight of the food. 5. PRESS THE START BUTTON. . Jet Defrost MIDWAY THROUGH THE DEFROSTING PROCESS the oven stops and prompts you to TURN FOOD. Open the door. Turn the food.
MAINTENANCE & CLEANING CLEANING IS THE ONLY MAINTENANCE normally required. FAILURE TO MAINTAIN THE OVEN in a clean condition could lead to deterioration of the surface that could adversely affect the life of the appliance and possibly result in a hazardous situation. DO NOT USE METAL SCOURING PADS, ABRASIVE CLEANSERS , steel- wool pads, gritty washcloths, etc. which can damage the control panel, and the interior and exterior oven surfaces.
TROUBLE SHOOTING GUIDE IF THE OVEN DOES NOT WORK, do not make a service call until you have made the following checks: The Turntable and turntable support is in place. The Plug is properly inserted in the wall socket. The Door is properly closed. Check your Fuses and ensure that there is power available. Check that the oven has ample ventilation. Wait for 10 minutes, then try to operate the oven once more. Open and then close the door before you try again.
TECHNICAL DATA MC 60 SUPPLY VOLTAGE MC 50 230 V/50 HZ RATED POWER INPUT 1300 W 10 A (UK 13 A) FUSE 750 W MW OUTPUT POWER OUTER DIMENSIONS (HXWXD) 382 X 595 X 320 INNER DIMENSIONS (HXWXD) 382 X 495 X 320 187 X 370 X 290 IN ACCORDANCE WITH IEC 60705. THE INTERNATIONAL ELECTROTECHNICAL COMMISSION, has developed a standard for comparative testing of heating performance of different microwave ovens. We recommend the following for this oven: Test Amount Approx. time Power level Container 12.3.
Notes :
Notes :
To contact our Customer Care Department, or for Service, please contact us on the details below. Customer Care Department • The Group Ltd. • Harby Road • Langar • Nottinghamshire • NG13 9HY T : 01949 862 012 F : 01949 862 003 E : service@cda.eu W : www.cda.