
Operating Instructions

Roping Chute
Operating Instructions (RC98AI)
OPMAN-RC98AI_1019
2630 S. Jeerson
P.O. Box 1540
Mt. Pleasant, TX 75456-1540
Congratulations on your purchase of Priefert’s new RC98AI Remote
Controlled Roping Chute. This is the “latest and greatest” in Roping Chutes.
In the fully automatic mode, by pushing one button to release the front gate,
the operator can set in motion the release of the steer in the chute and the
loading of another. If preferred, you may use the 4 buttons on the remote
control to command all actions of the chute yourself.
Roping Chute Hook-Up
Step 1: Screw air tting into hole marked air supply at back of the Automatic Control Box (ACB) bolted to the top of roping chute.
Step 2: Connect air supply to tting at the back of ACB. Set regulator on air compressor at 90 psi.
Step 3: Connect electrical cord to 110 volt outlet.
Proper performance requires a minimum of 2hp air compressor that will produce 3.1 cfm at 90 psi, with a 4 gallon tank.
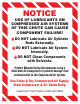
NOTICE: Priefert Manufacturing Recommends using a dedicated Air Compressor to prevent damage from contamination to the
Compressed Air System. Use Clean & Dry Compressed Air Supply. Drain Compressor & Air Tanks Daily.
SEE ATTACHED NOTICE
Roping Chute Operation
1-800-527-8616
903-572-1741 903-572-2798 Fax
sales@priefert.com
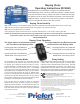
The Upper buttons of the Remote operate
the Front Gate of the Roping Chute
The Lower buttons of the Remote operate
the Rear Gate of the Roping Chute
Pressing this button will OPEN the
FRONT GATE of the Roping Chute
Pressing this button will CLOSE the
FRONT GATE of the Roping Chute
Pressing this button will OPEN the
REAR GATE of the Roping Chute
Pressing this button will CLOSE the
REAR GATE of the Roping Chute
Robotic Mode
Using the button on the right rear of the Control Box, the chute
can be switched into the “Robotic” mode, where the chute uses
an electronic eye to detect the presence or absence of a steer.
A red light will appear. To release the steer, push the “Front / Open”
button on the upper left of the remote control. The headgate
opens and a few seconds after detecting that the steer has left,
the headgate closes; the tailgate then opens and upon detection
of the next steer having entered the chute, the tailgate closes.
One push of a single button has completed the entire cycle and
ropers have the next steer loaded and ready to go upon return to
the roping box. To take the chute out of auto mode, simply push the
button again on the back right side of the Control Box.
This chute also oers the operator the option to override the
Robotic mode and “score” his horse by opening and closing the
tailgate with the push of buttons. This will not take the chute out of
Robotic mode and continues to be a great training tool to keep your
horse from leaving the box at the sound of the chute rather than
from a cue from the rider.
Delay Setting
Another control feature located on the back left of the Control Box is
a “Delay” setting. Just to the right of the green “on” indicator light is
a silver knob used to activate and set the delay timing. Each click
to the right gradually delays the activation of the opening of the
headgate from 2-30 seconds. When no one else is around, this great
feature oers ropers improved practice opportunities by allowing the
roper/operator to be fully prepared before the steer is released.
FCC Compliance Statement: This device complies with part 15 of the FCC Rules.
Operation is subject to the following two conditions:
(1) This device may not cause harmful interference, and
(2) this device must accept any interference received, including interference that may cause
undesired operation.
NOTE: This equipment has been tested and found to comply with the limits for a Class B digital device, pursuant to
part 15 of the FCC Rules. These limits are designed to provide reasonable protection against harmful interference in
a residential installation. This equipment generates, uses and can radiate radio frequency energy and, if not installed
and used in accordance with the instructions, may cause harmful interference to radio communications. However,
there is no guarantee that interference will not occur in a particular installation. If this equipment does cause harmful
interference to radio or television reception, which can be determined by turning the equipment off and on, the user
is encouraged to try to correct the interference by one or more of the following measures:
—Reorient or relocate the receiving antenna.
—Increase the separation between the equipment and receiver.
—Connect the equipment into an outlet on a circuit different from that to which the receiver is connected.
—Consult the dealer or an experienced radio/TV technician for help.