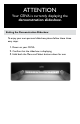
Attention Your CEIVA is currently displaying the demonstration slideshow. Exiting the Demonstration Slideshow To enjoy your own personal slideshow, please follow these three easy steps: 1. Power on your CEIVA. 2. Confirm that the slideshow is displaying. 3.
2 TABLE OF CONTENTS Table of Contents Introduction . . . . . . . . . . . . . . . . . . . . . . . . . . . . . . . . . . . . . . . . . . . . . . . . . . . . . . . . . . . . . . p. 3 Components . . . . . . . . . . . . . . . . . . . . . . . . . . . . . . . . . . . . . . . . . . . . . . . . . . . . . . . . . . . . . . p. 4 In the Box . . . . . . . . . . . . . . . . . . . . . . . . . . . . . . . . . . . . . . . . . . . . . . . . . . . . . . . . . . . . . . . p. 5 Getting Started . . . . . . . . . . . . .
INTRODUCTION Showcase Your Photos and Stay Connected with Friends and Family CEIVA Digital Photo Frames™ are the world’s only connected digital picture frames, renowned for their ease of use and unique patented technology. With CEIVA®, you have extensive options to see, share and store the photos that mean the most to you. Display Photos Directly from a Camera Memory Card Without a Computer • Instantly display a full color slideshow of photos stored on a memory card using the built-in card reader.
4 COMPONENTS Components 1. 2. 3. 4. Menu Button Left Button Right Button Down Button 5. Up Button 6. Select Button 7. New Photo Indicator 8. Power Light 9. Picture Button 10. Brightness Button 11. CF I/CF II Slot 12. SD/MMC/MS Slot 13. 14. 15. 16.
IN THE BOX In the Box Here's everything you need to set up your personal CEIVA Digital Photo Frame and begin displaying photos. 1. 2. 3. 4. 5. 6. CEIVA Digital Photo Frame Owner’s Guide Quick Start Guide Telephone Cord Dual Phone Splitter AC Power Supply Is Something Missing or Damaged? Locate the 12-digit serial number on the bottom of your CEIVA frame and call 1-877-MYCEIVA (1-877-692-3482) to speak with the CEIVA® Customer Care Team.
6 GETTING STARTED Getting Started — Set-Up is Easy! How Your CEIVA Frame Works Your CEIVA frame will display a continuous slideshow of your photos from a camera memory card. If you choose to activate your PicturePlan service, your CEIVA frame will automatically display new photos every day after retrieving these photos from the CEIVA Network.The frame connects to the CEIVA Network through an ordinary analog phone line without interrupting your phone service. You don’t need an extra phone line.
GETTING STARTED Plug In the Power Cord Plug one end of the power cord into the round power access port (labeled Power) located on the back of the CEIVA frame. Plug the other end of the power cord into an electrical outlet that is not controlled by a light switch.We recommend that you use a surge protector power strip to prevent surges of electrical current from damaging your CEIVA frame.
8 GETTING STARTED Insert a Memory Card to Display Photos To display photos stored on a memory card, simply insert the card into the built-in card reader. The CEIVA frame will display a continuous slideshow of up to 500 photos stored on a memory card. Photos must be in JPEG format and can be up to a resolution of 12 megapixels. Photos can also be displayed directly from a USB flash drive. Just plug the flash drive into your CEIVA frame’s C-Port 1 and watch your photos come to life.
GETTING STARTED With an active PicturePlan, your CEIVA frame will automatically retrieve up to 40 new photos (Model LF4007) or 50 new photos (Model LF4008) each night from your personal Incoming Photos inbox on the CEIVA Network.You can also manually retrieve new photos anytime simply by pushing and holding the white Picture button until you see the message “You can let go now, I'm dialing in” appear on the screen.
10 GETTING STARTED Members Send Photos with Ease! You and all of your Buddies can: • Send Photos Using Free Software: Edit, crop, rotate and enhance your photos, then send them quickly and easily to any CEIVA frame with an active PicturePlan, across town or across the globe. Download free software at http://software.ceiva.com. • Send Photos from Your CEIVA Account: Easily send one or multiple photos from your account at http://www.ceiva.com. Scan old photos and upload them to online albums.
BUTTONS To stop the slideshow on your favorite photo (Static Mode), simply press the white button once when you see the photo. An Info Bar will momentarily appear at the bottom of the screen (please refer to page 13). Your CEIVA frame will automatically resume Slideshow Mode after 30 seconds.To adjust this Auto Start setting, please refer to page 20. Black Button The black button (labeled Brightness) located on the back of the CEIVA frame allows you to adjust the brightness of your screen.
12 BUTTONS Left and Right Buttons In Static Mode, the Left and Right buttons enable you to browse through the photos on your CEIVA frame. Simply press the Left button to move backward or the Right button to move forward until you see the photo you are searching for. Press and hold either button to resume the slideshow. Your CEIVA frame will automatically resume Slideshow Mode after 30 seconds. To adjust this Auto Start setting, please refer to page 20.
ADVANCED FEATURES Advanced Features and Menu Options You can manage your photos and configure various settings on your CEIVA frame using Advanced Features. You can also access these features by logging in to your CEIVA account at http://www.ceiva.com. Some Advanced Features are only available if you have an active PicturePlan subscription and are so indicated in this manual with (PicturePlan only). NOTE: Menu options on your CEIVA frame may change.
14 ADVANCED FEATURES The Print Order icon appears whenever you have placed a print order. The order goes through the next time your CEIVA frame dials in to the CEIVA Network. (PicturePlan only) The Album icon appears whenever the CEIVA frame displays a photo from one of your Linked Albums. When you link Albums in your online account, your CEIVA frame randomly includes one photo from each selected Album in your daily slideshow.
ADVANCED FEATURES For screens with single-feature selection such as the one to the right: Use the Up and Down buttons on your CEIVA frame to scroll continuously through options. When you reach the option you want, press the Select button. A check mark indicates your current selection. Press the Select button again when Save is highlighted to confirm your choice. For screens with multi-feature selection such as the one to the right: Use the Up and Down buttons on your CEIVA frame to move between fields.
16 ADVANCED FEATURES Delete (continued) Network. To cancel your delete request and keep the photo in your slideshow rotation,repeat the steps for this feature, choosing Undelete. When you delete a slideshow photo that is stored on a memory card, you will not remove the photo from your memory card, only from the slideshow. You can manually browse through photos on the memory card to reinstate a photo into the slideshow. NOTE: You cannot delete CEIVA Channels on your frame.
ADVANCED FEATURES You MUST enable the Print option by setting up One-Button Printing and entering your billing and shipping information in your online CEIVA account to order prints directly from your CEIVA frame. If you received your CEIVA frame as a gift, the person who gave it to you may have already enabled the Print option. 1. Manually browse to the photo you wish to order and then press the Menu button. 2. Choose Order Prints and press the Select button.
18 ADVANCED FEATURES What to Display (continued) If you are not using a PicturePlan, choose Card Reader to display photos only from an instered memory card or USB flash drive. NOTE: Please refer to page 24 to learn more about Channels. 1. 2. 3. 4. Press the Menu button. Choose What to Display and then press the Select button. Choose what you would like to display and then press the Select button. The default is Everything. Press the Select button when Save is highlighted to confirm your choice.
ADVANCED FEATURES New Photo Indicator (PicturePlan only) The New Photo Indicator feature, when enabled, alerts you whenever you receive new photos. 1. Press the Menu button. 2. Choose Settings and then New Photo Indicator, pressing the Select button after each. 3. Choose ON or OFF and press the Select button. The default setting is ON. 4. Press the Select button when Save is highlighted to confirm your choice.
20 ADVANCED FEATURES Transition Type The Transition Type feature allows you to control how the slideshow transitions from one photo to the next. 1. Press the Menu button. 2. Choose Settings, then Slideshow Settings, and finally Transition Type, pressing the Select button after each. 3. Choose the transition type you want.The default is Dissolve. 4. Press the Select button when Save is highlighted to confirm your changes.
ADVANCED FEATURES 3. Choose your connection type and press the Select button. The default is Telephone. 4. Press the Select button when Save is highlighted to confirm your changes. Depending on your connection type, you may want to adjust additional settings. Please refer to Telephone Settings on page 22, or to http://ceivabroadband.ceiva.com or http://ceivawireless.ceiva.com.
22 ADVANCED FEATURES Vacation Mode (PicturePlan only) The Vacation Mode feature keeps you from missing any photos while you travel by halting your CEIVA frame’s connections to the CEIVA Network. Vacation Mode also keeps your frame's screen OFF. 1. Press the Menu button. 2. Choose Settings, then Connection Settings, then When to Connect, and finally Vacation Mode, pressing the Select button after each. 3. Choose ON or OFF and press the Select button. The default is OFF. 4.
ADVANCED FEATURES You may have to adjust the Dial Type on your CEIVA frame if your telephone system uses Pulse Dialing. Please contact CEIVA Customer Care before adjusting the Modem State. 1. Press the Menu button. 2. Choose Settings, then Connection Settings, then Telephone Settings, pressing the Select button after each. 3. Using the Left and Right buttons, choose a Modem Prefix and Modem State (lower if applicable) and select a Dial Type.The defaults are None for the Modem Prefix, 33.
24 ADDITIONAL FEATURES Additional Features and Extras If you have a computer, here are some creative things you can do when sending photos. If you don't have a computer, you can suggest these ideas to your family and friends who send photos to you.
FAQs Frequently Asked Questions NOTE: FAQs are also available online at http://help.ceiva.com and are updated on a regular basis. HOW DO I GET MY PHOTOS ONTO MY CEIVA FRAME? Insert the memory card from your digital camera to display your photos on your CEIVA frame in a slideshow. If you have a PicturePlan, there are several ways to get your personal photos to appear on your CEIVA frame. First, of course, you need digital photos.
26 FAQs WHO CAN SEND PHOTOS TO MY CEIVA FRAME? With the owner's permission, anyone with Internet access or a camera phone can send photos to your CEIVA frame from anywhere in the world, as long as the CEIVA frame has an active PicturePlan. Remember, anyone sending photos must sign up for a FREE CEIVA membership.The member's Sign-in Name is added to your Buddy List, allowing them to send photos to your CEIVA frame.
FAQs CAN I USE A CEIVA FRAME IN MY OFFICE? Yes, you can. If you are using an analog phone line, check to see if you need a dialing prefix, such as a 9 or 8, to access a dial tone.You can easily change the CEIVA frame's settings to reflect this dialing requirement (see page 22).Your CEIVA frame can also share the same line as your fax machine as this is generally an analog phone line.
28 FAQs WHAT HAPPENS IF I MOVE? Before you move your CEIVA frame to a new area code or phone number, you should update your phone information in your online CEIVA account under the Frame Settings option or call CEIVA Customer Care at 1-877-MYCEIVA (1-877-692-3482). Once you enter your new phone number into your Frame Settings (remember to click on Apply before leaving the Frame Settings area), simultaneously press and hold the black and white buttons on the back of your CEIVA frame.
TROUBLESHOOTING Troubleshooting Your CEIVA Digital Photo Frame THE CEIVA FRAME ISN’T DISPLAYING PHOTOS FROM MY MEMORY CARD. Make sure you are in Static or Slideshow mode, remove the memory card, and reinsert it. If your CEIVA frame does not display photos when you insert your memory card into the card reader, make sure there are photos on the card and that they are in JPEG format and less than 12 megapixels in resolution. THE CEIVA FRAME DOESN'T SEEM TO DIAL IN TO RETRIEVE PICTURES.
30 TROUBLESHOOTING WHY DON'T THE PICTURES SCROLL? Make sure that you have at least two photos in your CEIVA frame's slideshow. Then, press the white Picture button on the back of the CEIVA frame until you see the message, “You can let go now to start the slide show, or keep holding to connect.” HOW DO I STOP THE PICTURES FROM SCROLLING? To stop the slideshow, press the white button on the back of the CEIVA frame once.
TROUBLESHOOTING NEED MORE ASSISTANCE? If you have a computer, go to the Customer Care/Help section at http://help.ceiva.com.The Customer Care section was designed to provide fast and easy-to-understand answers to all your questions. It's available 24 hours a day, 365 days a year.The Help library is full of information on maintaining and troubleshooting your CEIVA frame.You can also reach Customer Care via e-mail at support@ceiva.com.
32 WARRANTY Limited Warranty THIS IS TO CERTIFY that the CEIVA products CEIVA 1 Digital Photo Receiver™, CEIVA 2 Digital Photo Receiver™, CEIVA 3 Digital Photo Receiver™, CEIVA 7-Inch Digital Photo Frame™, CEIVA 8-Inch Digital Photo Frame™, CEIVA Broadband™ adapter and CEIVA Wireless™ adapter (hereafter referred to as the "CEIVA Product") are warranted to be free of all defects in material and workmanship for one year (365 days) from the date of purchase if proof of purchase is presented within the warran
WARRANTY return the CEIVA Product prepaid and packaged appropriately for safe shipment to Manufacturer, and pay a nominal $19.95 repair fee.The buyer must contact the CEIVA Customer Care Department at 1-877-692-3482 to arrange for this repair. Manufacturer will repair the CEIVA product, if possible, and return the Product at its own expense, to the buyer.
34 WARRANTY LIABILITY FOR DAMAGES WILL NOT BE AFFECTED IF ANY REMEDY PROVIDED HEREIN SHALL FAIL OF ITS ESSENTIAL PURPOSE. LIMITATION OF DISCLAIMER SOME STATES DO NOT ALLOW THE EXCLUSION OR LIMITATION OF INCIDENTAL OR CONSEQUENTIAL DAMAGES, OR ALLOW LIMITATIONS ON HOW LONG AN IMPLIED WARRANTY LASTS SO THE ABOVE LIMITATIONS OR EXCLUSIONS MAY NOT APPLY TO YOU. THIS WARRANTY GIVES YOU SPECIFIC LEGAL RIGHTS, AND YOU MAY ALSO HAVE OTHER RIGHTS,WHICH VARY FROM STATE TO STATE.
WARRANTY MANUFACTURER,WARRANTOR CEIVA Logic, Inc. 12455 Branford Street, Unit #24 Arleta, CA 91331 IMPORTANT SAFEGUARDS When using an electrical appliance basic safety precautions should be followed, including the following: 1. To prevent against the risk of electrical shock, do not put your CEIVA Digital Photo Frame in water or other liquid. 2.
© 2007 CEIVA Logic, Inc., Burbank, CA 91502. All Rights Reserved. Protected by United States Patent No. 6,442,573. Other Patents Pending. Owner’s Guide for models LF4007 and LF4008.